

5 Viral Food Board Ideas That Are Actually Easy to Make
There is something inherently magical about a beautifully laid-out food board. It’s more than just a meal; it’s an invitation to gather, to linger, and to share stories over bites of something delicious. Whether it is the soft morning light hitting a spread of pastries or the vibrant greens of a fresh pesto, these boards capture the essence of slow living and thoughtful hosting that we all crave in our busy lives.
I remember the first time I set out a board for my friends; the room immediately felt warmer, and the conversation flowed so much more naturally. It takes the pressure off the ‘perfect’ plated meal and turns eating into an interactive experience. Today, I’m sharing five of my favorite viral board concepts that look like a million bucks but are surprisingly simple to whip up in your own kitchen.
The Sweet Success: Graduation Cake Board
Why we love this
There is nothing quite like the celebration of a major milestone, and a board dedicated to miniature graduation cakes brings a sense of whimsical joy to the table. Imagine the aroma of Madagascar vanilla and sweet buttercream wafting through the air as your guests marvel at the tiny, perfectly sculpted tiers. The texture is a cloud-like sponge that melts on the tongue, contrasted by the slight snap of tempered chocolate decorations. It’s a visual and sensory feast that feels both deeply personal and grandly celebratory.
Ingredients
- 2 1/2 cups All-purpose flour
- 1 1/2 cups Granulated sugar
- 1 tbsp Baking powder
- 1/2 tsp Salt
- 3/4 cup Unsalted butter, softened
- 1 cup Whole milk, room temperature
- 3 Large eggs
- 2 tsp Vanilla bean paste
- Swiss meringue buttercream
- Fondant for miniature caps
How to make it
- Preheat your oven to 350°F (175°C) and grease a multi-cavity mini cake pan or a standard sheet pan if you plan to cut rounds. Ensure all ingredients are at room temperature to create a stable emulsion.
- In a large bowl, sift the flour, sugar, baking powder, and salt. This aeration is crucial for a light, professional crumb. Using a paddle attachment, beat in the softened butter one tablespoon at a time until the mixture looks like coarse sand.
- Whisk the eggs, milk, and vanilla bean paste together. Gradually pour half of the liquid into the dry ingredients, beating on medium-low speed for two minutes to develop the cake’s structure. Add the remaining liquid in two batches, scraping the bowl often.
- Fill your cake cavities about two-thirds full. Bake for 18-22 minutes. You are looking for the edges to just pull away from the sides and a toothpick to come out with a few moist crumbs. Do not overbake, or the mini cakes will dry out quickly.
- Once cooled completely, level the tops with a serrated knife. Apply a thin ‘crumb coat’ of buttercream and refrigerate for 20 minutes. Finish with a smooth final layer of frosting and top with a small fondant graduation cap or a gold-leaf tassel.
The Mediterranean Glow: Lemon Pesto Board
Why we love this
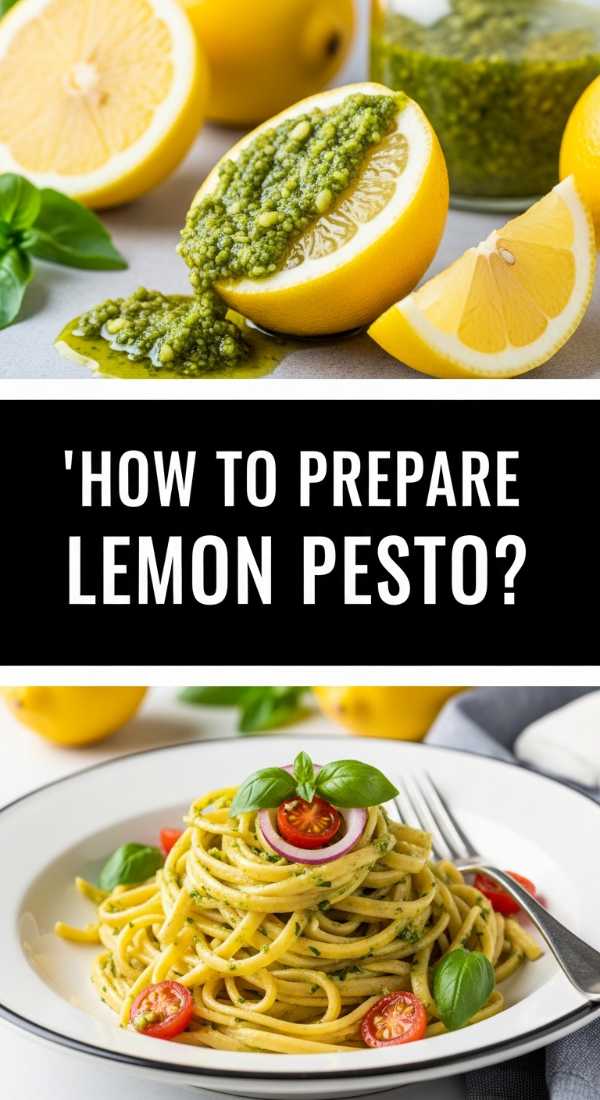
This board is a celebration of brightness and zest, centered around a vibrant, emerald-green lemon pesto that tastes like pure sunshine. The scent of fresh basil bruised by a mortar and pestle fills the kitchen with an earthy, peppery perfume, while the sharp, citrusy notes of Meyer lemons cut through the richness of pine nuts and parmesan. It’s creamy yet textured, perfect for smearing onto charred sourdough or dipping crisp seasonal radishes, creating a refreshing palate cleanser that feels sophisticated and effortless.
Ingredients
- 4 cups Fresh basil leaves, packed
- 1/2 cup Toasted pine nuts
- 3 cloves Garlic, smashed
- 1/2 cup Freshly grated Parmigiano-Reggiano
- 1/2 cup Extra virgin olive oil
- Zest and juice of 2 Meyer lemons
- 1/2 tsp Flaky sea salt
- 1/4 tsp Red pepper flakes
How to make it
- Start by lightly toasting your pine nuts in a dry skillet over medium-low heat. Shake the pan constantly; they transition from pale to burnt in seconds. Remove them as soon as they are golden and fragrant.
- In a food processor or high-speed blender, pulse the garlic and toasted pine nuts until they form a coarse paste. Adding the aromatics first ensures you don’t have large chunks of garlic in the final sauce.
- Add the fresh basil leaves and the lemon zest. Pulse in short bursts. Over-processing at this stage can oxidize the basil, turning it brown. You want a vibrant, textured green.
- With the motor running on the lowest setting, slowly drizzle in the extra virgin olive oil in a steady stream. This creates a beautiful emulsion. Once smooth, stir in the grated cheese and lemon juice by hand to maintain some texture.
- Taste and adjust the seasoning with sea salt and red pepper flakes. Serve in a shallow bowl in the center of a board surrounded by warm focaccia, marinated olives, and slices of salty prosciutto.
The Cozy Hearth: Rhubarb Crumble Board

Why we love this
A crumble board is the ultimate comfort food experience, offering a deconstructed take on a classic dessert that allows guests to customize their bites. The rhubarb provides a sharp, tangy bite that wakes up the senses, while the golden-brown oat topping offers a satisfying, buttery crunch. As the warm fruit bubbles, it releases a sweet-tart aroma that reminds me of early summer afternoons. Topped with a dollop of cold crème fraîche, it’s a study in the perfect balance of temperatures and flavors.
Ingredients
- 4 cups Rhubarb, cut into 1-inch pieces
- 3/4 cup Granulated sugar
- 1 tbsp Cornstarch
- 1 tsp Ground ginger
- 1 cup Rolled oats
- 1 cup Brown sugar
- 1 cup All-purpose flour
- 1/2 cup Cold unsalted butter, cubed
- Pinch of cinnamon
How to make it
- Preheat your oven to 375°F (190°C). In a large bowl, toss the sliced rhubarb with granulated sugar, cornstarch, and ground ginger. The cornstarch is vital as it thickens the rhubarb juices into a glossy, pourable sauce.
- Spread the rhubarb mixture into a shallow baking dish. In a separate bowl, combine the oats, flour, brown sugar, and cinnamon.
- Using your fingertips or a pastry cutter, work the cold butter cubes into the dry mixture until it resembles pea-sized crumbles. Keeping the butter cold ensures the topping stays crisp rather than melting into a flat cookie layer.
- Sprinkle the topping evenly over the fruit. Bake for 35-40 minutes until the fruit is bubbling vigorously around the edges and the topping is a deep, golden brown.
- Let it cool for at least 15 minutes to allow the juices to set. Place the dish on a large wooden board and surround it with small bowls of vanilla bean ice cream, honey-drizzled honeycomb, and extra toasted oats for a DIY dessert experience.
The Morning Buzz: Craft Coffee Drink Board
Why we love this
Forget the standard carafe of coffee; a coffee drink board turns your morning caffeine into a luxurious ritual. The deep, roasted scent of espresso beans fills the room, grounded by the creamy sweetness of various milks and artisanal syrups. There is something so tactile and satisfying about watching a cloud of cold foam marble into a dark brew. It’s a sophisticated way to host a brunch, offering textures ranging from the silkiness of a latte to the crispness of iced cold brew.
Ingredients
- 1 quart Cold brew concentrate
- 2 cups Whole milk or Oat milk
- 1/2 cup Heavy cream (for cold foam)
- Homemade vanilla bean syrup
- Salted caramel sauce
- Cinnamon sticks and cocoa powder for dusting
- Fresh mint leaves
How to make it
- Prepare your cold brew concentrate at least 12 hours in advance by steeping coarse coffee grounds in filtered water. Strain through a fine-mesh sieve and coffee filter to ensure a crystal-clear, non-bitter base.
- To make the signature cold foam, whisk heavy cream and a splash of vanilla syrup in a milk frother or with a handheld whisk until it reaches a thick, pourable consistency similar to melted ice cream.
- Arrange various glassware on the board—think ribbed tumblers and delicate coupe glasses. Place the cold brew in a glass carafe and the milks in smaller pitchers.
- Create ‘flavor stations’ on the board with small jars of salted caramel and cinnamon sticks. Provide a small sifter for the cocoa powder so guests can create their own latte art.
- Include plenty of ice (clear ice spheres look best) and long-handled stirring spoons. This setup allows every guest to be their own barista, experimenting with ratios and flavors.
The Playful Palate: Gourmet Toddler Lunch Board

Why we love this
Who says kids’ food can’t be beautiful? This board is a vibrant tapestry of colors and shapes designed to make healthy eating an adventure. The crunch of fresh snap peas, the sweetness of sun-ripened berries, and the soft, pillowy texture of crustless sandwiches make this a multi-sensory delight. It removes the ‘battle’ from mealtime by presenting a variety of finger foods that are as fun to look at as they are to eat, encouraging even the pickiest eaters to explore new textures and tastes.
Ingredients
- Mini whole wheat sandwiches (cucumber and cream cheese)
- Turkey and cheese roll-ups
- Hard-boiled egg halves
- Apple slices (soaked in lemon water to prevent browning)
- Steamed broccoli florets
- Mild cheddar cubes
- Hummus for dipping
- Greek yogurt with a honey swirl
How to make it
- Start by prepping the ‘main’ components. Use small cookie cutters to turn standard sandwiches into stars or hearts. This visual appeal is key for engagement.
- Steam the broccoli florets for just 3 minutes until they are bright green and tender-crisp. Immediately shock them in an ice bath to stop the cooking process and preserve the vibrant color.
- Slice the hard-boiled eggs with a sharp knife to ensure clean yolks. Sprinkle with a tiny pinch of mild paprika for a pop of color.
- Arrange the items on a low-rimmed board or a divided tray. Group items by color to create a rainbow effect—red apples next to orange carrots, followed by yellow cheese.
- Place the dips (hummus and yogurt) in small, colorful silicone cups. These are easy for little hands to manage and keep the wet ingredients from soaking into the sandwiches or crackers.
Final Thoughts on Board Hosting
The beauty of these boards lies in their versatility. Whether you are celebrating a graduation with mini cakes or simplifying your afternoon with a toddler-friendly spread, the goal is always the same: to create a moment of connection. These viral ideas are popular for a reason—they take everyday ingredients and elevate them into something memorable. So, grab your favorite wooden board, gather your ingredients, and let your creativity take over. Your guests (and your social media feed) will thank you!