
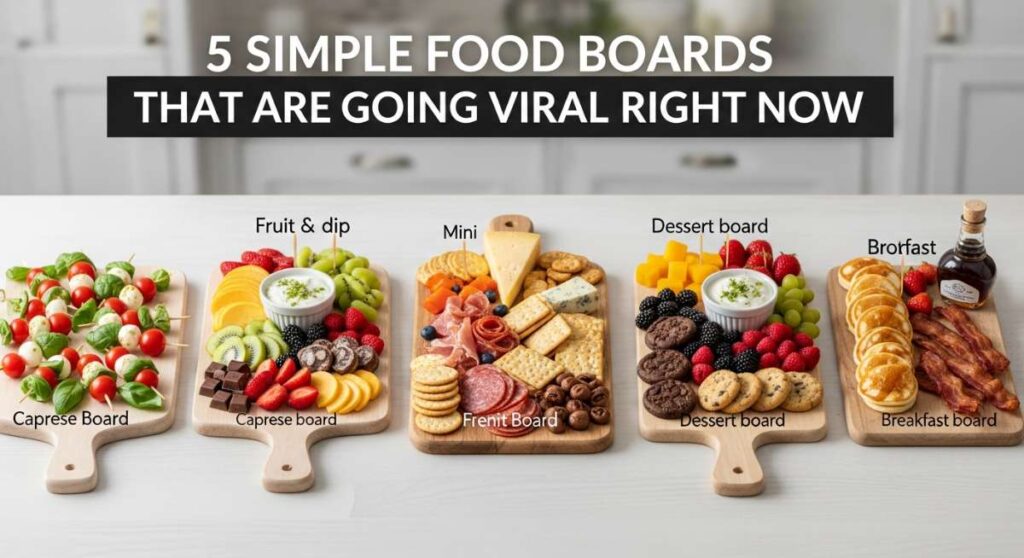
5 Simple Food Boards That Are Going Viral Right Now
There is something inherently magical about a shared meal that brings people together, especially when it’s presented with a touch of artistry and a whole lot of heart. As we transition into the season of celebrations and sun-drenched afternoons, the trend of curated food boards and themed platters has truly taken over our social feeds—and for good reason! It’s not just about the food; it’s about the memories we create while reaching for that perfect slice of pie or a beautifully decorated cookie.
I remember the first time I set out a large wooden board filled with seasonal treats; the room instantly filled with laughter and the sound of guests admiring the colors and textures. It’s that feeling of connection and effortless elegance that I want to share with you today. Whether you are celebrating a major milestone like a graduation or simply looking to brighten a weekday lunch, these viral ideas are designed to inspire your inner host and satisfy every craving.
How to decorate elegant graduation cakes

Why we love this
There is an undeniable air of sophistication that comes with a perfectly decorated graduation cake, blending the joy of achievement with timeless aesthetic appeal. Imagine the scent of Madagascar vanilla wafting through the kitchen as you smooth out a silky Swiss meringue buttercream that glistens under the light. The texture is a dream—velvety and light, providing the perfect canvas for delicate gold leaf accents or hand-pressed edible flowers that add a touch of organic beauty. It’s a centerpiece that demands attention, making the graduate feel truly celebrated in the most elegant way possible.
Ingredients
- Pre-baked layered sponge cake (chilled)
- Swiss meringue buttercream
- Edible gold leaf
- Fresh, organic edible flowers (like pansies or violas)
- Clear piping gel
- Pearl sprinkles
- Offset spatula and bench scraper
How to make it
- Begin by applying a thin ‘crumb coat’ of buttercream to your chilled cake layers using an offset spatula. This layer traps any loose crumbs. Chill the cake for 30 minutes until the frosting is firm to the touch.
- Apply a generous second layer of buttercream. Use a bench scraper held at a 45-degree angle against the rotating cake stand to achieve perfectly smooth, sharp edges. Aim for a matte, porcelain-like finish.
- Using sterilized tweezers, carefully apply small fragments of gold leaf to the sides of the cake. Do this in a draft-free room, as the leaf is incredibly delicate and will fly away with the slightest breeze.
- Lightly brush the back of your edible flowers with a tiny amount of piping gel. Press them gently onto the buttercream in a cascading ‘vine’ pattern starting from the top and flowing down one side.
- Finish by placing individual pearl sprinkles at the base of the cake for a polished, jewelry-like border. Chill until ready to serve to ensure the decorations stay perfectly in place.
How to make homemade rhubarb jam

Why we love this
Homemade rhubarb jam is like capturing the essence of spring in a glass jar, offering a vibrant pink hue that looks stunning on any breakfast board. The aroma is a delightful tug-of-war between the sharp, earthy tartness of the stalks and the deep, caramelized sweetness of the sugar as it simmers on the stove. When you spread it onto a warm piece of toast, the texture is thick and luscious, with soft bits of fruit that melt on your tongue. It’s a nostalgic treat that feels both humble and luxurious, bringing a burst of sunshine to even the grayest mornings.
Ingredients
- 4 cups fresh rhubarb stalks, chopped into 1/2 inch pieces
- 1 1/2 cups granulated sugar
- 1 tablespoon fresh lemon juice
- 1 teaspoon lemon zest
- 1/2 teaspoon pure vanilla bean paste
- A pinch of sea salt
How to make it
- In a heavy-bottomed stainless steel saucepan, combine the chopped rhubarb, sugar, lemon juice, and zest. Stir well and let it macerate for at least 30 minutes until the rhubarb begins to release its juices.
- Place the pan over medium-low heat. Stir constantly until the sugar has completely dissolved to prevent any grainy texture in the final jam.
- Increase the heat to medium-high and bring the mixture to a rolling boil. Continue to cook, stirring frequently to prevent sticking, for about 15-20 minutes. You are looking for the ‘sheeting’ stage where the jam drops off a cold metal spoon in one thick clump rather than individual droplets.
- Remove from heat and stir in the vanilla bean paste and sea salt. The salt is crucial as it balances the intense acidity of the rhubarb.
- Skim off any foam from the surface with a spoon. Pour the hot jam into sterilized glass jars, leaving 1/4 inch of headspace. Let them cool completely at room temperature before refrigerating; the jam will thicken significantly as it sets.
How to bake graduation sugar cookies
Why we love this
Graduation sugar cookies are the ultimate customizable treat, offering a crisp, buttery snap that gives way to a soft, melt-in-your-mouth center. The visual appeal lies in the sharp, clean lines of royal icing, which can be tailored to school colors with vibrant, saturated pigments. As they bake, the kitchen fills with the comforting smell of browned butter and almond extract, creating an atmosphere of cozy celebration. These cookies aren’t just snacks; they are edible keepsakes that can be shaped into diplomas, caps, or the year of graduation, making them a viral favorite for photo-ready parties.
Ingredients
- 3 cups all-purpose flour
- 1 cup unsalted butter, softened
- 1 cup granulated sugar
- 1 large egg
- 1 1/2 teaspoons almond extract
- Royal icing (stiff and flood consistencies)
- Gel food coloring
How to make it
- Cream the butter and sugar together on medium speed for 3-4 minutes until pale and fluffy. Add the egg and almond extract, mixing until just combined. Over-mixing at this stage can lead to cookies that spread too much in the oven.
- Gradually add the flour on low speed. Once the dough forms, wrap it in plastic and chill for at least 1 hour. This ensures the butter is cold, which helps the cookies retain their sharp ‘graduation cap’ shapes.
- Roll the dough out to exactly 1/4 inch thickness on a lightly floured surface. Cut shapes and place them on a parchment-lined baking sheet. Freeze the cutouts for 10 minutes before baking to further prevent spreading.
- Bake at 350°F (175°C) for 10-12 minutes. Look for the edges to be just barely golden; the centers should still look pale and set. Let them cool completely on a wire rack.
- Use ‘stiff’ icing to pipe the outlines of your designs. Once dry, ‘flood’ the centers with slightly thinner icing. Use a toothpick to pop any air bubbles. Allow to dry for 12 hours before stacking or packaging.
How to bake classic rhubarb pie

Why we love this
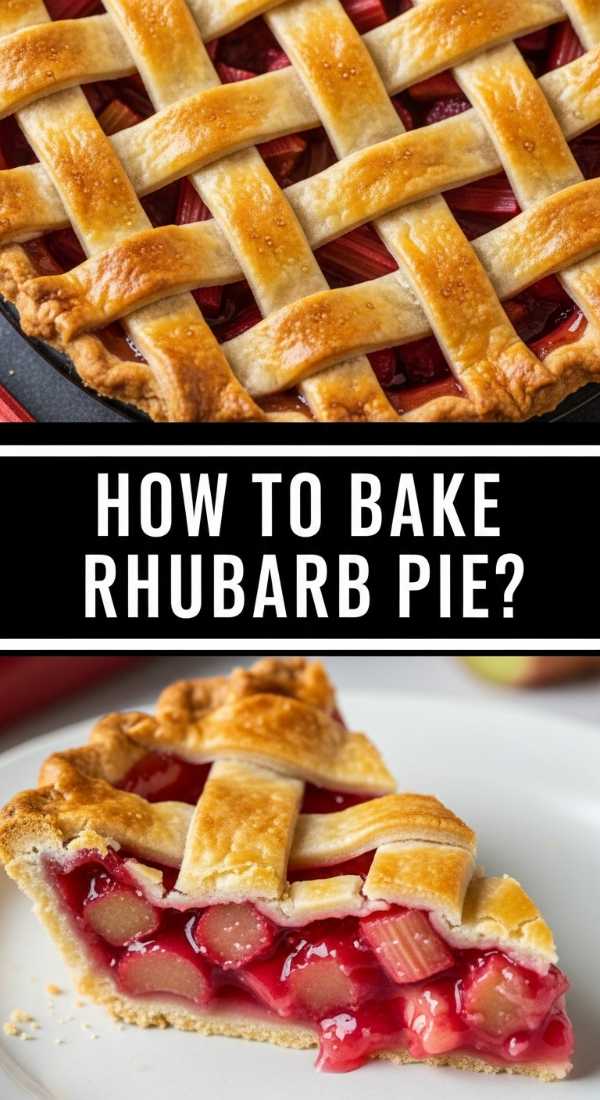
The classic rhubarb pie is a masterpiece of contrasts, featuring a shatteringly flaky, buttery crust that yields to a warm, bubbling filling of tart crimson fruit. There is something deeply satisfying about the steam that escapes when you slice into the lattice top, carrying the scent of toasted pastry and bright, acidic rhubarb. The filling should be thick and jammy, never runny, providing a mouth-puckering zing that is perfectly balanced by a scoop of cold vanilla bean ice cream. It is the quintessential summer dessert that feels like a warm hug from a loved one.
Ingredients
- Double pie crust (homemade or store-bought)
- 5 cups fresh rhubarb, cut into 1-inch pieces
- 1 1/4 cups granulated sugar
- 1/4 cup cornstarch (for thickening)
- 1/2 teaspoon ground cinnamon
- 1 tablespoon unsalted butter, cubed
- 1 egg (for egg wash)
- Coarse sparkling sugar
How to make it
- Preheat your oven to 400°F (200°C). Roll out the bottom crust and fit it into a 9-inch pie plate. Trim the edges, leaving a 1-inch overhang.
- In a large bowl, toss the rhubarb with sugar, cornstarch, and cinnamon. Ensure every piece of fruit is coated; the cornstarch is vital to absorbing the juices that rhubarb releases during baking.
- Pour the filling into the crust and dot the top with the small cubes of butter. This adds a richness to the filling and helps create a silky texture.
- Roll out the second crust and cut into 1-inch strips to create a lattice top. Weaving the strips ensures the steam can escape while the fruit cooks. Crimp the edges tightly to seal.
- Brush the lattice with a beaten egg and sprinkle generously with coarse sugar for a professional crunch. Bake at 400°F for 20 minutes, then reduce heat to 350°F and bake for another 35-45 minutes. The pie is done when the crust is deep golden brown and the juices are bubbling thick and slow in the center.
How to create graduation cupcakes
Why we love this
Graduation cupcakes offer a playful and portable way to celebrate, providing the perfect ratio of moist cake to decadent frosting in every bite. We love the versatility here—you can create a ‘forest’ of school colors using swirl piping techniques that look absolutely stunning on a tiered display. The texture of a well-made cupcake is airy and delicate, while the topping can range from a tangy cream cheese frosting to a rich chocolate ganache. Adding a small chocolate ‘cap’ on top makes them instantly recognizable and incredibly ‘Instagrammable’ for the big day.
Ingredients
- 12 baked chocolate or vanilla cupcakes
- Buttercream frosting in school colors
- Square chocolate pieces (like Ghirardelli)
- Miniature peanut butter cups
- Sour belt candy or fruit leather (for tassels)
- M&Ms or small round candies
How to make it
- Ensure your cupcakes are completely cool. If they are even slightly warm, the frosting will slide off and the decorations will melt.
- Pipe a flat swirl of buttercream on each cupcake using a large round tip. This will act as the ‘glue’ for your graduation cap.
- Place an upside-down miniature peanut butter cup in the center of each cupcake. This forms the base of the graduation cap.
- Apply a tiny dot of frosting to the top of the peanut butter cup and press a chocolate square firmly on top. Align it so it sits level.
- Cut a thin strip of sour belt candy to act as a tassel. Use a tiny bit of frosting to attach it to the center of the chocolate square, and finish by placing an M&M on top of the ‘tassel’ end to hide the attachment point.
How to style a graduation charcuterie board
Why we love this
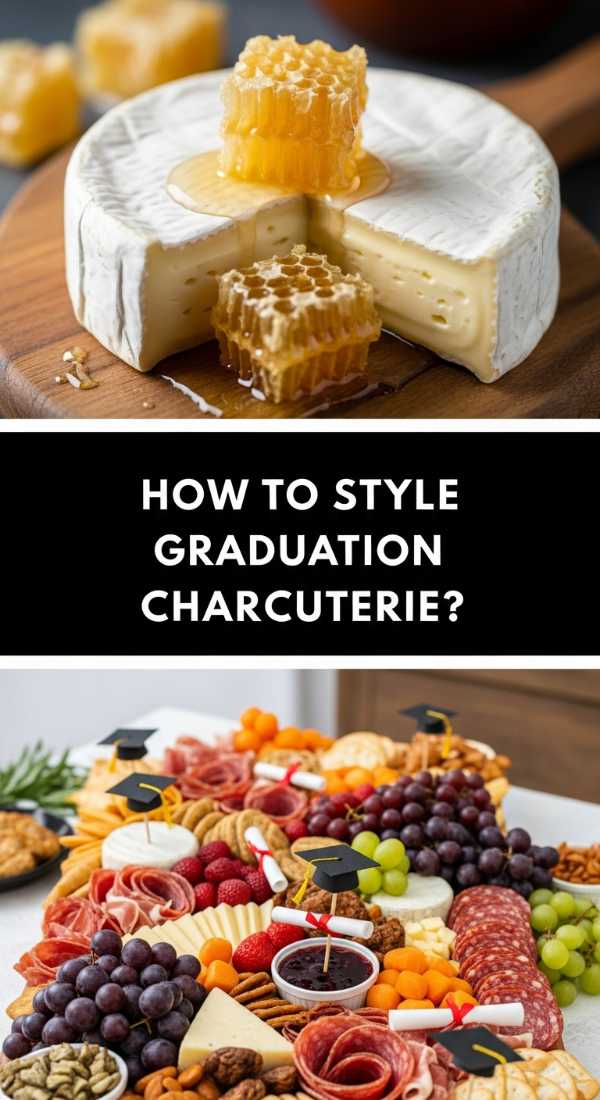
The graduation charcuterie board is the ultimate crowd-pleaser, offering a visual feast of colors, shapes, and flavors that invite guests to graze and mingle. We love the mix of salty prosciutto, creamy brie, and crunchy marcona almonds, punctuated by the sweetness of fresh grapes and honeycombs. The styling is where the magic happens; it’s an edible art piece where every crevice is filled with something delicious. It feels celebratory and abundant, reflecting the bright future of the graduate while providing a sophisticated snacking experience for guests of all ages.
Ingredients
- Assorted cheeses (Brie, Sharp Cheddar, Manchego)
- Cured meats (Prosciutto, Salami, Soppressata)
- Fresh fruits (Grapes, Berries, Fig slices)
- Crackers and sliced baguette
- Nuts and olives
- Graduation-themed accents (cap-shaped cheese cutouts)
- Fresh rosemary for garnish
How to make it
- Start with your largest items first: place the bowls for olives or honey and the large wedges of cheese in a ‘triangle’ formation across the board to create balance.
- Create ‘meat roses’ or fans by folding the salami and prosciutto. Place these near the cheeses they pair best with (e.g., prosciutto near the brie).
- Add the ‘structural’ elements like crackers and baguette slices, following the natural curves of the meat and cheese to create a flowing, serpentine path across the board.
- Fill the remaining large gaps with clusters of grapes and piles of nuts. Use different colors of fruit to ensure no two sections of the board look identical.
- For the final touch, use a small cookie cutter to shape slices of hard white cheese into graduation caps. Place these on top of the darker meats for contrast. Tuck in sprigs of fresh rosemary to fill any tiny ‘holes’ and add a wonderful herbal aroma.
How to make zesty lemon pesto

Why we love this
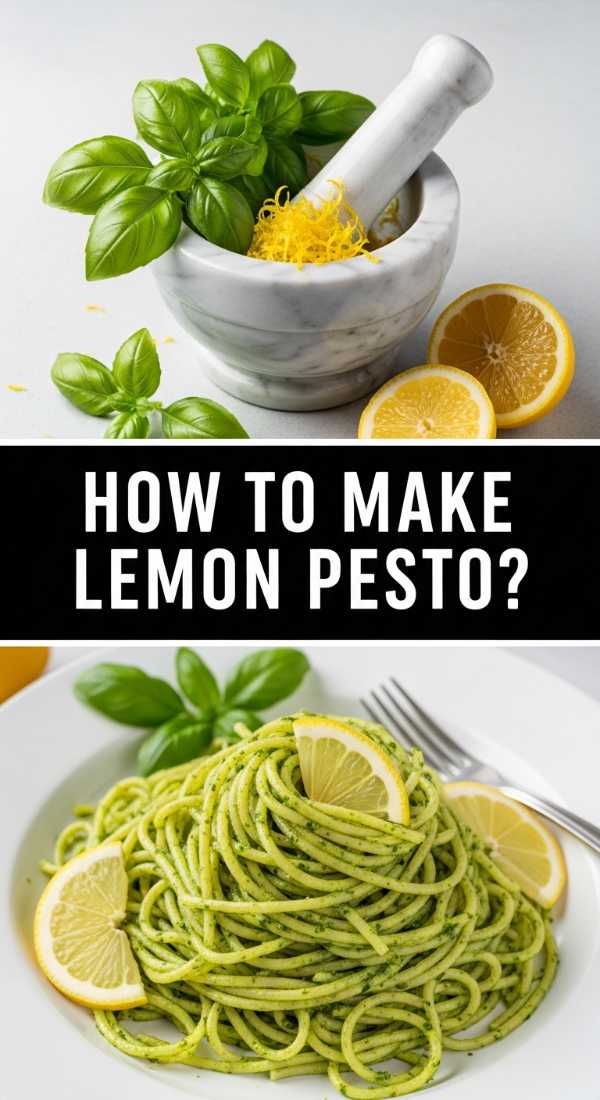
Zesty lemon pesto is a vibrant, herbaceous revelation that breathes new life into the traditional basil sauce. The aroma is intoxicating—a blend of peppery fresh basil, toasted pine nuts, and the sharp, clean scent of lemon zest that clears the senses. The texture is rustic and slightly coarse, allowing you to taste the individual components: the salty punch of Parmigiano-Reggiano and the fruity richness of extra virgin olive oil. It’s incredibly versatile, working as a dip on a board, a sandwich spread, or a bright sauce for summer pasta.
Ingredients
- 2 cups packed fresh basil leaves
- 1/2 cup extra virgin olive oil (high quality)
- 1/3 cup pine nuts (toasted)
- 2 cloves garlic
- 1/2 cup grated Parmigiano-Reggiano
- Zest of 2 large lemons
- 2 tablespoons fresh lemon juice
- Salt and black pepper to taste
How to make it
- In a small dry skillet over medium-low heat, toast the pine nuts for 3-5 minutes. Shake the pan constantly until they are golden brown and fragrant. Do not walk away, as they burn very quickly.
- Pulse the basil and toasted pine nuts in a food processor several times until coarsely chopped. Add the garlic and pulse again.
- With the processor running on low, slowly drizzle in the olive oil in a steady stream. This creates an emulsion, ensuring the pesto is creamy and doesn’t separate.
- Add the lemon zest, lemon juice, and grated cheese. Pulse just a few times to combine. You want to maintain some texture, so avoid over-processing into a smooth paste.
- Taste and season with salt and pepper. The lemon juice can vary in acidity, so adjust with a little more oil if it’s too sharp. Store in a jar with a thin layer of olive oil on top to prevent oxidation (browning).
How to prepare toddler lunch recipes
Why we love this
Preparing toddler lunches is an exercise in creativity and nutrition, turning simple ingredients into a colorful ‘snack board’ that even the pickiest eaters will love. The focus here is on bite-sized shapes and soft, safe textures that are easy for little hands to navigate. We love how a variety of colors—orange carrots, green cucumbers, and red strawberries—can make a plate look like a rainbow, encouraging kids to explore different flavors. It’s about making mealtime fun and stress-free, ensuring they get the energy they need to play and grow.
Ingredients
- Whole grain bread or tortillas
- Mild deli turkey or ham
- Cheese slices (cut into fun shapes)
- Cucumber wheels and baby carrots (steamed slightly for softness)
- Apple slices or berries
- Hummus or yogurt dip
How to make it
- Start by using a small star or heart-shaped cookie cutter to cut shapes out of the bread and cheese. Toddlers are much more likely to engage with food that looks like a toy.
- If using vegetables like carrots, steam them for 3-4 minutes until they are ‘fork-tender.’ This removes the choking hazard of raw, hard vegetables while maintaining their color and nutrients.
- Roll the deli meat into tight cigars and slice into ‘sushi’ bites. This makes them easy to pick up without needing a fork.
- Arrange the items in a muffin tin or a partitioned plate. Placing different foods in their own ‘cubby’ prevents flavors from touching, which is a common preference for toddlers.
- Include a ‘dip’ like hummus in a small central container. Dipping is a sensory activity that keeps toddlers engaged with their meal for longer periods.
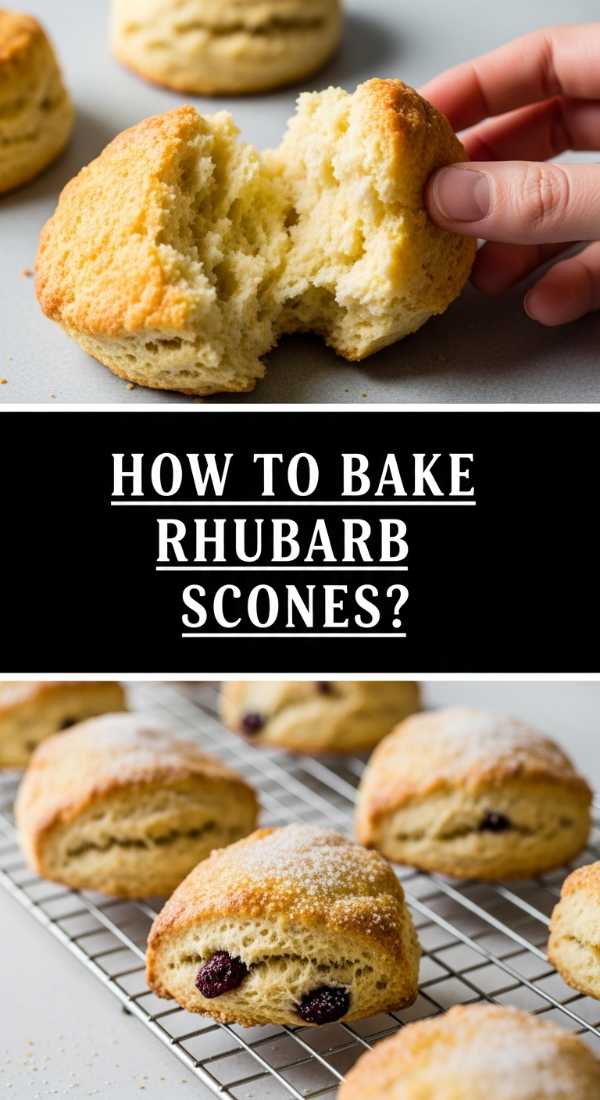
How to bake golden rhubarb scones

Why we love this
Golden rhubarb scones are the epitome of brunch luxury, featuring a crumbly, buttery exterior that hides a soft, tender heart studded with tart fruit. As they bake, the butter creates pockets of steam, resulting in a beautiful lift and a flaky texture that practically begs to be slathered in clotted cream. The rhubarb pieces soften into little jewels of flavor that burst against the sweet, heavy cream dough. Topped with a sprinkle of turbinado sugar, they have a satisfying crunch that contrasts perfectly with the delicate crumb inside.
Ingredients
- 2 cups all-purpose flour
- 1/3 cup granulated sugar
- 1 tablespoon baking powder
- 1/2 cup cold unsalted butter, cubed
- 1 cup fresh rhubarb, finely diced
- 1/2 cup heavy cream (plus extra for brushing)
- 1 egg
- 1 teaspoon vanilla extract
- Turbinado sugar for topping
How to make it
- In a large bowl, whisk together the flour, sugar, and baking powder. Using a pastry cutter or your fingertips, work the cold butter into the flour until the mixture resembles coarse crumbs with some pea-sized pieces of butter remaining.
- Gently fold in the finely diced rhubarb. The small dice is important so the moisture from the fruit doesn’t make the dough too soggy.
- Whisk the heavy cream, egg, and vanilla together. Pour into the dry ingredients and stir with a fork just until a shaggy dough forms. Do not overwork the dough, or the scones will be tough.
- Turn the dough onto a floured surface and pat into a 1-inch thick circle. Cut into 8 wedges and place them on a parchment-lined sheet. Freeze the scones for 15 minutes before baking; this ‘shocks’ the butter, leading to a much higher rise.
- Brush the tops with heavy cream and sprinkle with turbinado sugar. Bake at 400°F (200°C) for 18-22 minutes until the tops are golden brown and the bottoms are firm.
How to design funny graduation cakes
[IMAGE_10]
Why we love this
Sometimes the best way to celebrate a massive achievement is with a side of humor, and funny graduation cakes are the perfect way to lighten the mood. Whether it’s a cake that says “I’m 100% Done” or one decorated to look like a giant ramen noodle cup (the staple of student life), these designs are all about personality. The joy comes from the shared joke between friends and family, making the dessert a conversation starter. The textures are often bold—thick fudgy frosting or sculpted fondant—matching the playful and irreverent spirit of the celebration.
Ingredients
- Large rectangular sheet cake
- Colored fondant (black, white, and school colors)
- Edible markers
- Chocolate ganache or stiff buttercream
- Cake toppers (like a plastic ‘unemployed’ sign for humor)
How to make it
- Frost your sheet cake with a smooth layer of buttercream. If you’re going for a ‘notebook’ look, use a bench scraper to get the surface as flat as possible.
- Roll out white fondant and drape it over the cake. Trim the edges. Use a blue edible marker and a ruler to draw horizontal lines, and a red marker for the vertical margin line to mimic a piece of notebook paper.
- Write a humorous message in the ‘center’ of the notebook, such as “I survived 17 years of ‘The bell doesn’t dismiss you, I do.'” Use a steady hand and a fine-tip edible marker.
- Sculpt a small graduation cap out of black fondant and place it haphazardly in the corner of the cake, as if it were thrown there in relief.
- Add ‘coffee stains’ using a bit of watered-down brown food coloring and a round cutter to create circles on the ‘paper.’ This adds to the ‘exhausted student’ aesthetic that makes these cakes so viral and relatable.
Conclusion
Creating these viral food boards and treats is about more than just following a recipe; it’s about the joy of the process and the smiles on the faces of those you love. From the tart snap of a rhubarb scone to the elegant finish of a graduation cake, each of these ideas offers a way to make your next gathering truly unforgettable. So, grab your apron, clear off your counter, and let your creativity run wild—your guests (and your social media feed) will thank you!