
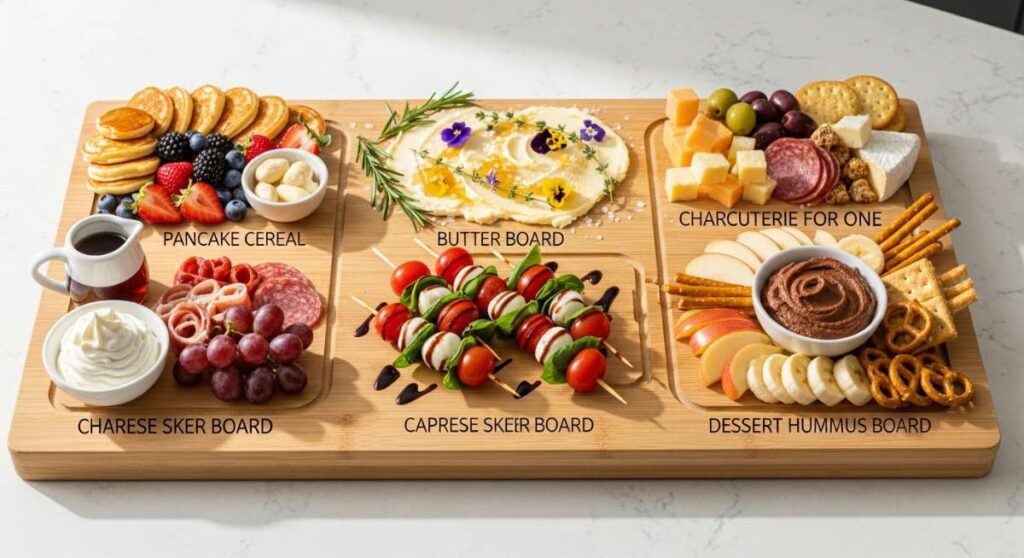
There’s something truly magical about the moment you set a beautifully arranged food board in the center of the table. It’s more than just a meal; it’s an invitation to linger, to graze, and to share stories over a tapestry of colors and textures. In my own kitchen, I’ve found that the best boards aren’t the most expensive ones, but the ones that balance comfort with a little bit of creative flair.
Lately, the internet has been buzzing with these simplified, high-impact snack boards that take the stress out of hosting. Whether it’s a rainy Tuesday night or a planned Sunday brunch, these ideas bring a sense of celebration to the everyday. I’ve gathered some of my favorite viral-inspired components that transform a simple platter into a conversation starter.
How to make protein bites?

Why we love this
These little spheres of energy are the ultimate multitasker on any board, offering a dense, chewy texture that satisfies a sweet tooth while providing a sustained boost. Imagine the rich aroma of toasted oats mingling with the deep, earthy scent of almond butter and a hint of vanilla. As you take a bite, you experience the slight crunch of flax seeds and the velvet-smooth melt of mini chocolate chips, creating a sensory experience that feels like eating raw cookie dough, but with much better ingredients for your body.
Ingredients
- 2 cups rolled oats
- 1 cup natural nut butter (peanut or almond)
- 1/2 cup honey or maple syrup
- 1/2 cup ground flaxseed
- 1/2 cup mini dark chocolate chips
- 1 teaspoon vanilla extract
- A pinch of sea salt
How to make it
- Begin by placing your rolled oats into a large mixing bowl. If you prefer a smoother texture, you can pulse half of the oats in a food processor for 10 seconds before adding them to the bowl.
- In a small microwave-safe bowl, combine your nut butter and honey. Heat them on low for 20 seconds just until they reach a pourable, liquid consistency, which ensures they will coat every single oat evenly.
- Pour the warm liquid mixture over the dry ingredients, adding the vanilla extract and salt. Stir vigorously with a sturdy spatula until the mixture becomes heavy and fully incorporated.
- Fold in the chocolate chips and flaxseed last. This prevents the chocolate from melting if the nut butter mixture was still warm.
- Place the bowl in the refrigerator for at least 30 minutes. This chilling phase is critical as it allows the oats to hydrate and the mixture to firm up, making it much easier to handle.
- Once chilled, use a small cookie scoop to portion out the dough. Roll them between your palms into 1-inch balls. If they stick to your hands, lightly dampen your palms with water. Store them in an airtight container in the fridge until you are ready to assemble your board.
How to cook crispy chickpeas?
Why we love this
There is nothing quite like the satisfying, audible crunch of a perfectly roasted chickpea hitting your palate. These savory gems carry a warm, smoky aroma from the paprika and cumin, reminiscent of a Mediterranean spice market. Inside, they maintain a slightly nutty, tender core that contrasts beautifully with their shattered-glass exterior. They add a much-needed saltiness and rustic texture to a food board, acting as the perfect healthy alternative to traditional croutons or heavy chips.
Ingredients
- 2 cans (15 oz each) chickpeas/garbanzo beans
- 2 tablespoons extra virgin olive oil
- 1 teaspoon smoked paprika
- 1/2 teaspoon garlic powder
- 1/2 teaspoon cumin
- 1/2 teaspoon sea salt
How to make it
- Preheat your oven to 400°F (200°C). This high temperature is essential for achieving that characteristic crispiness without drying out the interior too much.
- Drain the chickpeas into a colander and rinse them thoroughly under cold water to remove the canning liquid.
- This is the most important step: Spread the chickpeas onto a clean kitchen towel and pat them completely dry. Let them air dry for another 15 minutes. Any moisture left on the skin will cause them to steam rather than crisp.
- Remove any loose skins that have fallen off, as these will burn in the oven.
- Transfer the dry chickpeas to a parchment-lined baking sheet. Drizzle with olive oil and toss until every chickpea is glossy. Do not add the spices yet, as they can burn during the long roasting process.
- Roast for 20-30 minutes, shaking the pan every 10 minutes to ensure even browning. You’ll know they are ready when they sound like little marbles hitting the pan.
- Immediately after removing them from the oven, toss them in a bowl with the paprika, garlic powder, cumin, and salt. The residual heat will help the spices bloom and stick to the oil.
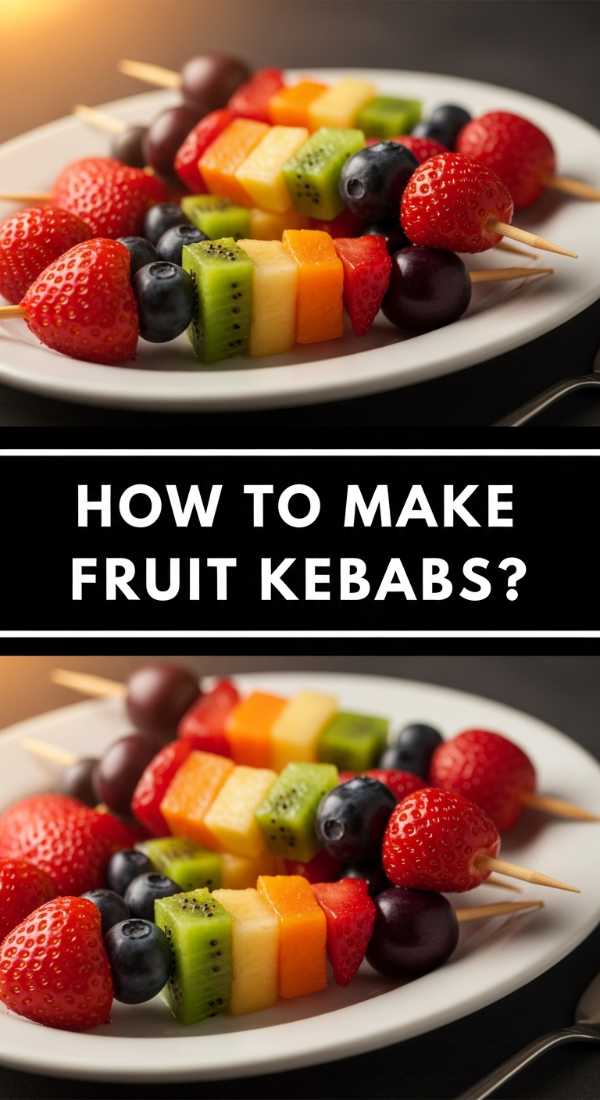
How to make fruit kebabs?

Why we love this
Fruit kebabs bring a playful, vertical dimension to a food board that is visually stunning and incredibly easy to grab. The scent of fresh, macerated berries and citrusy pineapple fills the air, creating a bright and refreshing atmosphere. Each bite is a burst of juicy sweetness—the snap of a cold grape followed by the soft, honeyed yield of a ripe melon. It’s a clean, vibrant palate cleanser that balances out the heavier savory elements of a snack spread.
Ingredients
- 1 pint strawberries, hulled
- 1 fresh pineapple, cubed
- 2 cups green and red grapes
- 1 cantaloupe, balled or cubed
- Wooden bamboo skewers
- Optional: Fresh mint leaves for threading
How to make it
- Prepare all your fruit by washing them in cold water and drying them gently. Excess water will make the skewers slippery and dilute the natural sugars.
- Cut your larger fruits (pineapple and melon) into uniform 1-inch pieces. Consistency in size is key for the visual “viral” look of the board.
- If using mint, pluck the leaves and keep them whole.
- Take a bamboo skewer and begin threading the fruit in a repeating color pattern. A classic sequence is strawberry, pineapple, cantaloupe, grape, and a mint leaf for a pop of green.
- Tip: To prevent the fruit from sliding off, ensure the denser fruits like pineapple or melon are at the bottom of the skewer to act as a base.
- Lay the completed skewers on a tray and lightly mist with a tiny bit of lime juice to keep the colors vibrant and prevent oxidation. Chill until the moment you serve.
How to prepare creamy dip?

Why we love this
A board without a central dip feels incomplete, and this whipped Greek yogurt and feta creation is the silkiness that binds everything together. It has a tangy, sophisticated aroma with a hint of lemon zest that perks up the senses. The texture is cloud-like—airy and light, yet rich enough to cling to a vegetable or cracker. Every scoop delivers a cooling sensation that cuts through spice, leaving a lingering, savory brightness on the tongue.
Ingredients
- 1 cup plain Greek yogurt (full fat is best)
- 4 oz feta cheese, crumbled
- 1 clove garlic, minced
- 1 tablespoon lemon juice
- 1 teaspoon lemon zest
- 2 tablespoons fresh dill or parsley
- A drizzle of honey
How to make it
- Place the crumbled feta and Greek yogurt into a food processor or high-speed blender. Processing these together is the secret to removing the graininess of the feta and achieving a mousse-like consistency.
- Add the minced garlic, lemon juice, and lemon zest. Pulse the mixture on high for about 60 seconds.
- Stop the processor and scrape down the sides with a rubber spatula to ensure no chunks of cheese remain.
- Blend for another 30 seconds until the mixture looks glossy and smooth. If it’s too thick, you can add a teaspoon of olive oil to help the emulsion.
- Transfer the dip to a serving bowl. Using the back of a spoon, create a decorative swirl on the surface.
- Finish by folding in the fresh chopped herbs and drizzling a thin stream of honey over the top. The honey provides a necessary floral sweetness that balances the saltiness of the feta.
How to bake zucchini fries?
Why we love this
Zucchini fries are the sophisticated cousin of the potato fry, offering a delicate sweetness and a tender, melt-in-your-mouth interior. The outer panko coating provides a high-definition crunch that is seasoned with parmesan, giving off an intoxicating cheesy aroma as they bake. They feel indulgent but are surprisingly light, making them a guilt-free addition to a grazing board that provides a beautiful pop of garden-fresh green.
Ingredients
- 2 medium zucchinis
- 1/2 cup all-purpose flour
- 2 large eggs, beaten
- 1 cup Panko breadcrumbs
- 1/2 cup grated Parmesan cheese
- 1 teaspoon Italian seasoning
- Salt and pepper to taste
How to make it
- Preheat your oven to 425°F (220°C). Prepare a baking sheet by placing a wire cooling rack on top of it. This allows hot air to circulate under the fries, ensuring they get crispy on all sides without needing to be flipped.
- Slice the zucchinis into “batons” or sticks, about 3 inches long and 1/2 inch thick. Try to keep them uniform so they cook at the same rate.
- Set up a dredging station with three shallow bowls: one with flour, salt, and pepper; one with the beaten eggs; and one with a mix of panko, parmesan, and Italian seasoning.
- Dredge each zucchini stick in the flour first, shaking off the excess. Then dip into the egg wash, and finally press firmly into the panko-parmesan mixture until fully coated.
- Arrange the fries on the wire rack so they aren’t touching.
- Bake for 15-20 minutes. You are looking for the breadcrumbs to turn a deep golden brown and the zucchini to feel tender when pierced with a fork. Serve immediately while the crust is at its peak crunch.
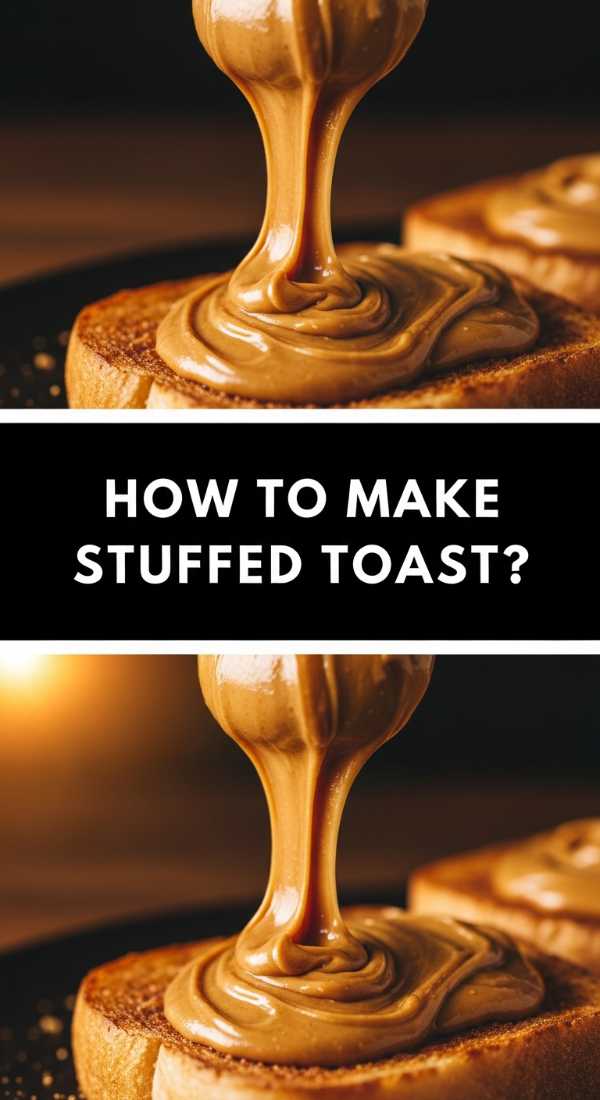
How to make stuffed toast?

Why we love this
There is something deeply comforting about warm, toasted bread that has been transformed into a mini-culinary masterpiece. These stuffed toasts feature a golden-brown crust that yields to a soft, warm center filled with creamy goat cheese and sweet fig jam. The aroma is a heavenly mix of yeast and caramelized fruit. It’s a sophisticated bite that feels like a fancy hors d’oeuvre but has the soul of a classic grilled cheese, providing a rich, savory-sweet anchor for your board.
Ingredients
- 1 baguette or loaf of sourdough
- 4 oz soft goat cheese
- 1/4 cup fig jam or balsamic glaze
- 2 tablespoons softened butter
- Fresh thyme leaves for garnish
How to make it
- Slice your bread into 1-inch thick rounds. If using a baguette, slice on a bias (diagonal) to create more surface area for the toppings.
- Using a small paring knife, carefully cut a slit into the top of each slice to create a small pocket, being careful not to cut all the way through the bottom or sides.
- Using a small spoon or a piping bag, stuff about a teaspoon of goat cheese and a half-teaspoon of fig jam into the pocket.
- Lightly butter both sides of the bread slices with the softened butter.
- Heat a non-stick skillet over medium-low heat. This lower temperature is vital so the cheese inside melts before the bread burns.
- Place the toast slices in the pan and cook for 2-3 minutes per side. You want a consistent golden-brown color and a slight sizzle.
- Once the cheese is soft and the bread is toasted, remove from the heat and sprinkle with fresh thyme. The warmth of the bread will release the essential oils of the thyme, adding a lovely herbal fragrance.
How to make apple nachos?

Why we love this
Apple nachos are the ultimate crowd-pleaser because they combine the crisp, tart freshness of autumn fruit with the gooey, decadent toppings of a dessert. The scent of cinnamon and warm almond butter is instantly nostalgic. As you eat them, you get the refreshing snap of the apple followed by the stickiness of the drizzle and the crunch of toasted nuts. It’s a lighter way to enjoy the flavors of a caramel apple without the mess or the heavy sugar load.
Ingredients
- 3 crisp apples (Honeycrisp or Granny Smith)
- 1/4 cup creamy almond butter or peanut butter
- 2 tablespoons honey
- 1/4 cup granola or chopped pecans
- A sprinkle of cinnamon
- Optional: A few dark chocolate shavings
How to make it
- Core the apples and slice them into thin wedges. To prevent browning while you prep the rest of the board, toss the slices in a bowl with a little lemon juice and water, then pat them dry before plating.
- Arrange the apple slices in a circular, overlapping pattern on your board to create a “base” for the nachos.
- In a small bowl, combine the nut butter and honey. Microwave for 15 seconds to create a thin, drizzlable consistency.
- Using a fork, drizzle the warm nut butter mixture back and forth across the apples in a zigzag pattern. This ensures every slice gets a bit of the topping.
- Immediately sprinkle the granola or chopped pecans over the top so they stick to the nut butter.
- Finish with a light dusting of cinnamon and the chocolate shavings. The contrast of the cold apple and the warm drizzle is what makes this dish truly addictive.
How to bake mini pizzas?

Why we love this
Mini pizzas are pure joy in a handheld format, bringing the smoky, cheesy aroma of a pizzeria right to your living room. The crust is perfectly crisp on the edges with a slight chew, while the tomato sauce provides a zesty, herb-infused brightness. The sight of bubbling, browned mozzarella cheese is universally inviting. They serve as a warm, hearty component on a food board that appeals to everyone from kids to food-loving adults.
Ingredients
- 1 package of mini pita breads or English muffins
- 1/2 cup marinara sauce
- 1 cup shredded mozzarella cheese
- Mini pepperoni slices or diced bell peppers
- 1/2 teaspoon dried oregano
- Red pepper flakes for garnish
How to make it
- Preheat your oven to 425°F (220°C). A hot oven ensures the cheese bubbles and the crust crisps up quickly without getting soggy.
- Place the pitas or English muffin halves on a large baking sheet.
- Spread a tablespoon of marinara sauce onto each base, leaving a small border for the “crust.” Don’t overdo the sauce, or the bread will lose its structural integrity.
- Generously sprinkle the mozzarella cheese over the sauce.
- Add your toppings—the mini pepperonis are great because they crisp up into little “cups” in the heat.
- Sprinkle the oregano over the top for that classic Italian aroma.
- Bake for 8-10 minutes until the cheese is melted and starting to develop golden-brown spots.
- Let them cool for 2 minutes before placing them on the board so the cheese sets slightly and doesn’t slide off.
How to season fresh edamame?

Why we love this
Edamame is the perfect interactive snack, providing a satisfying pop as you release the tender, buttery beans from their salty pods. The scent of toasted sesame oil and flaky sea salt is simple yet incredibly appetizing. It’s an umami-rich addition that brings a beautiful vibrant green color to your platter. The combination of the warm, steamed pods and the coarse salt creates a tactile experience that makes grazing feel more intentional and fun.
Ingredients
- 1 lb frozen edamame (in the pod)
- 1 tablespoon toasted sesame oil
- 1 tablespoon flaky sea salt (like Maldon)
- 1/2 teaspoon chili flakes (optional)
- 1 teaspoon toasted sesame seeds
How to make it
- Bring a large pot of salted water to a rolling boil. Adding salt to the water seasons the beans from the inside out during the cooking process.
- Add the frozen edamame pods and cook for 3-5 minutes. You are looking for a bright green color and a texture that is tender but still has a slight bite (al dente).
- Drain the edamame thoroughly in a colander. It’s important to shake off as much water as possible so the oil and salt can adhere to the pods.
- While the pods are still steaming hot, transfer them to a mixing bowl.
- Drizzle with the toasted sesame oil and toss well to coat. The heat from the beans will help the oil penetrate the surface of the pods.
- Add the flaky sea salt, chili flakes, and sesame seeds. Toss one last time.
- Serve immediately while warm, or at room temperature. Provide a small empty bowl on the side of your food board for the discarded pods.
How to make granola bars?
[IMAGE_10]
Why we love this
Homemade granola bars are worlds apart from store-bought versions; they are chewy, nutty, and possess a deep, caramelized flavor from the baked honey and toasted seeds. They fill the kitchen with the scent of toasted oats and cinnamon, a warm and inviting fragrance. These bars add a rustic, wholesome element to the board, offering a satisfying crunch that pairs beautifully with fresh fruit or a creamy dip. They are the ultimate “feel-good” snack that looks as good as it tastes.
Ingredients
- 2 1/2 cups rolled oats
- 1/2 cup chopped almonds or walnuts
- 1/3 cup honey
- 1/4 cup unsalted butter
- 1/4 cup brown sugar
- 1/2 teaspoon vanilla extract
- 1/4 teaspoon salt
- 1/2 cup dried cranberries or chocolate chips
How to make it
- Preheat your oven to 350°F (175°C). Spread the oats and chopped nuts on a baking sheet and toast them for 8-10 minutes until they smell fragrant and look slightly golden. This step is the secret to a professional-tasting bar.
- In a small saucepan over medium heat, combine the honey, butter, and brown sugar. Stir constantly until the sugar has dissolved and the mixture begins to bubble. Let it simmer for 2 minutes—this creates the “caramel” that holds the bars together.
- Remove the saucepan from the heat and stir in the vanilla and salt.
- In a large bowl, mix the toasted oats and nuts with the honey mixture. Stir until every oat is coated and glistening.
- Let the mixture cool for about 5 minutes before folding in the dried fruit or chocolate chips (this prevents the chocolate from melting completely).
- Line an 8×8 inch square pan with parchment paper, leaving an overhang on the sides.
- Transfer the mixture to the pan. Use the back of a greased metal spoon to press the mixture down as firmly as possible. The harder you press, the less likely the bars are to crumble when sliced.
- Refrigerate for at least 2 hours before using the parchment overhang to lift the block out and slice into bars.
The Art of the Grazing Board
Creating a food board is an act of love. It’s about more than just the individual recipes; it’s about the way they come together to create a moment of connection. Whether you’re serving the spicy crunch of chickpeas alongside the cooling creaminess of a whipped feta dip, you’re creating a balance of flavors that keeps people coming back for more. These simple ideas prove that you don’t need to be a professional chef to host something that feels truly special. So, grab a board, pick a few of these favorites, and enjoy the process of making something beautiful.