
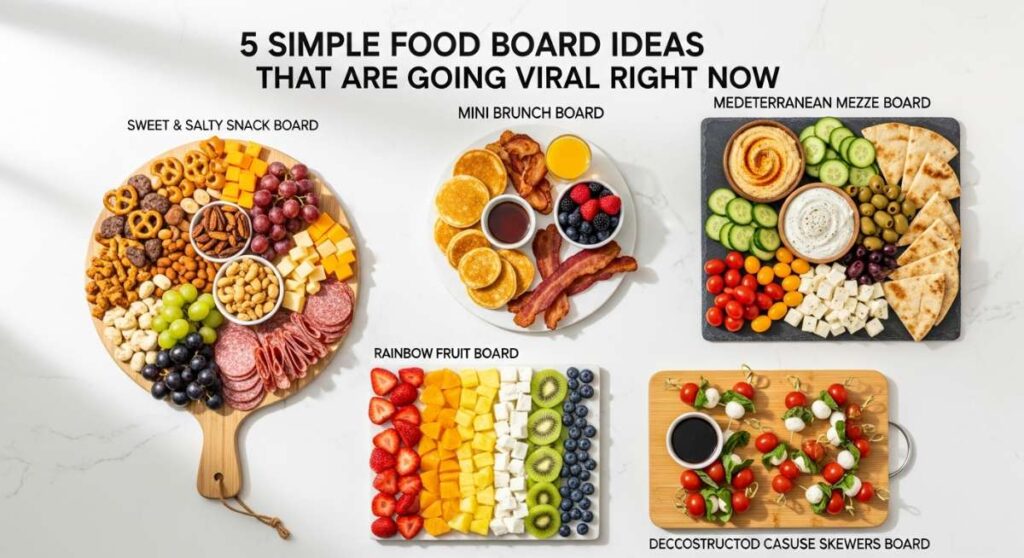
There is something undeniably magical about the way food brings us together, especially when it is laid out in a way that feels both effortless and artful. Whether it’s the golden light of a summer afternoon hitting a spread of fresh fruit or the comforting steam rising from a shared dessert, these moments are what memories are made of. Lately, my social media feeds have been overflowing with the most creative ‘food boards’ that take the stress out of hosting while turning every meal into a beautiful, interactive experience.
If you have been following along for a while, you know I’m all about finding that sweet spot between ‘wow-factor’ and ‘totally doable.’ These viral food board ideas are exactly that. They aren’t just about aesthetics; they are about slowing down, enjoying the textures and aromas of fresh ingredients, and making our loved ones feel special without spending eight hours in the kitchen. Let’s dive into the five boards that are currently taking the internet—and my own dining room table—by storm!
Ultimate Italian Summer Dinner Party Menu
Why we love this
This board captures the very essence of a Mediterranean sunset, blending the briny saltiness of cured meats with the sun-kissed sweetness of seasonal stone fruits and heirloom tomatoes. There is a tactile joy in assembling your own perfect bite—perhaps a thin ribbon of prosciutto draped over a slice of creamy mozzarella, drizzled with thick balsamic glaze. The aroma of fresh basil leaves being torn by hand fills the air, mingling with the earthy scent of toasted ciabatta. It is a sensory journey that encourages guests to linger over their plates, sipping chilled wine and enjoying the vibrant, contrasting textures of silky cheeses and crunchy artisanal crackers.
Ingredients
- Thinly sliced Prosciutto di Parma and Genoa Salami
- Fresh Burrata or Buffalo Mozzarella balls
- Heirloom tomatoes (sliced into rounds and wedges)
- Marinated artichoke hearts and Castelvetrano olives
- Fresh basil sprigs and arugula
- Aged balsamic glaze and extra virgin olive oil
- Seeded baguettes or ciabatta loaves
- Fresh figs or sliced peaches for a sweet contrast
How to make it
- Begin by selecting a large wooden board or a marble slab to act as your canvas; ensure it is clean and dry before you start.
- Place your ‘anchors’ first: set small ceramic bowls for the olives, artichokes, and balsamic glaze in a triangular pattern across the board to create visual balance.
- Carefully tear the Burrata balls in half to reveal the creamy interior, then place them in the center; season immediately with flaky sea salt and a crack of black pepper.
- Fold the prosciutto slices into loose ribbons or ‘roses’ to add height and texture, nesting them alongside the salami in overlapping rows.
- Fill the remaining gaps with clusters of heirloom tomatoes and fresh fruit, ensuring that the colors are distributed evenly so no one side looks ‘too red’ or ‘too green.’
- Just before serving, toast the sliced bread in an oven preheated to 375°F for about 5-7 minutes until the edges are golden and the center remains slightly soft.
- Tuck fresh basil leaves into the crevices for a pop of bright green and a final hit of fragrance.
Aesthetic Summer Coffee Drink Recipes

Why we love this
Imagine the clinking of ice cubes against glass as you prepare a personalized caffeine experience that looks like it belongs in a high-end Parisian café. This coffee bar board is a dream for early morning brunches, offering a visual feast of swirling milk clouds and deep, mahogany-colored espresso. The scent is intoxicating—a mix of roasted beans, floral vanilla bean paste, and a hint of cinnamon. There is something deeply satisfying about the gradient colors of a perfectly layered iced latte, where the dark coffee slowly bleeds into the creamy white milk, creating a masterpiece you almost don’t want to stir.
Ingredients
- Cold brew concentrate or freshly pulled espresso shots
- Choice of milks (Oat, Almond, and Full Cream)
- Homemade lavender or vanilla simple syrup
- Whipped heavy cream or cold foam
- Garnish: Dried lavender buds, cinnamon sticks, and cocoa powder
- Clear glass tumblers and long-handled stirring spoons
- Large, slow-melting ice cubes
How to make it
- Arrange your glassware on one side of a tray or board, ensuring you have a variety of shapes to catch the light beautifully.
- Prepare your coffee base: if using espresso, pull the shots right before serving to maintain the crema; if using cold brew, ensure it has been steeped for at least 18 hours for maximum smoothness.
- Fill small glass pitchers with your different milk options; frothing the oat milk slightly beforehand gives it a professional, velvety micro-foam texture.
- Set out the syrups in decorative dispensers; for a viral ‘marbled’ look, pour the syrup into the glass first, followed by the ice, then the milk, and finally the coffee.
- Teach your guests the ‘slow pour’ technique: hold the coffee pitcher close to the surface of the milk and pour steadily into the center to create those iconic layers.
- Top with a dollop of cold foam—achieve this by frothing skim milk and a touch of syrup until it doubles in volume and holds a soft peak.
- Finish with a light dusting of cinnamon or a single lavender sprig for that final, Instagram-worthy touch.
Healthy Toddler Lunch Ideas for School
Why we love this
This board is a vibrant explosion of color designed to make nutritious eating feel like a game for the little ones. By presenting healthy staples in a ‘snack board’ format, we eliminate the intimidation of a big meal and replace it with a variety of textures—crunchy cucumbers, soft-boiled eggs, and juicy berries. The visual appeal of star-shaped cheese and rolled-up turkey makes lunch feel like a celebration rather than a chore. It’s the perfect way to introduce new flavors, like the nutty richness of hummus or the slight tang of Greek yogurt, in a low-pressure environment where every bite is a new discovery.
Ingredients
- Whole grain crackers and mini pita pockets
- Turkey or ham slices rolled into tight cylinders
- Cheddar cheese cut into fun shapes using cookie cutters
- Cucumber slices and baby carrots
- Fresh strawberries and blueberries
- Hard-boiled eggs, halved and seasoned
- Creamy hummus or a mild yogurt dip
How to make it
- Start with a kid-friendly, durable board or a bento-style tray that has separate compartments to keep flavors from mingling too much.
- Use small cookie cutters to transform standard cheese slices into stars, hearts, or dinosaurs; this simple step significantly increases ‘picky eater’ engagement.
- Prepare the turkey rolls by laying a slice flat, rolling it tightly, and then cutting it into ‘sushi-style’ rounds that are easy for small hands to grip.
- For the vegetables, use a crinkle cutter to slice cucumbers; the ridges not only look cute but also help the hummus ‘stick’ to the veggie better.
- Place the hummus in a central, shallow bowl and create a ‘rainbow’ of fruits and vegetables radiating outward from it.
- Ensure the hard-boiled eggs are cooked for exactly 9 minutes for a firm but creamy yolk, then cool them in an ice bath immediately to prevent the gray ring from forming.
- Add a few ‘fun’ elements like a handful of yogurt-covered raisins or a couple of pretzels to provide a mix of sweet and salty flavors.
Custom Decorated Graduation Sugar Cookies

Why we love this
There is nothing quite like the buttery, nostalgic aroma of sugar cookies baking in the oven to mark a major life milestone. This board is a tribute to achievement, featuring cookies that are as crisp as a fresh diploma and decorated with silky, sweet royal icing. The texture is a perfect balance of a soft, melt-in-your-mouth center and a delicate, sugary snap on the edges. Seeing a board filled with personalized graduation caps and year-dated stars creates an emotional centerpiece that guests can’t help but admire before they inevitably reach for their favorite design.
Ingredients
- Sugar cookie dough (chilled and rolled to 1/4 inch thickness)
- Royal icing (stiff and flood consistencies)
- Gel food coloring (to match school colors)
- Edible gold leaf or metallic sprinkles
- Fine-tipped piping bags and toothpicks
- Graduation-themed cookie cutters (caps, gowns, diplomas)
How to make it
- Roll your chilled dough evenly; use ‘rolling pin rings’ to ensure every cookie is exactly the same thickness, which guarantees they all bake at the same rate.
- Cut out your shapes and bake at 350°F for 8-10 minutes; pull them out the moment the edges look ‘set’ but before they turn brown to keep that soft texture.
- While the cookies cool completely on a wire rack, prepare your royal icing: whip egg whites and powdered sugar until you reach ‘stiff peak’ consistency for outlining.
- Thin out a portion of the icing with a teaspoon of water at a time until it reaches ‘flood’ consistency (it should disappear back into itself in 10 seconds).
- Outline the cookie with the stiff icing first, then immediately fill the center with the flood icing; use a toothpick to pop any tiny air bubbles that surface.
- For the viral ‘marble’ or ‘swirl’ effect, drop a different color of flood icing onto the wet base and drag a toothpick through it in a figure-eight motion.
- Allow the icing to dry for at least 6-12 hours in a cool, dry place before stacking or arranging them on your display board.
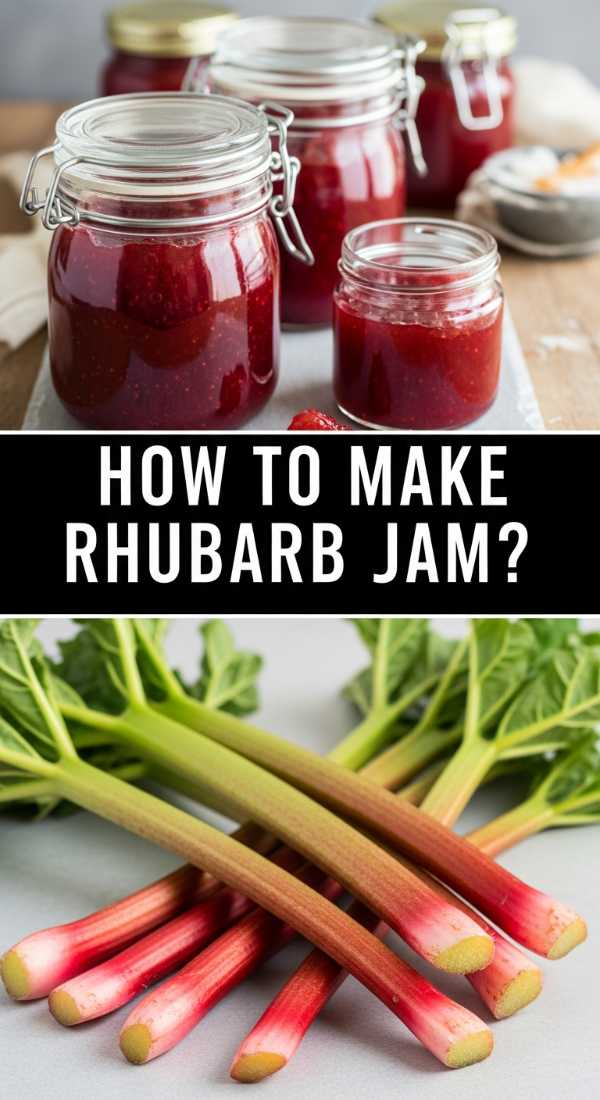
Crispy Golden Rhubarb Crumble Dessert

Why we love this
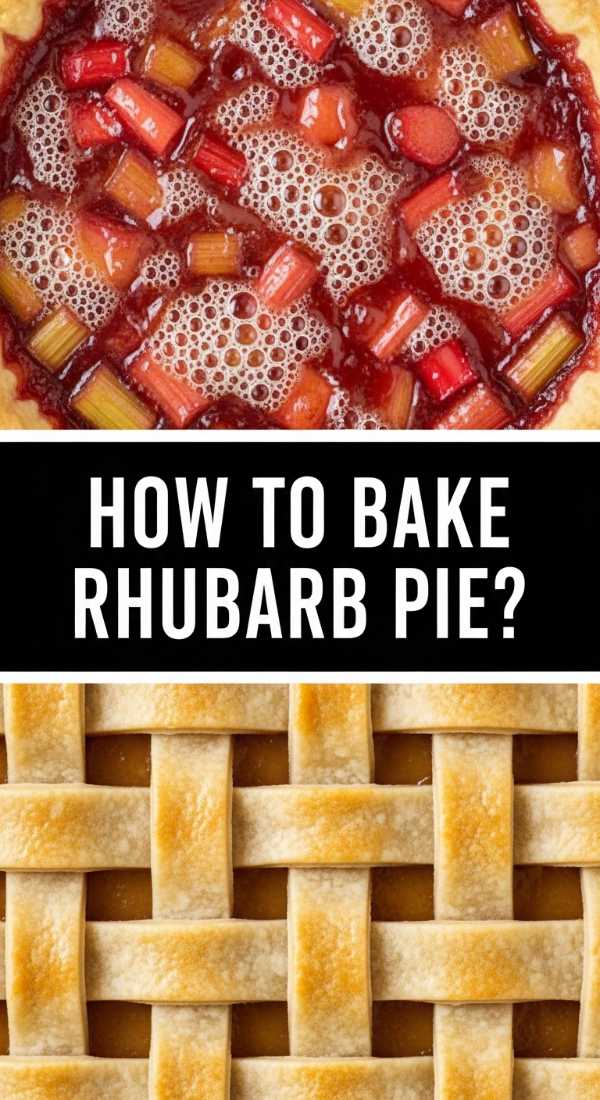
This dessert board centers around a rustic skillet of bubbling rhubarb, offering a cozy, communal way to end a meal. The smell of tart rhubarb mingling with caramelized brown sugar and warm cinnamon is pure comfort. When you break through the golden, buttery oat topping, you get a satisfying crunch that contrasts beautifully with the soft, ruby-red fruit underneath. It’s a symphony of temperatures and textures—the piping hot fruit juices, the cold, melting vanilla bean ice cream, and the toasted, nutty crumble that brings it all together in one perfect, gooey spoonful.
Ingredients
- 4 cups fresh rhubarb, chopped into 1-inch pieces
- 1 cup granulated sugar and 1 tbsp cornstarch
- 1 cup rolled oats and 1 cup all-purpose flour
- 1/2 cup cold salted butter, cubed
- 1/2 cup packed brown sugar
- 1 tsp cinnamon and a pinch of salt
- Vanilla bean ice cream for serving
How to make it
- Preheat your oven to 375°F and grease a 9-inch cast iron skillet or baking dish; the cast iron helps create a superior caramelized crust on the bottom.
- In a large bowl, toss the chopped rhubarb with the granulated sugar and cornstarch until the fruit is evenly coated and the sugar begins to look ‘wet.’
- In a separate bowl, combine the oats, flour, brown sugar, cinnamon, and salt; use your fingertips or a pastry cutter to work the cold butter into the mix.
- Stop mixing when the topping looks like coarse crumbs with some pea-sized chunks of butter remaining; these chunks are the secret to a ‘crispy’ finish.
- Pour the rhubarb mixture into the skillet and spread the crumble topping over it in an even layer, pressing down very lightly.
- Bake for 35-40 minutes; you are looking for the fruit juices to be thick and bubbling vigorously around the edges and the topping to be a deep, golden brown.
- Let it rest for 10 minutes before placing the entire skillet on a heat-safe board, surrounded by bowls of ice cream and extra spoons for a shared ‘dig-in’ experience.
The Joy of the Shared Board
At the end of the day, these viral boards are more than just a trend; they are a celebration of the simple things. Whether you are celebrating a graduation, hosting a summer dinner, or just trying to make a toddler’s lunch a little more exciting, these ideas remind us that food is a love language. So, grab a board, gather your favorite ingredients, and start creating something beautiful today!