
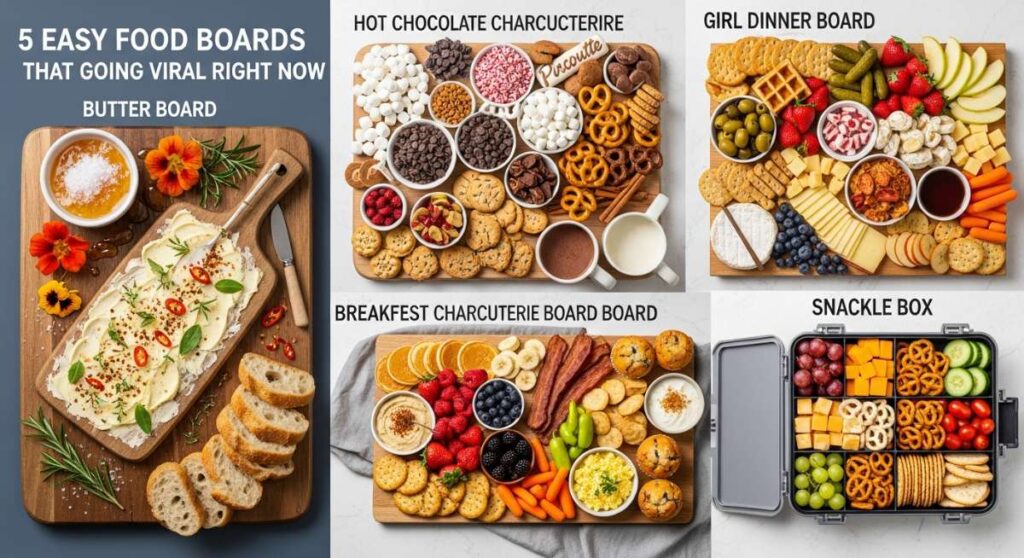
5 Easy Food Boards That Are Going Viral Right Now
There is something so incredibly magical about a shared meal, especially when it’s presented in a way that invites everyone to lean in, linger, and sample a little bit of everything. Lately, my kitchen has been transformed by the food board craze, and I’m not just talking about the traditional charcuterie. We are moving toward interactive, vibrant, and thematic displays that make even a Tuesday afternoon feel like a grand celebration. Whether you are hosting a milestones event or just trying to survive the lunch rush, these boards are the ultimate way to bring a little extra spark to your table.
I remember the first time I set out a themed board for my family; the room suddenly filled with laughter and curiosity rather than the usual ‘what’s for dinner?’ groans. It’s about the visual story you tell—the pop of bright fruit against a wooden platter, the aroma of freshly brewed coffee, and the tactile joy of picking up a perfectly decorated cookie. Today, I’m sharing five of the most viral board ideas that have taken over my feed and my heart. Let’s dive into how you can recreate these stunning spreads at home with ease and style!
How to style graduation boards?
Why we love this
A graduation board is more than just a snack tray; it is a vibrant celebration of achievement wrapped in edible textures and celebratory colors. Imagine the salty crunch of artisanal crackers paired with the creamy, velvet-like smoothness of a sharp cheddar, all accented by the sweet, floral scent of fresh grapes and honey. There’s a sense of pride in seeing a board styled with tiny ‘diplomas’ and color-coordinated treats that reflect the school spirit. It’s an inviting centerpiece that encourages guests to gather around, share memories of the school years past, and toast to the bright future ahead.
Ingredients
- Assorted hard and soft cheeses (Brie, Sharp Cheddar, Manchego)
- Cured meats (Prosciutto, Salami rosettes)
- Fresh berries (Strawberries, Blueberries)
- Fruit leather or thin-sliced meat tied with chives (to look like diplomas)
- Miniature graduation cap cupcake toppers
- Assorted nuts and dried apricots
- Honey and spicy mustard
How to make it
- Begin with a large, clean wooden board as your canvas. Place your largest items first—the cheese blocks—at diagonal corners to create a visual balance.
- Create ‘diplomas’ by rolling thin slices of prosciutto or fruit leather tightly and securing them with a single blanched chive or a thin piece of string. Group these in a small cluster near the center of the board.
- Add small bowls for your honey and mustard. This keeps the liquids contained and prevents the crackers from getting soggy while adding height and structure to the layout.
- Layer your crackers and bread in a ‘river’ formation, snaking them through the open spaces to guide the eye across the board.
- Fill the remaining gaps with vibrant berries and nuts. Ensure the colors are distributed evenly so no one side looks too ‘heavy’ or monochrome.
- Finish by placing tiny graduation caps or ‘2024’ cutouts on top of the cheese blocks or tucked into the fruit piles for that viral, festive touch.
How to prepare toddler lunches?
Why we love this
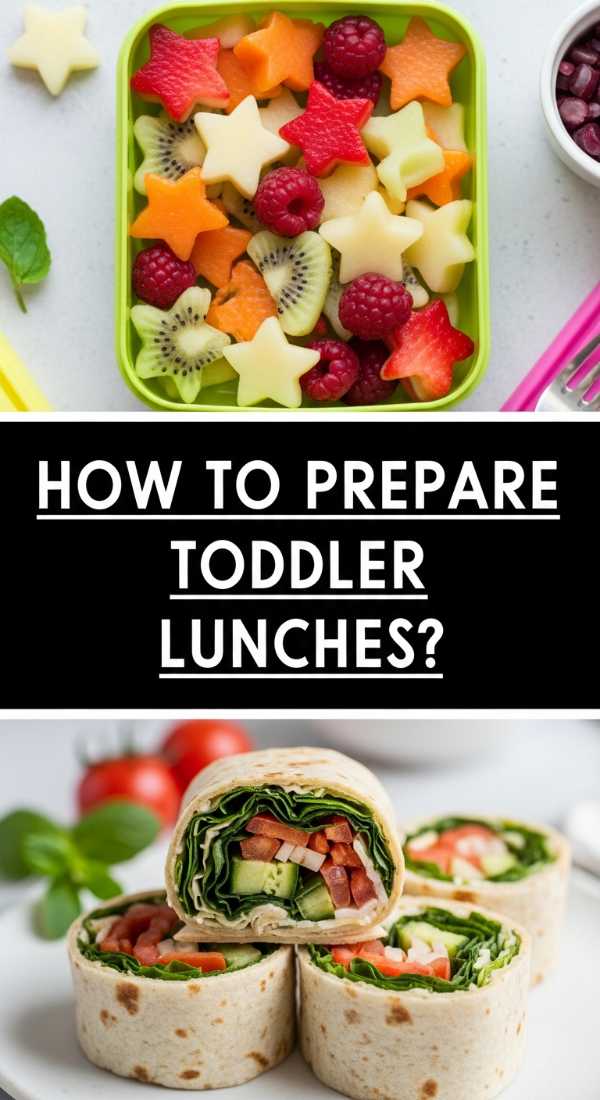
The ‘Toddler Charcuterie’ or Muffin Tin board is a game-changer for parents who deal with the daily struggle of picky eating. It transforms a standard lunch into a sensory playground of shapes, colors, and textures that appeal to a child’s natural curiosity. Picture the bright orange of carrot sticks, the soft squish of a mild cheese cube, and the satisfying pop of a cherry tomato. The aroma is clean and fresh, and the presentation removes the intimidation of a large plate, replacing it with bite-sized portions that make exploring new flavors feel like a fun game rather than a chore.
Ingredients
- Mild cheese cubes or shapes
- Whole grain crackers or mini pita pockets
- Sliced cucumbers and bell pepper strips
- Hummus or yogurt dip
- Grapes (sliced lengthwise for safety)
- Lean turkey roll-ups or boiled egg halves
- A few ‘fun’ items like mini pretzels or a few chocolate chips
How to make it
- Select a board with slightly raised edges or a muffin tin to keep the different food groups separate, which is often a big win for toddlers who don’t like their food touching.
- Use small cookie cutters to punch out shapes from the cheese and turkey slices. Hearts, stars, or animals instantly increase the ‘wow’ factor and engagement level.
- Place a small, colorful silicone cup in the center for the dip. This acts as the ‘anchor’ for the board and makes it easy for little hands to reach without spilling.
- Arrange the vegetables and fruits in a rainbow pattern around the dip. This visual appeal encourages them to try ‘one of every color.’
- Ensure all items are bite-sized. For grapes and cherry tomatoes, always slice them vertically into quarters to ensure they are safe for consumption.
- Introduce one ‘new’ or ‘brave’ food in a small quantity alongside their favorites to lower the pressure of trying something different.
How to make coffee drinks?
Why we love this
A Coffee Bar Board is the ultimate morning indulgence, turning a simple caffeine fix into a luxurious, multi-sensory experience. The air fills with the deep, roasted aroma of espresso, mingled with the sweet, nostalgic scent of vanilla bean and toasted cinnamon. You get the visual contrast of dark, rich coffee swirling with creamy milk, topped with the delicate crunch of a biscotti or a dusting of cocoa. It’s a tactile and aromatic delight that allows everyone to be their own barista, customizing their drink to the perfect level of sweetness and warmth.
Ingredients
- Strong brewed coffee or cold brew concentrate
- Assorted milks (Oat, Almond, Whole Milk)
- Flavor syrups (Vanilla, Caramel, Hazelnut)
- Cinnamon sticks and cocoa powder for dusting
- Whipped cream in a chilled bowl
- Biscotti, mini croissants, or chocolate-covered espresso beans
- Ice cubes (extra points for coffee-frozen ice cubes)
How to make it
- Choose a tray that can handle potential drips. Start by placing your liquids—coffee and milks—into clear glass carafes or aesthetic jars to show off the textures.
- Arrange your sweeteners and syrups in small, labeled dispensers. Using pump bottles gives it that professional coffee shop look that goes viral on social media.
- Set out a bowl of ice if you are serving cold brew. To prevent dilution, use ice cubes made of frozen coffee so the drink stays strong as it melts.
- Place your ‘stirrers’ like cinnamon sticks or long spoons in a tall glass. This adds vertical interest and keeps the board organized.
- Cluster your pastries and chocolate-covered beans in the remaining spaces. The goal is to make the board look lush and overflowing with treats.
- Provide a small sifter with cocoa powder or a shaker of cinnamon for guests to add a professional finishing touch to their froth.
How to make rhubarb crumble?
Why we love this
Serving a Rhubarb Crumble as part of a dessert board is the epitome of rustic elegance. The star is the crumble itself: a beautiful contrast between the tart, rosy-pink rhubarb that has softened into a jam-like consistency and the golden, buttery crunch of the oat topping. The aroma is intoxicating—warm cinnamon and brown sugar wafting through the house. When served on a board with scoops of melting vanilla bean ice cream and fresh mint, it creates a ‘build-your-own’ dessert experience that feels both cozy and sophisticated, perfect for a summer evening.
Ingredients
- 4 cups chopped rhubarb (1-inch pieces)
- 1/2 cup granulated sugar
- 1 cup rolled oats and 1 cup all-purpose flour
- 1/2 cup packed brown sugar
- 1/2 cup cold salted butter, cubed
- 1 teaspoon cinnamon
- Vanilla ice cream and fresh strawberries for the board
How to make it
- Preheat your oven to 375°F (190°C). In a baking dish, toss the rhubarb with the granulated sugar until evenly coated. The rhubarb should look wet and glossy.
- In a separate bowl, combine flour, oats, brown sugar, and cinnamon. Use a pastry cutter or your fingers to work the cold butter into the mixture until it resembles coarse crumbs. You want distinct pea-sized butter chunks for maximum fluffiness.
- Spread the crumble mixture evenly over the rhubarb. Bake for 30-35 minutes. You are looking for the fruit juices to be bubbling aggressively at the edges and the topping to be a deep, golden brown.
- Let the crumble cool slightly (about 15 minutes) so it sets. Then, place the entire baking dish in the center of a large wooden board.
- Surround the dish with a bowl of high-quality vanilla ice cream and a bowl of extra oat topping for those who want more crunch.
- Scatter fresh strawberries or sprigs of mint around the board to add a pop of fresh color and a scent that cuts through the richness of the butter.
How to frost graduation cookies?
Why we love this
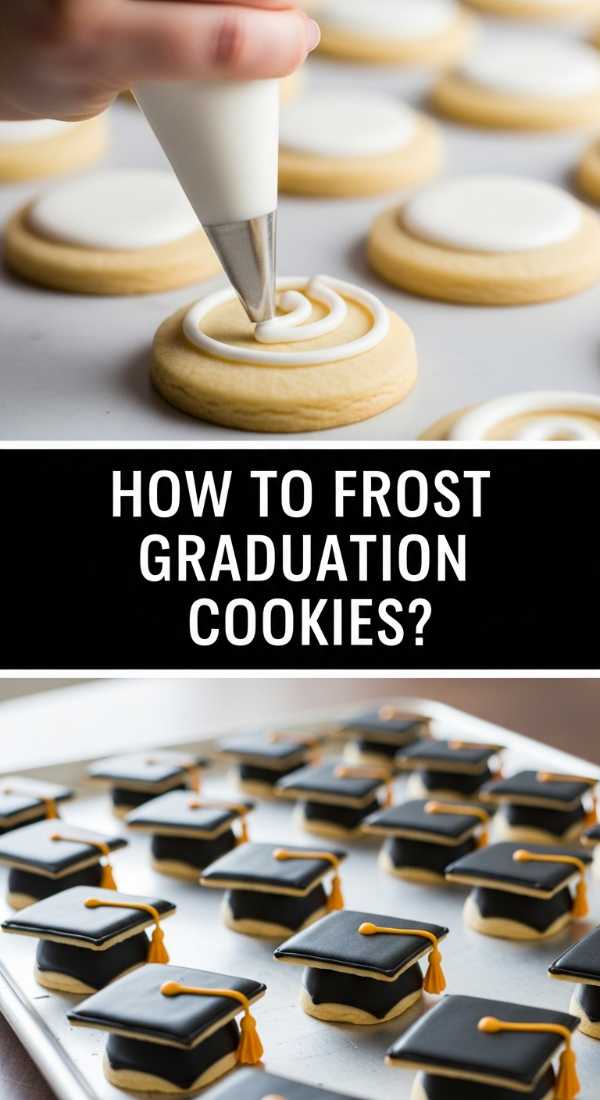
A Cookie Decorating Board is a viral sensation because it combines activity with art. The sight of smooth, glossy royal icing in various colors alongside buttery, golden sugar cookies is enough to make anyone’s heart skip a beat. There’s a specific joy in the ‘snap’ of dried icing followed by the melt-in-your-mouth sweetness of the cookie. The scent of vanilla and almond extract fills the air as you pipe delicate lines to create diplomas, caps, and ‘2024’ numerals. It’s a creative outlet that results in a stunning, edible display of success.
Ingredients
- Pre-baked sugar cookies (shapes: squares, circles, gowns)
- Royal icing in school colors and white
- Piping bags with small round tips
- Edible gold luster dust or gold sprinkles
- Tweezers (for precise sprinkle placement)
- Small bowls of decorative pearls and sanding sugar
How to make it
- Prepare your royal icing to two consistencies: ‘outline’ (like toothpaste) and ‘flood’ (like honey). This is the secret to those smooth, professional-looking viral cookies.
- Outline the edge of your graduation cap cookies with the thicker icing. Let it set for 2 minutes—this creates a ‘dam’ so the liquid icing doesn’t spill over the sides.
- ‘Flood’ the center with the thinner icing. Use a toothpick to pop any tiny air bubbles and move the icing into the corners for a perfectly flat, glass-like finish.
- To make ‘diplomas’, frost a rectangular cookie white and, while the icing is still wet, pipe a thin red or black line across the center to represent the ribbon.
- Once the base layer is dry (usually 4-6 hours), use a brush to apply gold luster dust mixed with a drop of lemon extract to create metallic accents on the tassels.
- Arrange the finished cookies on a board with the piping bags and extra sprinkles, inviting guests to add their own final flourishes or simply admire the edible art.
The Joy of the Board
As we’ve seen, the magic of a food board lies in its ability to turn simple ingredients into an interactive experience. Whether it’s the celebratory flair of a graduation spread, the practical whimsy of a toddler lunch, or the cozy comfort of a rhubarb crumble, these boards invite us to slow down and enjoy the process of eating together. I hope these ideas inspire you to clear off your counter, grab a board, and start styling your own viral masterpiece tonight!