

We’ve all been there—the doorbell rings, the house is filled with laughter, and suddenly you’re hit with that familiar wave of hosting panic. I used to spend hours in the kitchen, missing out on the best jokes and the warmest moments, until I discovered the absolute magic of the ‘Ultimate Food Board.’ It’s more than just a platter; it’s a centerpiece that invites everyone to dig in, get messy, and share the love.
The secret to being ‘famous’ among your friends isn’t about being a professional chef; it’s about the abundance of textures and the ease of assembly. When you bring out a board overflowing with golden-brown delights, the room literally changes energy. It’s comforting, it’s vibrant, and most importantly, it’s designed for you to spend less time at the stove and more time making memories.
How to make crispy wings?
Why we love this
There is nothing quite like the auditory satisfaction of a perfectly crispy chicken wing shattering under your teeth to reveal the succulent, steaming meat inside. We love these because they carry the nostalgic aroma of a classic sports bar but with a clean, home-cooked finish that isn’t heavy or greasy. The skin becomes a thin, crackling parchment of flavor, seasoned just enough to make your mouth water before you even take the first bite, creating a sensory experience that is both comforting and exhilarating.
Ingredients
- 2 lbs chicken wings (flats and drumettes)
- 1 tbsp baking powder (not soda!)
- 1/2 tsp kosher salt
- 1/4 tsp cracked black pepper
- Neutral oil spray
How to make it
- Begin by thoroughly patting your wings dry with paper towels; moisture is the enemy of crispiness, so take your time to ensure they are bone-dry.
- In a large mixing bowl, toss the wings with the baking powder, salt, and pepper until each piece is evenly coated in a thin, dusty film. The baking powder changes the pH of the skin, allowing it to brown and crisp more effectively.
- Arrange the wings on a wire rack set over a baking sheet to allow hot air to circulate around the entire wing.
- Preheat your oven to 250°F (120°C) and bake for 30 minutes to render the fat slowly; you will see the skin start to look translucent and tight.
- Increase the heat to 425°F (220°C) and bake for another 20-30 minutes. Watch for the visual cue of the skin turning a deep, mahogany gold and tiny bubbles forming on the surface.
- Remove and let rest for 5 minutes to allow the juices to redistribute before tossing in your favorite sauce.
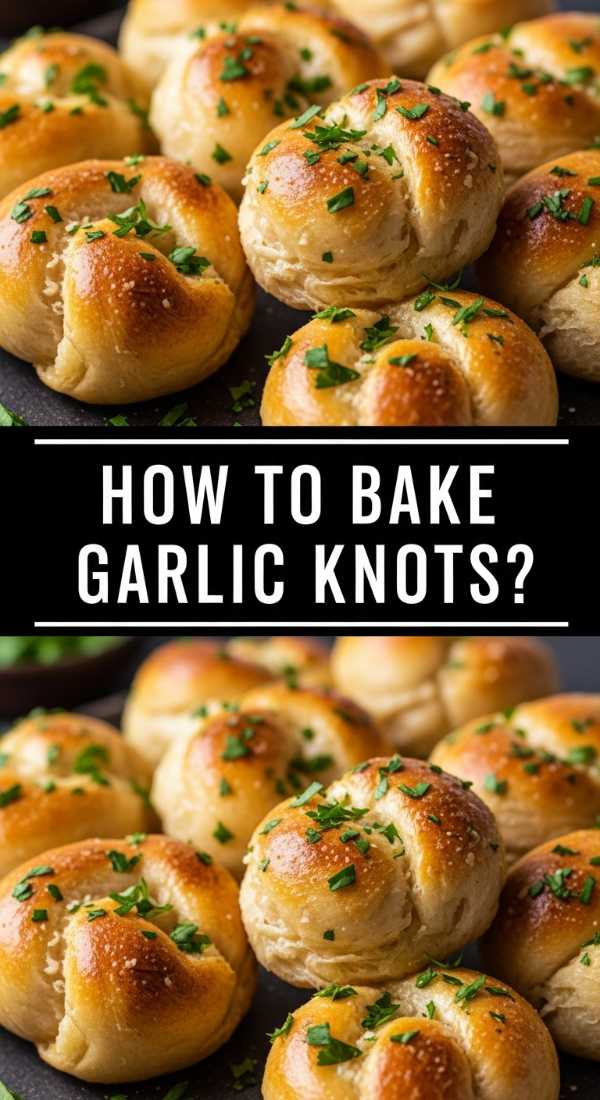
How to bake garlic knots?

Why we love this
Walking into a house filled with the scent of roasted garlic and yeast-risen dough is the ultimate sensory hug. These knots are the stars of the board because they provide that soft, pillowy contrast to the crunchier elements, offering a buttery, herb-flecked bite that melts on the tongue. The texture is light and airy on the inside, while the exterior is glazed in a savory garlic sheen that leaves a lingering, delicious warmth in your mouth long after the bread is gone.
Ingredients
- 1 lb pizza dough (room temperature)
- 4 tbsp unsalted butter
- 3 cloves minced garlic
- 1 tbsp fresh chopped parsley
- 1/4 cup grated Parmesan cheese
- Pinch of salt
How to make it
- Roll your room-temperature pizza dough into a long rectangle and cut it into 1-inch wide strips using a pizza cutter for clean edges.
- Take each strip and gently tie it into a simple overhand knot, tucking the ends under so they don’t unravel during the bake.
- Place the knots on a parchment-lined baking sheet and cover with a clean towel, letting them proof for about 20 minutes until they look slightly puffy and soft.
- Preheat your oven to 400°F (200°C) and bake for 12-15 minutes until the tops are just beginning to turn a pale golden brown.
- While baking, melt the butter in a small saucepan over low heat and add the minced garlic, cooking for 2 minutes until fragrant but not browned; stir in the parsley and salt.
- Immediately after taking the knots out of the oven, brush them generously with the garlic butter and sprinkle with Parmesan so the cheese adheres to the warmth of the bread.
How to fry mozzarella sticks?

Why we love this
The mozzarella stick is the undisputed king of the cheese pull, offering a dramatic and playful element to any food board. We love the contrast between the seasoned, herby breading that shatters upon impact and the molten, gooey heart of the cheese that stretches endlessly. It’s a rich, decadent bite that feels like a celebration, carrying the herbal notes of oregano and basil wrapped in a warm, salty embrace that satisfies every comfort food craving you’ve ever had.
Ingredients
- 12 pieces of string cheese
- 1/2 cup all-purpose flour
- 2 large eggs, beaten
- 1 cup Panko breadcrumbs
- 1 tsp Italian seasoning
- Vegetable oil for frying
How to make it
- The critical first step is to freeze your string cheese for at least 1 hour before breading; this prevents the cheese from melting and leaking out before the crust is golden.
- Set up a dredging station: one bowl with flour, one with beaten eggs, and one with Panko mixed with Italian seasoning.
- Coat each frozen cheese stick in flour (shake off excess), dip in egg, and then roll in Panko; for a fail-proof crust, dip it back in the egg and Panko a second time to double-coat.
- Heat 2 inches of oil in a heavy-bottomed skillet to 350°F (175°C); use a thermometer to ensure the heat is consistent so the sticks don’t get soggy.
- Fry in small batches for 1-2 minutes, turning once, until the breading is a vibrant golden brown.
- Drain on a wire rack immediately and serve while the cheese is at peak ‘stretch’ capacity.
How to cook spicy meatballs?

Why we love this
These meatballs bring a sophisticated depth to the board, offering a complex profile of savory umami balanced by a slow, creeping heat. The texture is incredibly tender—almost velvety—yielding easily to the fork while releasing a burst of rich juices seasoned with red pepper flakes and garlic. They provide a hearty, substantial element that grounds the lighter snacks, filling the air with the robust, mouth-watering aroma of seared meat and slow-simmered spices.
Ingredients
- 1 lb ground beef (80/20 mix)
- 1/2 lb ground pork
- 1/2 cup breadcrumbs
- 1 egg
- 2 tsp red pepper flakes
- 3 cloves garlic, minced
- 1/2 cup marinara sauce
How to make it
- In a large bowl, gently combine the beef, pork, breadcrumbs, egg, red pepper flakes, and garlic; do not overmix, as overworking the meat will make the meatballs tough and rubbery.
- Roll the mixture into small, 1-inch balls (about the size of a golf ball) to ensure they cook quickly and are easy to grab with a toothpick.
- Heat a large skillet over medium-high heat with a drizzle of oil and sear the meatballs for 2-3 minutes per side until a dark, caramelized crust forms.
- Reduce the heat to low and pour the marinara sauce over the meatballs, covering the pan with a lid to trap the steam.
- Simmer for 8-10 minutes until the internal temperature reaches 165°F (74°C) and the sauce has thickened into a glossy glaze that clings to the meat.
- Finish with a sprinkle of fresh parsley for a pop of color and freshness.
How to make loaded sliders?

Why we love this
Loaded sliders are the ultimate crowd-pleasers, packing an entire sandwich’s worth of flavor into a manageable, three-bite package. We love the way the tops of the buns become slightly toasted and buttery while the middle remains incredibly soft and saturated with melted cheese and savory deli meats. There’s a wonderful harmony between the sweet Hawaiian rolls and the salty tang of the fillings, making every bite a perfectly balanced explosion of party food perfection.
Ingredients
- 1 pack (12 count) Hawaiian sweet rolls
- 1/2 lb deli ham or turkey
- 6 slices Swiss or Provolone cheese
- 1/4 cup melted butter
- 1 tbsp Dijon mustard
- 1 tsp poppy seeds
How to make it
- Keep the rolls attached and use a long serrated knife to slice the entire block of rolls in half horizontally, creating a top and a bottom slab.
- Place the bottom slab on a foil-lined baking sheet and layer the deli meat evenly across the bread, followed by a thick layer of cheese slices.
- Place the top slab of rolls back on, pressing down gently to marry the layers together.
- Whisk the melted butter, Dijon mustard, and poppy seeds together in a small bowl until fully emulsified.
- Brush the butter mixture generously over the tops and sides of the buns, ensuring the liquid seeps into the crevices between the rolls.
- Cover with foil and bake at 350°F (175°C) for 10 minutes, then remove the foil and bake for another 5 minutes until the cheese is bubbling and the tops are toasted and golden.
How to bake chicken tenders?

Why we love this
Baking chicken tenders at home elevates a childhood favorite into a gourmet treat that is remarkably light yet satisfyingly crunchy. We love the buttermilk soak, which ensures the chicken stays incredibly moist and tender on the inside while the outside forms a rugged, craggy crust that holds onto dipping sauces beautifully. The aroma of toasted breadcrumbs and savory seasoning is absolutely irresistible, making these a high-protein staple that both kids and adults will fight over.
Ingredients
- 1 lb chicken tenderloins
- 1 cup buttermilk
- 1 cup flour
- 1 cup panko breadcrumbs
- 1 tsp garlic powder
- 1/2 tsp paprika
How to make it
- Marinate the chicken tenderloins in buttermilk for at least 30 minutes in the refrigerator; the acid in the buttermilk breaks down the proteins for maximum tenderness.
- Preheat your oven to 425°F (220°C) and prepare a baking sheet with a wire rack sprayed with non-stick oil.
- Create your dredging station with flour in one dish and a mix of panko, garlic powder, and paprika in another.
- Remove a tender from the buttermilk, dredge it in flour, dip it back into the buttermilk briefly, and then press it firmly into the panko mixture to ensure a thick coating.
- Place the tenders on the rack and spray the tops lightly with oil to help them brown evenly in the dry heat of the oven.
- Bake for 15-18 minutes, flipping halfway through, until the coating is a deep gold and the internal temperature hits 165°F (74°C).
How to prepare cheesy nachos?

Why we love this
Nachos are the soul of the food board, offering a colorful, messy, and incredibly social eating experience. We love the architectural beauty of stacked chips dripping with liquid gold cheese, punctuated by the bright green of jalapeños and the rich, earthy tones of black beans. Every chip is a different adventure—some are crisp and sharp, while others are softened by the warmth of the toppings, creating a landscape of flavors that is impossible to stop eating.
Ingredients
- 1 large bag of thick-cut tortilla chips
- 2 cups shredded sharp cheddar cheese
- 1/4 cup pickled jalapeños
- 1/2 cup black beans (rinsed)
- 1/4 cup diced tomatoes
- Sour cream and cilantro for garnish
How to make it
- Spread half of your tortilla chips in an even layer on a large sheet pan; avoid thin chips as they will wilt under the weight of the toppings.
- Top the first layer with half of the cheese and half of the beans; layering is essential so you don’t end up with ‘naked’ chips at the bottom.
- Add the remaining chips, followed by the rest of the cheese, beans, and the jalapeños.
- Place the pan under a broiler on high for 2-4 minutes; stay close and watch for the cheese to transition from solid shreds to a bubbling, translucent blanket.
- Remove from the oven and immediately top with fresh diced tomatoes to provide a cool contrast to the hot cheese.
- Drizzle with sour cream in a zig-zag pattern and scatter fresh cilantro over the top just before serving for a professional finish.
How to grill steak bites?

Why we love this
Steak bites bring an element of luxury and high-end steakhouse flair to your simple board. We love the intense, smoky char on the outside of each cube that gives way to a butter-soft, medium-rare center. The flavor is concentrated and rich, enhanced by a garlic-rosemary butter that coats each piece in a glossy, aromatic finish. It’s the kind of bite that feels indulgent and special, turning a casual gathering into a true feast.
Ingredients
- 1 lb Sirloin or Ribeye steak, cut into 1-inch cubes
- 2 tbsp high-smoke point oil (like avocado or grapeseed)
- 2 tbsp butter
- 2 cloves smashed garlic
- 1 sprig fresh rosemary
- Salt and heavy black pepper
How to make it
- Bring your steak cubes to room temperature for 20 minutes and season them generously with salt and pepper right before cooking; this ensures a better sear.
- Heat a heavy cast-iron skillet over high heat until it is just starting to smoke; this high heat is vital for the ‘Maillard reaction’ (browning).
- Add the oil, then place the steak bites in the pan in a single layer, making sure they aren’t touching so they sear instead of steam.
- Let them sit undisturbed for 2 minutes to develop a dark crust, then flip and cook for another 1-2 minutes for a perfect medium-rare.
- In the final minute, drop in the butter, smashed garlic, and rosemary sprig; as the butter foams, spoon it repeatedly over the steak bites (basting).
- Remove the steak from the pan immediately to prevent overcooking and let them rest on a plate for 3 minutes before adding to your board.
How to make potato wedges?
Why we love this
Potato wedges are the ultimate comfort side, offering a much more substantial and earthy experience than standard fries. We love their ‘steak-fry’ thickness, which allows for a fluffy, mashed-potato-like interior encased in a rugged, spice-rubbed skin. They carry the warmth of paprika and onion powder, providing a savory, salty crunch that pairs perfectly with every dip on the board, from cool ranch to spicy aioli.
Ingredients
- 3 large Russet potatoes
- 3 tbsp olive oil
- 1 tsp smoked paprika
- 1 tsp onion powder
- 1/2 tsp garlic salt
- 1/4 tsp cayenne pepper (optional)
How to make it
- Scrub the potatoes clean and cut each one in half lengthwise, then cut each half into 3 or 4 uniform wedges to ensure they all cook at the same rate.
- Soak the wedges in cold water for 30 minutes; this removes excess starch and is the ‘pro tip’ for getting a fluffy interior and a crisp exterior.
- Drain and pat the wedges completely dry with a kitchen towel before tossing them in a bowl with olive oil and all the spices until they are brightly coated.
- Arrange the wedges on a baking sheet with one of the cut sides down, making sure they have space between them for air to flow.
- Bake at 400°F (200°C) for 20 minutes, then flip them to the other cut side and bake for another 15-20 minutes.
- Look for the visual cue of the edges turning dark brown and the skins looking slightly puffed and crispy.
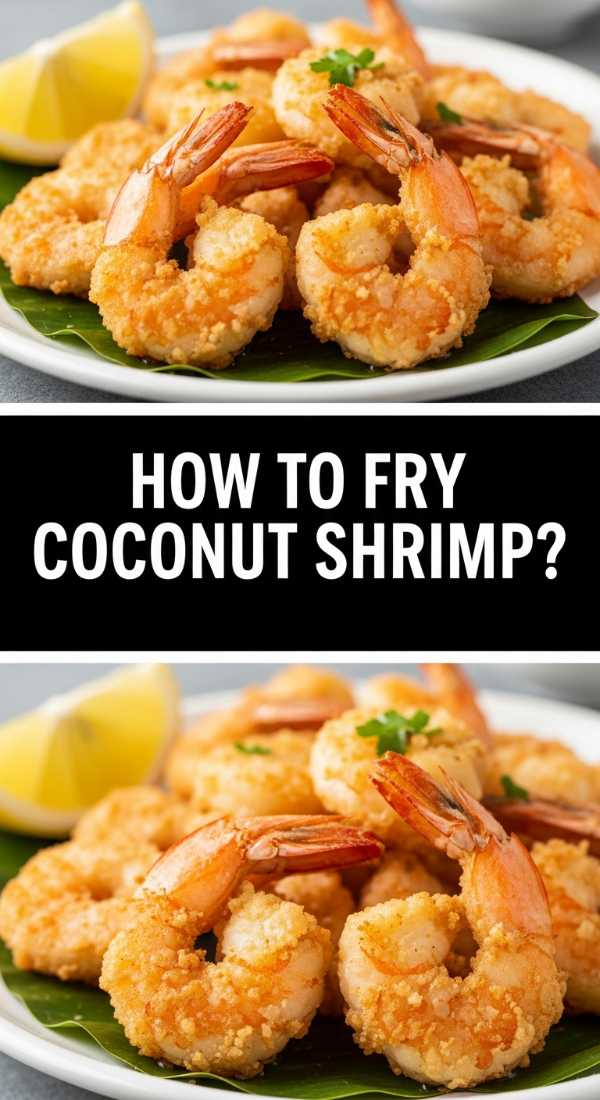
How to fry coconut shrimp?
[IMAGE_10]
Why we love this
Coconut shrimp adds a touch of tropical sweetness and an incredible textural variety to the board. We love the way the shredded coconut toasts into a golden, nutty crust that provides a loud, satisfying crunch before hitting the snap of the tender shrimp. It’s a sophisticated flavor profile that bridges the gap between sweet and savory, especially when paired with a tangy dipping sauce, making it feel like a vacation on a plate.
Ingredients
- 1 lb large shrimp (peeled and deveined, tails on)
- 1/2 cup all-purpose flour
- 2 eggs, beaten
- 1 cup sweetened shredded coconut
- 1/2 cup Panko breadcrumbs
- Vegetable oil for frying
How to make it
- Set up three shallow bowls: one with flour, one with the beaten eggs, and one with a 50/50 mix of shredded coconut and panko breadcrumbs.
- Hold each shrimp by the tail, dredge it in the flour (shaking off the excess), dip it into the egg wash, and then press it firmly into the coconut-panko mixture until heavily coated.
- Heat about 1 inch of oil in a medium skillet to 350°F (175°C); the oil should shimmer but not smoke.
- Gently place 5-6 shrimp in the oil at a time, being careful not to crowd the pan, which would drop the oil temperature and lead to greasiness.
- Fry for 2-3 minutes per side; because coconut has sugar, it will brown quickly, so watch for a bright golden-orange color.
- Remove with a slotted spoon and drain on paper towels, serving immediately while the coating is at its peak crispness.
Conclusion: The Board of Your Dreams
Creating a food board isn’t about perfection; it’s about the abundance of choices and the joy of sharing. By combining these crispy, cheesy, and savory elements, you’ve created a landscape of flavor that caters to every craving. So, set it down in the middle of the table, pour some drinks, and watch as your ‘5 Minutes to Famous’ board becomes the highlight of the night. You’ve earned the title of the ultimate host!