
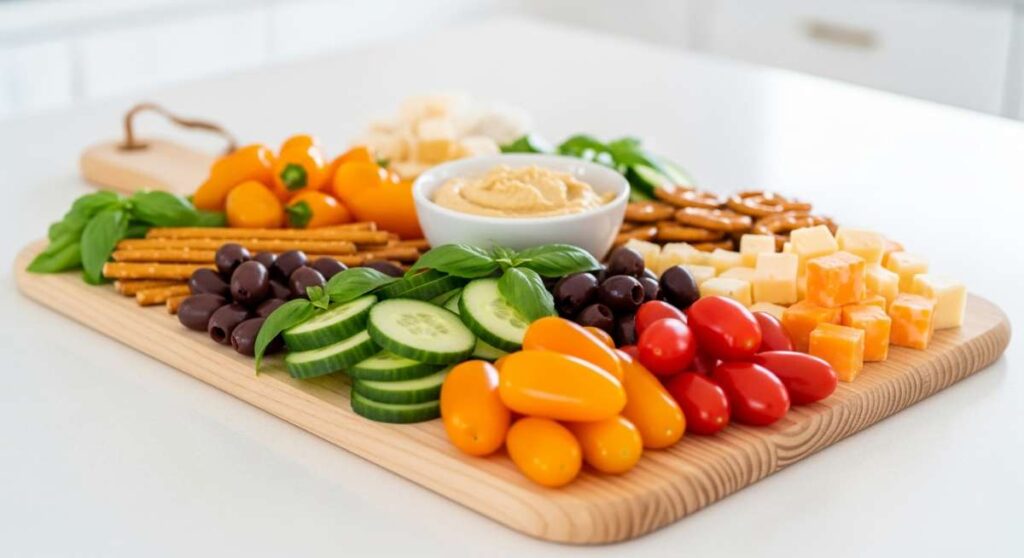
5 Minutes to Fame: The Simple Snack Board Taking Over Social Media
There is a specific kind of magic that happens when the sun begins to dip below the horizon, casting a golden hue over your backyard patio. We’ve all been there: the laughter is flowing, the drinks are cold, but the hunger starts to settle in, and the last thing anyone wants to do is disappear into a hot kitchen for an hour. This is where the art of the ‘Simple Food Board’ comes in—a viral sensation that is less about culinary perfection and more about the communal joy of grazing and gathering.
I remember the first time I set out a haphazard board filled with leftovers and garden-fresh finds; my friends didn’t just eat, they lingered. We stayed at that table for hours, picking at sprigs of mint and salty cheeses, proving that the best meals aren’t always the most complicated. This post is my love letter to those effortless summer moments, featuring ten ways to elevate your snack board game and become the host who actually gets to enjoy the party.
How to cook summer chicken?
Why we love this
There is nothing quite like the aroma of lemon-marinated chicken hitting a hot grill on a humid July evening. The skin turns a perfect, golden amber, crackling slightly as it caramelizes, while the meat inside remains incredibly succulent and infused with the bright, zesty notes of citrus and earthy oregano. Every bite is a balance of smoky char and refreshing acidity, making it the ideal protein to anchor a heavy grazing board without feeling weighed down. It’s the ultimate sensory experience of summer cooking.
Ingredients
- 4 boneless, skinless chicken breasts
- 1/4 cup extra virgin olive oil
- Zest and juice of 2 large lemons
- 3 cloves garlic, minced
- 1 tbsp fresh oregano, chopped
- 1 tsp sea salt
- 1/2 tsp cracked black pepper
How to make it
- Begin by pounding the chicken breasts to an even thickness of about 3/4 inch; this ensures they cook uniformly without drying out the thinner edges.
- In a large bowl or resealable bag, whisk together the olive oil, lemon zest, lemon juice, minced garlic, oregano, salt, and pepper to create a vibrant marinade.
- Submerge the chicken in the marinade, ensuring every inch is coated, and refrigerate for at least 30 minutes, though 2 hours is optimal for the deepest flavor penetration.
- Preheat your grill or cast-iron grill pan to medium-high heat (about 400°F). Lightly oil the grates to prevent sticking.
- Place the chicken on the grill and sear undisturbed for 5 to 6 minutes per side. You are looking for distinct, dark grill marks and an internal temperature of 165°F.
- Once cooked, transfer the chicken to a cutting board and let it rest for a full 5 minutes; this allows the juices to redistribute, ensuring a tender bite when sliced for your board.
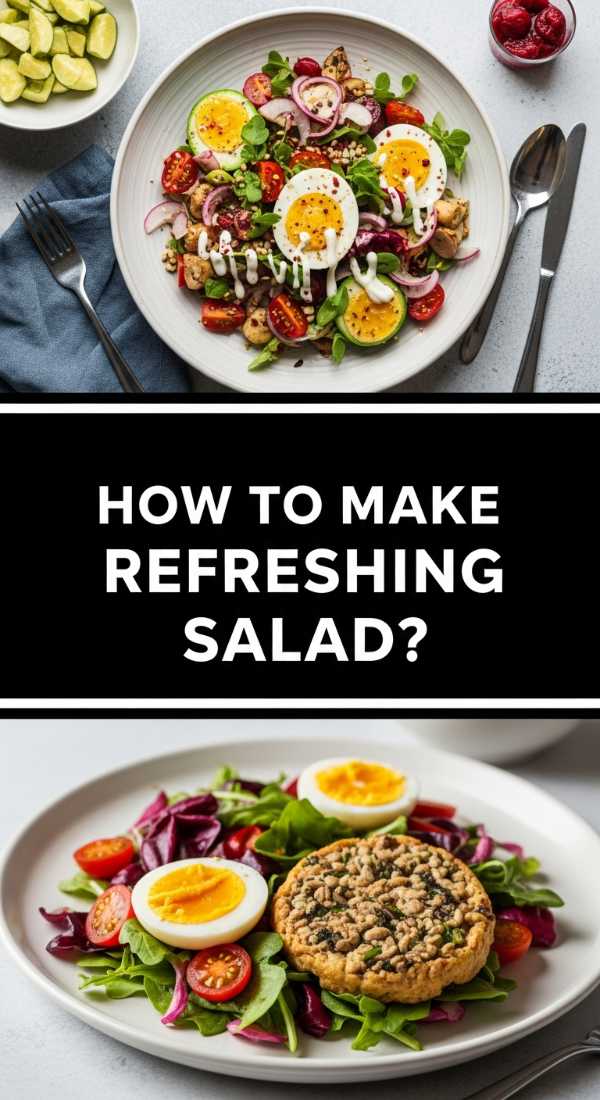
How to make refreshing salad?
Why we love this
This salad is like a cold splash of water on a scorching afternoon, combining the crystalline crunch of chilled watermelon with the creamy, briny punch of high-quality feta cheese. The visual contrast of the deep ruby red fruit against the snow-white cheese and vibrant green mint leaves is enough to stop any social media scroll in its tracks. As you eat, the sweetness of the melon melts into the salty tang of the dressing, creating a refreshing, hydrating experience that cleanses the palate and lifts the spirits.
Ingredients
- 4 cups cubed seedless watermelon (chilled)
- 1/2 cup crumbled feta cheese
- 1/4 cup fresh mint leaves, torn
- 1/2 red onion, thinly shaved
- 2 tbsp lime juice
- 1 tbsp honey
How to make it
- Start with a cold watermelon directly from the fridge; the temperature contrast is vital for the ‘refreshing’ aspect of this dish. Cube the fruit into bite-sized 1-inch squares.
- Using a mandoline or a very sharp knife, shave the red onion into paper-thin slices. To mellow the bite of the onion, soak the slices in ice water for 10 minutes, then pat dry.
- In a small jar, whisk the lime juice and honey together until the honey is completely dissolved, creating a light, sweet-tart dressing.
- In a large, shallow bowl, gently toss the watermelon cubes and onions with the lime-honey dressing until lightly coated.
- Scatter the crumbled feta over the top. Avoid over-mixing once the cheese is added to keep the melon from looking ‘cloudy’ from the cheese proteins.
- Finish by tearing fresh mint leaves over the bowl just before serving; tearing the leaves rather than chopping them prevents bruising and releases the most aromatic oils.
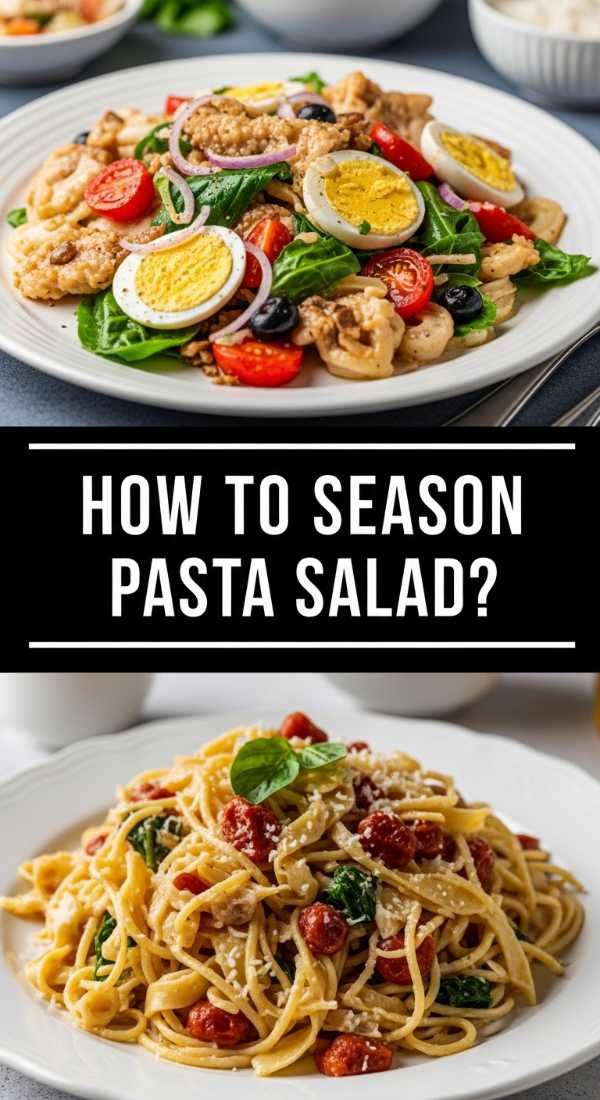
How to season pasta salad?

Why we love this
The secret to a viral pasta salad isn’t just the noodles; it’s the layering of textures and the aggressive, zesty seasoning that wakes up every taste bud. Imagine a forkful of al dente rotini coated in a silky, herb-flecked vinaigrette that pools in the spirals, accompanied by the sharp snap of bell peppers and the velvety richness of mozzarella pearls. It smells like a Mediterranean garden in full bloom—garlic, basil, and red wine vinegar harmonizing to create a dish that actually tastes better the longer it sits on your snack board.
Ingredients
- 1 lb rotini or fusilli pasta
- 1/2 cup Italian vinaigrette (homemade or high-quality store-bought)
- 1/4 cup grated Parmesan cheese
- 1 tsp dried oregano
- 1/2 tsp crushed red pepper flakes
- 1 cup cherry tomatoes, halved
- 1/2 cup cucumber, diced
- 1/4 cup fresh parsley, chopped
How to make it
- Boil a large pot of heavily salted water—it should taste like the sea—and cook the pasta for 1 minute less than the package directions for true al dente texture.
- Immediately drain the pasta and rinse with cold water to stop the cooking process and remove excess starch, which prevents the noodles from sticking together.
- While the pasta is still slightly damp, toss it with half of the Italian dressing. This ‘warm dressing’ technique allows the pasta to absorb the flavors as it cools.
- Add the dried oregano, red pepper flakes, and grated Parmesan. The cheese will create a light ‘paste’ with the dressing that helps the herbs cling to the noodles.
- Fold in the halved tomatoes, cucumbers, and any other fresh veggies. Let the salad sit in the refrigerator for at least one hour.
- Right before adding to your board, toss with the remaining dressing and fresh parsley to revive the gloss and brightness.
How to prepare summer sides?

Why we love this
Summer sides should be a celebration of the harvest, and nothing says ‘summer’ quite like charred, sweet corn dripping with lime-infused butter and a dusting of smoky chili. The kernels pop with a sugary sweetness that is perfectly offset by the charred, caramelized exterior from the high heat of the pan or grill. It’s a messy, joyful, hands-on eating experience that brings a rustic, farmhouse aesthetic to your food board, filling the air with the scent of toasted corn and citrus.
Ingredients
- 4 ears of fresh sweet corn, husks removed
- 2 tbsp unsalted butter, softened
- 1/2 tsp chili powder
- 1 lime, cut into wedges
- Fresh cilantro for garnish
- Flaky sea salt
How to make it
- Place the shucked corn directly onto a medium-high grill or into a dry cast-iron skillet over high heat.
- Rotate the ears every 2-3 minutes. You are looking for ‘leopard spotting’—pockets of deep char surrounded by bright yellow, steamed kernels. This should take about 8-10 minutes total.
- In a small bowl, mash the softened butter with the chili powder and a pinch of salt until well combined.
- While the corn is steaming hot, slather the chili butter over each ear using a pastry brush or knife, letting it melt into the crevices.
- Squeeze fresh lime juice over the buttery corn to provide an acidic lift that cuts through the richness.
- Garnish with a shower of chopped cilantro and a final sprinkle of flaky sea salt before arranging them vertically or sliced into rounds on your board.
How to make easy meals?

Why we love this
The beauty of an easy summer meal lies in its assembly-only nature, turning your kitchen into a ‘choose-your-own-adventure’ taco station. By using a pre-roasted chicken and a variety of colorful, pre-prepped toppings, you create a visual feast that feels celebratory without the stress of actual cooking. The sensation of folding a warm, soft tortilla around savory shredded meat, cool avocado, and crunchy slaw is pure comfort, making it a crowd-favorite staple for any viral board presentation.
Ingredients
- 1 rotisserie chicken, shredded
- 1 pack small flour or corn tortillas
- 1 avocado, sliced
- 1 cup pickled red onions
- 1/2 cup sour cream or Mexican crema
- Fresh lime wedges
How to make it
- Shred the rotisserie chicken while it is still warm, as the meat pulls away from the bone much easier; discard the skin and bones, then toss the meat in a bowl with a splash of lime juice to keep it moist.
- To elevate the tortillas, toast them individually over an open gas flame for 10 seconds or in a dry pan until they puff slightly and develop small charred spots.
- Keep the toasted tortillas warm by wrapping them in a clean kitchen towel or a specialized tortilla warmer.
- Arrange the shredded chicken in the center of a platter, surrounded by small bowls containing the avocado, pickled onions, and crema.
- Encourage guests to build their own tacos, ensuring there is a balance of creamy, crunchy, and acidic components in every serving.
- Provide plenty of lime wedges for that essential final spritz of brightness that ties the meal together.
How to serve summer dip?

Why we love this
A whipped ricotta dip is the ultimate luxury for a simple snack board, offering a cloud-like texture that is both airy and incredibly rich. When drizzled with golden honey and topped with cracked black pepper, it hits every flavor profile—creamy, sweet, and slightly spicy. It’s the kind of dip that feels sophisticated and expensive, yet it takes minutes to prepare, providing a beautiful, ivory centerpiece that invites everyone to tear off a piece of crusty bread and dive in.
Ingredients
- 1 cup whole milk ricotta cheese
- 1 tbsp extra virgin olive oil
- 1 tsp lemon zest
- 2 tbsp wildflower honey
- 1/2 tsp freshly cracked black pepper
- Crusty baguette or pita chips for serving
How to make it
- Place the cold ricotta, olive oil, and lemon zest into a food processor or high-speed blender.
- Process the mixture on high for 1-2 minutes. This is the crucial step; you want to aerate the cheese until it loses its graininess and becomes as smooth as whipped cream.
- Spread the whipped ricotta onto a shallow plate or bowl using the back of a spoon to create ‘swooshes’ and wells for the toppings to sit in.
- Drizzle the honey generously over the top, allowing it to pool in the decorative indentations you created.
- Finish with a heavy-handed sprinkle of cracked black pepper and a tiny pinch of flaky salt to balance the sweetness.
- Serve immediately with toasted baguette slices, ensuring the bread is warm to provide a beautiful temperature contrast with the cool cheese.
How to bake summer dessert?

Why we love this
Peach crumble bars are the quintessential taste of August, capturing the jammy, concentrated sweetness of sun-ripened peaches beneath a buttery, golden-brown oat crust. As they bake, the scent of cinnamon and warm sugar fills the house, creating an irresistible invitation to the table. Each bar offers a satisfying contrast between the soft, yielding fruit and the crunchy, salty-sweet crumble top, making them the perfect handheld treat to nestle into the corner of your dessert board.
Ingredients
- 3 cups sliced fresh peaches (peeled)
- 1/2 cup granulated sugar
- 1 tbsp lemon juice
- 1 1/2 cups all-purpose flour
- 1 cup rolled oats
- 1 cup brown sugar
- 3/4 cup cold unsalted butter, cubed
- 1 tsp cinnamon
How to make it
- Preheat your oven to 375°F and line an 8×8 inch baking pan with parchment paper, leaving an overhang for easy removal.
- In a medium bowl, toss the sliced peaches with granulated sugar and lemon juice; let them macerate for 10 minutes to release their natural syrups.
- In a separate large bowl, combine the flour, oats, brown sugar, cinnamon, and cold butter cubes. Use a pastry cutter or your fingers to work the butter into the dry ingredients until it resembles coarse crumbs.
- Press half of the crumble mixture firmly into the bottom of the prepared pan to create a solid base.
- Spread the peach mixture (including the juices) evenly over the base.
- Sprinkle the remaining crumble mixture over the top, leaving some larger clumps for texture. Bake for 35-40 minutes until the top is deeply golden and the fruit is bubbling. Let cool completely before slicing into squares.
How to make summer soup?

Why we love this
Gazpacho is the sophisticated ‘liquid salad’ of the summer, offering a bright, garden-fresh explosion of flavor that is served icy cold. The texture is a velvety puree of tomatoes and peppers, punctuated by the sharp bite of garlic and the clean, cooling essence of cucumber. Sipping this soup from small glasses on a food board provides a gourmet touch, cooling the palate between bites of savory meats and cheeses while filling the air with the intoxicating scent of fresh garden produce.
Ingredients
- 2 lbs ripe tomatoes, cored and chopped
- 1 cucumber, peeled and seeded
- 1 red bell pepper, deseeded
- 1 small red onion
- 2 tbsp sherry vinegar
- 1/3 cup extra virgin olive oil
- Salt and pepper to taste
How to make it
- Roughly chop all the vegetables and place them in a blender. If your blender is small, work in batches to ensure a smooth consistency.
- Add the sherry vinegar and a generous pinch of salt. Pulse until the mixture is broken down, then stream in the olive oil while the motor is running to emulsify the soup.
- For a truly professional, viral-worthy texture, pass the blended soup through a fine-mesh sieve to remove any remaining skins or seeds, resulting in a silky-smooth finish.
- Chill the soup in the refrigerator for at least 4 hours—gazpacho must be served very cold to allow the flavors to meld and the acidity to soften.
- Taste and adjust seasoning just before serving; cold temperatures can mute flavors, so you may need an extra splash of vinegar or a pinch of salt.
- Serve in small shooters or bowls, garnished with a tiny drizzle of olive oil and a leaf of basil.
How to pack summer lunch?
Why we love this
Packing a summer lunch for a picnic or a board should be about maintaining freshness and prevent soggy ingredients, which is why the ‘layered’ approach is a total game-changer. Imagine pulling out a crisp, vibrant jar where the dressing stays at the bottom, protected by hearty chickpeas, while delicate greens and feta sit safely at the top. It looks like a work of art and tastes just as good, with every ingredient retaining its individual integrity until the moment you toss it all together under the sun.
Ingredients
- 1/2 cup cooked chickpeas
- 1/2 cup diced cucumber
- 1/2 cup cherry tomatoes
- 1/4 cup crumbled feta
- 2 cups baby spinach or arugula
- 3 tbsp balsamic vinaigrette
How to make it
- Select a wide-mouth quart-sized mason jar; this provides enough room for the ingredients to be layered without being crushed.
- Pour the balsamic vinaigrette into the very bottom of the jar. This is the ‘foundation’ layer that must stay separate from the greens.
- Add the chickpeas as the second layer. Since they are hardy, they can sit in the dressing and actually ‘marinate,’ becoming more flavorful as the day goes on.
- Layer the cucumbers and tomatoes next. These act as a barrier between the wet ingredients and the dry ones.
- Add the crumbled feta, followed by the baby spinach or arugula packed tightly at the very top.
- When ready to serve on your board or at a picnic, simply shake the jar vigorously to coat everything in dressing and pour it out into a bowl for a perfectly fresh, crisp lunch.
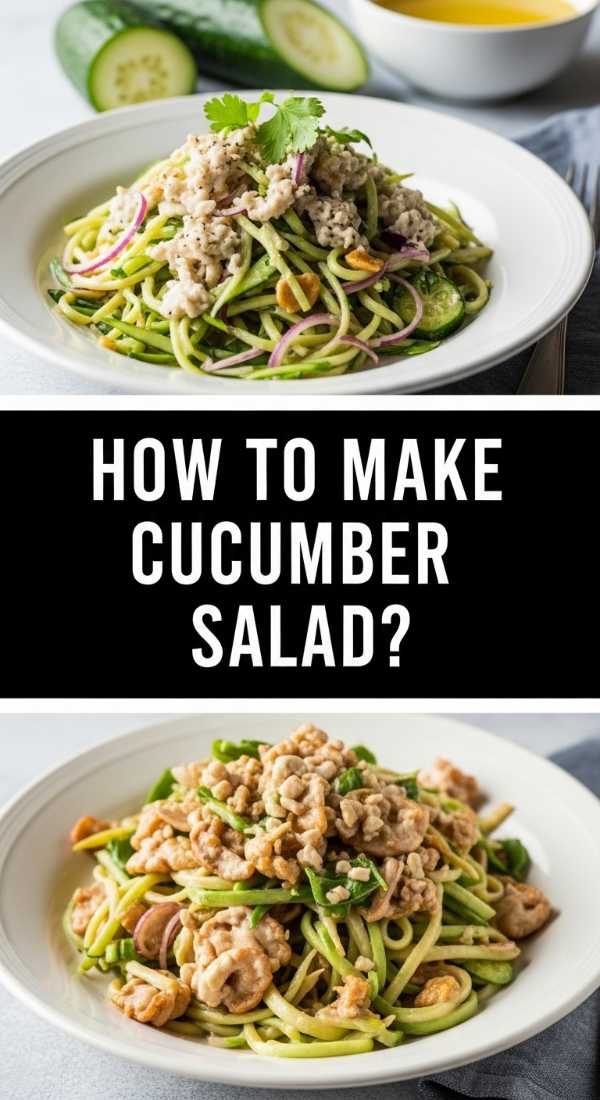
How to make cucumber salad?
[IMAGE_10]
Why we love this
This cucumber salad is a nostalgic nod to grandma’s kitchen but with a modern, viral twist that focuses on extreme crunch and a zesty, creamy finish. The scent of fresh dill is immediate and intoxicating, paired with the sharp, vinegary tang of the dressing that softens the creaminess of the base. It’s light, hydrating, and provides the perfect acidic ‘pop’ to balance out grilled meats or heavy cheeses, making it an essential, low-calorie addition to any summer gathering.
Ingredients
- 2 large English cucumbers, thinly sliced
- 1/2 red onion, thinly sliced
- 1/2 cup Greek yogurt or sour cream
- 2 tbsp white vinegar
- 2 tbsp fresh dill, chopped
- 1/2 tsp sugar
- Salt and pepper
How to make it
- Slice the cucumbers as thinly as possible—ideally 1/8th of an inch. If you have time, sprinkle the slices with salt and let them sit in a colander for 15 minutes to drain excess water, ensuring your salad isn’t watery.
- In a medium mixing bowl, whisk together the Greek yogurt, white vinegar, sugar, and chopped dill until the dressing is smooth and pale green.
- Pat the sliced cucumbers dry with a paper towel and add them to the dressing along with the sliced red onions.
- Gently fold the vegetables into the dressing until every slice is thoroughly coated.
- Season generously with freshly cracked black pepper; the spice of the pepper beautifully offsets the coolness of the yogurt.
- Refrigerate for 30 minutes before serving. This allows the cucumbers to slightly pickle in the vinegar, enhancing the ‘crunch’ and deepening the herbal notes of the dill.
Final Thoughts on the Viral Snack Board
The beauty of the 5-minute snack board isn’t just in the food; it’s in the freedom it gives you. By focusing on simple, high-impact dishes like charred corn, whipped ricotta, and refreshing watermelon salad, you create a tapestry of flavors that invites people to linger, talk, and enjoy the season. Remember, there are no rules—just good food, great company, and the golden light of summer. So, grab a board, start layering, and let the flavors speak for themselves!
Frequently Asked Questions
How do I keep my snack board fresh outdoors?
The best way to keep ingredients fresh is to place your board on top of a larger tray filled with ice, or simply keep the more perishable items (like the whipped ricotta or gazpacho) in the fridge until the very moment you are ready to serve. Covering the board with a mesh food tent can also protect it from unwanted guests like flies!
Can I make these components ahead of time?
Absolutely! In fact, the pasta salad and the cucumber salad actually benefit from sitting for a few hours. I recommend prepping the vegetables and dressings a day in advance, then assembling the board 15 minutes before your guests arrive to ensure the textures remain perfect.