
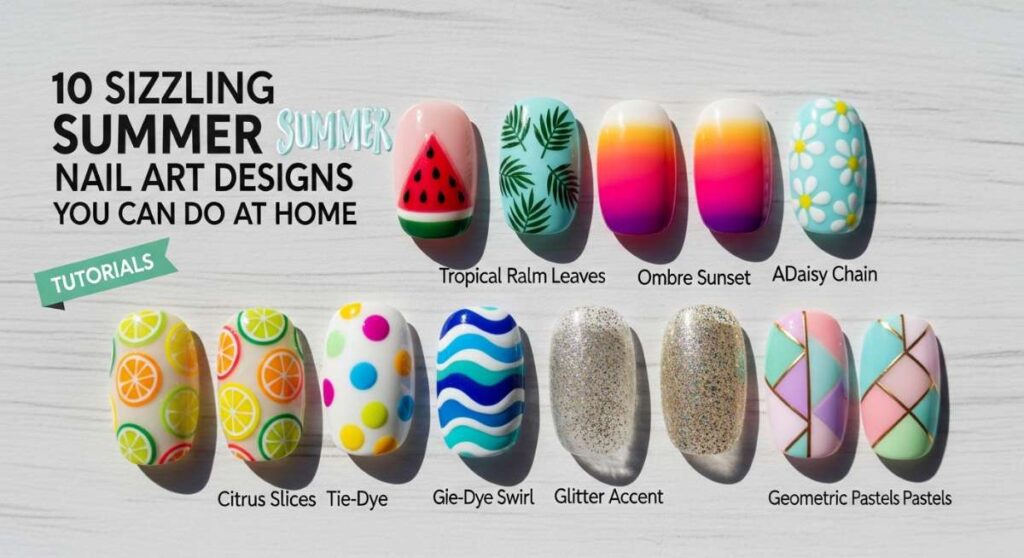
10 Sizzling Summer Nail Art Designs You Can Do at Home
Hello, my beautiful loves! There is something so incredibly soul-soothing about sitting by a sun-drenched window, a iced matcha in hand, and taking a little time just for you. As the days stretch longer and the golden hour feels like a warm, cloud-soft embrace, I find myself wanting to carry that summer magic right on my fingertips. There’s no need for a pricey salon visit when we can create something stunning together in the comfort of our own little sanctuaries.
Today, I’m sharing my favorite summer nail art designs that feel like a vacation in a bottle. Whether you’re heading to the beach or just dreaming of a strawberry garden, these designs are meant to make you feel radiant and creative. Let’s dive into these little masterpieces, shall we? Grab your favorite polishes and let’s get glowing!
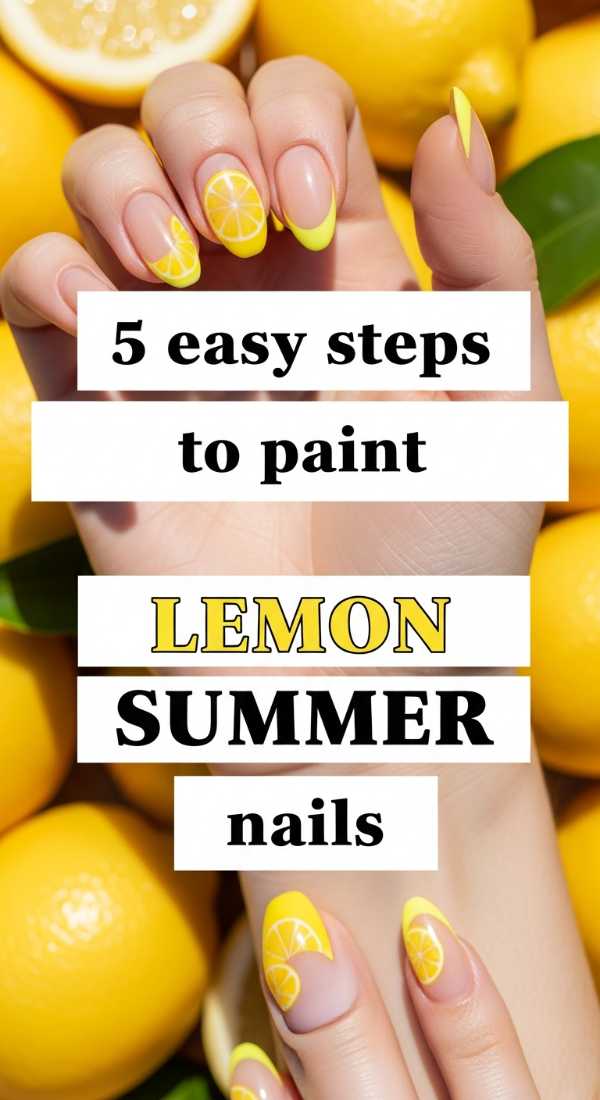
1. Zesty Lemon Summer Nails
Why to love these Nails:
These lemon nails are pure sunshine! They are the perfect way to add a pop of bright, cheerful energy to your look. Every time you look down at your hands, you’ll feel like you’re sipping cold lemonade on a porch in Amalfi. It’s fresh, zesty, and so incredibly vibrant for those hot July afternoons.
Essential Items:
- Opaque white base polish
- Bright yellow nail polish
- Thin nail art brush or toothpick
- Forest green polish
- High-shine top coat
How to Prepare:
- Apply two coats of white base and let dry completely.
- Paint two yellow semi-circles on the sides of your nails.
- Use a thin brush to draw thin white lines from the center of the yellow circles to create ‘segments’.
- Add two tiny green leaves at the top of your lemon.
- Seal the design with a glossy top coat.
Budget Range
- Essie ‘Check Your Baggage’ Yellow – $10
- OPI ‘Alpine Snow’ – $11
- Sally Hansen Insta-Dri Top Coat – $6
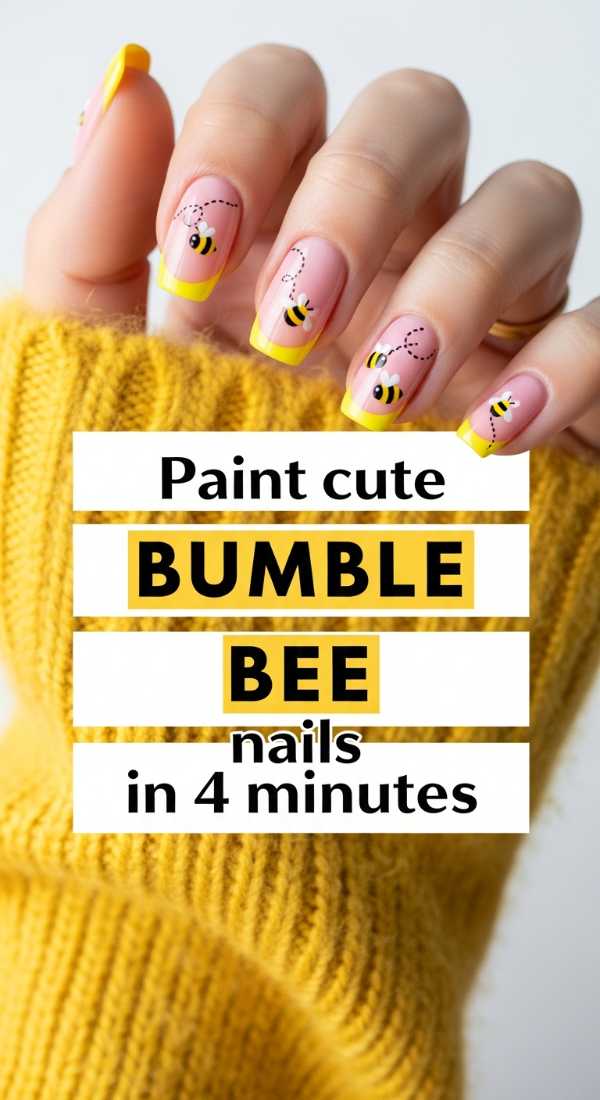
2. Sweet Little Bumble Bee Nails
Why to love these Nails:
There is nothing quite as darling as a tiny bumble bee buzzing across your nails. This look is whimsical and sweet, capturing the essence of a blooming summer garden. It’s a conversation starter that takes only 4 minutes to achieve but looks like you spent hours on it, my loves.
Essential Items:
- Yellow polish
- Black striper or black polish
- Large and small dotting tools
- White polish for wings
How to Prepare:
- Paint your nail a solid yellow and wait for it to be tacky.
- Draw three thin black horizontal stripes across the middle.
- Use a large dotting tool to place two white dots side-by-side for the wings.
- Add a tiny black dot for the head and let it dry.
Budget Range
- Wet n Wild ‘NailSlick’ Yellow – $2
- Nail Art Dotting Tool Set – $5
- Holler and Glow Black Polish – $4
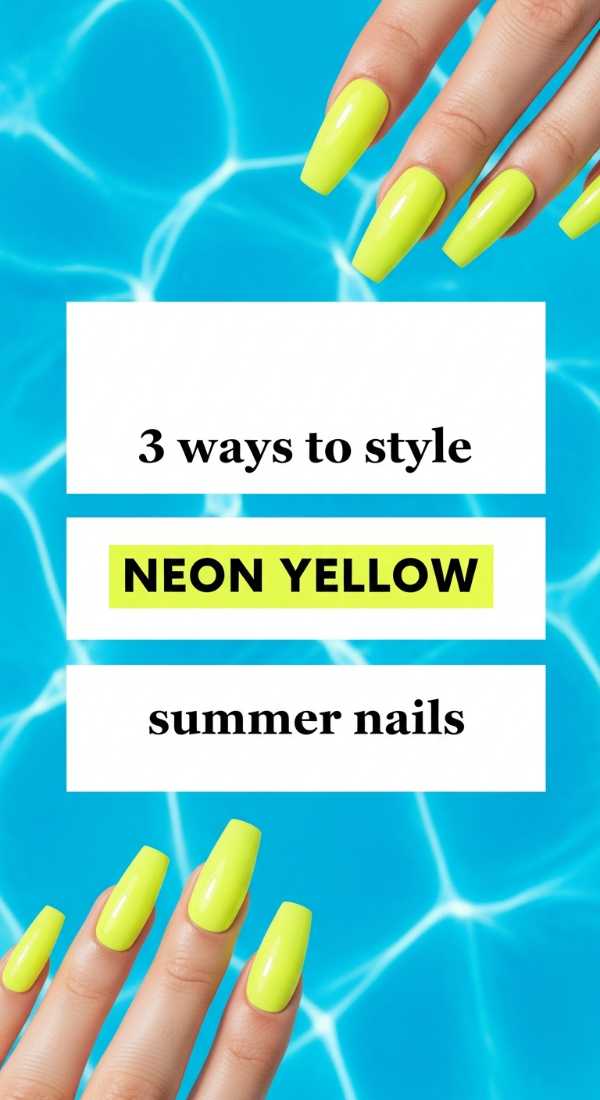
3. Neon Yellow Summer Vibe
Why to love these Nails:
Sometimes we just need to be bold, right? Neon yellow is the ultimate ‘it’ color for summer. It glows against a tan and brings an electric energy to any outfit. I love this because it’s modern, edgy, and impossible to ignore—a true statement of confidence.
Essential Items:
- Neon yellow polish
- Matte top coat
- Gold foil flakes
How to Prepare:
- The Matte Look: Paint nails neon and apply a matte top coat for a soft, velvet finish.
- The Accent: Keep four nails neon and add gold foil to the ring finger.
- The Ombre: Sponge neon yellow onto a white base for a soft gradient effect.
Budget Range
- Orly ‘Glowstick’ Neon – $12
- Revlon Matte Top Coat – $7
- Amazon Nail Gold Foil – $6
4. Strawberry Garden Cottagecore
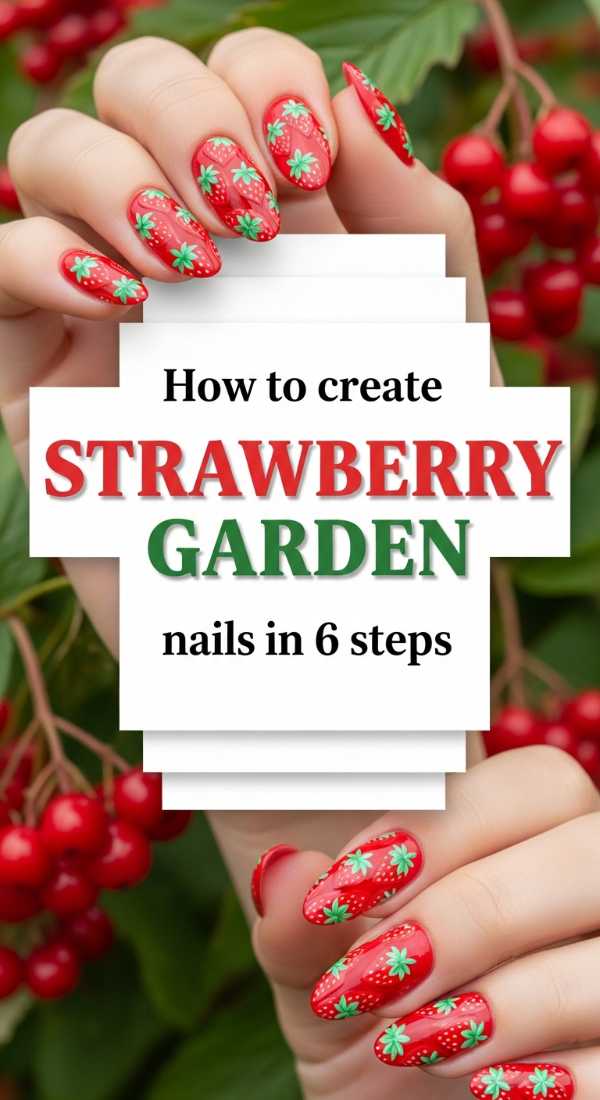
Why to love these Nails:
These strawberry garden nails are a dream for my cottagecore lovers. They feel so nostalgic and sweet, like a picnic in a field of wild berries. It’s a soft, romantic look that adds a touch of vintage charm to your summer aesthetic.
Essential Items:
- Cherry red polish
- Light green polish
- Pale pink or nude base
- Yellow or gold nail pen
How to Prepare:
- Start with a pale pink base coat.
- Paint a small red oval (the strawberry body).
- Using a thin brush, draw three tiny green leaves at the top of the red oval.
- Wait for the red to dry slightly, then add tiny yellow dots for seeds.
- Repeat on 2-3 accent nails.
- Finish with a protective top coat.
Budget Range
- Zoya ‘Sizzling’ Red – $12
- Essie ‘Mint Candy Apple’ – $10
- Nail Art Detail Brush – $4
5. Palm Tree Beach Vacation
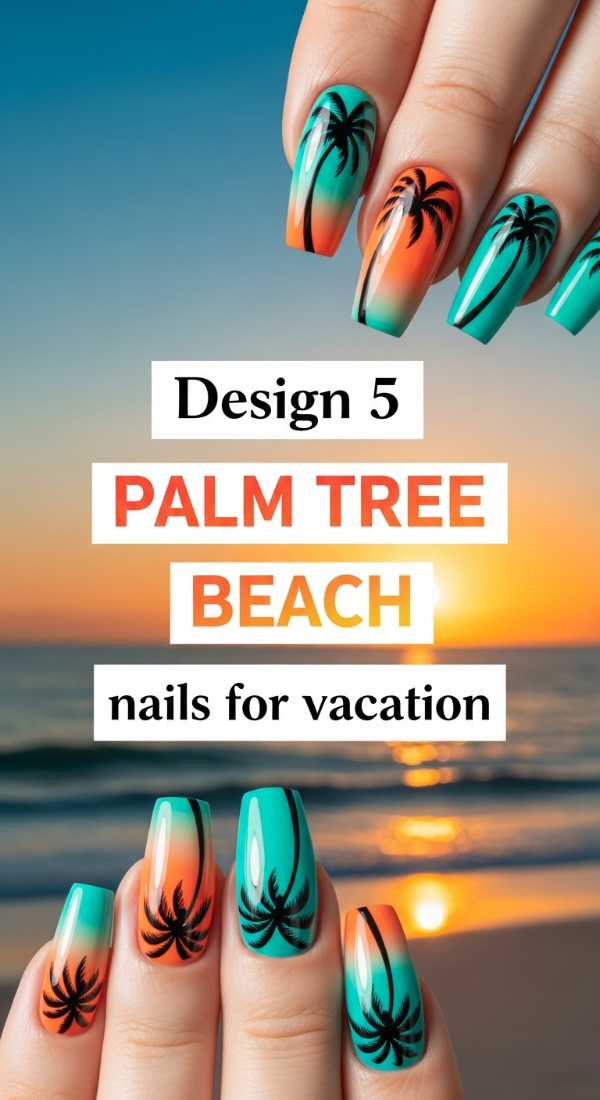
Why to love these Nails:
Take the beach with you wherever you go! These palm tree nails are the ultimate vacation accessory. I love the silhouette effect—it reminds me of watching the sunset over the ocean with a warm breeze in my hair. It’s pure tropical bliss on your fingertips.
Essential Items:
- Sunset orange or pink polish
- Black nail art pen
- Sponge for gradient
How to Prepare:
- Create a sunset gradient using pink and orange on a makeup sponge.
- Dab the sponge onto your nail until blended.
- Draw a thin black vertical line (the trunk) with a slight curve.
- Draw 4-5 curved lines coming from the top for leaves.
- Add a tiny black bird ‘V’ in the corner for extra detail.
Budget Range
- China Glaze ‘Flip Flop Fantasy’ – $8
- Sally Hansen Black Detailer – $7
- Makeup Sponges – $3
6. The Unique French Tip Twist
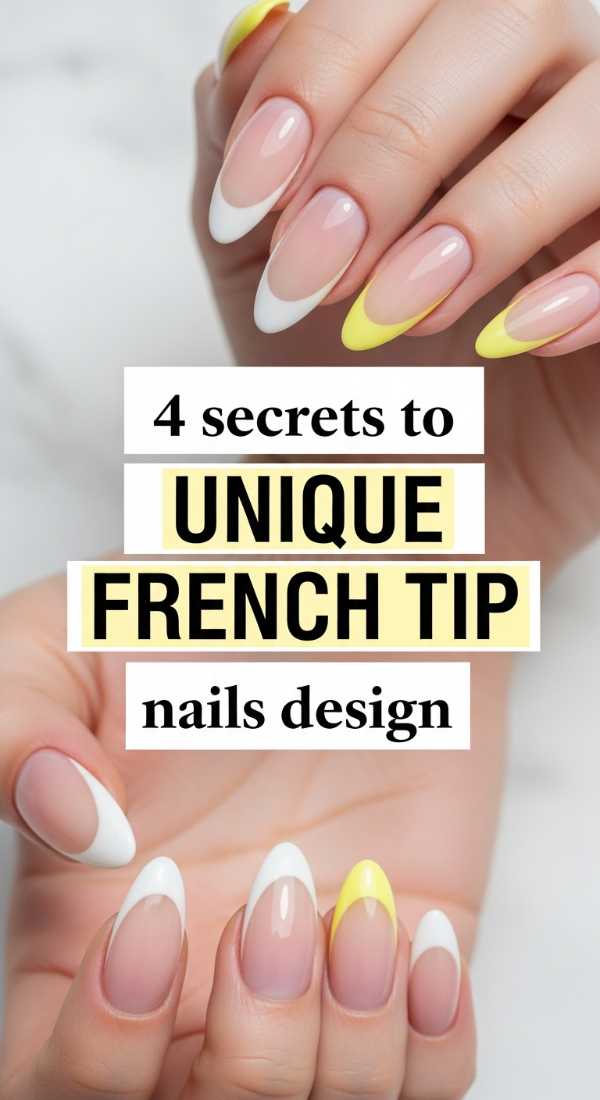
Why to love these Nails:
The classic French tip is getting a summer makeover, darling! I love this because it’s sophisticated but playful. By adding unexpected colors or shapes, you’re taking a timeless look and making it uniquely yours. It’s chic, polished, and so very fresh.
Essential Items:
- Nude base polish
- Pastel or neon tip colors
- French tip guides or tape
How to Prepare:
- Secret 1: Use a silicone stamper to press your tip into the polish for a perfect curve.
- Secret 2: Try ‘Double Tips’ by drawing two thin lines instead of one thick one.
- Secret 3: Use mismatched colors for each finger for a rainbow effect.
- Secret 4: Add a tiny heart at the base of the tip for a feminine touch.
Budget Range
- Nail Stamper Kit – $9
- OPI ‘Bubble Bath’ – $11
- Maybelline Color Show Pastels – $4 each
7. Sunflower Boho Chic
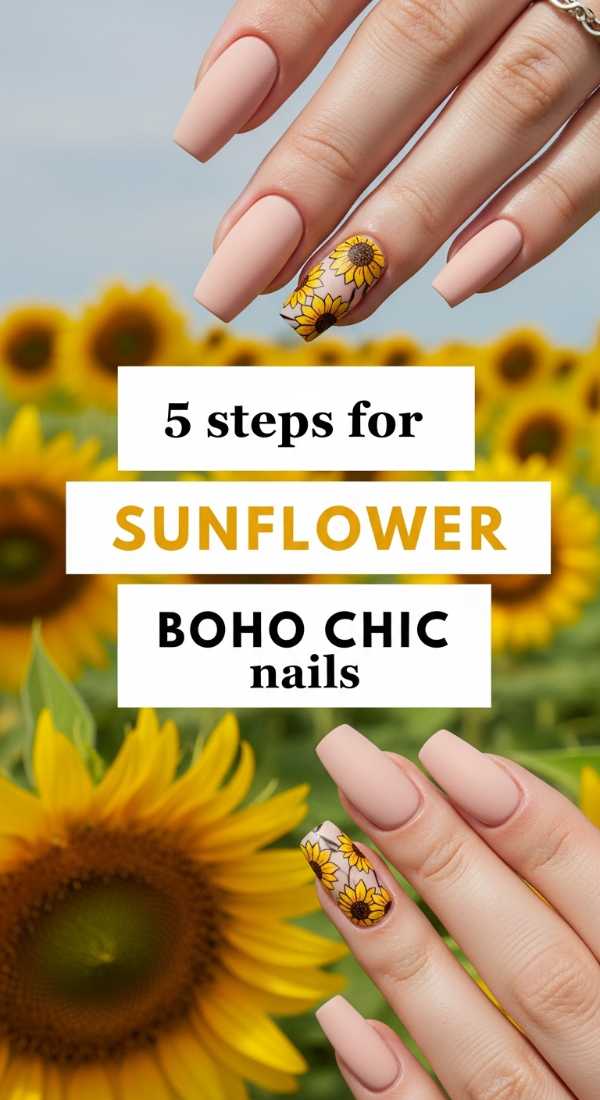
Why to love these Nails:
Sunflowers symbolize loyalty and adoration, and they are the crowning jewel of summer flowers. This design feels boho-chic and earthy. It’s for the souls who love wandering through farmer’s markets and wearing flowy linen dresses.
Essential Items:
- Mustard yellow polish
- Dark brown or black polish
- Thin detail brush
- Clear base coat
How to Prepare:
- Apply a clear or nude base coat.
- Place a large brown dot in the corner of your nail.
- Paint thin, teardrop-shaped yellow petals radiating out from the brown center.
- Add tiny black dots inside the brown center for texture (the seeds).
- Apply a top coat to protect the delicate petals.
Budget Range
- Olive & June ‘Honey’ – $9
- Essie ‘Licorice’ – $10
- Sally Hansen ‘Barely Nude’ – $7
8. Ladybug Garden Party
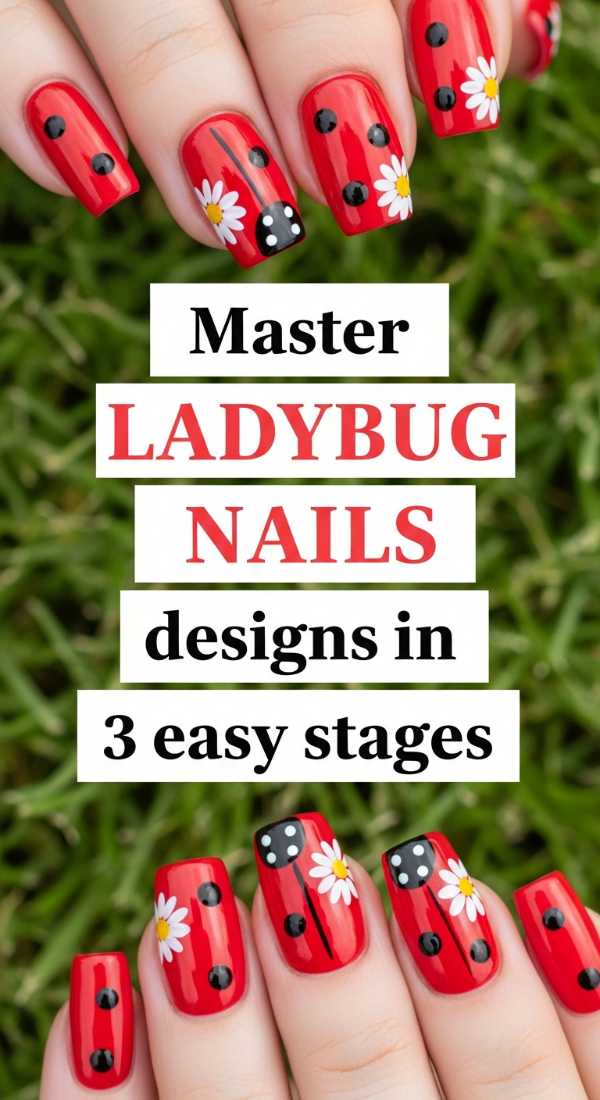
Why to love these Nails:
Ladybugs are a sign of good luck, and who doesn’t want a bit of that? This design is bold, bright, and incredibly cute. It’s a great way to use that classic red polish in a way that feels playful and summery rather than just formal.
Essential Items:
- Bright red polish
- Black polish
- Dotting tool
How to Prepare:
- Stage 1: Paint the entire nail red.
- Stage 2: Paint a black ‘French tip’ at the top for the head and a thin black line down the middle.
- Stage 3: Use a dotting tool to add 3-4 black spots on each side of the line.
Budget Range
- Revlon ‘Red’ – $6
- Sinful Colors Black – $3
- Dotting tool (or use a bobby pin) – $1
9. Mediterranean Italy Tile Design
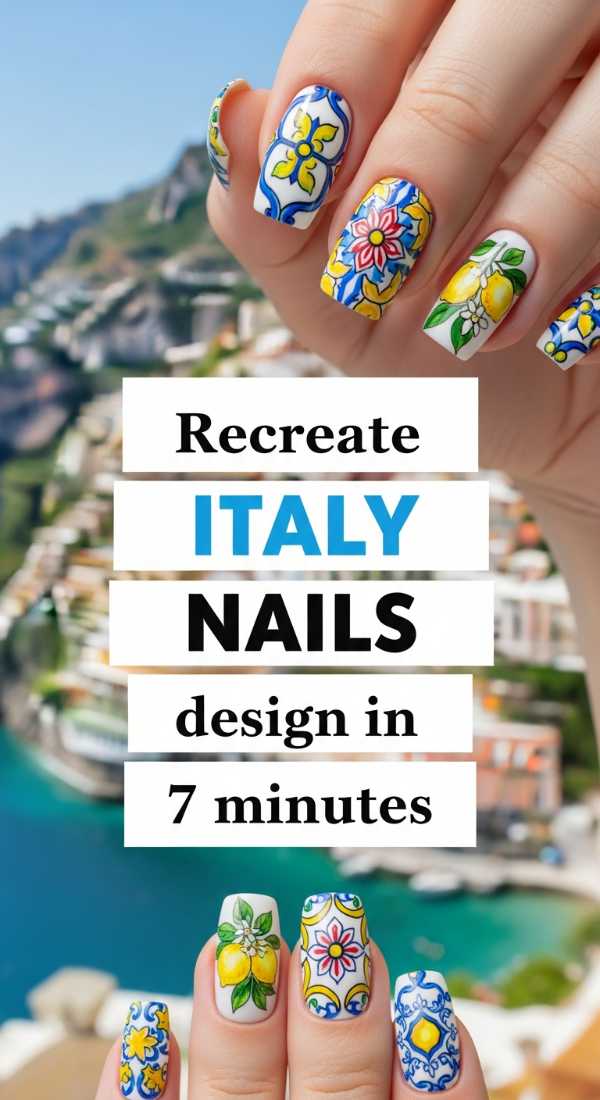
Why to love these Nails:
Close your eyes and imagine the Amalfi Coast—the blue tiles, the lemon trees, the sparkling water. This design is for the traveler at heart. It’s sophisticated, artistic, and feels like a luxury escape every time you type or check your phone.
Essential Items:
- Cobalt blue polish
- White base polish
- Ultra-fine nail art brush
How to Prepare:
- Paint nails a crisp, solid white.
- Using the cobalt blue, draw small geometric ‘cross’ shapes to mimic tiles.
- Add tiny blue dots in the corners of the tiles.
- On the ring finger, paint a tiny yellow lemon for that Italian flair.
- Finish with a high-gloss coat to look like glazed ceramic.
Budget Range
- Sally Hansen ‘Pacific Blue’ – $6
- OPI ‘Alpine Snow’ – $11
- Professional Nail Art Brushes – $8
10. Easy Beginner Summer Mix

Why to love these Nails:
If you’re just starting your nail art journey, don’t worry, my love! This beginner mix is all about simple shapes that look professional. It’s low-stress and high-reward, perfect for a relaxing Sunday afternoon of self-care.
Essential Items:
- 3-4 of your favorite summer shades
- Toothpicks
- Top coat
How to Prepare:
- Dots: Use a toothpick to make simple polka dots.
- Stripes: Drag a brush vertically for a single stripe.
- The Half-Moon: Leave the base of your nail bare and paint the rest.
- Glitter Accent: One solid glitter nail.
- Color Block: Paint half the nail one color, half another.
- Confetti: Random small dots of multiple colors.
Budget Range
- Target ‘Mondo Llama’ Acrylic Paint (for dots) – $5
- Wet n Wild Polishes – $1.50 each
- Clear Top Coat – $4
Embrace Your Inner Artist
I hope these designs inspire you to slow down and enjoy the creative process. Remember, my loves, it doesn’t have to be perfect—the beauty is in the time you spend caring for yourself. Whether you choose the zesty lemons or the dreamy Italian tiles, your hands will be a beautiful reflection of the summer sun. Tag me in your photos; I can’t wait to see your gorgeous creations!