

We’ve all been there—the guests are arriving in twenty minutes, the house is a whirlwind of half-lit candles and stray pillows, and you still haven’t figured out what to put on the table. You want that viral, ‘Instagram-perfect’ moment, but your energy is running low. That is exactly why I fell in love with the concept of the ‘Everything Board.’ It’s more than just a platter; it’s an experience that invites everyone to lean in, grab a fork, and share a story over a beautiful spread of comfort food.
The secret to a board that goes viral isn’t just about how it looks; it’s about the soul of the food. It’s the contrast between a sizzling, garlic-infused shrimp and a cool, crisp salad, or the way a golden slice of cornbread sits perfectly next to a rich, slow-cooked stew. When you assemble these ten elements, you aren’t just serving dinner—you’re creating a landscape of flavors that feels both effortless and incredibly indulgent. Let’s dive into the ten essentials that will make your board the talk of the season.
How to cook quick chicken?

Why we love this
There is nothing quite like the sound of a chicken breast hitting a hot pan and creating that immediate, satisfying sizzle. When done right, quick-cooked chicken develops a gorgeous, golden-brown crust that seals in all the moisture, leaving the inside tender and incredibly juicy. The aroma of searing poultry mixed with a hint of olive oil and cracked black pepper fills the kitchen with a sense of homey warmth, promising a protein that is both light and deeply satisfying to the palate.
Ingredients
- 2 boneless, skinless chicken breasts
- 2 tablespoons olive oil
- 1 teaspoon sea salt
- 1/2 teaspoon cracked black pepper
- 1/2 teaspoon garlic powder
- Fresh thyme sprigs for garnish
How to make it
- Start by patting the chicken breasts completely dry with paper towels; moisture is the enemy of a good sear and will cause the meat to steam rather than brown.
- Place the chicken on a cutting board and lightly pound the thicker end with a meat mallet or a heavy skillet until the entire breast is an even thickness (about 3/4 inch), ensuring it cooks at the same rate.
- Season both sides generously with salt, pepper, and garlic powder, pressing the spices into the meat so they adhere during the cooking process.
- Heat a stainless steel or cast-iron skillet over medium-high heat for 2-3 minutes until it is very hot but not smoking. Add the olive oil and swirl to coat the bottom.
- Carefully lay the chicken into the pan, moving away from you to avoid oil splashes. Let it cook undisturbed for 5-6 minutes; do not move it until it naturally releases from the pan with a golden crust.
- Flip the chicken and cook for another 5 minutes, or until the internal temperature reaches 165°F (74°C). Remove from the heat and let it rest for 5 minutes on a warm plate before slicing to allow the juices to redistribute.
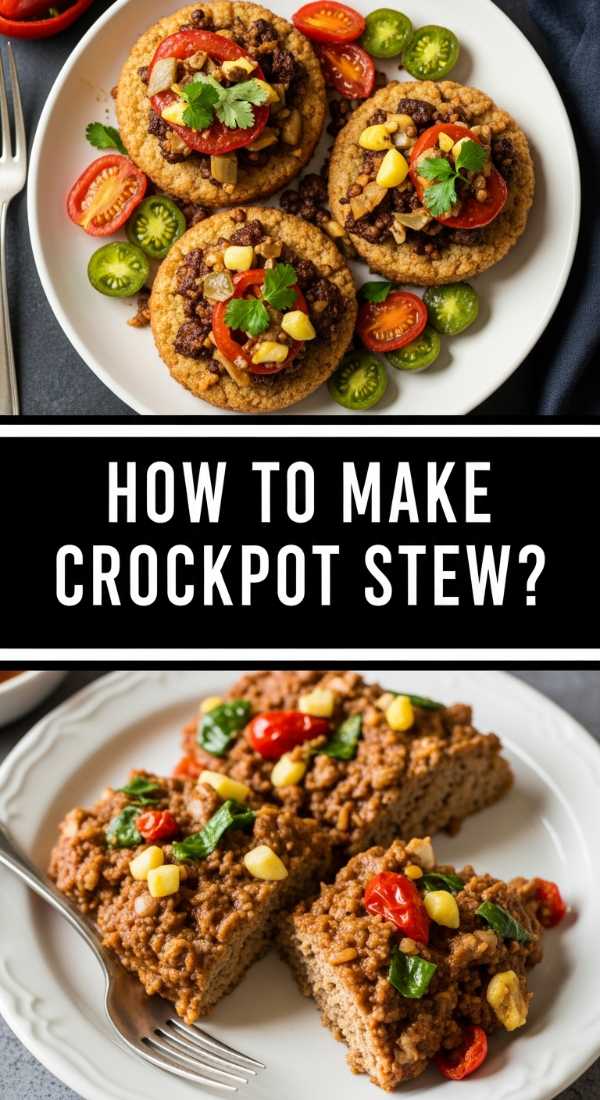
How to make crockpot stew?
Why we love this
Crockpot stew is the ultimate culinary hug, a slow-building masterpiece that transforms humble ingredients into a rich, velvety tapestry of flavor. As the beef breaks down over hours of gentle heat, it becomes so tender it practically melts on the tongue, while the root vegetables soak up the savory, herb-infused broth until they are bursting with richness. The deep, earthy aroma that wafts through your home all afternoon creates an atmosphere of pure comfort and anticipation.
Ingredients
- 2 lbs beef chuck roast, cubed
- 4 large carrots, sliced into thick rounds
- 3 russet potatoes, peeled and cubed
- 1 yellow onion, chopped
- 3 cups beef bone broth
- 2 tablespoons tomato paste
- 2 cloves garlic, minced
- 1 tablespoon Worcestershire sauce
- 2 sprigs fresh rosemary
How to make it
- Begin by searing the beef cubes in a hot pan with a splash of oil for about 2 minutes per side to develop a Maillard reaction, which adds a complex, roasted depth to the final stew.
- Transfer the seared meat into the crockpot and add the carrots, potatoes, and onions, ensuring the vegetables are tucked around the meat.
- In a small bowl, whisk together the beef broth, tomato paste, minced garlic, and Worcestershire sauce until smooth, then pour this mixture over the ingredients in the pot.
- Tuck the rosemary sprigs into the liquid and set the crockpot to ‘Low’ for 8 hours or ‘High’ for 4-5 hours; the low setting is preferred for the most tender results.
- Avoid opening the lid during the cooking process as this releases heat and adds significant time to the cook. The stew is done when the beef pulls apart easily with two forks.
How to grill perfect steaks?

Why we love this
The experience of grilling a perfect steak is a sensory delight, from the intense heat of the grates to the charred, smoky fragrance that signals a summer evening. A well-grilled steak offers a sophisticated play of textures: a slightly salty, caramelized exterior giving way to a buttery, pink center that releases a burst of savory flavor with every bite. It is the centerpiece of any great board, demanding attention with its bold presence and rustic elegance.
Ingredients
- 2 Ribeye or New York Strip steaks (1.5 inches thick)
- 1 tablespoon coarse Kosher salt
- 1 teaspoon coarse black pepper
- 2 tablespoons unsalted butter
- 1 clove garlic, smashed
How to make it
- Remove the steaks from the refrigerator at least 45 minutes before grilling; bringing meat to room temperature ensures an even cook throughout the center.
- Preheat your grill to high heat (around 450-500°F). While it heats, pat the steaks dry and season them aggressively with salt and pepper on all sides, including the edges.
- Place the steaks on the hottest part of the grill at a 45-degree angle to the grates. Close the lid and sear for 3 minutes without moving them.
- Flip the steaks and cook for another 3-4 minutes for medium-rare. For a professional finish, add a pat of butter and the smashed garlic to the top of the steaks during the final minute of grilling.
- Use a meat thermometer to check for a pull temp of 130°F for medium-rare; the temperature will rise about 5 degrees while resting.
- Crucially, let the steaks rest on a cutting board for a full 10 minutes before slicing against the grain to ensure no juices are lost.
How to bake corn bread?

Why we love this
Cornbread is the sweet and savory heartbeat of a comfort board, offering a crumbly, golden texture that is impossible to resist. When baked in a hot skillet, the edges become wonderfully crisp and lace-like, while the interior remains soft, moist, and infused with the scent of honey and browned butter. It’s the kind of side dish that feels like a treat, providing a sunny, yellow pop of color and a flavor profile that balances perfectly against salty meats and spicy dips.
Ingredients
- 1 cup yellow cornmeal
- 1 cup all-purpose flour
- 1/2 cup granulated sugar
- 1 tablespoon baking powder
- 1 cup buttermilk
- 1/2 cup melted butter
- 2 large eggs
- 2 tablespoons honey
How to make it
- Preheat your oven to 400°F (200°C) and place a 9-inch cast-iron skillet inside the oven while it heats; a hot pan is the secret to a crunchy, professional crust.
- In a large bowl, whisk together the cornmeal, flour, sugar, and baking powder until well combined and free of lumps.
- In a separate bowl, beat the eggs then whisk in the buttermilk, melted butter, and honey until the mixture is uniform.
- Pour the wet ingredients into the dry ingredients and stir with a spatula just until moistened; do not overmix, as this will lead to a tough, dry bread.
- Carefully remove the hot skillet from the oven, grease it with a little extra butter, and pour the batter in. It should sizzle at the edges immediately.
- Bake for 20-25 minutes until the top is golden brown and a toothpick inserted into the center comes out clean. Serve warm with a drizzle of extra honey.
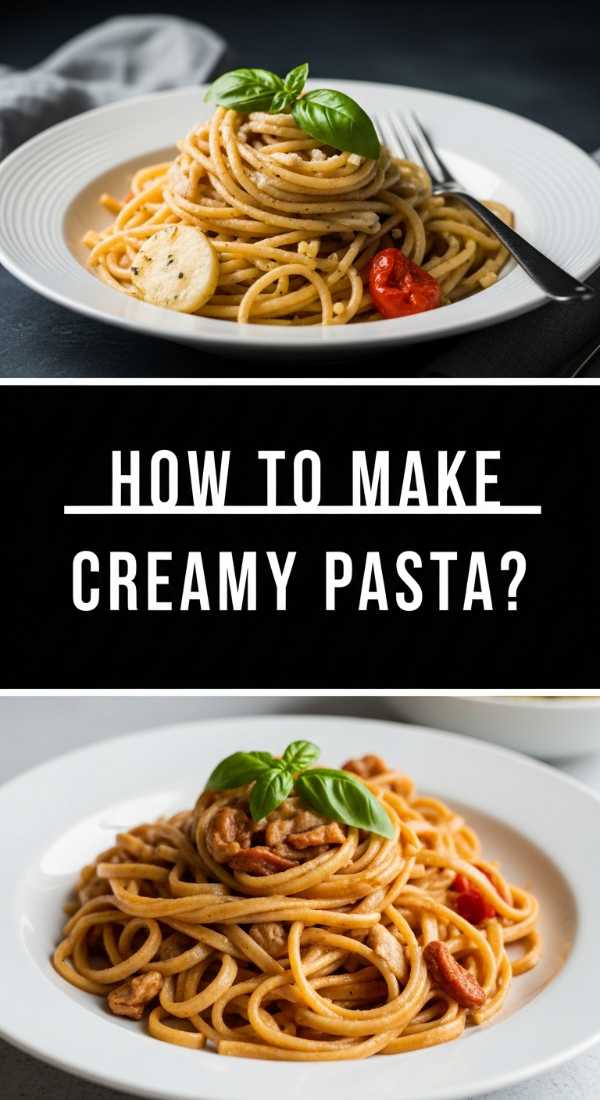
How to make creamy pasta?
Why we love this
There is a luxurious, silk-like quality to a perfectly executed creamy pasta that makes it feel like an absolute indulgence. Each strand of noodle should be draped in a glossy, velvet-smooth sauce that clings without being heavy or oily. The mild, milky notes of heavy cream and aged parmesan create a comforting base that highlights the subtle bite of the pasta, making it a crowd favorite that disappears within minutes of being served.
Ingredients
- 12 oz Fettuccine or Penne
- 1 cup heavy cream
- 1/2 cup freshly grated Parmesan cheese
- 2 tablespoons butter
- 1/2 cup reserved pasta water
- Pinch of nutmeg
- Fresh parsley, chopped
How to make it
- Bring a large pot of heavily salted water to a rolling boil. Add the pasta and cook for 1-2 minutes less than the package instructions call for, aiming for a firm ‘al dente’ texture.
- Crucial step: Before draining, scoop out at least one cup of the starchy pasta water. This liquid gold is the secret to emulsifying the sauce.
- In a wide skillet over medium heat, melt the butter and add the heavy cream. Bring to a gentle simmer (do not boil rapidly) for 3 minutes until it slightly thickens.
- Lower the heat to the lowest setting and whisk in the Parmesan cheese and nutmeg until the sauce is smooth and shiny.
- Add the cooked pasta directly into the sauce. Pour in about 1/4 cup of the reserved pasta water and toss vigorously with tongs. The starch will help the sauce bind to the noodles.
- Continue tossing for 1-2 minutes over low heat until the sauce reaches your desired thickness, adding more pasta water if it seems too dry. Garnish with parsley and serve immediately.
How to roast juicy chicken?

Why we love this
A whole roasted chicken is the ultimate symbol of a home-cooked feast, offering a spectacular visual center with its bronzed, crackling skin and aromatic herbs. The meat beneath that skin stays incredibly succulent, dripping with natural juices that carry the essence of rosemary and lemon. It provides a variety of textures—from the tender breast to the rich, dark meat of the thighs—ensuring there is a perfect bite for every guest at the table.
Ingredients
- 1 whole chicken (4-5 lbs)
- 4 tablespoons softened butter
- 1 lemon, halved
- 1 head of garlic, sliced crosswise
- 3 sprigs rosemary and thyme
- Salt and pepper to taste
How to make it
- Preheat the oven to 425°F (220°C). Remove the giblets and pat the chicken extremely dry inside and out; any moisture on the skin will prevent it from becoming crispy.
- Season the cavity of the chicken with salt and pepper, then stuff it with the lemon halves, garlic head, and fresh herbs.
- Gently loosen the skin over the breast meat with your fingers and slide about half of the softened butter underneath, spreading it evenly. Rub the remaining butter all over the exterior skin.
- Truss the legs with kitchen twine to ensure even cooking and place the chicken on a roasting rack in a shallow pan.
- Roast for 15 minutes at high heat to jumpstart the skin crisping, then lower the oven to 375°F (190°C) and continue roasting for about an hour.
- The chicken is done when the juices run clear and a thermometer in the thickest part of the thigh reads 165°F. Let the bird rest for 15-20 minutes before carving to keep it juicy.
How to make crispy tacos?

Why we love this
Crispy tacos bring a vibrant, festive energy to the board, offering a multi-sensory experience of crunch, spice, and freshness. The golden, fried shells provide a sturdy, toasted base for seasoned meats and cool toppings, creating a perfect balance of temperatures and textures. Whether you’re hearing the first snap of the shell or tasting the bright zing of lime and cilantro, these tacos are designed to be fun, messy, and absolutely delicious.
Ingredients
- 1 lb ground beef or shredded chicken
- 10 corn tortillas
- 1 tablespoon taco seasoning (cumin, chili powder, paprika)
- 1/2 cup vegetable oil for frying
- Toppings: Shredded lettuce, cheddar cheese, salsa, sour cream
How to make it
- Brown your protein in a skillet over medium heat, draining any excess fat. Stir in the taco seasoning and a splash of water, simmering for 5 minutes until the flavors are locked in.
- In a small frying pan, heat about 1/2 inch of oil over medium-high heat until it shimmers (around 350°F).
- Using tongs, place a corn tortilla in the oil for 10 seconds until soft. Fold it in half and hold it open with the tongs to create a ‘V’ shape.
- Fry each side of the folded tortilla for about 30-45 seconds until it is stiff and golden brown. Drain on paper towels and immediately sprinkle with a tiny pinch of salt.
- Fill the warm shells with the meat mixture first, then layer the cheese so it melts slightly against the warm protein.
- Top with the cold lettuce, salsa, and sour cream just before serving to maintain the contrast between the hot shell and fresh toppings.
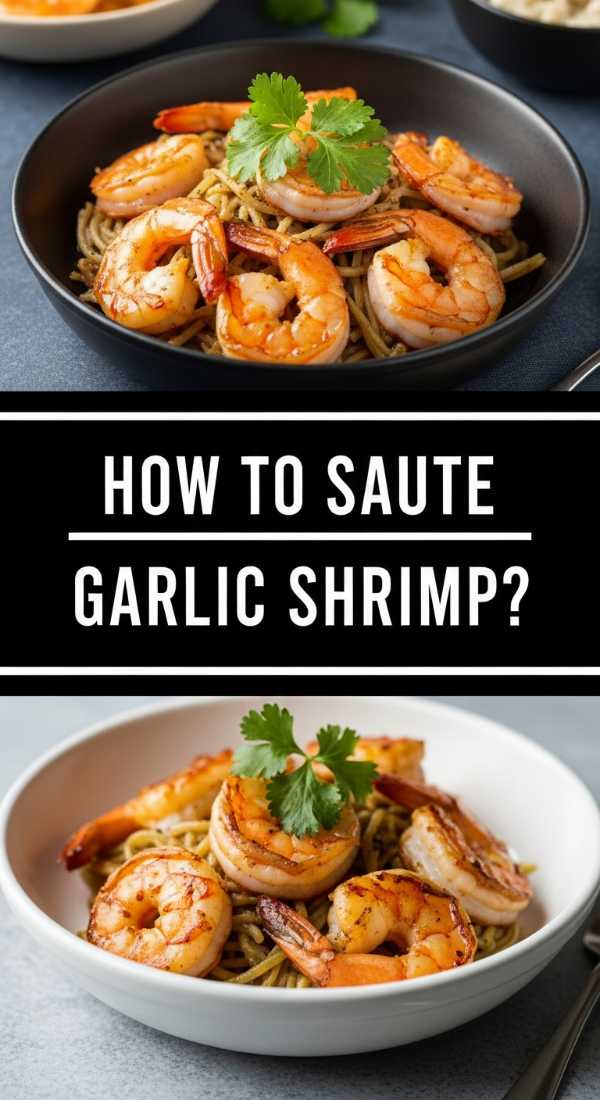
How to saute garlic shrimp?
Why we love this
Garlic shrimp is the epitome of quick elegance, turning just a few ingredients into a sophisticated, flavor-packed dish in mere minutes. The shrimp turn a beautiful, opaque coral pink as they curl into perfect ‘C’ shapes, swimming in a pool of golden butter and toasted garlic bits. The bright, acidic finish of lemon juice cuts through the richness, creating a zesty, aromatic experience that feels like a seaside vacation on a plate.
Ingredients
- 1 lb large shrimp, peeled and deveined
- 4 cloves garlic, thinly sliced
- 3 tablespoons butter
- 1 tablespoon olive oil
- 1/2 teaspoon red pepper flakes
- Fresh parsley and lemon wedges
How to make it
- Pat the shrimp dry with paper towels; this ensures they sear and brown instead of boiling in their own juices. Season lightly with salt.
- In a large skillet, heat the olive oil and butter over medium heat. Once the butter is foaming, add the sliced garlic and red pepper flakes.
- Sauté the garlic for about 1 minute until it becomes fragrant and turns a very light golden color—be careful not to burn it, as burnt garlic is bitter.
- Increase the heat to medium-high and add the shrimp in a single layer. Do not crowd the pan; cook in batches if necessary.
- Cook the shrimp for 2 minutes on the first side without moving them, then flip and cook for only 1 minute more. They are done when they are opaque and have just curled into a ‘C’ shape.
- Remove from heat immediately, squeeze fresh lemon juice over the top, and toss with chopped parsley to serve.
How to make cheesy potatoes?

Why we love this
Cheesy potatoes are the ultimate indulgence, a bubbling, gooey masterpiece that brings a sense of pure decadence to any meal. The potatoes become incredibly soft and tender, suspended in a rich, cheesy sauce that browns beautifully at the edges of the dish. Each bite offers a satisfying stretch of melted cheese and the earthy, comforting taste of seasoned potatoes, making it the dish that guests always reach for a second helping of.
Ingredients
- 2 lbs Yukon Gold potatoes, thinly sliced
- 2 cups shredded sharp cheddar cheese
- 1 cup heavy cream
- 1/2 cup sour cream
- 1 teaspoon onion powder
- 1/2 teaspoon smoked paprika
- Salt and pepper
How to make it
- Preheat your oven to 375°F (190°C) and grease a 9×13 inch baking dish with butter.
- In a large bowl, whisk together the heavy cream, sour cream, onion powder, smoked paprika, salt, and pepper until smooth.
- Layer half of the thinly sliced potatoes in the bottom of the dish, then sprinkle with one cup of the cheddar cheese.
- Add the remaining potatoes in an even layer and pour the cream mixture over the top, using a spatula to ensure the liquid seeps between the slices.
- Cover the dish tightly with aluminum foil and bake for 45 minutes. This steams the potatoes until they are fork-tender.
- Remove the foil, sprinkle the remaining cup of cheese on top, and bake uncovered for another 15-20 minutes until the cheese is bubbly and develops golden-brown spots. Let sit for 10 minutes before serving to set the sauce.
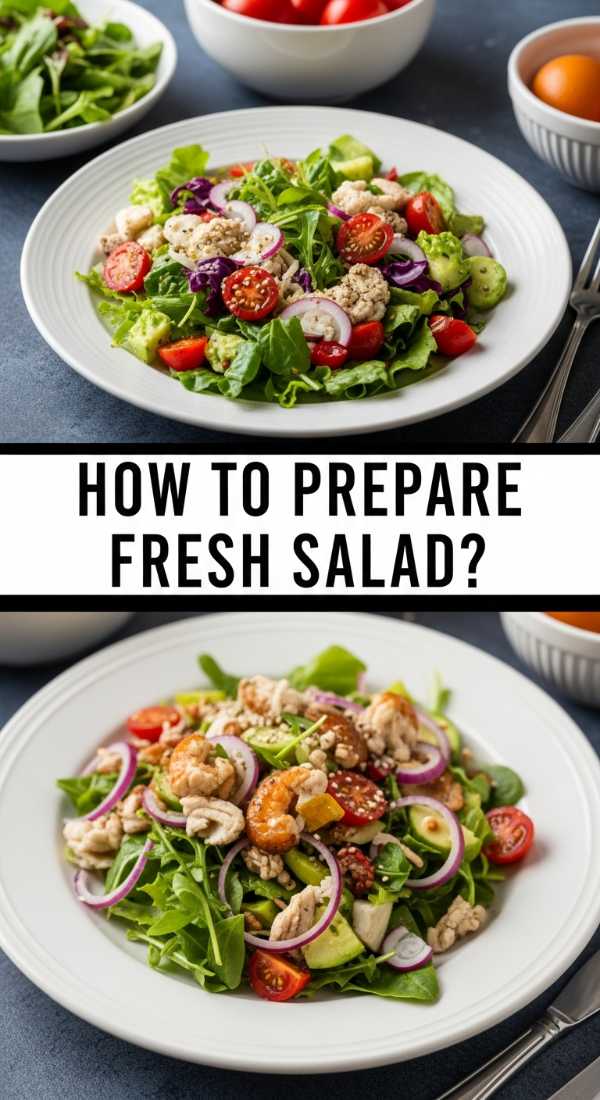
How to prepare fresh salad?
Why we love this
A fresh salad is the essential ‘palette cleanser’ of a food board, providing a bright, crunchy counterpoint to the richer, cooked elements. The vibrant greens, the snap of a cucumber, and the zing of a homemade vinaigrette wake up the taste buds and add a necessary lightness to the spread. It’s a celebration of raw textures and garden-fresh flavors that makes the whole meal feel balanced, colorful, and thoughtfully curated.
Ingredients
- 5 oz mixed baby greens (arugula, spinach, butter lettuce)
- 1 English cucumber, thinly sliced
- 1 cup cherry tomatoes, halved
- 1/4 red onion, paper-thin slices
- Dressing: 3 tbsp olive oil, 1 tbsp balsamic vinegar, 1 tsp Dijon mustard, honey
How to make it
- Start by washing your greens in cold water and using a salad spinner to get them completely dry; dressing will not cling to wet leaves and will make the salad soggy.
- Prepare the vinaigrette in a small jar by combining olive oil, balsamic vinegar, mustard, a tiny drizzle of honey, salt, and pepper. Shake vigorously until the oil and vinegar are fully emulsified.
- In a large chilled bowl, toss the greens gently with about half of the dressing using your hands or light tongs.
- Add the cucumber, tomatoes, and red onion. Only add the remaining dressing if needed—you want the leaves to look glossy, not drenched.
- For a professional touch, season the finished salad with a final tiny pinch of flaky sea salt and fresh cracked pepper.
- Assemble the salad at the very last minute before serving the board to ensure the greens stay crisp and upright rather than wilting.
Conclusion
Building a viral food board isn’t about being a professional chef; it’s about the joy of assembly and the love of good, simple ingredients. By combining these ten classic dishes, you’ve created a feast for the eyes and the soul. Now, clear the table, pour some drinks, and enjoy the beautiful spread you’ve created!
Frequently Asked Questions
Can I make these components ahead of time? Yes! The stew and potatoes actually taste better the next day. However, the shrimp, steak, and salad should always be prepared fresh for the best texture.
What is the best board to use for serving? A large wooden butcher block or a marble slab works beautifully. If you don’t have one, you can even line your clean countertop with parchment paper for a rustic ‘grazing table’ look.
How do I keep the hot food warm? Use small ceramic dishes for the hot components like the potatoes and stew, as they hold heat well. Arrange the cold items (salad, tacos) on the perimeter so they don’t get warmed by the hot dishes.