

10-Minute Viral Food Boards You Need to Try
There is something undeniably magical about the moment you set a beautifully arranged food board in the center of a table. It’s more than just a meal; it’s an invitation to linger, to graze, and to connect without the formality of a seated dinner. I remember the first time I ditched the traditional plates for a massive wooden board piled high with colors and textures; the room immediately felt lighter, and the conversation flowed as easily as the honey over the brie. These viral food boards have changed my hosting game forever, turning even a hectic Tuesday into a celebratory experience.
We live in a fast-paced world, but these 10-minute viral food boards prove that you don’t need hours in the kitchen to create something that looks and tastes like a masterpiece. Whether you’re fueling up for a week of work or hosting a sunset gathering on the patio, these ideas focus on fresh ingredients and effortless assembly. Let’s dive into the sensory delights of these simple yet stunning boards that are taking the internet—and our kitchens—by storm.
7 Best Summer Meal Prep Ideas?

Why we love this
This meal prep board is a literal rainbow on a platter, offering the satisfying crunch of bell peppers paired with the velvety smoothness of homemade hummus. As you assemble these components, the air fills with the bright, herbaceous scent of freshly chopped parsley and the zesty tang of lemon juice. It feels like capturing the very essence of a sunny afternoon in a container, providing a refreshing and crisp mouthfeel that keeps you energized throughout the day without the heaviness of a cooked lunch. It’s the ultimate way to stay cool while feeling completely nourished.
Ingredients
- Sliced rainbow bell peppers (red, yellow, orange)
- Persian cucumbers, sliced into rounds
- Cherry tomatoes, halved
- Grilled chicken breast strips or chickpeas for protein
- Creamy classic hummus
- Kalamata olives
- Feta cheese crumbles
- Whole grain pita wedges
How to make it
- Begin by washing all your fresh produce under cold running water to ensure maximum crispness; pat dry thoroughly with a lint-free kitchen towel to prevent sogginess.
- Using a sharp chef’s knife, slice your bell peppers into uniform 1/2-inch strips and your cucumbers into 1/4-inch rounds to create a consistent texture across the board.
- Place a small decorative bowl of hummus in the center of your board or prep container to act as the focal point.
- Fan out the pita wedges and grilled chicken strips on opposite sides of the bowl to create a balanced visual weight.
- Fill the remaining gaps with the olives, tomatoes, and cucumber rounds, ensuring colors are distributed evenly for that ‘viral’ aesthetic.
- Sprinkle the feta cheese and a pinch of dried oregano over the entire board to add a final layer of salty, savory depth.
Top 5 Viral Rotel Dip Recipes?
Why we love this
Nothing screams ‘comfort food’ quite like the sight of bubbling, golden cheese flecked with spicy green chilies and savory browned meat. The aroma is intoxicating—a heady mix of toasted cumin, melted cheddar, and the sharp bite of onions that immediately draws everyone to the kitchen island. As you dip a salty, crunchy tortilla chip into the warm, velvety pool of dip, the contrast between the hot, gooey cheese and the crisp chip creates a perfect bite that is both decadent and deeply satisfying. It is the heart and soul of any casual gathering.
Ingredients
- 1 lb Velveeta cheese, cubed
- 1 can (10 oz) Ro-Tel Diced Tomatoes and Green Chilies
- 1 lb ground beef or spicy sausage
- 1/2 cup diced white onion
- 1 tbsp taco seasoning
- Fresh cilantro for garnish
- Bag of sturdy corn tortilla chips
How to make it
- Start by browning your ground meat in a heavy-bottomed skillet over medium-high heat; use a wooden spoon to break it into very small, uniform crumbles to ensure even distribution in the dip.
- Once the meat is no longer pink, drain the excess fat carefully to prevent the dip from becoming oily, then stir in the diced onions and taco seasoning, cooking for 2-3 minutes until the onions are translucent.
- Reduce the heat to low and add the cubed Velveeta cheese and the entire can of Ro-Tel (do not drain the liquid, as it provides the essential spice and acidity).
- Stir constantly with a silicone spatula, using a gentle folding motion until the cheese is completely melted and the mixture is silky smooth.
- Transfer the hot dip to a ceramic bowl placed on a large wooden board, surrounding it with a generous mountain of tortilla chips.
- Garnish with fresh cilantro and a few extra slices of jalapeño if you crave an extra kick of heat before serving immediately.
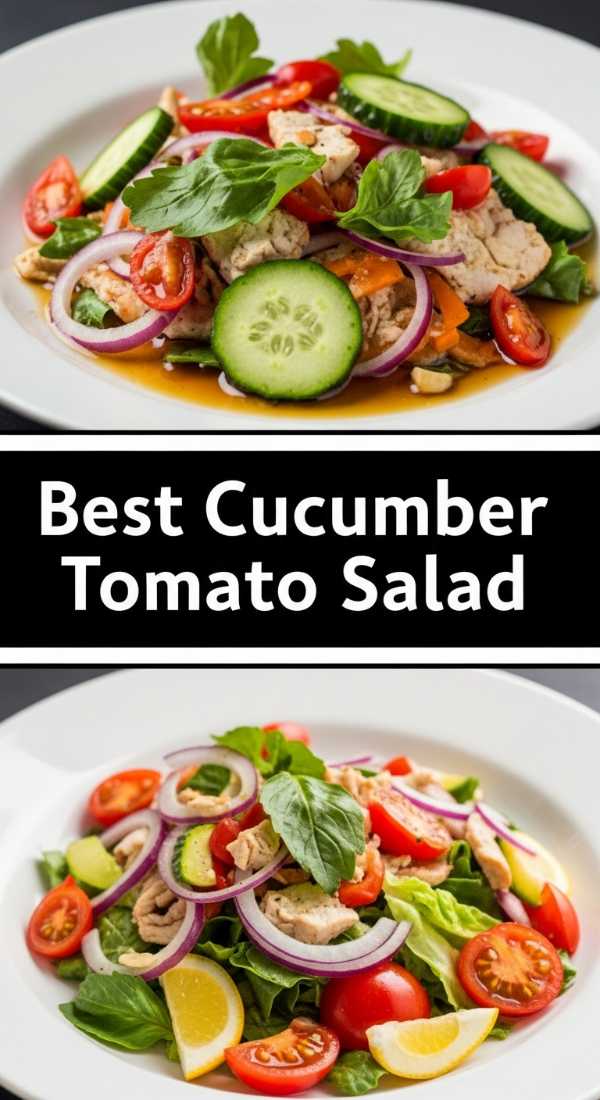
Which Cucumber Tomato Onion Salad Wins?
Why we love this
This salad board is a masterclass in simplicity, highlighting the incredible sweetness of vine-ripened tomatoes and the cool, watery snap of garden-fresh cucumbers. The scent of red wine vinegar and dried oregano transports you to a Mediterranean seaside bistro, where the air is salty and the food is pure. Each bite offers a harmonious balance of acidic bite from the onions and the soothing, fatty richness of a high-quality olive oil drizzle. It’s a clean, vibrant experience that cleanses the palate and leaves you feeling refreshed and light.
Ingredients
- 4 large Roma tomatoes, chopped into chunks
- 2 English cucumbers, sliced and halved
- 1 small red onion, thinly sliced into half-moons
- 1/4 cup extra virgin olive oil
- 2 tbsp red wine vinegar
- 1 tsp dried oregano
- Salt and cracked black pepper to taste
- Fresh basil leaves
How to make it
- Prepare the red onions first by soaking the thin slices in a bowl of ice water for 5 minutes; this removes the harsh ‘burn’ and leaves them crisp and sweet.
- In a small glass jar, combine the olive oil, red wine vinegar, oregano, salt, and pepper; shake vigorously until the dressing is emulsified and slightly thickened.
- Arrange the tomatoes and cucumbers in alternating piles on a large shallow board or platter to allow the dressing to coat every surface.
- Drain the onions and pat them dry before scattering them loosely over the top of the vegetables for a beautiful layered effect.
- Drizzle the dressing slowly over the entire board, ensuring you get into all the nooks and crannies of the chopped vegetables.
- Finish by tearing fresh basil leaves by hand—this prevents bruising and releases more aromatic oils—and scattering them over the salad right before serving.
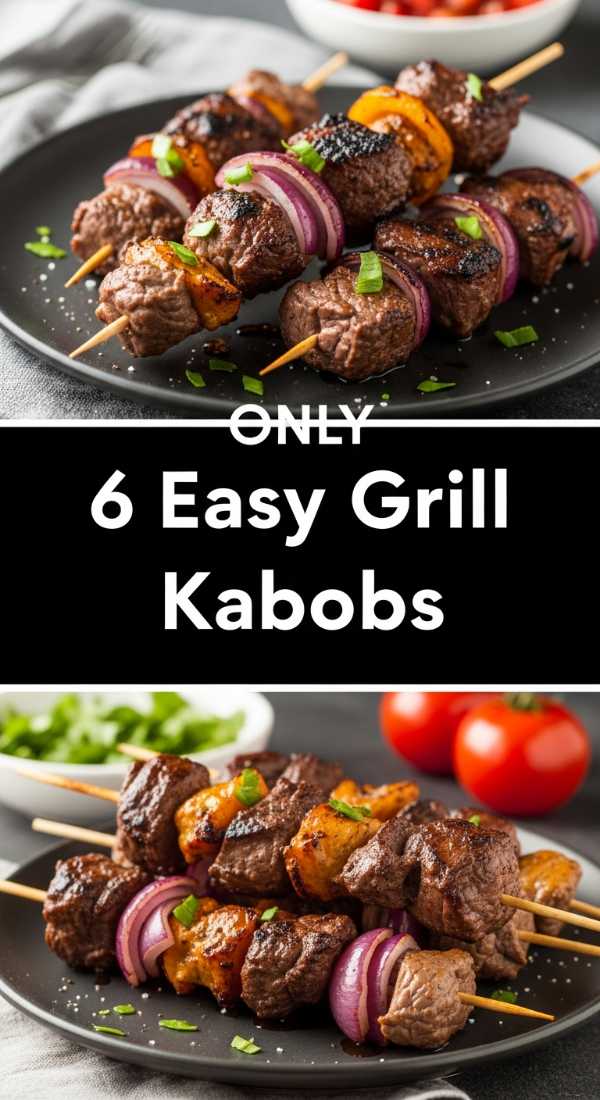
6 Easy Grill Kabob Ideas?
Why we love this
There’s a primal joy in the scent of charred wood and caramelized proteins wafting through the backyard. This kabob board brings that outdoor experience inside, featuring tender morsels of meat and charred vegetables that have been kissed by the flame until they develop a smoky, sweet crust. The texture is a delightful journey: the outer snap of a grilled zucchini followed by the juicy, melt-in-your-mouth tenderness of marinated steak or chicken. It’s a communal feast that encourages guests to grab a skewer and enjoy the rustic, bold flavors of summer.
Ingredients
- Sirloin steak cubes or chicken thighs
- Red and green bell peppers, cut into squares
- Red onion chunks
- Whole button mushrooms
- Pineapple chunks (for a sweet twist)
- Balsamic glaze or BBQ sauce
- Wooden or metal skewers
How to make it
- If using wooden skewers, soak them in water for at least 30 minutes prior to assembly to prevent them from catching fire on the grill.
- Thread the ingredients onto the skewers, alternating between protein and vegetables to ensure that the juices from the meat season the produce as they cook.
- Preheat your grill to a steady medium-high heat (about 400°F); lightly oil the grates using a folded paper towel dipped in vegetable oil held by tongs.
- Place the skewers on the grill and cook for 3-4 minutes per side; you are looking for distinct grill marks and an internal temperature of 145°F for steak or 165°F for chicken.
- During the last 2 minutes of cooking, brush your chosen glaze or sauce over the skewers to allow it to caramelize and become tacky without burning.
- Lay the finished skewers across a large board lined with grilled flatbreads to soak up the juices, and serve with a side of cooling tzatziki sauce.
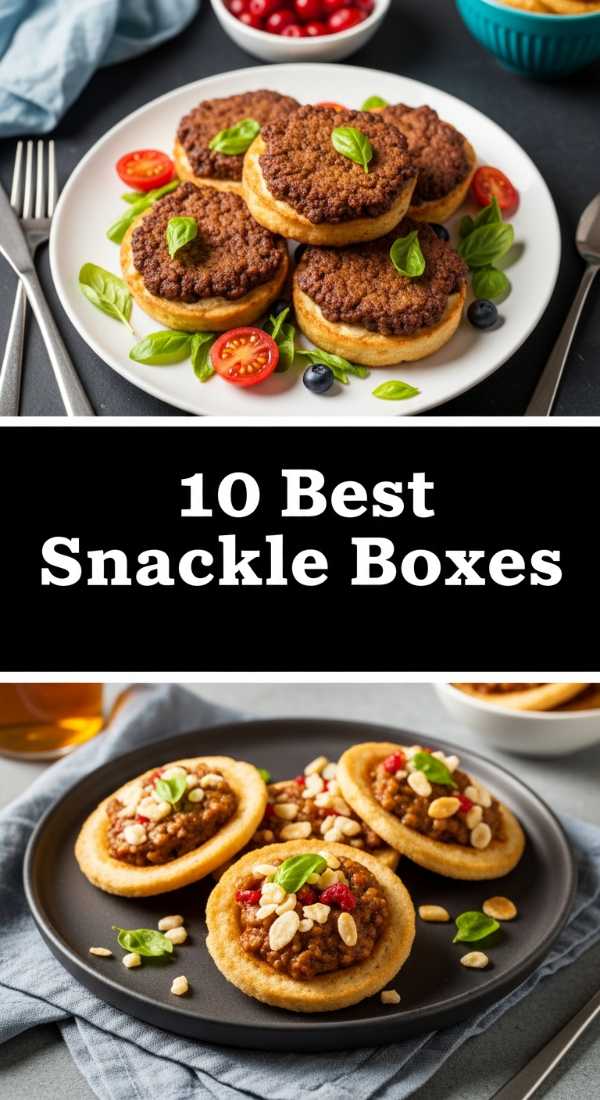
Top 10 Adult Snackle Box Ideas?

Why we love this
The ‘Snackle Box’ is the ultimate viral trend for a reason—it’s a portable treasure chest of flavors tailored for the sophisticated palate. Opening the lid reveals an organized grid of salty, sweet, creamy, and crunchy elements that make you feel like a kid again, but with grown-up ingredients like sharp aged cheddar and Marcona almonds. The tactile experience of picking through the different compartments, pairing a dried apricot with a slice of prosciutto, is incredibly meditative. It’s the perfect companion for a boat day, a picnic, or a long road trip where you want a little bit of everything.
Ingredients
- A multi-compartment plastic organizer box (clean and food-safe)
- Cubed sharp cheddar and brie wedges
- Prosciutto or salami rosettes
- Marcona almonds and pistachios
- Dried apricots and cranberries
- Fresh grapes and berries
- Gourmet crackers and pretzel thins
- Dark chocolate squares
How to make it
- Thoroughly wash and dry your multi-compartment box; ensure there is no moisture left in the corners to keep your crackers from getting soft.
- Start by filling the larger central compartments with your ‘anchors’: the cheeses and the meats, folding the prosciutto into small ribbons to save space.
- Use the smaller perimeter compartments for ‘loose’ items like nuts and dried fruits, which act as colorful fillers.
- Place the crackers in a separate, dry compartment or keep them in a small reusable bag to maintain their maximum crunch until you are ready to eat.
- Group items by flavor profile—place the dark chocolate near the dried fruit and the salty nuts near the hard cheeses for a cohesive tasting experience.
- Close the lid tight and keep it in a cool place; the beauty of this board is its portability and the surprise of variety in every section.
Best Hummingbird Nectar Recipe Found?
Why we love this
While not a board for us, creating a ‘Nature’s Board’ for our feathered friends is a lifestyle staple that brings life and movement to any garden. The sight of a shimmering hummingbird darting toward a feeder filled with homemade nectar is pure magic. This simple mixture of sugar and water mimics the natural sucrose found in flowers, providing the high-energy fuel these tiny creatures need. Watching them hover and sip against a backdrop of summer blooms creates a peaceful, zen-like atmosphere in your outdoor space, connecting you directly to the rhythms of nature.
Ingredients
- 1 cup white granulated sugar
- 4 cups filtered water
- A clean hummingbird feeder
- No red dye (it’s harmful to the birds!)
How to make it
- In a medium saucepan, combine the 4 cups of filtered water and 1 cup of granulated sugar over medium heat.
- Stir the mixture constantly until the sugar is completely dissolved; you do not need to bring it to a rolling boil, just a gentle simmer to ensure a clear, consistent syrup.
- Let the mixture cool completely to room temperature; this is crucial, as hot liquid can warp plastic feeders and harm the birds.
- Clean your hummingbird feeder thoroughly with hot water and a bottle brush, avoiding soap which can leave a residue that birds dislike.
- Fill the feeder with the cooled nectar and hang it in a shaded area to prevent the sugar from fermenting too quickly in the summer heat.
- Change the nectar every 3-5 days (more often in extreme heat) to keep it fresh and safe for your backyard visitors.
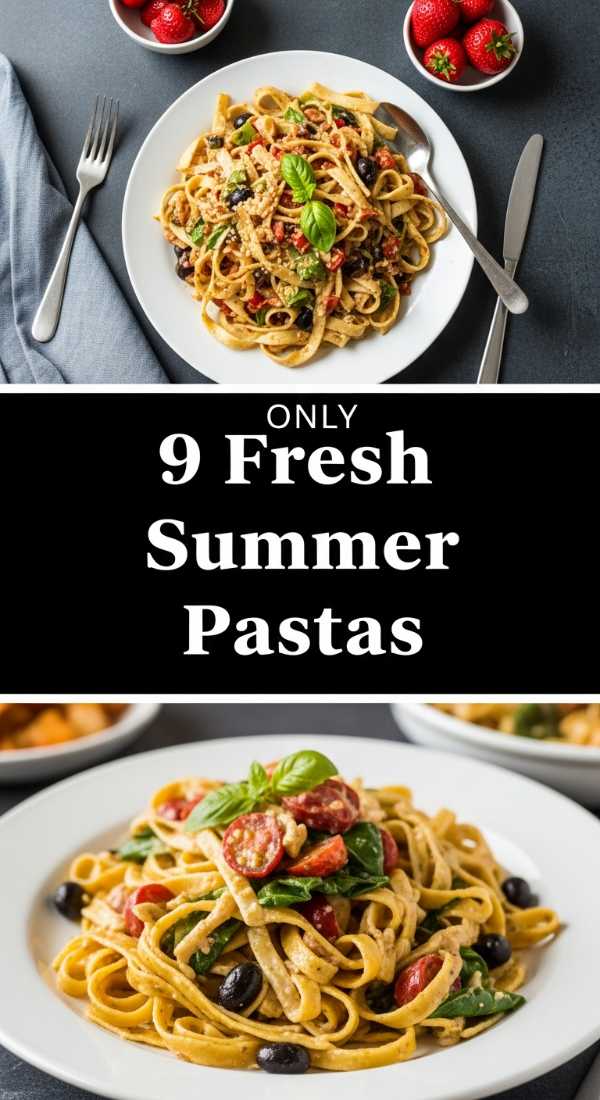
9 Healthy Summer Pasta Recipes?

Why we love this
This pasta board celebrates the lightness of summer, moving away from heavy creams and toward the vibrant, citrusy notes of lemon and garlic. The scent of toasted pine nuts and fresh basil fills the kitchen, promising a meal that is both filling and incredibly fresh. The texture of al dente pasta tossed in a light, silken olive oil sauce, punctuated by the burst of roasted cherry tomatoes, creates a sophisticated mouthfeel. It’s the kind of dish that tastes like a warm breeze—complex, comforting, and quintessentially summer.
Ingredients
- Whole wheat or chickpea fusilli pasta
- Fresh lemon zest and juice
- Extra virgin olive oil
- Blistered cherry tomatoes
- Baby spinach leaves
- Toasted pine nuts
- Shaved parmesan cheese
- Fresh cracked black pepper
How to make it
- Bring a large pot of salted water to a boil; cook your pasta until it is just ‘al dente’ (usually 1-2 minutes less than the package directions) to ensure it holds its shape on the board.
- While the pasta cooks, sauté cherry tomatoes in a pan with olive oil and garlic over medium heat until their skins begin to burst and release their sweet juices.
- Reserve 1/2 cup of the starchy pasta water before draining; this is the secret to a smooth, clinging sauce.
- Toss the hot pasta with the tomatoes, baby spinach, lemon juice, and the reserved pasta water, stirring until the spinach just begins to wilt.
- Spread the pasta out on a large, flat board or decorative platter, allowing the steam to dissipate slightly so the ingredients don’t become mushy.
- Finish the board by generously topping it with toasted pine nuts, lemon zest, and heaps of shaved parmesan for a salty, nutty finish.
Top 8 Fourth Of July Party Ideas?

Why we love this
The Fourth of July board is an explosion of patriotic color and nostalgic flavors that instantly sets a festive mood. The deep indigo of blueberries against the bright crimson of strawberries and the stark white of mini marshmallows creates a visual ‘flag’ that is as delicious as it is beautiful. There’s a certain joy in the sweet, juicy burst of seasonal berries paired with the soft, airy texture of angel food cake cubes. It captures the essence of an American summer—carefree, bold, and perfect for sharing while waiting for the fireworks to start.
Ingredients
- Fresh strawberries, halved
- Blueberries and blackberries
- Mini marshmallows
- Angel food cake, cubed
- Yogurt-covered pretzels
- White chocolate chips
- Small American flags for decor
How to make it
- Start by choosing a large rectangular board to mimic the shape of a flag; this provides the best canvas for your patriotic arrangement.
- In the top left corner, create a ‘star’ section by mounding the blueberries and blackberries in a neat square or rectangle.
- Create the ‘stripes’ by alternating horizontal rows of red fruits (strawberries) and white items (marshmallows and angel food cake cubes).
- Ensure the rows are tightly packed to create distinct color lines that pop against the wood of the board.
- Tuck yogurt-covered pretzels into any small gaps to add a salty-sweet crunch and reinforce the white ‘stripe’ sections.
- Add a few decorative mini flags and serve with a side of whipped cream or a honey-yogurt dip for the ultimate festive grazing experience.
Which Summer Dessert Recipe Is Best?
Why we love this
The ultimate summer dessert board is all about the ‘build-your-own’ experience, focusing on the decadence of s’mores but with a gourmet twist. The scent of toasted graham crackers and melting dark chocolate is a universal language of happiness. The texture is a play of opposites: the cold, crisp snap of a chocolate bar against the warm, gooey fluff of a toasted marshmallow. It’s an interactive, messy, and wonderful way to end a meal, encouraging everyone to get their hands a little sticky while laughing around a fire pit or a tabletop roaster.
Ingredients
- Gourmet graham crackers (honey and chocolate)
- Large marshmallows
- Assorted chocolate bars (dark, milk, and white)
- Sliced bananas and strawberries
- Peanut butter or hazelnut spread
- Sea salt flakes
How to make it
- Arrange the graham crackers in a fanned-out pattern around the edges of the board to create an easy-to-grab border.
- Place different varieties of chocolate in the center, breaking some into squares to show off the different textures and fillings.
- Fill small ramekins with peanut butter and hazelnut spread, placing them strategically for dipping or spreading.
- Add the fresh fruit slices in colorful clusters; the acidity of the berries perfectly cuts through the richness of the chocolate.
- If serving indoors, pile the marshmallows in a large bowl with long bamboo skewers nearby so guests can toast them over a controlled flame.
- Sprinkle a tiny bit of sea salt over the chocolate sections to enhance the sweetness and provide a professional, ‘viral’ flavor profile.
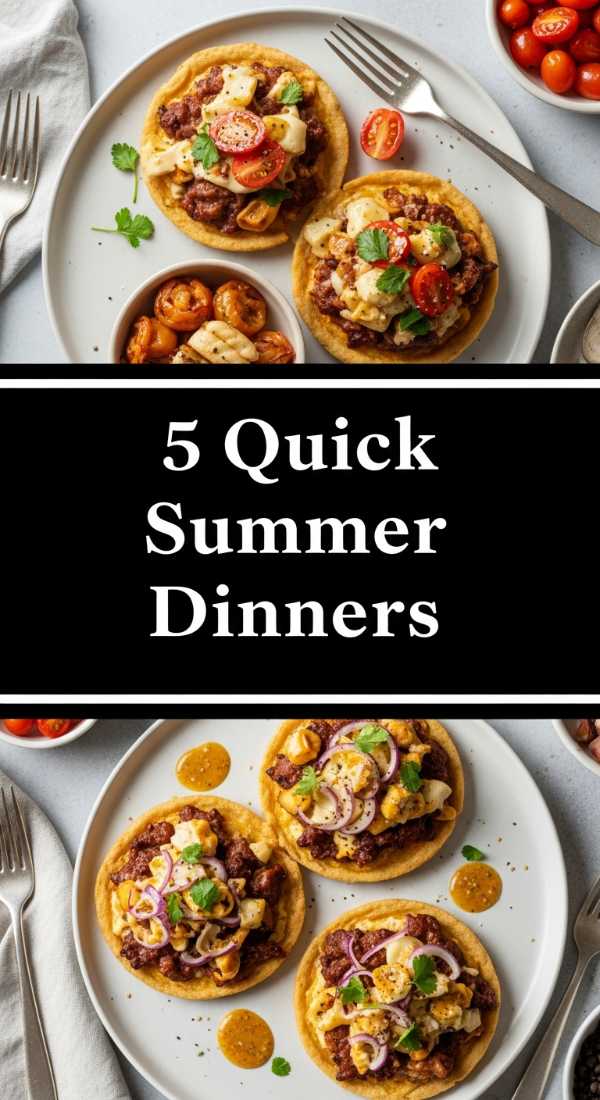
5 Best Quick Summer Dinners?
[IMAGE_10]
Why we love this
This dinner board is the answer to those ‘too hot to cook’ nights, featuring a Flatbread Pizza Board that is as versatile as it is fast. The aroma of baked naan and warm pesto is comforting yet light enough for a humid evening. Each bite of the thin, crispy crust topped with creamy goat cheese and balsamic glaze feels like a high-end flatbread from a trendy bistro. It’s a low-stress way to feed a family, allowing everyone to customize their section of the board with their favorite toppings, making dinner feel like a creative activity rather than a chore.
Ingredients
- Pre-baked naan or flatbreads
- Basil pesto or sun-dried tomato spread
- Fresh mozzarella pearls or goat cheese
- Prosciutto or salami
- Arugula tossed in lemon juice
- Balsamic glaze for drizzling
How to make it
- Preheat your oven to 400°F and place the flatbreads directly on the rack for 3-5 minutes until they are just starting to crisp but are still pliable.
- Spread a thin, even layer of pesto over the warm bread, leaving a small border for the ‘crust’.
- Top with the cheese pearls and meat, then return to the oven for another 2 minutes until the cheese is soft and just beginning to melt.
- Once out of the oven, slide the flatbreads onto a large cutting board and slice them into manageable triangles or strips.
- Mound the lemon-dressed arugula in the center of the board; its peppery bite is the perfect topper for the warm flatbreads.
- Finish with a dramatic drizzle of balsamic glaze across the entire board, ensuring every piece gets a touch of that sweet, acidic finish.
Wrapping Up Your Board Journey
Whether you’re crafting a Snackle Box for a road trip or a patriotic spread for the Fourth, these viral food boards are all about bringing joy back into the kitchen. They remind us that food doesn’t have to be complicated to be beautiful or delicious. By focusing on fresh ingredients and a bit of creative assembly, you can turn any meal into an unforgettable experience. Now, go grab your favorite board and start creating!
Frequently Asked Questions
How do I keep my food boards fresh during outdoor parties? To keep boards fresh, place them on a larger tray filled with ice, especially for meats and cheeses. Keep them in the shade and replenish small amounts frequently rather than putting everything out at once.
What is the best type of board to use for food? Hardwoods like maple, walnut, or cherry are best because they are durable and less porous. Ensure your board is food-safe and regularly seasoned with mineral oil.
Can I make these boards ahead of time? Most boards can be prepped 1-2 hours in advance. Keep them tightly wrapped in the fridge, but add crackers, nuts, and bread just before serving to maintain their crunch.