

We’ve all been there—scrolling through our feeds and stopping dead in our tracks at those stunning, perfectly curated food boards that look like they belong in a high-end editorial. There is something so deeply satisfying about a well-arranged spread; it’s a feast for the eyes before it ever touches your palate. In our busy lives, these boards have become the ultimate cheat code for hosting because they offer that ‘wow factor’ without requiring you to be a professional chef. They represent the beauty of gathering, the joy of grazing, and the simple pleasure of sharing small bites with the people you love most.
Today, I’m sharing my secrets for the viral 10-minute food boards everyone is obsessed with. Whether you’re celebrating a graduate, hosting a summer brunch, or just trying to elevate your Sunday afternoon, these concepts are designed to be approachable yet breathtaking. We are moving beyond just cheese and crackers into a world of vibrant fruit jams, perfectly iced cookies, and seasonal pies that turn your table into a masterpiece. Let’s dive into these viral sensations and get you ready to create something truly unforgettable.
How to style graduation cakes?
Why we love this
There is a profound sense of pride that comes with a perfectly styled graduation cake, acting as the centerpiece for one of life’s biggest milestones. We love this because it blends elegance with achievement, using textures like smooth fondant and shimmering gold leaf to catch the light. The aroma of rich vanilla bean or deep chocolate wafting from the cake board creates an immediate sense of celebration. When you slice into a beautifully styled cake, the contrast between the crisp outer decorations and the moist, tender crumb inside provides a sensory experience that feels both luxurious and nostalgic.
Ingredients
- Pre-baked multi-layer cake
- Silk smooth Swiss meringue buttercream
- Edible gold leaf or metallic luster dust
- Miniature graduation cap toppers
- Fresh organic flowers (roses or peonies)
- Pearl sprinkles or metallic dragees
How to make it
- Begin by applying a ‘crumb coat’ of buttercream to your chilled cake layers using an offset spatula to trap any loose crumbs, then refrigerate for 20 minutes until firm.
- Apply the final layer of frosting, using a bench scraper held at a 45-degree angle against the turntable to create a perfectly smooth, sharp-edged finish.
- Gently press edible gold leaf onto the sides of the cake using a dry, soft-bristled food-safe brush, ensuring you don’t touch it with your fingers as it will stick to your skin.
- Arrange your fresh flowers on one side of the top, ensuring the stems are wrapped in floral tape for food safety, and nestle a miniature mortarboard topper among the blooms.
- Finish the base of the cake with a delicate border of pearl sprinkles, placing them individually with tweezers for a refined, high-end look.
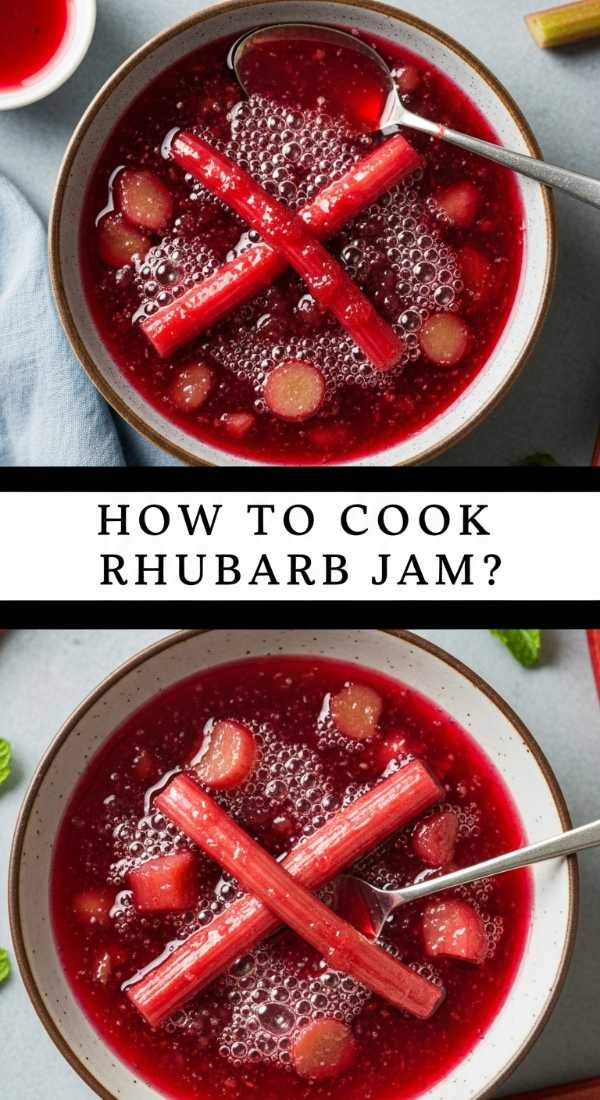
How to cook rhubarb jam?
Why we love this
Rhubarb jam is the unsung hero of the viral food board, offering a sophisticated tartness that cuts through rich cheeses and buttery breads. We love it for its stunning ruby-pink hue and the way it transforms from tough, fibrous stalks into a glossy, jewel-like preserve. As it simmers on the stove, your kitchen fills with a bright, zingy aroma that signals the arrival of spring. The texture is thick and luscious, with just enough fruit structure to feel artisanal and homemade, making it the perfect conversational piece for your next spread.
Ingredients
- 4 cups fresh rhubarb, chopped into 1/2 inch pieces
- 1 1/2 cups granulated sugar
- 1 tablespoon fresh lemon juice
- 1 teaspoon lemon zest
- 1/2 teaspoon pure vanilla bean paste
How to make it
- In a heavy-bottomed stainless steel saucepan, combine the chopped rhubarb, sugar, lemon juice, and zest, stirring well to coat the fruit.
- Let the mixture sit at room temperature for about 30 minutes; this process, called maceration, allows the sugar to draw out the natural juices from the rhubarb.
- Place the pan over medium heat and bring the mixture to a gentle boil, stirring frequently with a wooden spoon to prevent the sugar from scorching on the bottom.
- Reduce the heat to low and simmer for 20-25 minutes, or until the rhubarb has completely broken down and the liquid has thickened to a syrupy consistency that coats the back of a spoon.
- Stir in the vanilla bean paste during the last minute of cooking, then remove from heat and let cool completely before transferring to glass jars for the fridge.
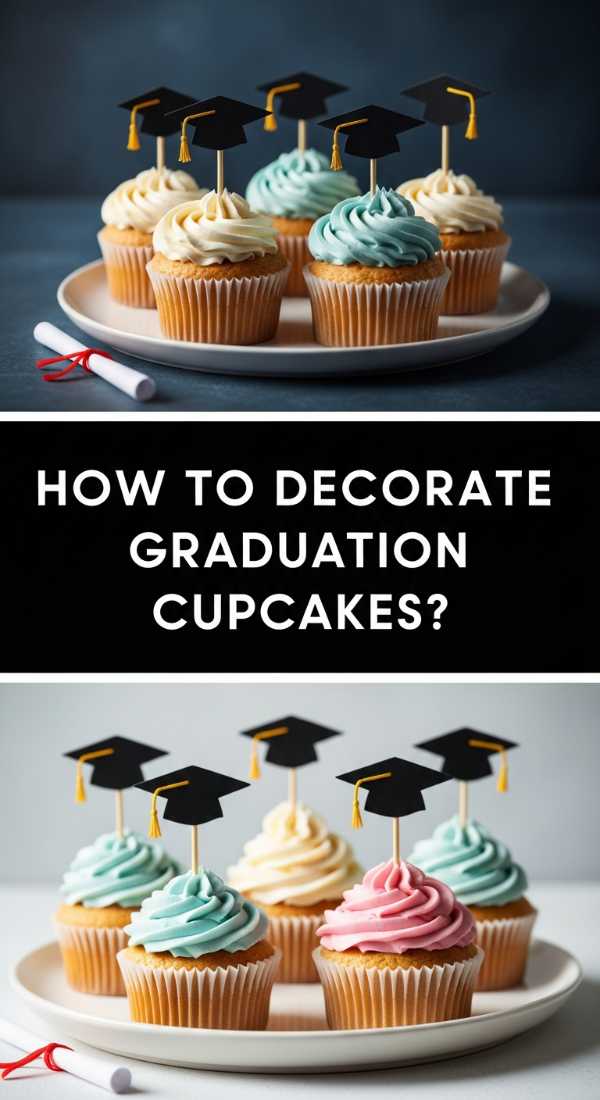
How to decorate graduation cupcakes?
Why we love this
Cupcakes are the perfect bite-sized addition to any board, and decorating them for graduation adds a personalized touch that guests adore. We love the playfulness of turning a simple sweet treat into a miniature academic symbol, complete with tassels and caps. The sight of a dozen uniform cupcakes with swirling, peaked frosting creates a rhythmic beauty on the board. The tactile joy of biting through a soft, sugary decoration into a fluffy sponge makes these a viral favorite for both their aesthetic appeal and their effortless portability.
Ingredients
- Freshly baked cupcakes in liners
- Stiff-consistency buttercream frosting
- Chocolate squares (Ghirardelli or similar)
- Miniature peanut butter cups (unwrapped)
- Melted chocolate or royal icing
- Sour belt candy or fruit leather for tassels
How to make it
- Pipe a flat, circular swirl of buttercream onto each cupcake using a large round tip to create a stable base for your ‘cap.’
- Place an upside-down miniature peanut butter cup in the center of the frosting swirl to act as the base of the graduation mortarboard.
- Apply a small dot of melted chocolate to the top of the peanut butter cup and press a chocolate square firmly onto it, ensuring it sits level.
- Cut a thin strip of sour belt candy or fruit leather, fraying the end with scissors to resemble a tassel, and use a tiny drop of frosting to adhere it to the center of the chocolate square.
- Add a tiny round sprinkle or a dot of icing to the center of the square to represent the button holding the tassel in place.
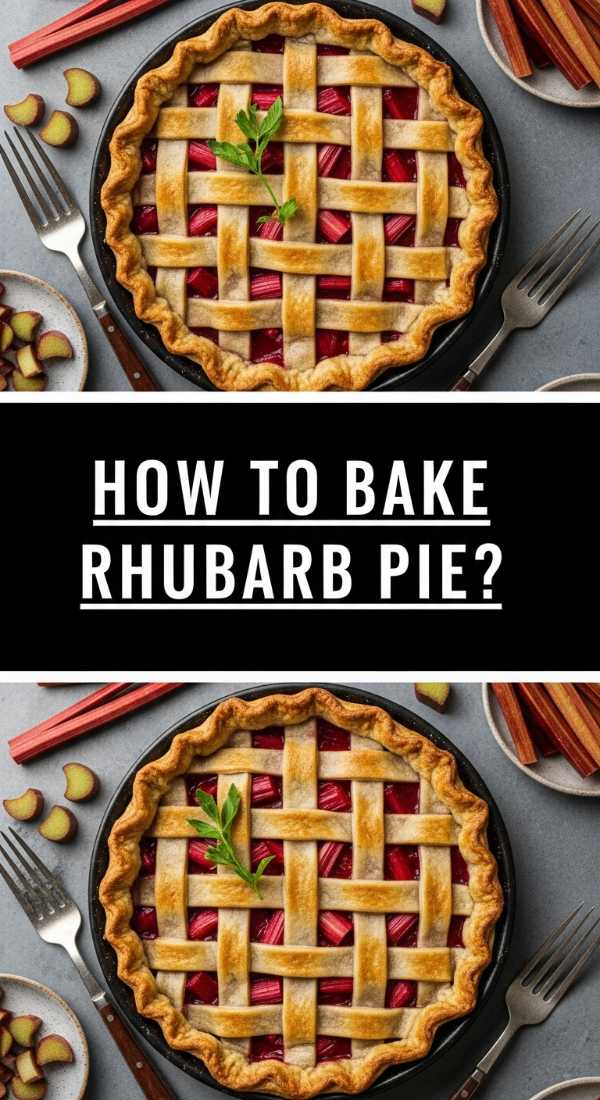
How to bake rhubarb pie?

Why we love this
There is something deeply comforting about a rhubarb pie, with its rustic, golden-brown lattice crust and the bubbling, crimson filling peeking through. We love the dramatic contrast between the flaky, salty pastry and the sharp, acidic punch of the rhubarb, mellowed slightly by sugar. When it comes out of the oven, the aroma of toasted butter and cooked fruit is absolutely intoxicating. It serves as a stunning anchor for a dessert board, looking just as good sliced into wedges as it does as a whole, steaming centerpiece.
Ingredients
- Double pie crust (homemade or store-bought)
- 5 cups rhubarb, sliced into 1-inch pieces
- 1 1/4 cups sugar
- 1/3 cup cornstarch (for thickening)
- 1 tablespoon cold butter, cubed
- 1 egg (for egg wash) and coarse sugar for topping
How to make it
- Preheat your oven to 400°F (200°C) and roll out your bottom crust, fitting it into a 9-inch pie plate and trimming the edges to a half-inch overhang.
- In a large bowl, toss the rhubarb with sugar and cornstarch until evenly coated, then pour the mixture into the prepared crust and dot the top with the small cubes of butter.
- Roll out the second crust and cut into 1-inch strips, weaving them over the top of the rhubarb in a lattice pattern, then crimp the edges of the bottom and top crusts together to seal.
- Whisk the egg with a splash of water and brush the lattice generously, then sprinkle with coarse sugar to provide a professional, glittering crunch.
- Bake for 45-55 minutes, covering the edges with foil if they brown too quickly, until the filling is thick and bubbling and the crust is a deep golden brown.
How to make coffee drinks?

Why we love this
A viral board isn’t complete without the perfect beverage pairing, and artisanal coffee drinks bring a cozy, caffeinated energy to any gathering. We love the visual appeal of layered lattes—dark espresso bleeding into creamy white milk—and the sophisticated aroma of freshly ground beans. Whether it’s a cold brew with a thick foam cap or a warm, frothy cappuccino, coffee drinks add a level of hospitality that makes guests feel pampered. The ritual of pouring and stirring is as much a part of the experience as the drink itself.
Ingredients
- High-quality espresso beans or strong cold brew concentrate
- Whole milk or oat milk (for best foaming)
- Flavored syrups (vanilla, lavender, or salted caramel)
- Ice cubes (for cold versions)
- Cinnamon or cocoa powder for dusting
How to make it
- For a layered iced latte, fill a tall glass with ice and pour in 3/4 cup of your choice of milk mixed with 1 tablespoon of flavored syrup.
- Slowly pour 2 shots of hot espresso or 1/4 cup of cold brew concentrate over the back of a spoon into the glass; this slows the liquid and creates a beautiful ombré effect.
- If making a hot drink, use a milk frother to heat and aerate the milk until it reaches 150°F and has a thick, micro-foam texture.
- Pour the steamed milk into your espresso, holding back the foam with a spoon, then dollop the foam on top at the very end.
- Finish with a light dusting of cinnamon or a drizzle of caramel, served immediately while the temperature and textures are at their peak.
How to ice graduation cookies?
Why we love this
Graduation cookies are like edible art pieces that tell a story of success. We love the smooth, porcelain-like finish of royal icing and the way it can be customized to match school colors, making every board feel bespoke. The satisfying ‘snap’ of a well-baked sugar cookie followed by the melt-in-your-mouth sweetness of the icing is a textural delight. Using these as accents on a food board provides pops of color and intricate detail that always get people talking and reaching for their cameras.
Ingredients
- Baked sugar cookies (diploma and gown shapes)
- Royal icing (in flood and piping consistencies)
- Gel food coloring (school colors)
- Scribe tool or toothpick
- Fine-tip piping bags
How to make it
- Outline your cookie with ‘piping consistency’ icing (think toothpaste thickness) using a small round tip to create a border that will hold the rest of the icing in place.
- Immediately fill the center with ‘flood consistency’ icing (think honey thickness), using a scribe tool to pop any air bubbles and push the icing into the corners.
- For a ‘wet-on-wet’ design like a diploma ribbon, pipe a line of contrasting color into the wet flood icing so it sinks in and creates a perfectly flat, seamless look.
- Let the base layer dry for at least 4-6 hours (or overnight) in a cool, dry place until the surface is hard to the touch.
- Use your stiff piping icing to add ‘over-piped’ details like the graduate’s name, the year, or the texture of a tassel to give the cookie dimension and professional flair.
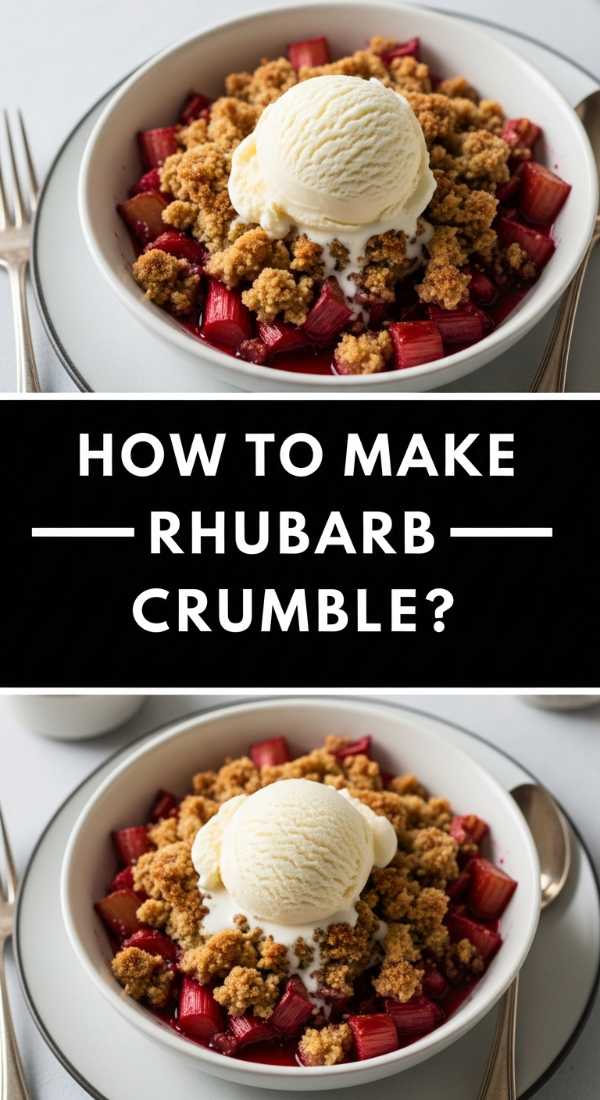
How to make rhubarb crumble?
Why we love this
Rhubarb crumble is the ultimate ‘low-effort, high-reward’ dessert that brings a rustic, farmhouse vibe to your viral food board. We love the messy, beautiful nature of the golden oat topping clumping together over the bubbling, bright red fruit. It’s a sensory explosion: the sound of the crunch, the smell of toasted cinnamon, and the warmth of the fruit against cold vanilla ice cream. It’s a less formal alternative to pie that encourages people to dig in and enjoy the simple, home-cooked flavors of the season.
Ingredients
- 6 cups chopped rhubarb
- 1 cup brown sugar (divided)
- 1 1/2 cups rolled oats
- 1 cup all-purpose flour
- 3/4 cup cold unsalted butter, cut into cubes
- 1 teaspoon ground cinnamon
How to make it
- Preheat your oven to 375°F (190°C) and grease a 9×13 inch baking dish with butter to ensure the fruit doesn’t stick.
- Toss the rhubarb with 1/2 cup of brown sugar in the dish, spreading it out into an even layer so it cooks consistently.
- In a separate bowl, combine the oats, flour, the remaining 1/2 cup of brown sugar, and cinnamon, stirring to mix the dry ingredients thoroughly.
- Use your fingers or a pastry cutter to work the cold butter cubes into the oat mixture until it forms large, pea-sized crumbs that hold together when squeezed.
- Sprinkle the crumble topping evenly over the rhubarb and bake for 35-40 minutes until the topping is a deep golden brown and the rhubarb juices are bubbling up around the edges.
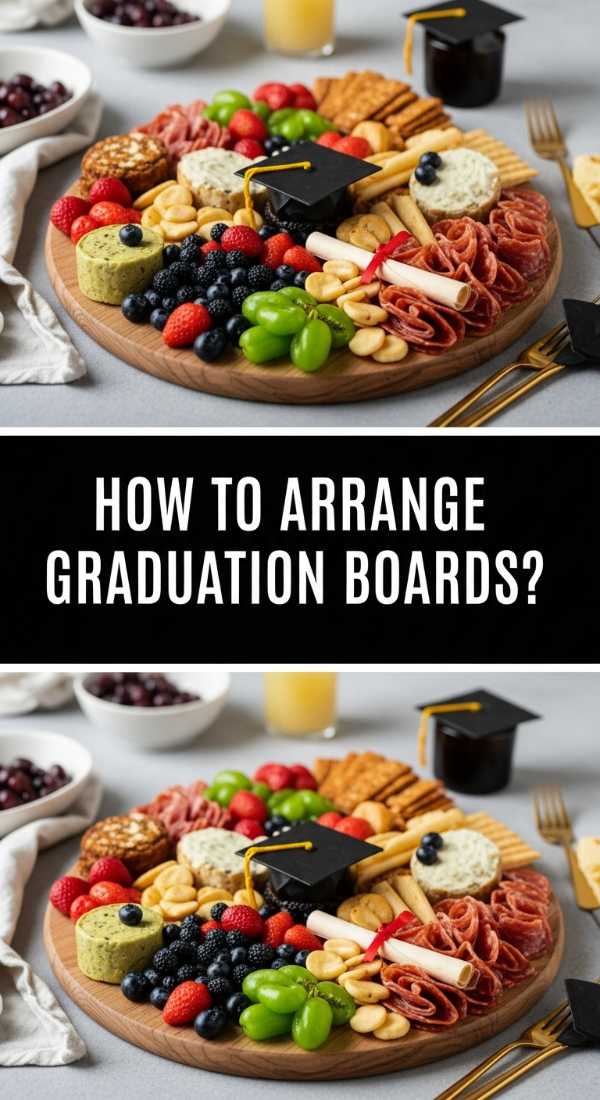
How to arrange graduation boards?

Why we love this
Arranging a graduation board is where your inner artist truly comes to life. We love this because it’s a celebration of abundance, combining savory snacks, sweet treats, and themed decorations into one cohesive display. There’s a psychological joy in seeing a variety of colors and shapes neatly packed together; it suggests a generosity of spirit. The board becomes a focal point for the party, encouraging guests to mingle and pick their favorite items while admiring the clever graduation-themed details you’ve tucked throughout.
Ingredients
- Large wooden board or slate platter
- Assorted cheeses and charcuterie
- Graduation-themed cookies and cupcakes
- Fruit (grapes, berries, and sliced melon)
- Nuts and olives for filling gaps
- Decorative elements like small diplomas (rolled napkins)
How to make it
- Start by placing your largest items first—like small bowls for dips or a centerpiece cake—to create ‘anchors’ on the board.
- Arrange cheeses and meats in flowing ‘rivers’ or fans around the anchors, creating movement that guides the eye across the display.
- Cluster your themed sweets, like iced graduation cookies or decorated cupcakes, in specific zones to create ‘sweet spots’ among the savory elements.
- Fill in larger empty spaces with bunches of grapes or sliced fruit, ensuring you vary the colors to keep the board visually dynamic and appetizing.
- Use the ‘fill the gaps’ method: tuck small nuts, berries, or sprigs of rosemary into every tiny remaining hole until the board looks lush, overflowing, and incredibly abundant.
How to design summer cookies?
Why we love this
Summer cookies capture the essence of sunshine and relaxation in a single bite. We love them for their bright, citrusy flavors and their whimsical designs—think watermelons, suns, and flip-flops. These cookies bring a lighthearted, playful energy to any food board, making them perfect for outdoor gatherings. The vibrant colors of the icing and the addition of fresh lemon or lime zest in the dough create a refreshing taste profile that is a welcome departure from heavier winter sweets.
Ingredients
- Lemon or lime-infused sugar cookie dough
- Royal icing in neon or pastel summer shades
- Edible glitter or sanding sugar
- Fine-tipped edible ink markers
- Star and sun-shaped cookie cutters
How to make it
- Roll out your chilled citrus dough to a 1/4 inch thickness and cut into summer-themed shapes, then bake until the edges are just barely starting to turn golden.
- Flood your cookies with bright, summery colors like turquoise, coral, and sunshine yellow, allowing them to dry completely for at least 6 hours.
- Once dry, use an edible ink marker to add fine details like ‘sunglasses’ on a sun shape or ‘seeds’ on a watermelon slice for a clean, graphic look.
- Apply a thin layer of clear corn syrup to specific areas of the icing and sprinkle with sanding sugar to create the texture of glistening sand or sparkling water.
- For a 3D effect, pipe small ‘dollops’ of stiff white icing onto the edges of a wave-shaped cookie to mimic the foam of the ocean.
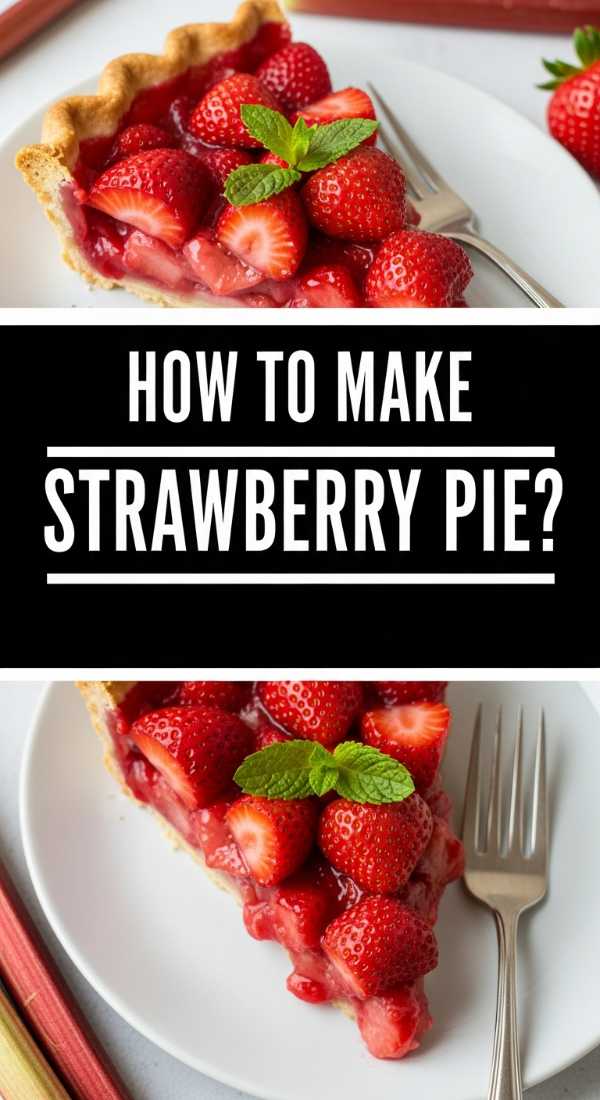
How to make strawberry pie?
[IMAGE_10]
Why we love this
Nothing says ‘summer viral sensation’ quite like a fresh strawberry pie. We love it for its glossy, vibrant red glaze and the way it showcases the natural beauty of whole, sun-ripened berries. It’s a pure celebration of the season, offering a sweet, juicy explosion in every mouthful. The aroma of fresh strawberries mixed with a hint of vanilla and a buttery crust is nostalgic and irresistible. It looks stunning on a board, especially when topped with a cloud of whipped cream, making it the ultimate crowd-pleaser.
Ingredients
- Pre-baked 9-inch pie shell
- 6 cups fresh strawberries (cleaned and hulled)
- 1 cup sugar
- 3 tablespoons cornstarch
- 1 cup water
- 1/2 package of strawberry-flavored gelatin (Jell-O)
How to make it
- Place your cleaned, whole strawberries (or halves if they are very large) into the pre-baked and cooled pie shell, arranging them pointed-side up for a professional look.
- In a small saucepan, whisk together the sugar, cornstarch, and water until smooth, then cook over medium heat, stirring constantly until the mixture thickens and becomes clear.
- Remove the saucepan from the heat and stir in the strawberry gelatin powder until it is completely dissolved and the mixture is a brilliant, translucent red.
- Slowly pour the warm glaze over the strawberries in the pie shell, ensuring each berry is thoroughly coated and the gaps are filled with the syrup.
- Refrigerate the pie for at least 3-4 hours until the glaze is completely set and firm, then serve with a dollop of fresh whipped cream.
Conclusion
Creating these viral food boards is about more than just the food; it’s about the creativity and the connection that happens when we share something beautiful. From the tart zip of rhubarb jam to the intricate details on a graduation cookie, every element we’ve discussed today adds a layer of magic to your table. Remember, there are no mistakes in board-making—only opportunities to add more color, more texture, and more love. So grab your favorite platter, pick a few of these recipes, and start building your own masterpiece. Your guests (and your feed) will thank you!