
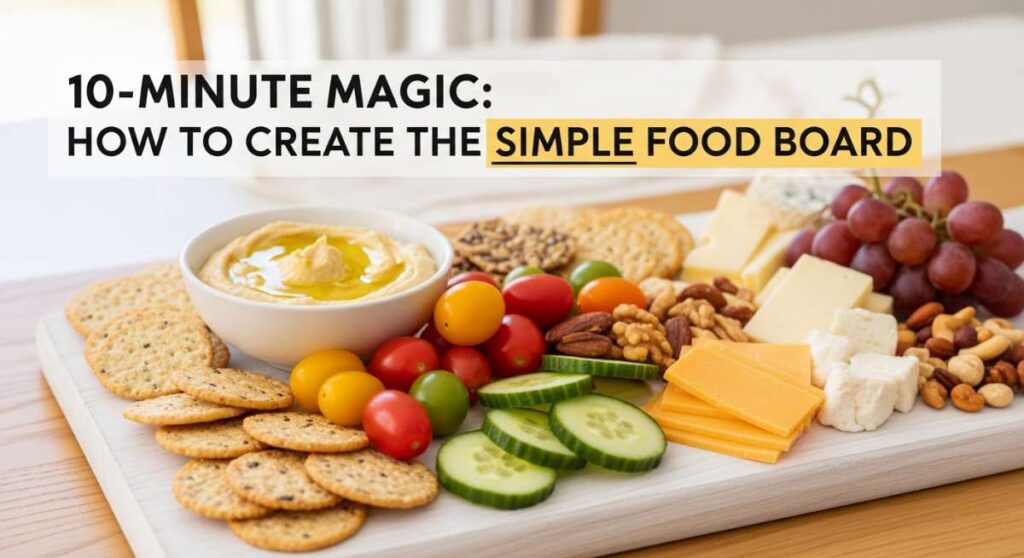
10-Minute Magic: How to Create the Viral Simple Food Board
There is something inherently magical about the way a gathering transforms the moment a beautifully styled food board hits the table. We’ve all seen them—those effortlessly chic, sprawling canvases of color and texture that seem to dominate our social media feeds. They whisper of slow Sunday afternoons, clinking glasses of crisp rosé, and the kind of intimate conversation that only happens when people are leaning in to grab a slice of salty prosciutto or a smudge of creamy brie. For the longest time, I thought these required a professional stylist, but the secret is much simpler: it’s all about the art of the assembly.
Creating a viral-worthy board isn’t about spending hours in the kitchen or having a culinary degree; it’s about embracing the beauty of high-quality, simple ingredients and arranging them with intention. It’s a love letter to your guests, a tactile experience that engages every sense from the moment they walk through the door. Today, I’m pulling back the curtain on how you can whip up a stunning, mouth-watering board in just ten minutes, turning a standard Tuesday night or a planned Saturday brunch into an unforgettable event that feels like luxury on a wooden plank.
How to choose the perfect foundation?
Why we love this
The foundation of your board is the stage upon which your culinary theater performs, and choosing the right material sets the entire mood for your evening. A heavy, dark walnut board offers a rustic, grounded warmth that feels cozy and historic, while a sleek white marble slab provides a cool, sophisticated edge that makes vibrant fruits and cheeses pop with editorial clarity. When you run your hand over the smooth grain or the chilled stone, you feel the weight of the occasion, creating a sensory anchor that makes the food feel more substantial and curated. It is the silent narrator of your food story, providing the texture and backdrop that turns a collection of snacks into a cohesive masterpiece.
Ingredients
- A large wooden cutting board (Walnut or Olive wood)
- A marble pastry slab or slate board
- Food-grade mineral oil
- Microfiber cloth
How to make it
- Select a board that is at least 15-20 inches in length to ensure you have enough surface area to create layers without overcrowding.
- Inspect the surface for any lingering scents from previous uses; if it smells like onions or garlic, rub half a lemon over it and rinse with cool water to neutralize.
- Dry the board completely using a microfiber cloth to prevent any moisture from seeping into your crackers or bread later on.
- Apply a very thin layer of food-grade mineral oil to the wood to give it a rich, deep luster that makes the colors of your food stand out vividly.
- Place the board in its final serving location before you start building, as a fully loaded board can be heavy and difficult to move without disturbing your intricate styling.
How to select a balanced cheese trio?

Why we love this
Cheese is the undisputed soul of any food board, providing a decadent range of textures that travel from silky and spreadable to sharp and crystalline. There is an incredible joy in the contrast of a bloomy-rind brie that oozes across the board at room temperature, paired against the rugged, salty bite of an aged cheddar that crumbles under the slightest pressure. Each bite offers a different aroma—from the earthy, mushroomy notes of a soft goat cheese to the nutty, sweet undertones of a firm alpine cheese. It’s this diversity that keeps your palate engaged, ensuring that every trip back to the board feels like a new discovery of flavor and mouthfeel.
Ingredients
- One soft cheese (Brie, Camembert, or Chevre)
- One semi-firm cheese (Manchego, Gruyere, or Havarti)
- One hard/aged cheese (Aged Cheddar, Parmesan, or Pecorino)
How to make it
- Remove your cheeses from the refrigerator at least 30 to 45 minutes before serving; cheese served at room temperature releases its full aromatic profile and achieves the ideal texture.
- Place the largest cheese (usually the soft wheel) on the board first to act as an anchor, slightly off-center for a more organic, asymmetrical look.
- Pre-slice the hard cheeses into uniform triangles or cubes to make it easy for guests to grab without struggling with a knife.
- For semi-firm cheeses like Manchego, remove the wax rind and slice into thin wedges, fanning them out to create a sense of movement across the board.
- Leave the soft cheese whole but cut out one small wedge and place it next to the wheel to signal to guests that the board is ready to be enjoyed.
How to fold meat into ribbons?
Why we love this
Adding charcuterie is as much about the visual architecture as it is about the savory, salty punch that balances out the richness of the cheese. When you fold paper-thin slices of prosciutto or salami into delicate ribbons and roses, you create height and volume that makes the board look abundant and professionally styled. The way the light catches the marbled fat and the deep ruby hues of the cured meat adds a luxurious, artisanal feel to the spread. As guests pull a single, translucent ribbon away, the delicate texture melts on the tongue, offering a hit of umami that perfectly complements the sweetness of fresh fruits and honey.
Ingredients
- Prosciutto di Parma
- Genoa Salami (thinly sliced)
- Sopressata or Mortadella
How to make it
- Peel the prosciutto slices apart carefully, as they are very delicate and prone to tearing; keep them slightly chilled for easier handling.
- Take a single slice of prosciutto and fold it loosely in half lengthwise, then accordion-fold it back and forth to create a “ribbon” effect.
- For the salami, use the “salami rose” technique: fold each circle in half and then in half again, tucking the points into a small glass or simply nesting them tightly together on the board so they stay upright.
- Place these meat groupings directly next to the cheeses they pair best with, such as prosciutto next to the brie or spicy salami next to a hard cheddar.
- Ensure the meats are grouped in odd numbers (clusters of 3 or 5) to create a more natural and visually appealing aesthetic that draws the eye across the board.
How to create the perfect fruit spill?
Why we love this
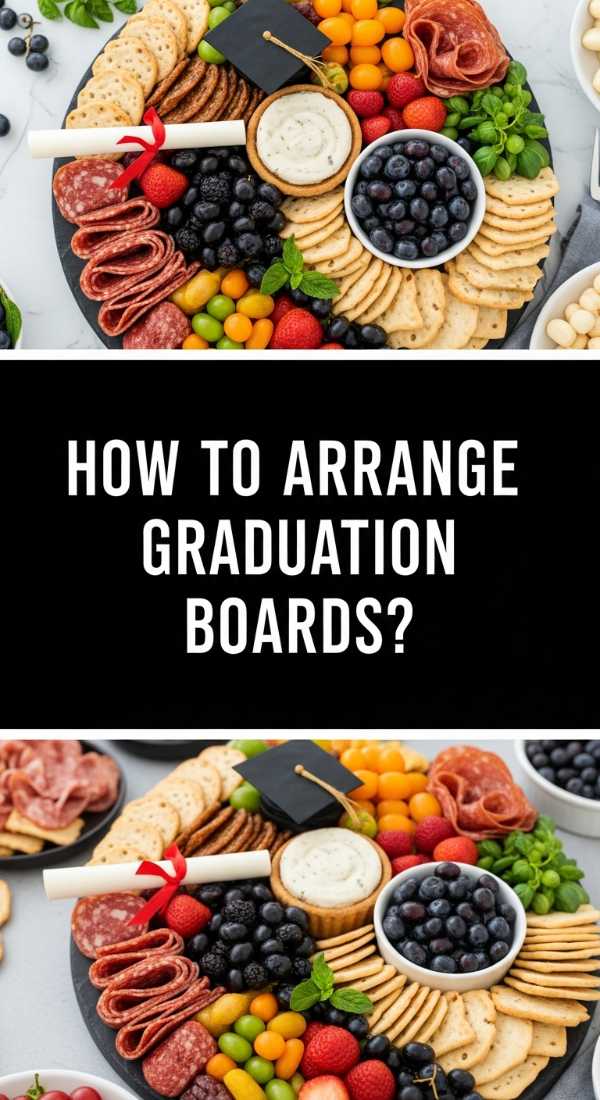
Fruit provides the essential brightness and acidity needed to cut through the heavy fats of meat and cheese, acting as a refreshing palate cleanser between bites. There is something breathtaking about a “spill” of deep purple grapes or vibrant red strawberries cascading across the wood, giving the board a lush, overflowing garden feel. The scent of fresh berries and the snap of a crisp apple slice add a layer of freshness that makes the entire spread feel light and seasonal. It’s the pop of color—the jewel tones of pomegranate seeds or the sunny glow of apricots—that truly brings the board to life and makes it look like a work of art.
Ingredients
- Fresh grapes (on the vine)
- Berries (Blackberries, Raspberries, or Strawberries)
- Sliced fruit (Apples or Pears)
- Dried apricots or figs
How to make it
- Keep grapes on the vine but snip them into small, manageable clusters of 4-5 grapes so guests can easily pick up a bunch without pulling the whole vine apart.
- Wash and thoroughly dry all berries; moisture is the enemy of a long-lasting board, as it can make crackers soggy and cheeses weep.
- Slice apples or pears just before serving to prevent browning; toss them in a little bit of lemon juice if you need to prep them more than 10 minutes in advance.
- Arrange the fruit in a “river” pattern, starting from one corner and winding it through the gaps between the cheeses and meats.
- Use dried fruits like apricots to fill in smaller gaps, providing a chewy texture contrast and a concentrated burst of sweetness.
How to style your cracker stacks?
Why we love this
The crackers are the unsung heroes of the board, providing the necessary crunch and the sturdy vehicle for all your delicious toppings. By styling them in flowing lines and overlapping stacks, you create a sense of rhythm and direction that guides the guest’s eye through the arrangement. Whether it’s a rustic, seed-heavy crisp or a light, buttery water cracker, the varied shapes and toasted colors add a homey, approachable element to the luxury. The sound of a crisp cracker snapping is the quintessential auditory cue that the snacking has begun, providing a satisfying structural base for the creamy and soft elements above it.
Ingredients
- Artisan sourdough crackers
- Fruit and nut crisps
- Thin breadsticks (Grissini)
- Classic water crackers
How to make it
- Select 2-3 different types of crackers with varying shapes (round, square, rectangular) and textures to keep the board visually interesting.
- Create a “shingle” effect by overlapping the crackers in a curved line that snakes around the bowls or cheese wheels.
- Place upright breadsticks in a small jar or glass to add vertical height to the board, which breaks up the flat plane of the other ingredients.
- Ensure that crackers are placed away from any “wet” ingredients like olives or cut fruit to maintain their crispness throughout the party.
- Refill the cracker stacks halfway through the event, as these are usually the first items to disappear from the board.
How to nestle bowls for depth?

Why we love this
Small bowls are the secret weapon for adding structure, height, and containment to your board, preventing liquid-heavy items from making a mess of your dry ingredients. There is a charming, gathered look to a board dotted with tiny ceramic or glass vessels filled with glistening olives or golden honey. They provide visual “anchors” that help organize the space and offer a clean way to introduce bold, vinegary, or sweet flavors that might otherwise overwhelm the milder cheeses. The glossy sheen of a high-quality olive oil or the jewel-like clarity of a fig jam inside a small bowl adds a professional, polished finish to the rustic display.
Ingredients
- Castelvetrano olives
- Cornichons (mini pickles)
- Fig jam or apricot preserves
- Grainy Dijon mustard
How to make it
- Choose 2-3 small, mismatched bowls that vary in height and material (ceramic, wood, or glass) to add character to the board.
- Place these bowls on the board first, even before the cheese, to establish the main focal points and spacing.
- Fill the bowls to the very brim; an overflowing bowl looks much more inviting and abundant than one that is only half-full.
- Place a small spoon or a honey dipper inside each bowl to encourage guests to help themselves without using their fingers.
- Group the bowls near the items they pair with—put the mustard near the salami and the jam near the soft, creamy brie.
How to add the crunch of nuts?
Why we love this
Nuts bring a vital earthiness and a robust, toasted aroma that rounds out the flavor profile of a viral food board. Their irregular shapes and toasted brown tones fill in the tiny, awkward gaps between the larger items, making the board look dense and professionally “packed.” Whether it’s the buttery richness of a Marcona almond or the woodsy snap of a walnut half, nuts provide a satisfying, high-protein crunch that balances the sweetness of fruit and the saltiness of cured meats. They are the finishing touch that transforms a simple arrangement into a sophisticated, multi-layered culinary experience that feels complete and thoughtfully executed.
Ingredients
- Marcona almonds (salted)
- Walnut halves
- Pistachios (shelled or unshelled)
- Candied pecans
How to make it
- Toast raw nuts in a dry pan over medium heat for 3-5 minutes until they become fragrant and slightly golden; this step vastly improves the flavor and aroma.
- Let the nuts cool completely before adding them to the board to avoid melting any nearby cheese.
- Sprinkle the nuts into the “nooks and crannies”—those small empty spaces between the cheese, meat, and crackers.
- Cluster them in small piles rather than scattering them individually, which creates more visual impact and makes them easier to grab.
- If using pistachios in the shell, provide a small, empty side bowl for guests to discard the shells, keeping your main board looking pristine.
How to drizzle the honey finishing touch?

Why we love this
The honey drizzle is the ultimate “viral” moment of board styling, adding a glistening, liquid gold element that catches the light beautifully. The slow, thick flow of honey over a wedge of salty cheese or a pile of nuts adds a layer of decadent sweetness that elevates the entire flavor experience. It’s an interactive element that feels indulgent and high-end, transforming a simple bite into a gourmet treat. The floral, amber scent of a good clover or wildflower honey enhances the sensory experience, inviting guests to slow down and savor the complex interplay of sweet and savory notes on their palate.
Ingredients
- Raw wildflower honey or Truffle honey
- Honeycomb (optional, for extra texture)
- Fresh thyme sprigs
How to make it
- If using a honeycomb, place a 2-inch square directly on top of your softest cheese (like brie) so the honey naturally seeps out over the sides.
- For liquid honey, use a wooden honey dipper or a small silver spoon; hold it about 4 inches above the board to get a steady, thin stream.
- Drizzle the honey in a slow, zig-zag motion over the hard cheeses and the nuts, avoiding the crackers so they don’t get sticky.
- Add a pinch of flaky sea salt over the honey-drizzled areas to create a salted-caramel flavor profile that is absolutely addictive.
- Garnish the honey-covered cheese with a tiny sprig of fresh thyme to add a savory herbal note and a beautiful green contrast.
How to garnish with fresh herbs?
Why we love this
Herbs are the “jewelry” of the food board, providing that final, vibrant pop of green that makes everything look garden-fresh and alive. The scent of bruised rosemary or fresh mint wafting from the board adds a layer of aromatic complexity that makes the food feel lighter and more sophisticated. These tiny botanical details fill in the last remaining slivers of space, creating a lush, overgrown look that is the hallmark of a viral styling job. It’s the difference between a board that looks like it came from a grocery store and one that looks like it was harvested from a Mediterranean hillside, adding a breath of fresh air to the rich, heavy components.
Ingredients
- Fresh rosemary stalks
- Thyme sprigs
- Fresh mint leaves
- Edible flowers (optional)
How to make it
- Select herbs that are hearty and won’t wilt quickly; rosemary and thyme are excellent choices because they maintain their structure for hours.
- Tuck small sprigs of rosemary under the edges of the cheese wheels to create a frame of greenery.
- Scatter individual thyme leaves or very small sprigs over the fruit and bowls of olives for a delicate, finished look.
- Use mint specifically near the berries or soft cheeses to provide a cooling aromatic contrast to the sweetness.
- Ensure the herbs are clean and dry, and place them in areas where they won’t be accidentally eaten as a main component, but rather enjoyed for their scent and beauty.
How to serve for maximum impact?
[IMAGE_10]
Why we love this
The way you present and serve your board is the final act in this 10-minute magic show, turning a collection of food into a shared memory. There is a profound sense of warmth and hospitality when a board is placed in the center of a table, acting as a campfire around which everyone gathers. It encourages a communal style of eating that is relaxed, tactile, and deeply human, breaking down the formalities of a seated dinner. The visual impact of a fully-loaded, colorful, and textured board creates an immediate “wow” factor that lingers long after the last cracker has been eaten, making your guests feel truly cared for and celebrated.
Ingredients
- Small appetizer plates
- Cocktail napkins
- Cheese knives and spreaders
- Small waste bowls for pits/stems
How to make it
- Position the board at the center of the table where it is accessible from all sides, ensuring that no guest has to reach too far.
- Place a stack of small, high-quality napkins and several small plates nearby to give guests a place to assemble their perfect bites.
- Provide a specific knife for each type of cheese to prevent flavors from mixing—a spreader for the soft cheese and a sharp knife for the hard ones.
- Dim the lights and add a few unscented candles nearby; the flickering light will make the textures of the board and the glisten of the honey look even more appetizing.
- Have a small “refill station” hidden in the kitchen with extra crackers and pre-cut fruit so you can quickly replenish the board without interrupting the flow of the party.
The Final Flourish
And there you have it—a viral-worthy, stunning simple food board created in just ten minutes. It’s easy to get caught up in the pursuit of perfection, but remember that the true magic of a board lies in its abundance and the joy it brings to those sharing it. Don’t be afraid to let a few nuts stray or for the honey to drip a little too far; those “perfect imperfections” are what make the board feel accessible, inviting, and real. Whether you’re hosting a big celebration or just elevating a quiet evening at home, this 10-minute technique ensures you spend less time in the kitchen and more time making memories. Happy styling!