
10-Minute Hosting Magic: The Simple Food Board That Went Viral
We’ve all been there: the doorbell rings in twenty minutes, your living room is a semi-controlled disaster zone, and you realize you haven’t even thought about what to serve. For years, I struggled with the pressure of being the ‘perfect host,’ thinking I needed a five-course meal to show my friends I cared. But everything changed the night I threw together a mismatched collection of vibrant, bite-sized snacks on my largest wooden board. It wasn’t just food; it was a conversation starter that allowed me to actually sit down and laugh instead of being tethered to the oven.
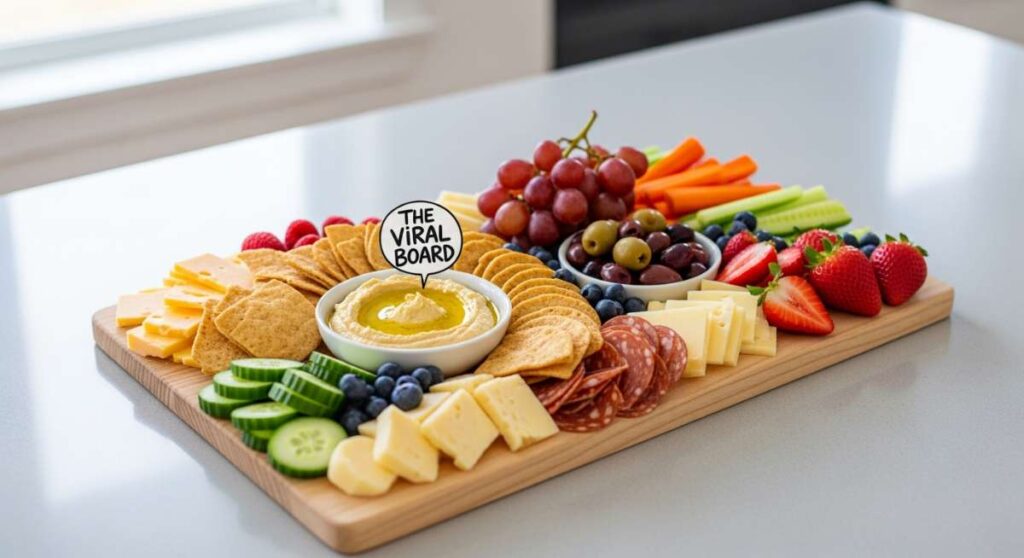
This viral simple food board is born from that exact spirit of ‘effortless elegance.’ It’s a rainbow of textures and temperatures—crispy, creamy, warm, and refreshing—all designed to be eaten with your hands. Whether you are hosting a book club or just a cozy Friday night in with your family, this board proves that the best memories are made when the host is relaxed and the food is nourishing. Let’s dive into the ten components that will make your next gathering absolutely legendary.
How to cook salmon bites?

Why we love this
There is something undeniably luxurious about a perfectly cooked nugget of salmon that flakes at the slightest pressure. These bites offer a stunning contrast between the caramelized, slightly sweet exterior glaze and the buttery, tender pink center that melts on your tongue. As they cook, the aroma of honey and garlic wafts through the kitchen, creating an immediate sense of comfort. Each morsel is a concentrated burst of omega-3 richness, finished with a sprinkle of flaky sea salt that heightens the natural sweetness of the fish.
Ingredients
- 1 lb fresh Atlantic salmon fillet, skin removed
- 2 tbsp olive oil
- 1 tbsp honey
- 1 tsp garlic powder
- 1/2 tsp smoked paprika
- Salt and cracked black pepper to taste
- Fresh chives for garnish
How to make it
- Begin by patting the salmon fillet completely dry with paper towels; moisture is the enemy of a good sear, so ensure the surface is matte before proceeding.
- Cut the salmon into uniform 1-inch cubes to ensure even cooking across the entire batch, then place them in a medium mixing bowl.
- Whisk together the olive oil, honey, garlic powder, and paprika in a small ramekin until the honey is fully incorporated, then pour the mixture over the salmon.
- Toss the cubes gently with a spatula or your hands until every side is glistening with the marinade, letting them sit for 5 minutes to absorb the flavors.
- Heat a heavy-bottomed non-stick skillet or cast-iron pan over medium-high heat until a drop of water sizzles and evaporates instantly.
- Place the salmon bites in the pan in a single layer, ensuring they aren’t touching; cook undisturbed for 2-3 minutes until a golden-brown crust forms on the bottom.
- Flip each cube carefully using tongs and cook for another 2 minutes; the internal temperature should reach 145°F, and the flesh should look opaque but still moist in the center.
How to roast turmeric cauliflower?

Why we love this
Turmeric cauliflower is the golden crown jewel of any food board, providing a stunning visual pop and a deeply earthy flavor profile. When roasted at high heat, the florets transform from crunchy and bland into tender, caramelized delights with charred, crispy edges that provide a satisfying snap. The warm, peppery notes of the turmeric are balanced by the mellow sweetness of the cauliflower, creating a savory snack that feels both indulgent and incredibly healthy. It’s the kind of vegetable dish that even the most dedicated meat-eaters will reach for again and again.
Ingredients
- 1 large head of cauliflower, cut into small florets
- 3 tbsp avocado oil
- 1.5 tsp ground turmeric
- 1 tsp cumin
- 1/2 tsp sea salt
- 1/4 tsp cayenne pepper (optional for heat)
- Fresh parsley for finishing
How to make it
- Preheat your oven to 425°F (220°C) and line a large rimmed baking sheet with parchment paper to prevent sticking and make cleanup a breeze.
- In a large bowl, toss the cauliflower florets with the avocado oil, ensuring every nook and cranny of the vegetable is lightly coated in fat.
- Sprinkle the turmeric, cumin, salt, and cayenne over the cauliflower, then use your hands to massage the spices into the florets until they are uniformly bright yellow.
- Spread the cauliflower across the prepared baking sheet in a single, sparse layer; if the pan is crowded, the cauliflower will steam instead of roast, losing that desired crispiness.
- Slide the tray into the center rack of the oven and roast for 20-25 minutes, pausing halfway through to toss the florets with a spatula for even browning.
- The cauliflower is done when the stems are fork-tender and the tops of the florets have developed dark, caramelized brown spots.
- Remove from the oven and immediately sprinkle with fresh parsley to add a hit of brightness to the earthy spices.
How to bake sweet potatoes?

Why we love this
Sweet potatoes bring a much-needed soft, velvety texture to the board that acts as a canvas for both savory and sweet toppings. When baked correctly, the natural sugars in the potato migrate toward the skin, creating a sticky, caramelized exterior while the inside becomes as fluffy as a cloud. The fragrance is reminiscent of autumn afternoons—warm, sugary, and deeply comforting. Each bite offers a gentle sweetness that pairs perfectly with the salty components of the board, making it an essential balancing element for your spread.
Ingredients
- 2 large sweet potatoes, scrubbed clean
- 1 tbsp coconut oil, melted
- 1/2 tsp cinnamon
- 1/4 tsp sea salt
- Optional: A drizzle of maple syrup
How to make it
- Preheat your oven to 400°F (200°C) and prepare a baking sheet with parchment paper or a silicone mat.
- Slice the sweet potatoes into 1/2-inch thick rounds or wedges; keeping the thickness consistent is crucial so they all finish baking at the same time.
- In a bowl, coat the potato slices with melted coconut oil, cinnamon, and salt, ensuring a thin, even layer of oil on both sides of each slice.
- Arrange the slices on the baking sheet, making sure they do not overlap, which allows the hot air to circulate and crisp the edges.
- Bake for 15 minutes, then use tongs to flip each slice over to ensure the underside gets that beautiful golden color.
- Bake for an additional 10-15 minutes until the centers are completely soft when pierced with a fork and the edges are starting to slightly curl and brown.
- Let them rest on the pan for 5 minutes after removing from the oven; this allows the exterior to firm up slightly, making them easier to pick up.
How to make avocado fries?

Why we love this
Imagine the creamy, buttery interior of a ripe avocado encased in a shatteringly crisp, golden panko crust—it is the ultimate texture play. These ‘fries’ are a sophisticated upgrade to traditional potato fries, offering a rich mouthfeel that feels decadent yet surprisingly fresh. The contrast between the warm, softened fruit and the seasoned breading is addictive, especially when dipped into a zesty aioli. They provide a beautiful green hue to your board and are always the first item to vanish whenever I serve them to guests.
Ingredients
- 2 firm-ripe avocados
- 1/2 cup all-purpose flour
- 2 large eggs, beaten
- 1 cup Panko breadcrumbs
- 1 tsp garlic salt
- 1/2 tsp dried oregano
- Cooking oil spray
How to make it
- Preheat your air fryer to 400°F or your oven to 425°F; using firm-ripe avocados is key as overripe ones will turn to mush during the breading process.
- Slice each avocado in half, remove the pit, and cut each half into 4-5 thick wedges, gently peeling the skin away.
- Set up a dredging station with three bowls: one for flour, one for the beaten eggs, and one for the panko mixed with garlic salt and oregano.
- Coat each avocado wedge in flour (shake off excess), dip thoroughly in the egg wash, and then press firmly into the panko crumbs until fully coated.
- Place the breaded wedges into the air fryer basket or on a wire rack over a baking sheet, ensuring they are not touching each other.
- Lightly spray the tops with cooking oil to help the panko achieve a deep golden color and a professional crunch.
- Air fry for 8-10 minutes (or bake for 12-15) until the coating is hard and golden brown, then serve immediately while the interior is still warm and creamy.
How to grill ginger chicken?

Why we love this
Ginger chicken provides a zesty, high-protein anchor for the board that feels light yet satisfying. The ginger adds a sharp, clean heat that cuts through the richness of other components, while the grill marks provide a smoky depth of flavor and an appealing aesthetic. When sliced into thin strips, the chicken is juicy and tender, carrying the aromatic scent of toasted sesame and fresh aromatics. It’s the kind of dish that feels like a summer cookout condensed into a single, perfect bite, offering a refreshing zing that cleanses the palate.
Ingredients
- 1 lb chicken breast, pounded to even thickness
- 2 tbsp grated fresh ginger
- 2 tbsp soy sauce
- 1 tbsp sesame oil
- 1 clove garlic, minced
- 1 tbsp honey
- Lime wedges for serving
How to make it
- In a zip-top bag or shallow dish, whisk together the ginger, soy sauce, sesame oil, garlic, and honey to create a potent, aromatic marinade.
- Place the chicken in the marinade, ensuring it’s completely submerged, and refrigerate for at least 30 minutes (or up to 4 hours) to allow the ginger to tenderize the meat.
- Heat an indoor grill pan or outdoor grill to medium-high heat, lightly oiling the grates to prevent the chicken from sticking.
- Remove the chicken from the marinade, letting the excess drip off, and place it on the hot grill.
- Sear the chicken for 5-7 minutes per side; look for clear, dark grill marks and ensure the internal temperature reaches a safe 165°F (74°C).
- Once cooked, transfer the chicken to a cutting board and let it rest for a full 5 minutes; this allows the juices to redistribute so the meat stays moist when sliced.
- Slice against the grain into 1/2-inch strips and squeeze fresh lime juice over the top just before adding to the board.
How to prepare beet bites?

Why we love this
Beet bites are the ultimate ‘sophisticated’ snack, combining earthy, roasted sweetness with a tangy pop of creamy topping. The deep ruby color of the beets adds a dramatic flair to your food board, making it look like a professional catering spread. These bites have a dense, satisfying texture that pairs beautifully with soft cheeses or nuts. There is a primal, rooted quality to the flavor of a roasted beet that, when elevated with the right garnish, becomes a complex and elegant addition that surprises even those who claim not to like vegetables.
Ingredients
- 3 medium red beets
- 1 tbsp olive oil
- 2 oz goat cheese or feta
- 1/4 cup crushed walnuts
- 1 tsp balsamic glaze
- Fresh thyme leaves
How to make it
- Preheat your oven to 400°F (200°C); wrap each beet individually in aluminum foil after drizzling with a tiny bit of olive oil and a pinch of salt.
- Place the foil-wrapped beets on a baking sheet and roast for 45-60 minutes, depending on size, until a knife slides easily into the center.
- Once cool enough to handle, use a paper towel to rub the skins off the beets; they should slip right off, leaving the smooth, vibrant flesh beneath.
- Slice the beets into 1/2-inch thick rounds and arrange them on a platter or your serving board.
- Top each beet round with a small crumble of goat cheese or a cube of feta while the beets are still slightly warm so the cheese softens.
- Garnish each bite with a few crushed walnuts for crunch and a tiny sprig of fresh thyme for an herbal aroma.
- Finish with a very light drizzle of balsamic glaze to add a touch of acidity and a glossy, professional finish.
How to crisp garlic chickpeas?

Why we love this
Crispy chickpeas are the ‘popcorn’ of the healthy food world—once you start snacking on them, it’s nearly impossible to stop. These little gems offer a thunderous crunch that transitions into a nutty, savory finish, infused with the pungent, mouthwatering aroma of toasted garlic. They provide a fantastic source of plant-based protein and fiber, making the board feel more substantial. Their small size makes them perfect for filling in the gaps between larger items on your board, ensuring every inch of space is packed with flavor and texture.
Ingredients
- 1 can (15 oz) chickpeas, rinsed and drained
- 1.5 tbsp olive oil
- 1 tsp garlic powder
- 1/2 tsp sea salt
- 1/4 tsp smoked paprika
- Fresh rosemary (optional)
How to make it
- The most important step for crunch is drying: roll the rinsed chickpeas between two clean kitchen towels until they are bone-dry and any loose skins have been removed.
- Preheat your oven to 400°F (200°C) or set your air fryer to 390°F.
- In a bowl, toss the dry chickpeas with olive oil until they are well-coated; do not add the dry spices yet, as they can burn during the long roasting process.
- Spread the chickpeas on a baking sheet and roast for 20-30 minutes (or air fry for 12-15 minutes), shaking the pan every 10 minutes to ensure they crisp on all sides.
- Test a chickpea for doneness; it should be crunchy all the way through, not soft in the middle.
- Immediately after removing them from the heat, toss the hot chickpeas with the garlic powder, salt, and paprika while the oil is still wet so the spices adhere.
- Let them cool completely on the tray; they will continue to crisp up as they reach room temperature.
How to bake broccoli tots?

Why we love this
Broccoli tots are a playful, nostalgic addition that appeals to the inner child in everyone, but with a much-needed nutritional upgrade. They have a crispy, cheesy exterior that gives way to a tender, savory interior packed with finely chopped greens. The aroma of toasted parmesan and onion powder makes them incredibly inviting, and their uniform shape makes them perfect for dipping into spicy mustard or Greek yogurt dip. They are a clever way to incorporate more greens into a social setting without sacrificing the ‘fun’ factor of finger foods.
Ingredients
- 2 cups broccoli florets, steamed and finely chopped
- 1 large egg
- 1/2 cup breadcrumbs (Italian seasoned)
- 1/2 cup shredded cheddar or parmesan cheese
- 1/4 cup finely diced onion
- 1/2 tsp garlic salt
How to make it
- Preheat your oven to 400°F (200°C) and grease a baking sheet or line it with parchment paper.
- After steaming your broccoli, squeeze it in a clean kitchen towel to remove every drop of excess moisture; too much water will result in soggy tots that fall apart.
- In a large bowl, combine the chopped broccoli, egg, breadcrumbs, cheese, onion, and garlic salt, mixing until the mixture holds together when pressed.
- Scoop about 1 tablespoon of the mixture and roll it into a small cylinder or tater-tot shape using your hands.
- Arrange the tots on the baking sheet, leaving about an inch of space between each one to allow for browning.
- Bake for 18-22 minutes, flipping them halfway through, until they are firm to the touch and the cheese has formed a golden-brown crust.
- Serve warm, as the cheese is best when it is still slightly melty and the exterior is at its peak crunch.
How to assemble cucumber bites?

Why we love this
Cucumber bites are the essential cooling element of the board, offering a crisp, watery snap that provides an instant refresh between the more intensely flavored roasted items. The cool green rounds are topped with a swirl of herbed cream cheese that feels light and airy, creating a bite that is as beautiful as it is delicious. The scent of fresh dill and lemon zest is invigorating, making these bites feel like a breath of fresh air. They are incredibly simple to prepare but add a level of ‘spa-like’ elegance to your hosting game.
Ingredients
- 2 English cucumbers, sliced into 1-inch rounds
- 4 oz cream cheese, softened
- 1 tbsp fresh dill, chopped
- 1 tsp lemon zest
- Smoked salmon or capers for garnish (optional)
- A pinch of black pepper
How to make it
- Wash the English cucumbers and partially peel them in stripes for a decorative look, then slice them into thick, sturdy rounds.
- If you want a more professional look, use a small melon baller or spoon to scoop out a tiny divot in the center of each cucumber round to hold the filling.
- In a small bowl, whip the softened cream cheese with the fresh dill, lemon zest, and black pepper until it is light and fluffy.
- For a viral-worthy presentation, transfer the cream cheese mixture to a piping bag fitted with a star tip and pipe a neat swirl onto each cucumber.
- If you don’t have a piping bag, simply use two small spoons to create a neat dollop in the center of the rounds.
- Top each bite with a single caper or a tiny slier of smoked salmon to add a hit of saltiness and visual interest.
- Keep these chilled in the refrigerator until the very moment you are ready to serve the board to maintain their crispness.
How to make berry clusters?
[IMAGE_10]
Why we love this
Every good food board needs a sweet finale, and these berry clusters are the perfect way to satisfy a sugar craving while keeping things relatively light. The snap of dark chocolate against the tart, juicy explosion of a fresh blueberry or raspberry is a match made in heaven. As you bite into a cluster, the rich cocoa notes mingle with the bright fruit acidity, finished with a hint of sea salt that makes the flavors sing. They look like little jewels scattered across your board and provide a wonderful communal dessert experience that doesn’t require plates or forks.
Ingredients
- 1 cup fresh blueberries or raspberries (must be dry!)
- 4 oz high-quality dark chocolate (60% cocoa or higher)
- 1 tsp coconut oil
- Flaky sea salt for topping
- Optional: Chopped pistachios
How to make it
- Line a small tray with parchment paper; ensure your berries are washed and—most importantly—completely dry, as water will cause the chocolate to seize.
- Break the chocolate into small pieces and place in a microwave-safe bowl with the coconut oil; heat in 30-second increments, stirring in between, until completely smooth.
- Gently fold the dry berries into the melted chocolate, using a rubber spatula to coat each one without crushing the fruit.
- Using a spoon, scoop small clusters (about 5-6 berries each) onto the parchment paper, ensuring they are touching so they freeze into a single unit.
- Immediately sprinkle a tiny pinch of flaky sea salt and optional chopped pistachios over the wet chocolate before it sets.
- Place the tray in the refrigerator for at least 20 minutes (or the freezer for 10) until the chocolate is hard and matte.
- Peel the clusters off the parchment and place them in a small bowl or directly on the board as the final, sweet touch.
Conclusion
Building a viral-worthy food board isn’t about being a professional chef; it’s about the art of assembly and the joy of variety. By combining these ten different elements, you create a dining experience that caters to every craving—salty, sweet, crunchy, and creamy. The magic happens when your guests start mixing and matching, perhaps pairing a salmon bite with a cucumber round or a chickpea with a sweet potato slice. So, next time you feel the hosting jitters, remember this board. Grab your biggest platter, follow these simple steps, and prepare to be the hero of the party. Happy hosting!