

10-Minute Food Boards That Are Taking Over the Internet
There is something undeniably magical about a gathering where the food feels like an invitation rather than a formal ceremony. In the whirlwind of our busy lives, the ‘food board’ has emerged as the ultimate hero of hospitality, turning simple ingredients into a stunning mosaic of flavors that encourages guests to linger and graze. I remember the first time I set down a sprawling board filled with crispy textures and savory scents; the room’s energy shifted instantly from polite small talk to genuine, laughter-filled connection as everyone reached for their favorite bite.
The beauty of these viral boards lies in their accessibility. You don’t need a culinary degree or hours of prep time to create something that looks like it belongs in a high-end lifestyle magazine. By focusing on a few star elements—like golden-fried snacks, charred proteins, and vibrant dips—you can assemble a feast that is as much a feast for the eyes as it is for the palate. These boards are all about the joy of the ‘perfect bite,’ where every guest can customize their experience, mixing and matching flavors in a way that feels personal and indulgent.
Today, I’m sharing the secret components of the most successful food boards taking over my feed. These ten items are designed to be quick, high-impact, and absolutely delicious. Whether you’re hosting a last-minute game night or just want to make a Tuesday dinner feel a bit more special, these quick-prep recipes will ensure your board is the talk of the town.
How to make crispy wings

Why we love this
There is something inherently soul-satisfying about the audible crunch of a perfectly rendered chicken wing. As you pull it apart, a plume of savory steam rises, carrying the aroma of garlic and toasted spices that makes your mouth water instantly. The skin is thin and glass-like, giving way to meat that is so tender it practically melts off the bone. It’s the ultimate tactile finger food that brings everyone around the board, messy fingers and all, creating that perfect casual atmosphere where the best conversations happen over a bowl of discarded bones and plenty of napkins.
Ingredients
- 2 lbs chicken wings (flats and drumettes)
- 1 tablespoon baking powder (not soda!)
- 1 teaspoon kosher salt
- 1/2 teaspoon black pepper
- 1 teaspoon garlic powder
- Optional: Buffalo or BBQ sauce for tossing
How to make it
- Pat the wings extremely dry with paper towels. Moisture is the enemy of crispiness, so take your time to ensure every nook and cranny is bone-dry.
- In a large bowl, whisk together the baking powder, salt, pepper, and garlic powder. The baking powder raises the pH level of the skin, allowing it to brown and crisp up more efficiently.
- Toss the wings in the powder mixture until they are lightly and evenly coated. You don’t want a thick paste; just a fine dust.
- Preheat your oven to 425°F (220°C). Place a wire rack over a foil-lined baking sheet. This allows hot air to circulate under the wings so they crisp on all sides without needing to be fried in oil.
- Arrange the wings on the rack in a single layer, ensuring they aren’t touching. Bake for 45-50 minutes, flipping halfway through. You are looking for a deep golden-brown color and a skin that sounds hard when tapped with a fork.
- Once removed, let them rest for 5 minutes to allow the juices to redistribute, then toss in your favorite sauce if desired, or serve them dry-rubbed for maximum crunch.
How to cook potato skins
Why we love this
Imagine a crisp, salty potato shell that acts as a rustic vessel for a molten river of sharp cheddar cheese and smoky bacon bits. The contrast between the earthy, slightly charred skin and the fluffy, cream-infused interior creates a symphony of textures in every single bite. When you dip one into a cool, chive-speckled dollop of sour cream, the temperature play—hot potato versus cold cream—is nothing short of addictive. These aren’t just appetizers; they are nostalgic comfort food gems that disappear from the board within minutes of being set down.
Ingredients
- 4 large Russet potatoes
- 2 tablespoons melted butter
- 1 cup shredded sharp cheddar cheese
- 1/2 cup cooked bacon bits
- 2 green onions, sliced
- Sour cream for serving
How to make it
- Scrub the potatoes and bake them at 400°F (200°C) for about an hour until tender. If you’re in a rush, you can microwave them for 10-12 minutes, though the skin won’t be quite as sturdy.
- Allow the potatoes to cool slightly, then cut them in half lengthwise. Use a spoon to scoop out the flesh, leaving a 1/4-inch thick wall of potato against the skin. Save the insides for mashed potatoes later!
- Brush both the inside and outside of the potato skins with melted butter and sprinkle with salt. Place them hollow-side down on a baking sheet.
- Broil on high for 2-3 minutes until the skin is crispy and golden. Flip them over and broil for another 2 minutes.
- Fill each skin with a generous amount of shredded cheese and bacon bits. Return to the broiler for 1-2 minutes until the cheese is bubbling and slightly browned.
- Garnish with fresh green onions and serve immediately with a side of cold sour cream.
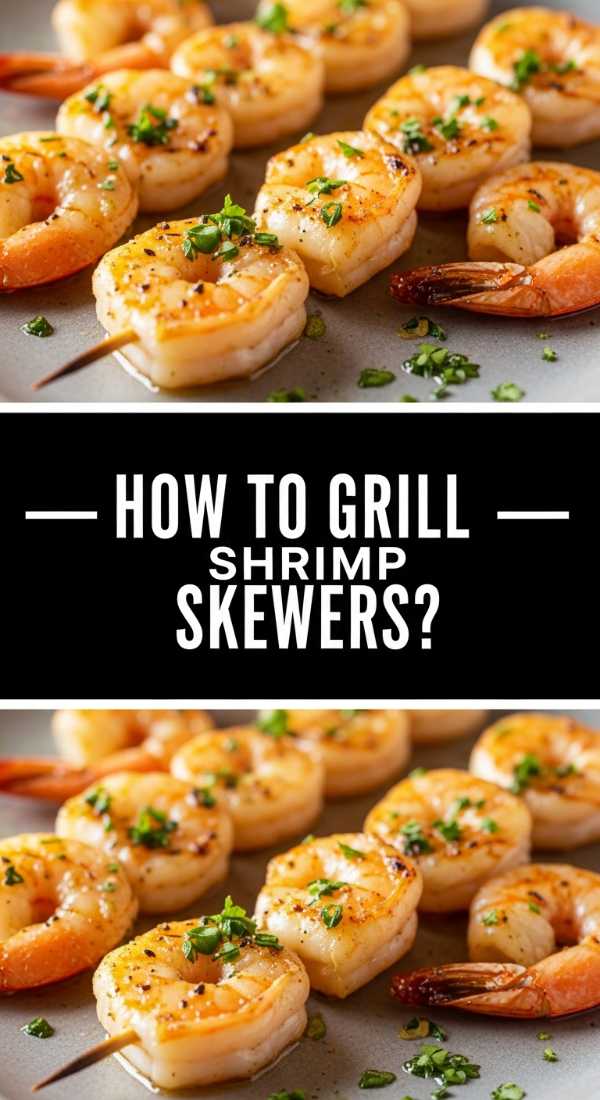
How to grill shrimp skewers

Why we love this
Shrimp skewers bring an elegant, coastal vibe to any food board, offering a light and snappy contrast to heavier fried items. The high heat of the grill caramelizes the natural sugars in the shrimp, creating beautiful char marks and a delicate sweetness that pairs perfectly with a squeeze of charred lemon. As you pull a succulent, pink shrimp from the wooden skewer, you get the herbaceous hit of garlic and parsley, followed by the firm, juicy texture of perfectly cooked seafood. They are vibrant, colorful, and feel like a summer vacation on a plate.
Ingredients
- 1 lb jumbo shrimp, peeled and deveined
- 2 tablespoons olive oil
- 3 cloves garlic, minced
- 1 teaspoon smoked paprika
- 1 lemon (half sliced, half for juice)
- Fresh parsley, chopped
- Wooden or metal skewers
How to make it
- If using wooden skewers, soak them in water for at least 20 minutes to prevent them from burning on the grill.
- In a bowl, whisk together olive oil, minced garlic, smoked paprika, and a squeeze of lemon juice. Toss the shrimp in this marinade for 15 minutes—don’t go longer, or the acid will start ‘cooking’ the shrimp.
- Thread 4-5 shrimp onto each skewer. Ensure they are snug but not squashed together, as air needs to circulate for even cooking.
- Preheat your grill or grill pan to medium-high heat. Lightly oil the grates to prevent sticking.
- Place the skewers on the grill. Cook for 2-3 minutes per side. You are looking for the shrimp to turn from translucent grey to an opaque pink and white with a firm ‘C’ shape. Do not overcook into an ‘O’ shape, or they will be rubbery.
- Remove from heat and immediately sprinkle with fresh parsley and an extra spritz of lemon.
How to fry mozzarella sticks

Why we love this
Is there anything more visually iconic than the legendary ‘cheese pull’ of a fresh mozzarella stick? The exterior is a seasoned, golden-brown fortress of breadcrumbs that shatters upon impact, revealing a heart of gooey, melted cheese that stretches for days. The aroma of toasted oregano and melted dairy is universally comforting. Dipped into a tangy, herb-heavy marinara sauce, these sticks provide a rich, indulgent experience that satisfies that deep-seated craving for something warm, cheesy, and crunchy all at once.
Ingredients
- 12 pieces of string cheese (mozzarella)
- 1/2 cup all-purpose flour
- 2 eggs, beaten
- 1 cup Italian seasoned breadcrumbs
- 1/2 teaspoon garlic salt
- Vegetable oil for frying
How to make it
- This is the golden rule: Freeze your string cheese for at least 1-2 hours before frying. This prevents the cheese from leaking out before the crust is golden.
- Set up a dredging station with three bowls: flour in the first, beaten eggs in the second, and breadcrumbs mixed with garlic salt in the third.
- Roll each frozen cheese stick in flour, dip in egg, and then coat thoroughly in breadcrumbs. For a truly professional crust, dip it back in the egg and then the breadcrumbs a second time (double coating).
- Heat 2 inches of oil in a heavy skillet to 350°F (175°C). Use a thermometer to ensure the temp is consistent.
- Fry 3-4 sticks at a time for about 30-60 seconds. They cook fast! As soon as they are golden brown, remove them with a slotted spoon.
- Drain on paper towels for 1 minute before serving to ensure the crust stays crispy and doesn’t get soggy from excess oil.
How to bake mini sausages

Why we love this
Mini sausages, or ‘lil smokies,’ are the unsung heroes of the snack board world. They are bite-sized explosions of smoky, savory flavor that take on a beautiful lacquered sheen when baked in a glaze. The casing has a satisfying little ‘pop’ when you bite into it, giving way to a juicy, seasoned interior. When glazed with something sweet like honey or maple, they create a sticky, finger-licking experience that bridges the gap between sweet and savory, making them incredibly difficult to stop eating once you start.
Ingredients
- 1 package (12-14 oz) cocktail sausages
- 1/4 cup honey or maple syrup
- 1 tablespoon Dijon mustard
- 1 tablespoon soy sauce
- A pinch of red pepper flakes
How to make it
- Preheat your oven to 375°F (190°C) and line a small baking dish or sheet with parchment paper for easy cleanup (sugar glazes stick!).
- In a small bowl, whisk together the honey, Dijon mustard, soy sauce, and red pepper flakes. This mixture provides the perfect balance of sweet, tang, and heat.
- Toss the mini sausages in the glaze until every single one is well-coated.
- Spread the sausages out in a single layer on the baking sheet.
- Bake for 15-20 minutes. About halfway through, use a spatula to toss them around so the glaze redistributes and begins to caramelize on all sides.
- The sausages are done when they look plump, the glaze is thick and bubbling, and the edges are starting to turn a dark, sticky brown. Serve with toothpicks for easy grabbing.
How to make buffalo bites
Why we love this
Buffalo bites offer all the fiery, buttery goodness of a traditional wing but in a convenient, boneless format that is perfect for grazing. Each nugget is a powerhouse of flavor, drenched in a silky orange sauce that tingles the tongue with vinegar-based heat. The coating stays surprisingly crisp even under the weight of the sauce, providing a textural contrast to the tender chicken inside. Paired with a cooling blue cheese or ranch dip and some crisp celery, these bites provide that classic sports-bar energy in a sophisticated board setting.
Ingredients
- 1 lb boneless skinless chicken breast, cut into 1-inch chunks
- 1 cup flour
- 1 teaspoon paprika
- 1/2 cup Buffalo hot sauce
- 4 tablespoons melted butter
- 1/2 teaspoon garlic powder
How to make it
- In a bowl, toss the chicken chunks with flour and paprika until fully coated. Shake off any excess; you want a light veil of flour, not a heavy batter.
- You can air fry these at 400°F for 12 minutes or pan-fry in a little oil until the internal temperature reaches 165°F and the outside is golden.
- While the chicken cooks, whisk together the hot sauce, melted butter, and garlic powder in a large bowl. This ’emulsifies’ the sauce, making it thick and glossy.
- As soon as the chicken comes out of the heat, toss it immediately into the sauce bowl. The residual heat helps the sauce soak into the crust.
- Use a slotted spoon to remove the bites so you don’t pool too much sauce on your board.
- Serve immediately while the contrast between the hot, spicy coating and the juicy chicken is at its peak.
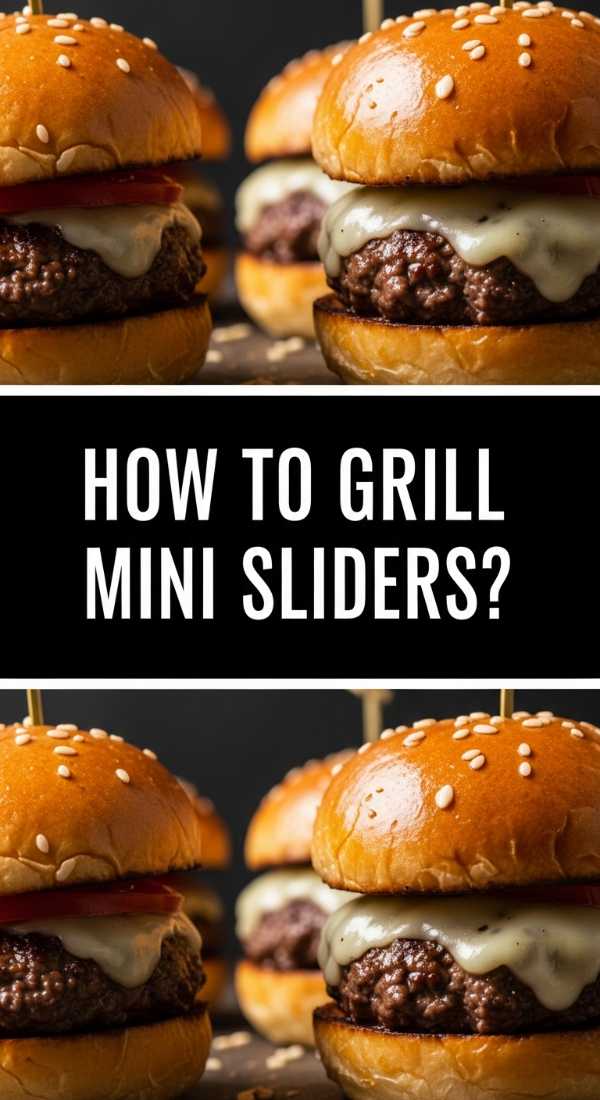
How to grill mini sliders

Why we love this
Mini sliders are the undisputed kings of the food board, offering a miniature version of the ultimate comfort food. There’s something charming about a tiny, toasted brioche bun cradling a thick, juicy patty with a blanket of melted cheese. The smell of searing beef on a hot griddle is enough to draw anyone into the kitchen. Each slider is a perfect composition of textures—the soft bread, the charred meat, and the crunch of a pickle—making it a substantial, satisfying component that grounds the lighter elements of your board.
Ingredients
- 1 lb ground beef (80/20 blend for juiciness)
- 1 package mini slider buns (brioche preferred)
- 6 slices cheddar cheese, quartered
- Salt and pepper
- 1 tablespoon butter
- Pickle slices and slider sauce
How to make it
- Divide your beef into 2-ounce portions and gently roll them into balls. Do not overwork the meat, or the sliders will be tough.
- Preheat a cast-iron skillet or grill to high heat. Butter the insides of the buns and toast them until golden brown; this creates a barrier so the juices don’t make the bread soggy.
- Place the meat balls on the hot surface and use a heavy spatula to smash them down into flat patties. This ‘smash’ technique creates maximum surface area for a delicious crust.
- Season generously with salt and pepper. Cook for 2 minutes until a deep brown crust forms.
- Flip the patties and immediately top with a quarter-slice of cheese. Cover the pan with a lid for 30 seconds to help the cheese melt into every crevice of the meat.
- Assemble the sliders with a bit of sauce, a pickle, and the patty. Use a long toothpick or skewer to hold the layers together on the board.
How to make zucchini fries

Why we love this
Zucchini fries are the ‘cool, healthy’ cousin of the potato fry, offering a refreshing but equally crunchy alternative. When prepared correctly, the zucchini stays vibrant and tender inside, while the Parmesan-panko crust provides a salty, nutty exterior that shatters beautifully. They have an earthy sweetness that is amplified by the high heat of the oven, and because they feel lighter than traditional fries, you can enjoy several without feeling weighed down. They are a fantastic way to add a bit of green to your board while keeping the ‘fried food’ vibe alive.
Ingredients
- 2 medium zucchinis
- 1/2 cup Panko breadcrumbs
- 1/4 cup grated Parmesan cheese
- 1 teaspoon Italian seasoning
- 2 eggs, beaten
- 1/2 cup flour
How to make it
- Slice the zucchini into sticks about 3 inches long and 1/2 inch thick. Try to keep them uniform so they cook at the same rate.
- Set up your dredging station: flour in one bowl, beaten eggs in the second, and a mix of panko, Parmesan, and Italian seasoning in the third.
- Dredge each stick in flour, dip in egg, and then press firmly into the panko mixture. The Parmesan in the crust will help it brown and become extra crispy.
- Place the fries on a parchment-lined baking sheet, ensuring they aren’t touching. If they are crowded, they will steam instead of crisp.
- Bake at 425°F (220°C) for 15-20 minutes, flipping halfway through. You want the crust to be a dark golden brown.
- Sprinkle with a little extra salt the second they come out of the oven. Serve with a garlicky aioli or lemon-herb dip.
How to glaze party meatballs

Why we love this
Party meatballs are the ultimate crowd-pleaser, evoking memories of festive holiday gatherings and cozy potlucks. These tender, herb-flecked morsels are simmered in a rich, glossy glaze that is the perfect marriage of sweet and savory. As the glaze reduces, it coats each meatball in a sticky, umami-rich blanket that catches the light beautifully on the board. The aroma of simmering beef and sweet glaze is intoxicating, and the soft, melt-in-your-mouth texture provides a lovely counterpoint to the many crunchy items on your display.
Ingredients
- 1 lb pre-cooked frozen meatballs (or homemade)
- 1/2 cup grape jelly
- 1/2 cup chili sauce (like Heinz)
- 1 teaspoon Worcestershire sauce
- Fresh chives for garnish
How to make it
- In a large saucepan or slow cooker, combine the grape jelly, chili sauce, and Worcestershire sauce. Whisk over medium heat until the jelly has melted and the sauce is smooth.
- Add the meatballs to the sauce. If using frozen meatballs, there is no need to thaw them first; just increase the simmer time.
- Bring the mixture to a gentle simmer. Cover and cook for about 15-20 minutes, stirring occasionally to ensure every meatball is bathed in the glaze.
- Remove the lid for the last 5 minutes of cooking. This allows the sauce to reduce and thicken into a sticky glaze that clings to the meat rather than running off.
- The meatballs are ready when they are heated through and the sauce has a jam-like consistency.
- Transfer to a small bowl on your board and garnish with finely chopped chives for a pop of color and fresh onion flavor.
How to bake spinach bites
[IMAGE_10]
Why we love this
Spinach bites are like mini, hand-held quiches that pack a sophisticated punch. They feature a buttery, flaky exterior—often made with puff pastry or a savory dough—that gives way to a creamy, earthy center filled with sautéed spinach, garlic, and tangy feta or parmesan. The smell of baking pastry is one of the most welcoming scents in the world, signaling to guests that something special is on the way. These bites are elegant, colorful, and offer a vegetarian option that feels just as indulgent as the meat-heavy components of the board.
Ingredients
- 1 sheet frozen puff pastry, thawed
- 1 cup chopped cooked spinach (squeezed dry)
- 1/2 cup ricotta cheese
- 1/4 cup grated Parmesan
- 1 clove garlic, minced
- 1 egg (for egg wash)
How to make it
- Preheat your oven to 400°F (200°C). It is vital to squeeze every drop of moisture out of your cooked spinach using a kitchen towel; otherwise, the pastry will get soggy.
- In a bowl, mix the dried spinach, ricotta, Parmesan, and minced garlic. Season with a little salt and pepper.
- Roll out the puff pastry and cut it into 2-inch squares or circles. Place a small dollop of the spinach mixture in the center of each.
- Fold the pastry over or pinch the corners together to create a little parcel. Brush the outside with a beaten egg wash for that classic professional shine.
- Bake for 12-15 minutes on a parchment-lined sheet. Watch for the pastry to puff up significantly and turn a deep, golden-brown color.
- Let them cool for 3-4 minutes before placing them on the board, as the cheese filling can be very hot. They are best served warm but are still delicious at room temperature.
Conclusion
Building a viral food board isn’t about perfection; it’s about the abundance of choices and the joy of sharing. By combining these ten diverse recipes, you create a landscape of flavors and textures that caters to every craving. Remember to fill in the gaps of your board with fresh grapes, sliced cucumbers, and a variety of nuts to create that ‘overflowing’ look that makes food boards so visually appealing. Now, grab a board, start cooking, and watch your guests dive into a feast they won’t soon forget!
Frequently Asked Questions
Can I make these items ahead of time?
Most of these components, like the meatballs and sausages, can be prepared a few hours early and kept warm. However, for maximum ‘wow’ factor, items like the mozzarella sticks and wings are best served fresh for the ultimate crunch.
How do I keep the food warm on the board?
The best trick is to use small, warmed ceramic bowls for items like meatballs and to place the board out just as guests arrive. Wood is a natural insulator and will help keep the dry items warm for about 20-30 minutes.
What is the best board to use?
A large wooden butcher block or a marble slab works beautifully. If you don’t have one, you can even line your clean kitchen counter with brown parchment paper and build the feast directly on the paper for an ‘epic’ look!