
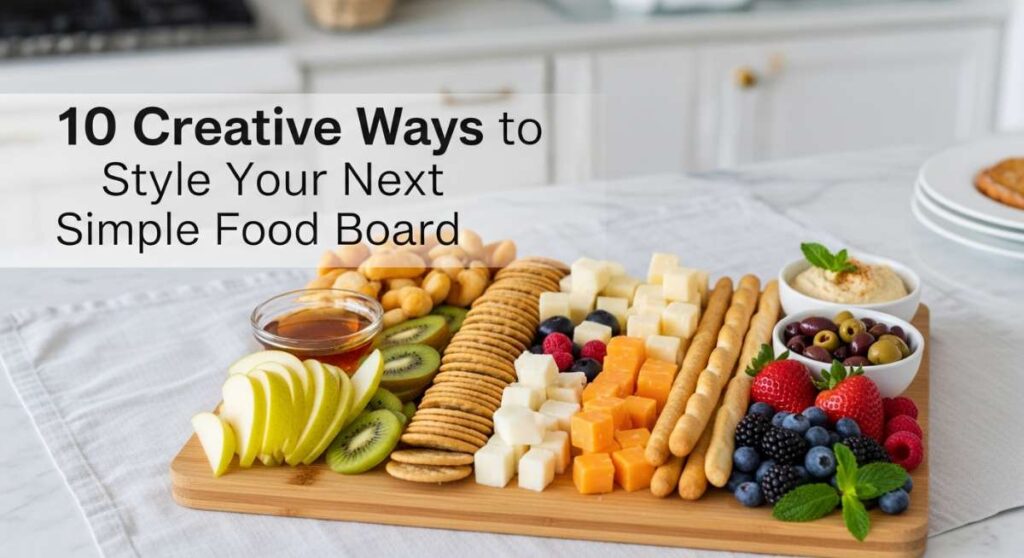
There is something undeniably magical about gathering around a table where the center of attention isn’t just one dish, but a vibrant, overflowing board of culinary delights. We’ve all seen those stunning food boards taking over our social feeds—the ones that look almost too beautiful to eat, yet you can’t help but reach in. They represent more than just a meal; they represent a moment of connection, a slower pace of life where we savor every bite and every conversation. Creating a viral-worthy food board isn’t about being a professional chef; it’s about the love and care you put into the textures, colors, and flavors that invite your favorite people to dig in.
Lately, I’ve found myself leaning into the ‘Simple Food Board’ trend because it strips away the stress of a formal dinner party while keeping all the elegance. Whether it’s a rainy Tuesday or a celebratory Sunday, these boards allow us to curate our favorite comfort foods into a shared experience. In this guide, I’m sharing ten of my absolute favorite, tried-and-true recipes that will turn your next board into a viral sensation. From the satisfying crunch of perfect potatoes to the gooey melt of cheesy sliders, let’s dive into the art of making food that feels like a warm hug.
How to make crispy potatoes
Why we love this
There is nothing quite like the sound of a fork hitting a perfectly crisp potato skin, followed by the reveal of a fluffy, cloud-like interior. These golden gems are the ultimate comfort food, offering a satisfying crunch that echoes through the room while the scent of roasted rosemary and sea salt fills the air. They provide a beautiful earthy tone to your food board, acting as the perfect anchor for dipping sauces or simply enjoyed on their own. Each bite is a harmony of textures, moving from a shatteringly crisp exterior to a buttery, melt-in-your-mouth center that feels like pure indulgence.
Ingredients
- 2 lbs Yukon Gold potatoes, peeled and chopped into 1-inch chunks
- 1/2 cup extra virgin olive oil or duck fat
- 4 cloves of garlic, smashed
- 2 sprigs of fresh rosemary
- Flaky sea salt and cracked black pepper
How to make it
- Start by parboiling your potatoes in a large pot of heavily salted water for about 8-10 minutes until the edges are just tender but the centers are still firm.
- Drain the potatoes and let them steam dry in the colander for 2 minutes; then, give the colander a vigorous shake to roughen up the edges—this starchy ‘fuzz’ is the secret to maximum crunch.
- Preheat your oven to 425°F (220°C) and place a large rimmed baking sheet inside to get screaming hot.
- Carefully remove the hot tray, pour in your oil, and add the potatoes, ensuring each piece is coated while listening for that satisfying sizzle.
- Spread them into a single layer with plenty of space between pieces and roast for 40-50 minutes, turning them every 15 minutes with a metal spatula until they are deep mahogany and crisp.
- In the final 10 minutes of roasting, toss in the smashed garlic and rosemary sprigs to infuse the oil with aromatic oils without burning the herbs.
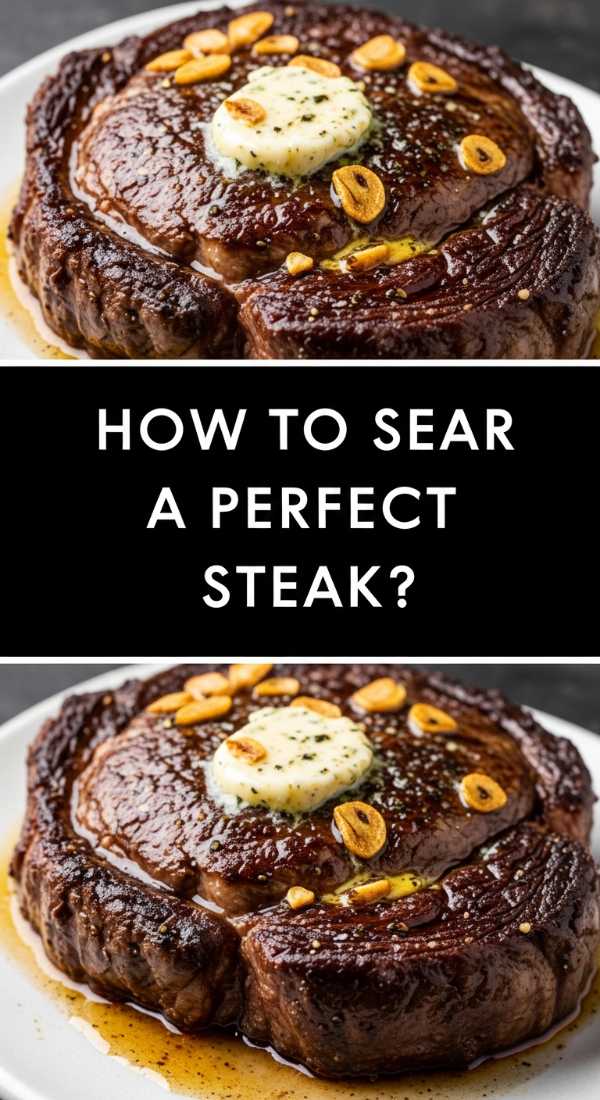
How to sear perfect steak
Why we love this
A perfectly seared steak is the crowning jewel of any high-end food board, offering a rich, umami depth that pairs beautifully with fresh greens or crusty bread. The sight of that deep, dark Maillard crust contrasted against a tender, rosy-pink medium-rare center is enough to make anyone’s mouth water instantly. As you slice into it, the aroma of browned butter, garlic, and earthy thyme wafts up, creating an atmosphere of rustic luxury. It’s the kind of dish that feels celebratory and grounding all at once, providing a hearty, savory protein that anchors the more delicate elements of your spread.
Ingredients
- 1.5-inch thick Ribeye or New York Strip steak
- 2 tbsp high-smoke point oil (like avocado oil)
- 3 tbsp unsalted butter
- 3 cloves of garlic, unpeeled and smashed
- Fresh thyme and rosemary sprigs
- Kosher salt and coarse black pepper
How to make it
- Take your steak out of the refrigerator at least 45 minutes before cooking to bring it to room temperature, which ensures even cooking throughout the meat.
- Pat the steak extremely dry with paper towels on all sides; any moisture on the surface will create steam instead of a crust.
- Season aggressively with salt and pepper, pressing the seasoning into the fibers of the meat.
- Heat a heavy cast-iron skillet over high heat until the oil is shimmering and just starting to wisps of smoke appear.
- Lay the steak away from you in the pan and sear for 3 minutes without moving it to build a thick, dark crust; flip and cook for another 2 minutes.
- Reduce the heat to medium, add the butter, garlic, and herbs to the pan, and as the butter foams, tilt the pan and spoon the flavored fat over the steak repeatedly for 2-3 minutes (the ‘baste’).
- Remove the steak when the internal temperature hits 130°F (54°C) for medium-rare and let it rest on a cutting board for at least 10 minutes to allow the juices to redistribute before slicing.
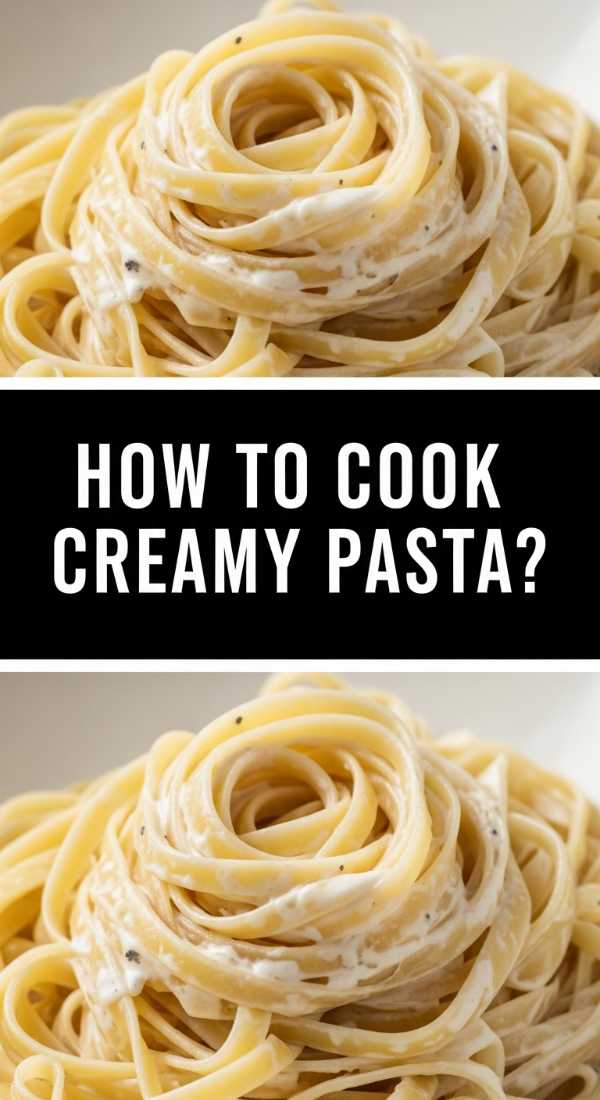
How to cook creamy pasta

Why we love this
Creamy pasta is the definition of soul-soothing food, offering a silky, velvety texture that wraps around every noodle like a warm blanket. The aroma of simmering cream, sharp parmesan, and toasted garlic creates a fragrance that is both homey and sophisticated, drawing guests to the board immediately. There’s a beautiful gloss to a well-made sauce that catches the light, making it a visual centerpiece that promises a rich, decadent experience. Every bite is a balance of savory cheese and smooth cream, providing a luxurious mouthfeel that complements the textures of roasted vegetables or crispy proteins on your board.
Ingredients
- 12 oz long pasta (like Fettuccine or Linguine)
- 1 cup heavy cream
- 1/2 cup freshly grated Parmigiano-Reggiano
- 2 tbsp unsalted butter
- 2 cloves garlic, minced
- Reserved pasta water
- Fresh parsley and lemon zest for garnish
How to make it
- Boil a large pot of water and season it heavily with salt until it tastes like the sea; cook your pasta until it is ‘al dente’ (about 1-2 minutes less than the package instructions).
- While the pasta cooks, melt butter in a wide skillet over medium-low heat and gently sauté the minced garlic until fragrant but not browned.
- Pour in the heavy cream and bring to a gentle simmer, letting it reduce slightly for about 3 minutes until it coats the back of a spoon.
- Before draining the pasta, reserve at least 1 cup of the starchy pasta water—this is your ‘liquid gold’ for the sauce.
- Transfer the pasta directly into the cream sauce and sprinkle in the grated parmesan cheese.
- Toss vigorously while adding splashes of the reserved pasta water; the starch and fat will emulsify to create a glossy, clingy sauce rather than a clumpy one.
- Keep tossing over low heat until the sauce is thick and luxurious, then finish with a bright pop of lemon zest and parsley.
How to bake chewy cookies

Why we love this
No food board is complete without a sweet finale, and these chewy cookies are the ultimate crowd-pleaser with their soft, doughy centers and crisp, buttery edges. The scent of vanilla and toasted sugar baking in the oven is the universal signal for comfort, creating an inviting atmosphere long before the board is even served. They have a rustic, handmade look that adds a touch of whimsy and sweetness to your aesthetic, especially when paired with fresh berries or dark chocolate shards. The contrast between the molten chocolate pockets and the slightly salty dough makes each bite a complex, addictive journey of flavor.
Ingredients
- 1 cup unsalted butter, browned and cooled
- 1 cup brown sugar, packed
- 1/2 cup granulated sugar
- 1 large egg + 1 egg yolk (room temperature)
- 2 tsp vanilla extract
- 2 1/4 cups all-purpose flour
- 1 tsp baking soda
- 1/2 tsp sea salt
- 1.5 cups dark chocolate chunks
How to make it
- Brown your butter in a saucepan over medium heat, stirring constantly until it smells nutty and golden bits settle at the bottom; let it cool until it’s just warm to the touch.
- In a large bowl, whisk the browned butter with both sugars for at least 2 minutes until the mixture looks pale and slightly fluffy.
- Add the egg, egg yolk, and vanilla, whisking until the mixture becomes glossy and smooth.
- Gently fold in the flour, baking soda, and salt using a spatula until just combined—do not overmix, as this will make the cookies tough.
- Fold in the chocolate chunks, then chill the dough in the refrigerator for at least 2 hours (or overnight) to develop flavor and prevent spreading.
- Scoop rounded tablespoons of dough onto a parchment-lined sheet and bake at 350°F (175°C) for 10-12 minutes.
- Look for the edges to be set and golden while the centers still look slightly underbaked; they will firm up as they cool on the tray, resulting in that perfect chewy texture.
How to roast juicy chicken

Why we love this
Roast chicken is the ultimate centerpiece for a rustic food board, offering a stunning golden-brown skin that crackles under the knife to reveal incredibly moist meat. The combination of lemon, garlic, and fresh herbs creates a bright, savory aroma that feels sophisticated yet deeply traditional. It adds a sense of abundance to your board, making it feel like a true feast rather than just a collection of snacks. The juices from the chicken naturally mingle with other elements on the board, like crusty bread or roasted potatoes, enhancing every other component with its rich, savory essence.
Ingredients
- 1 whole chicken (about 4 lbs)
- 4 tbsp softened butter
- 1 lemon, halved
- 1 head of garlic, sliced in half horizontally
- Fresh sage, rosemary, and thyme
- Kosher salt and black pepper
How to make it
- Remove the chicken from the fridge 30 minutes before roasting and pat the skin completely dry with paper towels; moisture is the enemy of crispy skin.
- Generously season the cavity with salt and pepper, then stuff it with the lemon halves, garlic head, and half of the herb sprigs.
- Rub the softened butter all over the outside of the chicken, making sure to get under the skin of the breast meat for extra juiciness.
- Tuck the wing tips behind the back and tie the legs together with kitchen twine (trussing) to ensure the bird cooks evenly.
- Place the chicken in a roasting pan and cook at 450°F (230°C) for the first 15 minutes to blast the skin, then reduce the heat to 375°F (190°C).
- Continue roasting for about 50-60 minutes, or until a meat thermometer inserted into the thickest part of the thigh reads 165°F (74°C).
- Crucially, let the chicken rest for 15-20 minutes before carving; this allows the juices to settle back into the meat so they don’t run out on your board.
How to make fluffy pancakes
Why we love this
Bringing breakfast elements to a lifestyle food board is a genius move, and these fluffy pancakes are the star of the ‘Brunch Board’ trend. They are like edible clouds, stacked high and waiting to be drizzled with amber maple syrup and topped with melting pats of butter. The gentle scent of vanilla and malted flour creates a nostalgic, cozy vibe that makes everyone feel at home. Their uniform golden circles provide a satisfying geometric beauty to the board, while their soft, airy texture provides a wonderful contrast to crunchy bacon or fresh, tart fruit.
Ingredients
- 1 1/2 cups all-purpose flour
- 3 tbsp sugar
- 1 tbsp baking powder
- 1/2 tsp salt
- 1 1/4 cups buttermilk
- 1 large egg
- 3 tbsp melted butter
- 1 tsp vanilla extract
How to make it
- In a large bowl, whisk together the dry ingredients; in a separate jug, whisk the buttermilk, egg, melted butter, and vanilla.
- Pour the wet ingredients into the dry and stir with a fork until just combined—it is vital to leave some lumps in the batter to keep the pancakes light and airy.
- Let the batter rest for 10 minutes; this allows the baking powder to activate and the flour to hydrate, resulting in a better rise.
- Heat a non-stick griddle or skillet over medium-low heat and lightly grease with butter or oil.
- Pour 1/4 cup of batter for each pancake and watch closely; when small bubbles form on the surface and stay open, it’s time to flip.
- Flip gently and cook for another 1-2 minutes until the second side is golden brown.
- Keep them warm in a low oven (200°F) until you are ready to assemble your board to ensure they stay soft and supple.
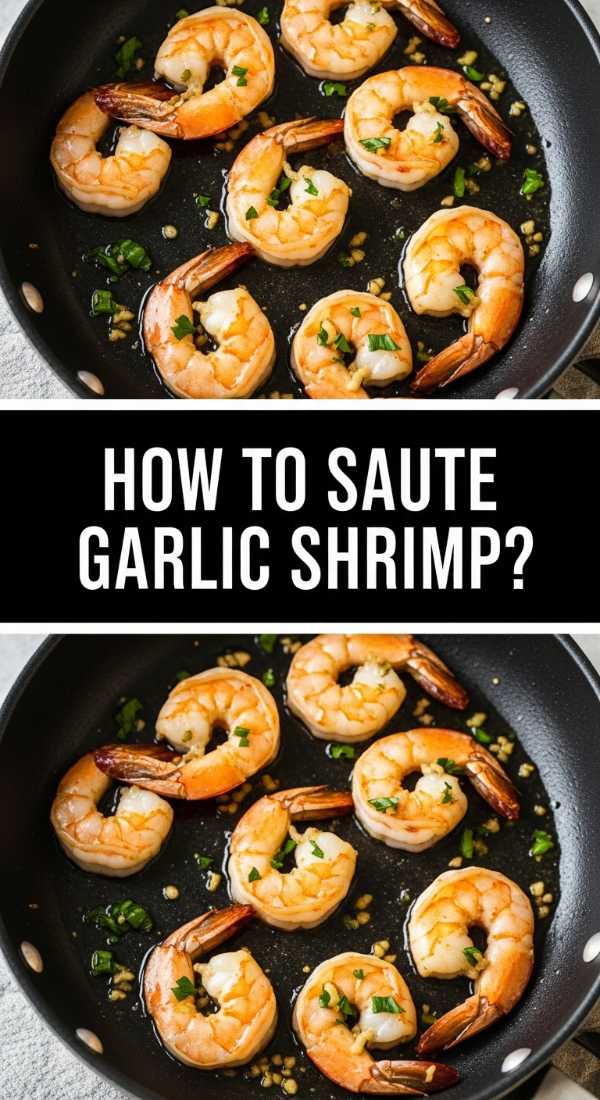
How to sauté garlic shrimp
Why we love this
Garlic shrimp adds a touch of coastal elegance and a punch of bold flavor to your board, cooking up in minutes but tasting like a gourmet treat. The visual of the bright pink, curled shrimp nestled in a pool of golden, garlic-flecked butter is absolutely mouthwatering. As they hit the pan, the aroma of sizzling garlic and red pepper flakes creates an irresistible scent that draws people in from other rooms. They are the perfect ‘finger food’ for a board, offering a snap of texture and a burst of zesty, herbal flavor that feels light yet deeply satisfying.
Ingredients
- 1 lb large shrimp, peeled and deveined
- 4 tbsp unsalted butter
- 4 cloves garlic, thinly sliced
- 1/2 tsp red pepper flakes
- 1/4 cup dry white wine or chicken broth
- Fresh parsley, chopped
- Lemon wedges
How to make it
- Pat the shrimp dry with paper towels and season lightly with salt; dry shrimp will sear beautifully instead of steaming.
- Heat a large skillet over medium-high heat and melt 2 tablespoons of butter until it starts to foam.
- Add the shrimp in a single layer, ensuring they aren’t crowded; sear for about 1-2 minutes per side until they just turn pink and opaque.
- Remove the shrimp from the pan immediately to avoid overcooking (they should be C-shaped, not tight O-shaped).
- Reduce the heat to medium and add the remaining butter, sliced garlic, and red pepper flakes, cooking for 1 minute until the garlic is fragrant and golden.
- Deglaze the pan with the white wine, scraping up any browned bits, and let it simmer for 2 minutes to reduce.
- Return the shrimp to the pan, toss to coat in the garlic butter sauce, and finish with a heavy sprinkle of parsley and a squeeze of fresh lemon.
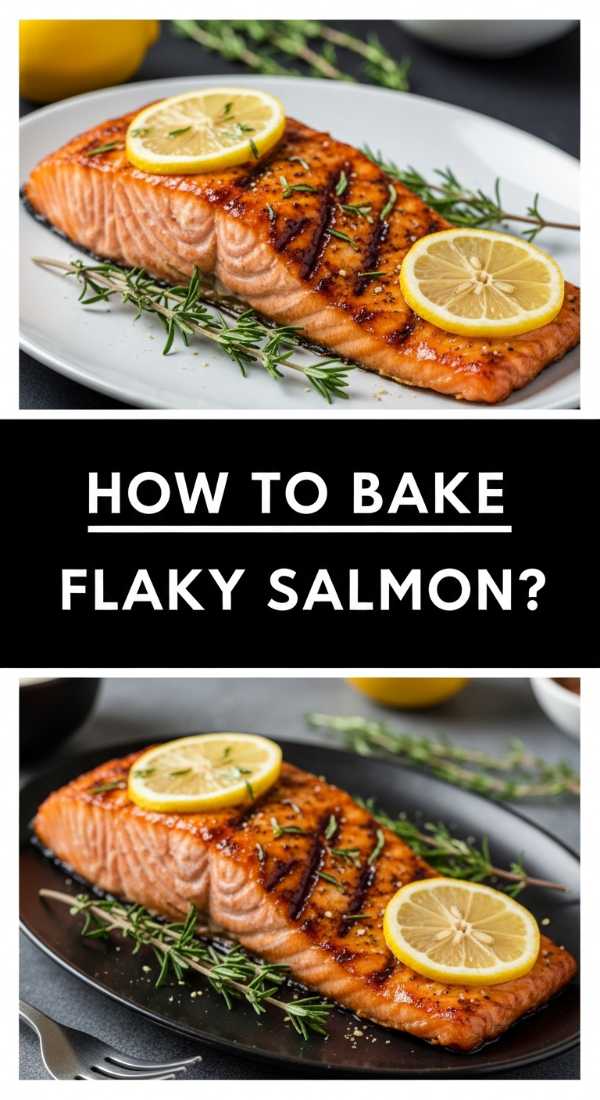
How to bake flaky salmon

Why we love this
Baked salmon is a showstopper on a food board, offering a vibrant pop of coral color and a texture that is so tender it flakes at the touch of a fork. The glaze caramelizes in the oven, creating a glossy, sweet-and-savory finish that looks professional and tastes even better. It brings a sophisticated, healthy element to your spread, pairing perfectly with fresh cucumbers, dill, or a dollop of creme fraiche. The aroma of roasted fish with hints of honey and ginger is subtle and inviting, making it a favorite for those who love clean yet bold flavors.
Ingredients
- 1 large side of salmon (or individual fillets)
- 2 tbsp olive oil
- 2 tbsp honey
- 1 tbsp soy sauce
- 1 tsp grated fresh ginger
- 1 lemon, thinly sliced
- Fresh dill for garnish
How to make it
- Preheat your oven to 400°F (200°C) and line a baking sheet with parchment paper or foil for easy cleanup.
- Whisk together the olive oil, honey, soy sauce, and ginger in a small bowl to create your glaze.
- Place the salmon on the baking sheet and pat the skin dry; brush the glaze generously over the entire surface of the fish.
- Top the salmon with lemon slices, which will soften and release their juices into the meat as it bakes.
- Roast for 12-15 minutes depending on the thickness; the key visual cue is when the salmon turns from translucent to opaque and the white albumin (protein) just starts to appear.
- To check for doneness, press the thickest part of the fish with a fork—it should easily separate into large, moist flakes.
- Garnish with fresh dill immediately after removing from the oven for a burst of herbal fragrance.
How to make street tacos

Why we love this
Street tacos bring a fun, interactive energy to a food board, allowing guests to build their own perfect bite with a variety of colorful toppings. The smell of charred corn tortillas and spicy, seared meat creates an atmosphere of a summer festival right in your living room. There’s something so satisfying about the combination of warm, soft tortillas, juicy filling, and the sharp, cold crunch of raw onions and cilantro. They add a vibrant, casual aesthetic to the board, with piles of lime wedges and radishes providing bright pops of color that look incredible in photos.
Ingredients
- 1 lb flank steak or chicken thighs, diced small
- 1 tbsp taco seasoning (cumin, chili powder, garlic powder)
- Small corn tortillas
- 1/2 white onion, finely diced
- Fresh cilantro, chopped
- Radishes, thinly sliced
- Lime wedges
How to make it
- Toss your diced meat with the seasonings and a splash of oil, letting it marinate for at least 15 minutes to penetrate the fibers.
- Heat a heavy skillet or cast-iron griddle over high heat until it’s smoking slightly; sear the meat in batches so the pan stays hot and the meat gets a dark, caramelized crust.
- While the meat rests, wipe the pan and heat your corn tortillas for 30 seconds per side until they show charred ‘leopard spots’ and become pliable.
- Pro tip: Keep the tortillas warm by wrapping them in a clean kitchen towel as you work through the stack.
- To assemble the board, place the meat in a central bowl and surround it with the charred tortillas and small piles of onion, cilantro, and radishes.
- Always include plenty of lime wedges; the acidity is essential to cutting through the richness of the seared meat.
How to grill cheesy sliders
[IMAGE_10]
Why we love this
Sliders are the ultimate ‘party food,’ offering all the satisfaction of a burger in a cute, manageable size that fits perfectly on a crowded board. The sight of melted cheddar cheese oozing over the sides of a juicy patty, tucked into a toasted, buttery bun, is universally loved. They fill the air with the nostalgic scent of a backyard barbecue, creating a relaxed and joyful vibe for your gathering. Each slider is a little bundle of joy, providing a savory, salty, and cheesy bite that pairs wonderfully with pickles or a spicy aioli, making them the first thing to disappear from the board.
Ingredients
- 1 lb ground beef (80/20 blend for juiciness)
- 12-pack of slider buns (like Hawaiian rolls)
- 6 slices of sharp cheddar cheese, halved
- Softened butter
- Salt and pepper
- Optional: caramelized onions or pickles
How to make it
- Form the ground beef into 12 small, round patties, making them slightly wider than the buns as they will shrink during cooking.
- Use your thumb to make a small indentation in the center of each patty; this prevents them from puffing up into balls while grilling.
- Heat your grill or a large skillet to medium-high heat and season the patties generously with salt and pepper just before they hit the heat.
- Grill for 3 minutes on the first side to develop a deep brown crust, then flip.
- Immediately place a half-slice of cheese on each patty and cover the grill or pan with a lid for 1 minute to ensure the cheese is completely melted and gooey.
- Split the slider buns and lightly butter the insides, toasting them on the grill for 30 seconds until they are golden and crisp.
- Assemble with your favorite toppings and secure with a toothpick if they are stacked high, then line them up in a row on your board for a classic, viral look.
Conclusion
Creating a viral simple food board is truly an art form that celebrates the beauty of everyday ingredients. By focusing on these ten versatile recipes, you can mix and match flavors to suit any occasion, from a cozy movie night to a sophisticated garden party. Remember, the ‘secret sauce’ to a great board isn’t just the cooking technique—it’s the way you arrange the elements to invite people in. Don’t be afraid to let things overlap, add a few sprigs of fresh herbs for garnish, and let the natural colors of the food shine. I can’t wait to see the stunning boards you create!