
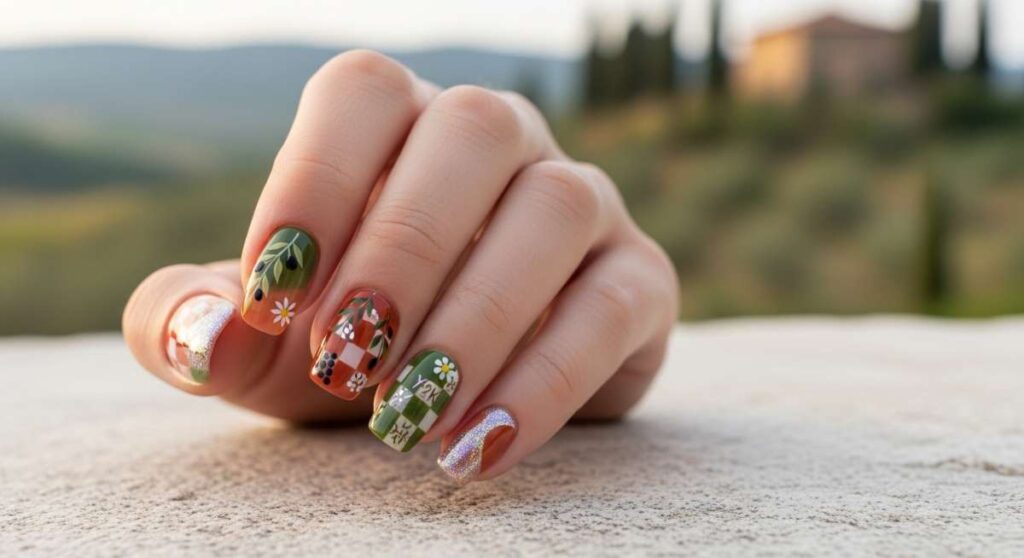
Y2K Meets Italy: How to Rock Tuscan-Inspired Nail Art
Hello, my beautiful loves. Imagine, for just a moment, that you’re sitting on a sun-drenched balcony in the heart of Tuscany, the air smelling of wild rosemary and lemons, while your favorite early-2000s playlist hums softly in the background. It’s that perfect, dreamy intersection of rustic elegance and that sparkly, butterfly-clip nostalgia we all crave. I’ve been feeling so inspired by this ‘Mediterranean-Meets-Main-Character’ energy lately, and I wanted to bring that warmth straight to your fingertips.
Lately, my heart has been gravitating toward textures that feel like warm terracotta and designs that sparkle like the Mediterranean Sea at high noon. We’re moving away from the stark, cold trends and embracing something that feels like a soft, cloud-like hug for your soul. Whether you’re sipping an espresso in a piazza or just dreaming of one from your living room, these nail looks are designed to make you feel radiant, nostalgic, and deeply connected to your most vibrant self.
Today, we’re diving into ten stunning ways to blend the earthy soul of Italy with the playful spirit of the Y2K era. Grab a cup of tea, settle into your favorite cozy chair, and let’s create some magic together.
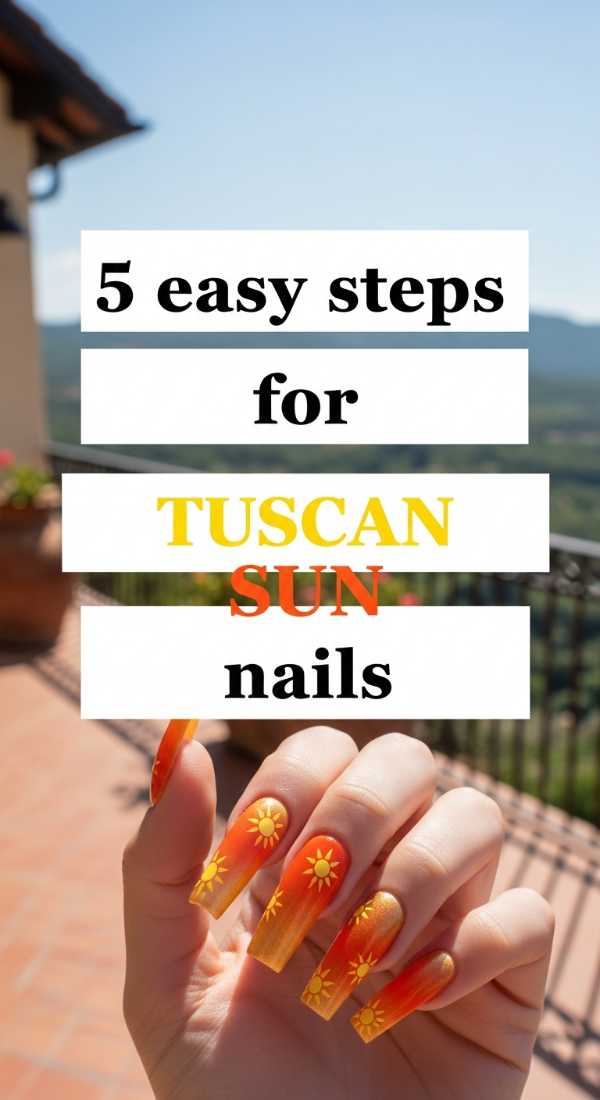
Golden Hour: 5 Easy Steps for Tuscan Sun Nails
Why to love these Nails:
These nails are like capturing the very last rays of a Tuscan sunset and wearing them wherever you go. The warm ochre and gold tones are incredibly flattering on every skin tone, giving you a healthy, sun-kissed glow even on the grayest days. It’s pure vitamin D in a bottle, loves.
Essential Items:
- Ochre yellow polish
- Gold leaf flakes
- Clear top coat
- Detailing sponge
- Matte base coat
How to Prepare:
- Apply a matte base coat to create a smooth, earthy canvas.
- Sponge a light layer of ochre yellow onto the tips for a soft gradient.
- While tacky, gently press gold leaf flakes onto the center of the nail.
- Seal the edges with a second thin layer of yellow to ‘bury’ the gold.
- Finish with a high-shine top coat to mimic the glistening sun.
Budget Range
- Essie ‘Check In To Check Out’ – $10
- Beauty Secrets Gold Leaf Kit – $6
- Sally Hansen Insta-Dri Top Coat – $7
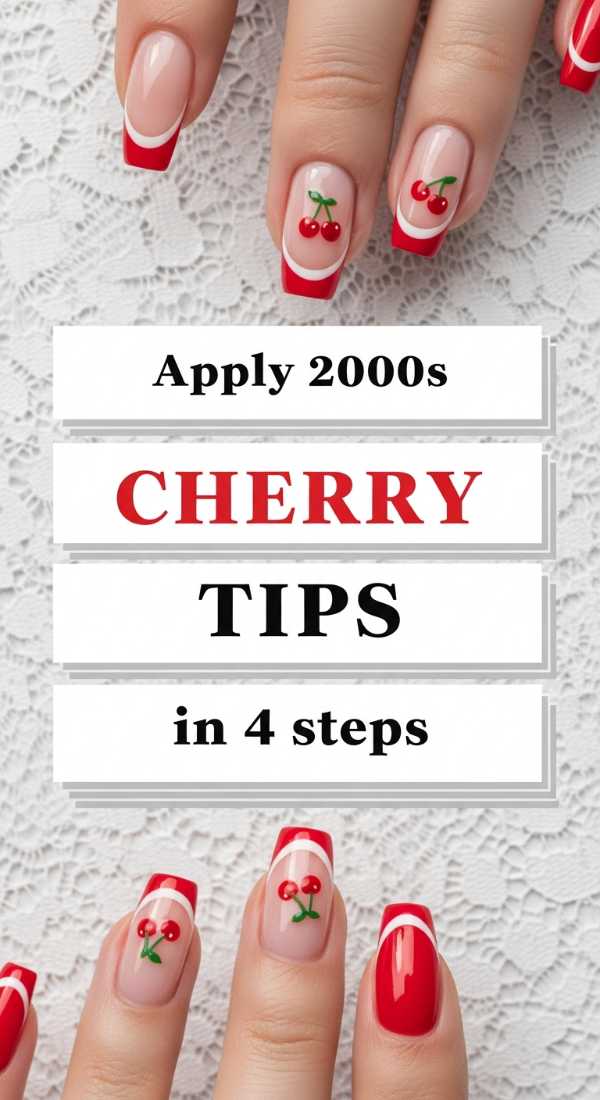
Sweet Sensation: Apply 2000s Cherry Tips in 4 Steps
Why to love these Nails:
Nothing screams Y2K quite like a juicy cherry motif, but when we pair it with a sophisticated Italian almond shape, it becomes something truly special. It’s playful, flirty, and reminds me of picking fresh fruit in a hillside orchard while wearing oversized sunglasses.
Essential Items:
- Sheer pink base polish
- Bright red nail pen
- Forest green striper
- Dotting tool
How to Prepare:
- Paint two coats of sheer pink to give your nails a healthy, ‘lip gloss’ finish.
- Use a large dotting tool to place two red circles side-by-side near the tip.
- Connect the circles with a delicate green ‘V’ using your striper brush.
- Add a tiny white ‘highlight’ dot on each cherry for that 3D plastic look.
Budget Range
- OPI ‘Bubble Bath’ – $11
- Holler and Glow Nail Art Pens – $8
- Zoya ‘Sizzling Red’ – $12
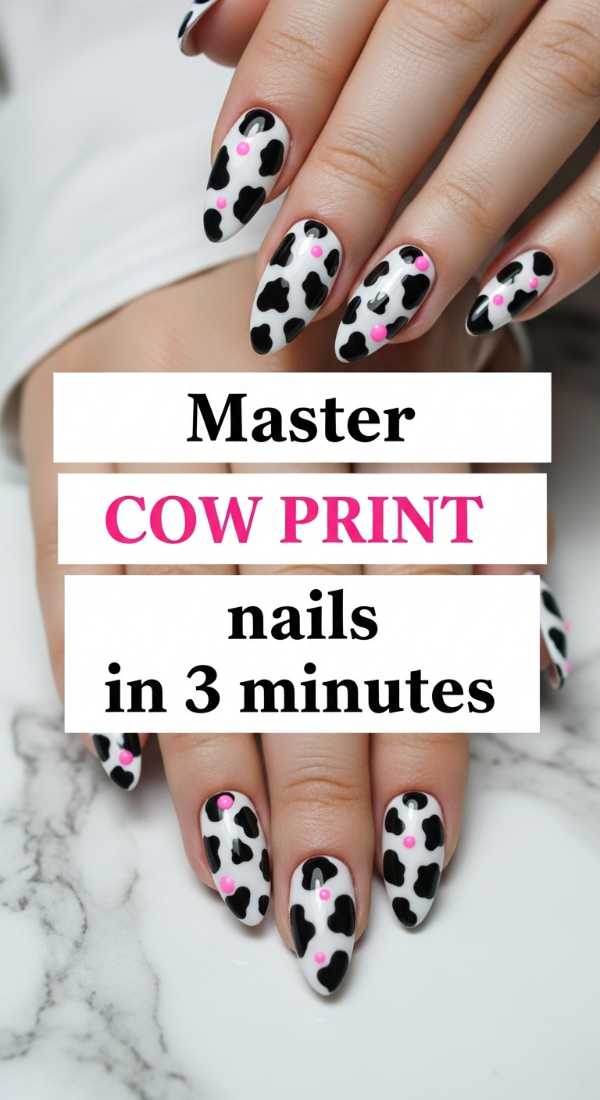
Rustic Chic: Master Cow Print Nails in 3 Minutes
Why to love these Nails:
We’re taking the viral cow print trend and giving it a Tuscan farmhouse makeover. Instead of stark black and white, we’re using chocolate browns and creamy beiges. It’s a little bit country, a little bit ‘it-girl,’ and totally effortless.
Essential Items:
- Creamy beige polish
- Espresso brown polish
- Toothpick or fine brush
How to Prepare:
- Paint your base in a warm cream and let it dry for 60 seconds.
- Dip your toothpick into the espresso brown and create 4-5 irregular ‘splashes’ across the nail.
- Fill in the shapes loosely—imperfection is what makes this look authentic and rustic!
Budget Range
- Revlon ‘Enamel Coffee Bean’ – $6
- Wet n Wild ‘Sugar’ – $3
- Nail Art Detail Brush Set – $5
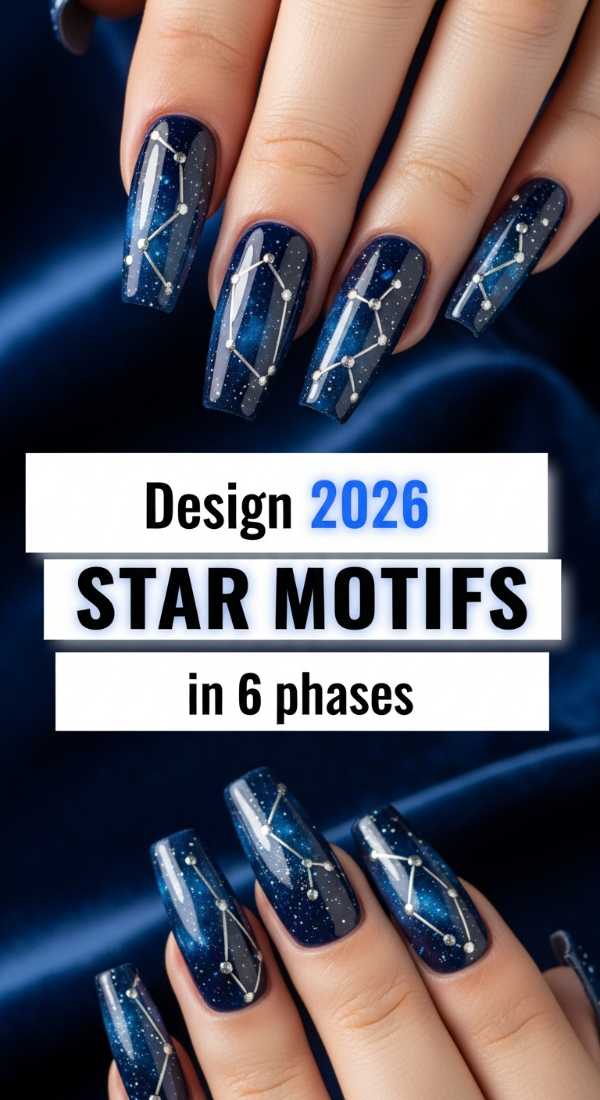
Future Nostalgia: Design 2026 Star Motifs in 6 Phases
Why to love these Nails:
This is for my loves who like to look ahead. We’re blending 2000s star stickers with a futuristic, Tuscan-twilight blue. It feels like looking up at the stars from a vineyard, dreaming of what’s next. It’s ethereal and deeply cool.
Essential Items:
- Deep navy blue polish
- Silver holographic star decals
- Tweezers
- UV Lamp (if using gel)
How to Prepare:
- Phase 1: Apply a deep navy base to represent the midnight sky.
- Phase 2: Cure or dry completely to ensure a non-slip surface.
- Phase 3: Use tweezers to place varying sizes of stars in a ‘milky way’ curve.
- Phase 4: Press down firmly on edges to prevent lifting.
- Phase 5: Apply a thick ‘plumping’ top coat to encapsulate the decals.
- Phase 6: Final cure/dry and a drop of cuticle oil for that celestial shine.
Budget Range
- Mooncat ‘Midnight Drive’ – $14
- Amazon Star Nail Decals – $5
- Seche Vite Dry Fast Top Coat – $9
Amore Art: Create Italian Heart Tips in 5 Steps

Why to love these Nails:
A classic French tip, but make it romantic. By shaping the tips into soft hearts using the colors of the Italian landscape—terracotta and sage—we create a look that is soft, feminine, and full of love. It’s a gentle reminder to lead with your heart.
Essential Items:
- Terracotta orange polish
- Sage green polish
- Stamping guide or steady hand
- Nude base polish
How to Prepare:
- Apply a nude base that matches your natural nail bed.
- Using the terracotta polish, draw two diagonal swoops from the sidewalls to the center tip.
- Repeat the shape to form a crisp heart point.
- Add a tiny sage green dot at the base of the heart for a ‘leaf’ effect.
- Seal with a matte top coat for a pottery-inspired finish.
Budget Range
- Olive & June ‘SCT’ – $9
- Orly ‘Sagebrush’ – $10
- Ella + Mila ‘Pure’ – $11
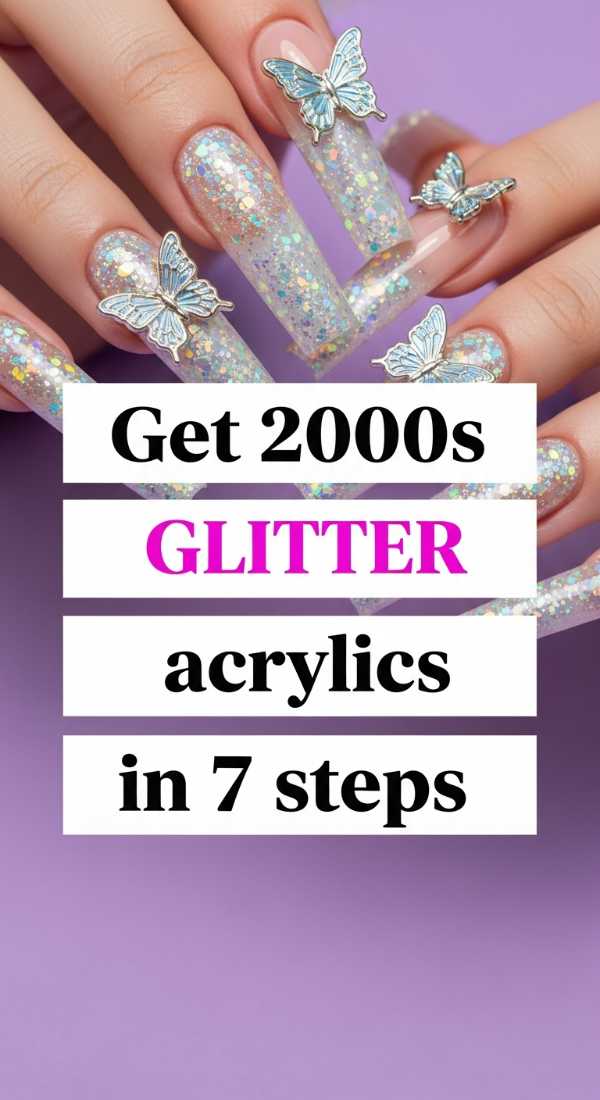
Y2K Glam: Get 2000s Glitter Acrylics in 7 Steps
Why to love these Nails:
Sometimes, we just need to sparkle, loves! This look brings back the heavy, chunky glitter of the early 2000s but keeps it elegant with a Mediterranean turquoise hue. It’s bold, it’s loud, and it’s unapologetically fabulous.
Essential Items:
- Chunky turquoise glitter
- Clear acrylic powder/liquid or builder gel
- Nail forms
- E-file or hand file
How to Prepare:
- Prep the natural nail by pushing back cuticles and dehydrating the surface.
- Apply the nail form to extend the length to a classic Y2K square.
- Mix the turquoise glitter with clear builder gel or acrylic.
- Apply the glitter mixture heavily at the tip, fading toward the cuticle.
- Encapsulate the entire design with a clear layer of product.
- File into a sharp, confident square shape.
- Buff to a high shine and finish with a non-wipe top coat.
Budget Range
- Morovan Acrylic Nail Kit – $25
- Festival Face Chunky Glitter – $7
- Modelones Builder Gel – $10
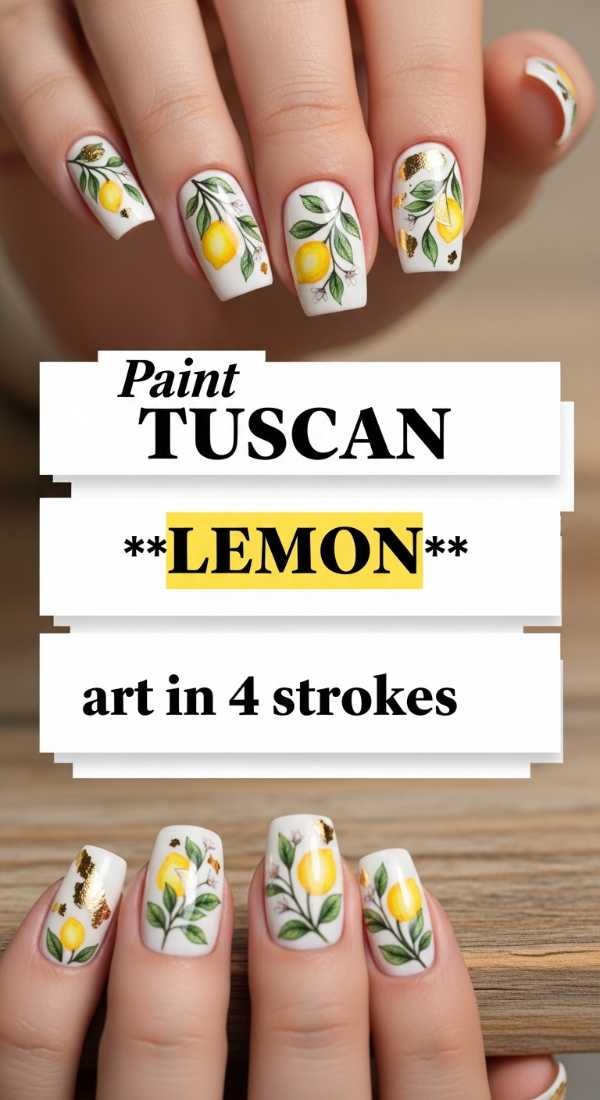
Zesty Vibes: Paint Tuscan Lemon Art in 4 Strokes
Why to love these Nails:
Is there anything more iconic than a Tuscan lemon? This design is so fresh and bright. It’s the perfect ‘pick-me-up’ for your mood. By simplifying the technique into four easy strokes, anyone can achieve this boutique look at home.
Essential Items:
- Bright yellow polish
- White acrylic paint (for detail)
- Thin liner brush
How to Prepare:
- Stroke 1: Paint an oval yellow shape on the side of the nail.
- Stroke 2: Add a tiny ‘nub’ at the end of the oval for the lemon’s tip.
- Stroke 3: Swipe a tiny bit of white paint inside the yellow for a ‘zest’ reflection.
- Stroke 4: Add a single green leaf stroke at the top to ground the fruit.
Budget Range
- Cirque Colors ‘Hedonist’ – $12
- Apple Barrel White Acrylic – $2
- Beetles Liner Brush Set – $8
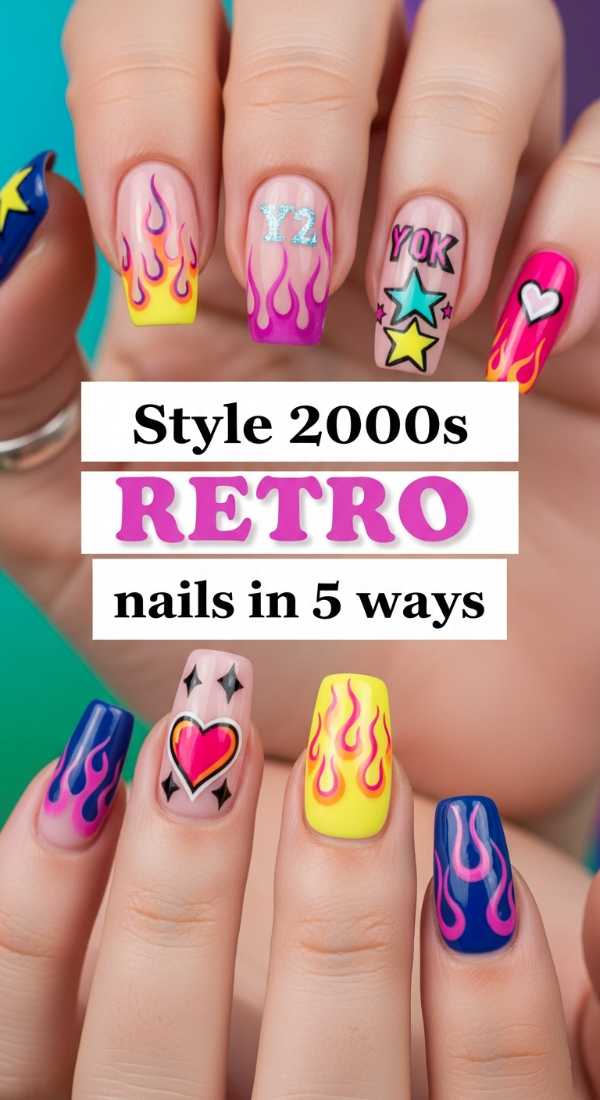
Nostalgia Trip: Style 2000s Retro Nails in 5 Ways
Why to love these Nails:
This is a tribute to the eclectic energy of the year 2000. We’re combining different textures and patterns across one hand. It’s for the bold souls who can’t pick just one style and want to celebrate every facet of their personality.
Essential Items:
- A palette of 5 pastel shades
- Checkered decals
- Small rhinestones
- Silver striping tape
How to Prepare:
- Way 1 (Thumb): Classic Y2K checkerboard in soft lavender and white.
- Way 2 (Index): A single large rhinestone ‘piercing’ the center of a clear tip.
- Way 3 (Middle): Abstract ‘lava lamp’ swirls using two contrasting pastels.
- Way 4 (Ring): Minimalist silver striping tape over a sheer base.
- Way 5 (Pinky): Full-coverage micro-shimmer in a Mediterranean blue.
Budget Range
- Sally Hansen ‘Hard as Nails’ Pastels – $4 each
- Nail Art Rhinestone Wheel – $5
- Line Art Stripping Tape – $3
Stone Cold Beauty: Build Tuscan Marble Nails in 6 Layers
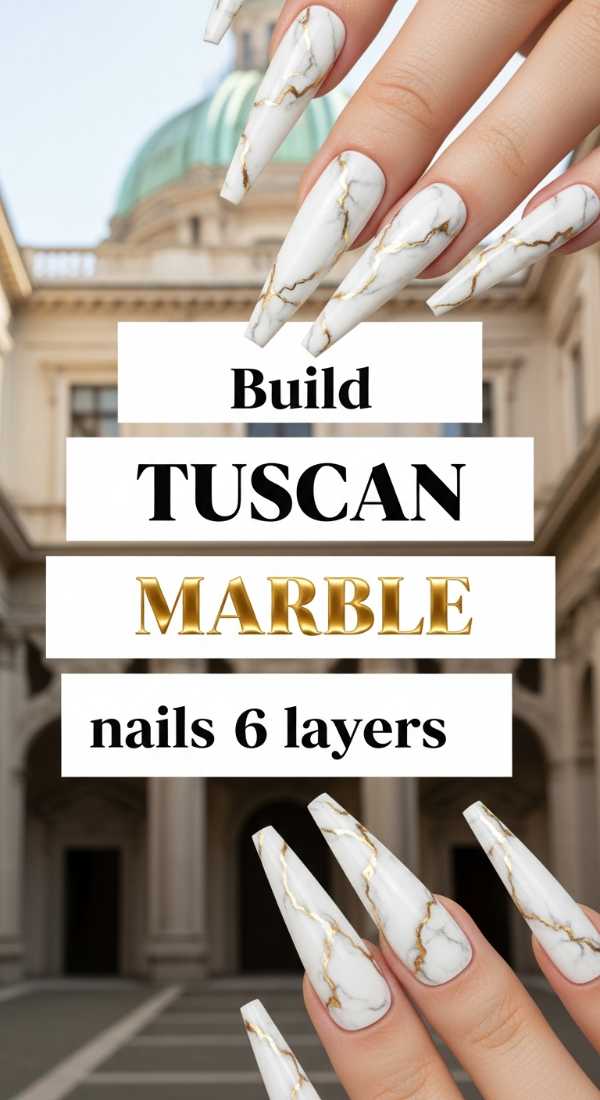
Why to love these Nails:
Inspired by the ancient statues and marble quarries of Italy, these nails feel expensive and timeless. By layering the polish, we create a realistic depth that looks like real stone. It’s sophisticated, quiet luxury at its finest.
Essential Items:
- White polish
- Grey polish
- Isopropryl alcohol
- Old eyeshadow brush
How to Prepare:
- Layer 1: Apply a solid white base and let dry.
- Layer 2: Apply a thin, patchy layer of grey polish.
- Layer 3: While grey is wet, dab a brush soaked in alcohol to ‘bloom’ the color.
- Layer 4: Add tiny, thin veins of dark grey with a fine brush.
- Layer 5: Apply a very sheer white ‘milky’ coat over the top to soften the veins.
- Layer 6: Finish with a high-gloss top coat to mimic polished stone.
Budget Range
- OPI ‘Alpine Snow’ – $11
- Essie ‘Serene Slate’ – $9
- 70% Isopropyl Alcohol – $3
Charm School: Perfect 2000s Charm Nails in 3 Stages
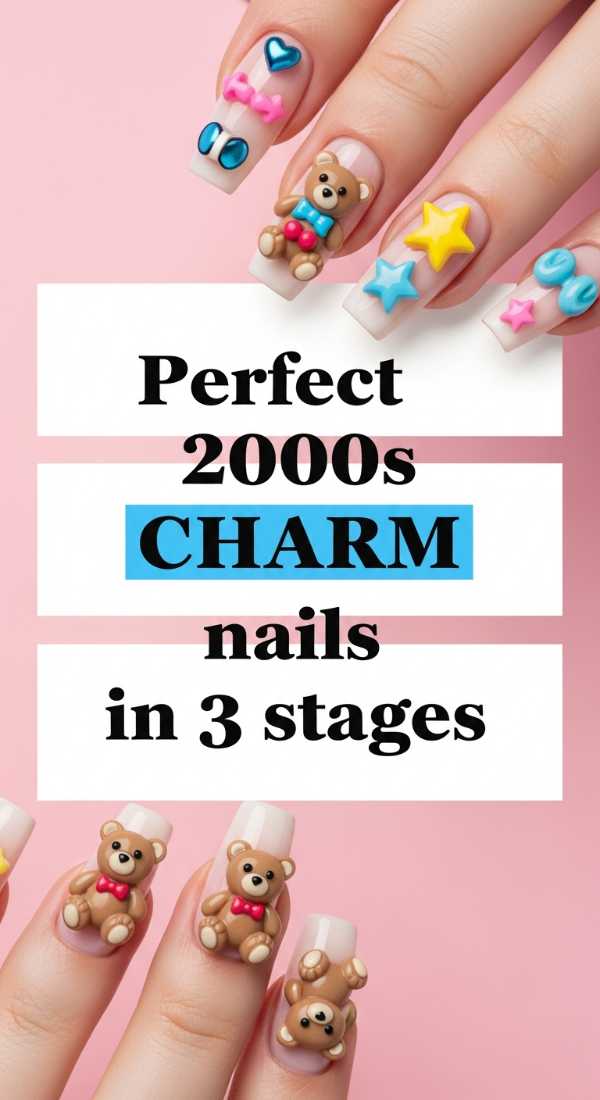
Why to love these Nails:
The ultimate Y2K throwback! Adding 3D charms makes your nails feel like a piece of jewelry. We’re using Italian-inspired charms like tiny gold leaves or grapes to keep it within our Tuscan theme. It’s tactile, fun, and a total conversation starter.
Essential Items:
- Nail glue or thick gem gel
- 3D Gold leaf or grape charms
- Pointed tweezers
How to Prepare:
- Stage 1: Apply your favorite base color (we love a soft terracotta for this).
- Stage 2: Place a bead of gem gel where you want the charm to sit.
- Stage 3: Secure the charm with tweezers and hold until set, sealing the edges with top coat.
Budget Range
- Makartt Rhinestone Glue – $9
- Etsy Vintage Italian Nail Charms – $12
- Tweezerman Pointed Tweezers – $15
Embrace Your Inner Glow
Loves, I hope these designs inspire you to take a little moment for yourself this week. Whether you choose the bold sparkle of 2000s acrylics or the quiet grace of Tuscan marble, remember that your nails are a canvas for your joy. Life is too short for boring nails, especially when you can carry a piece of an Italian summer with you. Please tag me in your recreations—I can’t wait to see your beautiful work! Stay glowing, stay inspired, and always remember to treat yourself with the same kindness you give the world.
Your Nail Art Questions, Answered
I know starting a new nail journey can feel a bit overwhelming, so I’ve gathered some of your most-asked questions to help you get that perfect Tuscan finish!