

Why This Viral Simple Food Board is the Only Appetizer You Need This Season
There is a certain magic that happens when you set a beautifully curated food board in the center of a table. It’s more than just an appetizer; it’s an invitation to slow down, lean in, and share stories while grazing on a tapestry of flavors. I remember the first time I ditched the formal plated starters for a rustic wooden board piled high with seasonal goodness—the energy in the room shifted instantly from stiff to soulful. This viral trend isn’t just about the aesthetics; it’s about the ease of hosting and the joy of seeing your favorite people linger over every bite.
As we transition into the warmer months, our cravings shift toward freshness, brightness, and dishes that don’t require us to spend hours hunched over a hot stove. Whether you are hosting a breezy backyard gathering or a quiet Sunday brunch, the concept of the ‘Viral Simple Food Board’ adapts to every occasion. It celebrates the bounty of the season, from the first dandelions of spring to the sun-ripened tomatoes of midsummer, all while keeping the preparation stress-free and the presentation effortlessly chic.
In this guide, I’m sharing my favorite ways to expand this board concept into full meals, treats, and even drinks. We’ll explore everything from the perfect marinated chicken to delicate floral jellies, ensuring that your table is always the place where everyone wants to be.
How to cook summer dinner?

Why we love this
A summer dinner should feel like a warm hug from the sun, focusing on ingredients that are at their peak ripeness and require very little interference. We love this approach because it emphasizes the crunch of garden-fresh vegetables against the char of the grill, creating a sensory experience that smells like charred wood and tastes like pure sunshine. There is a deep satisfaction in the way the cool, crisp textures of a salad contrast with the smoky warmth of the main dish, making every mouthful a refreshing journey through the best parts of the season.
Ingredients
- 4 large ears of sweet corn
- 2 lbs heirloom tomatoes, sliced thick
- 1 bunch fresh basil leaves
- 8 oz fresh burrata cheese
- Flaky sea salt and cracked black pepper
- Extra virgin olive oil and balsamic glaze
How to make it
- Begin by preheating your grill to a medium-high heat, roughly 400°F (200°C), ensuring the grates are clean and lightly oiled to prevent sticking.
- Place the shucked corn directly onto the grates; you want to hear a gentle sizzle immediately. Rotate the ears every 2-3 minutes using tongs until the kernels are bright yellow and dotted with deep brown char marks, which usually takes about 10-12 minutes.
- While the corn cools slightly, arrange your heirloom tomato slices on a large wooden board, overlapping them slightly to create a colorful base.
- Carefully place the burrata balls in the center of the tomatoes, tearing them open slightly with a knife so the creamy stracciatella center begins to ooze out visually inviting guests.
- Cut the grilled corn kernels off the cob in large planks and scatter them over the tomatoes and cheese for a smoky, sweet crunch.
- Finish the board by tucking in fresh basil leaves, drizzling generously with high-quality olive oil and balsamic glaze, and a final aggressive sprinkle of flaky sea salt for texture.
How to make quick meals?

Why we love this
Quick meals are the ultimate savior for the busy hostess who still wants to deliver a gourmet experience without the exhaustive cleanup. We love the efficiency of assembling high-quality, pre-prepped components that look artisanal but take mere minutes to pull together into a cohesive, stunning board. The aroma of toasted sourdough mingling with the sharp tang of goat cheese and the sweetness of dried fruits creates an instant craving that satisfies both the eyes and the palate during those frantic weeknights.
Ingredients
- 1 loaf crusty sourdough bread
- 4 oz softened goat cheese or herbed Boursin
- Prosciutto di Parma or thin-sliced ham
- 1 cup Marcona almonds
- Seasonal preserves (fig or apricot)
- Fresh arugula for a peppery bite
How to make it
- Slice your sourdough into half-inch thick pieces and toast them under a broiler for 1-2 minutes per side until the edges are golden brown and the center remains slightly chewy.
- While the bread is warm, use a butter knife to spread a thick, cloud-like layer of goat cheese across each slice, letting the residual heat soften the cheese further.
- Artfully drape a single ribbon of prosciutto over the cheese, folding it loosely to create height and visual interest on your board.
- In the center of your board, place a small ceramic bowl filled with your fruit preserves to act as a sweet dipping element.
- Scatter the Marcona almonds and fresh arugula leaves in the empty spaces between the toast slices to provide a salty crunch and a fresh, peppery finish.
- Serve immediately while the bread is still warm, encouraging guests to add a dollop of preserves to their savory toasts for the perfect flavor balance.
How to bake spring cake?

Why we love this
Baking a spring cake is like capturing the essence of a blooming garden and turning it into a moist, delicate crumb that melts in your mouth. We love the way the light, citrusy aromas fill the kitchen, signaling the end of winter’s heavy flavors and the arrival of something bright and floral. The texture should be soft and airy, like a sponge, providing a perfect canvas for silky buttercreams and the tart pop of fresh berries that celebrate the rejuvenation of the season.
Ingredients
- 2 cups all-purpose flour
- 1 1/2 cups granulated sugar
- 3 large eggs, room temperature
- 1 cup whole milk and 1/2 cup softened butter
- Zest of 2 large lemons
- 1 tbsp baking powder
- 1 cup fresh raspberries for folding
How to make it
- Preheat your oven to 350°F (175°C) and grease two 8-inch round cake pans with butter, lining the bottoms with parchment paper to ensure a clean release.
- In a large bowl, cream together the softened butter and sugar using an electric mixer on medium-high speed for about 3-5 minutes until the mixture is pale, light, and fluffy.
- Add the eggs one at a time, beating well after each addition to emulsify the fats and liquids properly, then stir in the fresh lemon zest for that essential aromatic brightness.
- In a separate bowl, whisk together the flour and baking powder; begin adding this to the wet ingredients in three parts, alternating with the milk, starting and ending with the dry ingredients.
- Gently fold in the fresh raspberries by hand using a spatula, being careful not to overmix, which would result in a tough cake or purple-streaked batter.
- Divide the batter evenly between the pans and bake for 25-30 minutes; check for doneness by inserting a toothpick into the center—it should come out clean or with just a few moist crumbs.
How to make peeps treats?

Why we love this
Peeps treats are the ultimate nod to childhood nostalgia, bringing a playful and whimsical element to your seasonal food board that guests of all ages will adore. We love the contrast between the sugary, marshmallowy softness of the Peeps and the rich, velvety chocolate or salty crunch of accompanying pretzels. It’s a texture explosion that feels celebratory and fun, turning a simple snack into a focal point of conversation and colorful delight.
Ingredients
- 1 package of marshmallow Peeps (chicks or bunnies)
- 12 oz semi-sweet chocolate melting wafers
- 1 cup colorful spring sprinkles
- Pretzel rods or graham cracker squares
- Edible glitter (optional)
How to make it
- Prepare a baking sheet by lining it with wax paper or a silicone mat so your treats don’t stick as the chocolate sets.
- Melt the chocolate wafers in a microwave-safe bowl in 30-second intervals, stirring thoroughly between each burst until the chocolate is glossy and completely smooth.
- Dip the bottom half of each marshmallow Peep into the melted chocolate, allowing the excess to drip off before placing it onto the prepared sheet.
- Immediately shower the wet chocolate with spring sprinkles or edible glitter before it begins to harden, ensuring the decorations stick firmly.
- If using pretzel rods, dip one end in chocolate and سپس press the chocolate-coated Peep onto the top of the rod to create a “Peep Pop.”
- Place the tray in the refrigerator for at least 15 minutes to allow the chocolate to fully set into a crisp shell before arranging them vertically on your food board for height.
How to grill healthy meals?

Why we love this
Grilling healthy meals is the best way to lock in deep, smoky flavors without the need for heavy sauces or excessive fats, keeping your lifestyle board light and vibrant. We love the way the high heat caramelizes the natural sugars in vegetables and lean proteins, creating a delicious outer crust while keeping the inside succulent and tender. The aroma of searing bell peppers and zucchini over an open flame is synonymous with outdoor living and wholesome, nourishing eating.
Ingredients
- 2 lbs lean chicken breast or firm tofu
- 3 bell peppers (mixed colors), sliced into wide strips
- 2 large zucchinis, sliced into rounds
- 1 bunch of asparagus, woody ends trimmed
- Avocado oil spray
- Lemon wedges and fresh parsley for garnish
How to make it
- Clean your grill grates thoroughly and preheat the grill to a steady medium-medium-high heat (around 375°F) to ensure even cooking without scorching the delicate vegetables.
- Lightly coat your protein and vegetables with avocado oil spray; this has a high smoke point and will help achieve those perfect grill marks without the oil breaking down.
- Place the chicken or tofu on the hottest part of the grill first; for chicken, cook for 6-7 minutes per side until the internal temperature reaches a safe 165°F (74°C).
- Arrange the vegetables around the perimeter of the protein where the heat is slightly less intense; grill the peppers and zucchini for 4-5 minutes per side until tender-crisp with clear char lines.
- Add the asparagus during the last 3 minutes of cooking, as they cook very quickly and you want to maintain their vibrant green color and snap.
- Remove everything from the grill and let the protein rest for 5 minutes before slicing; arrange the whole spread on a board with lemon wedges for a hit of acidity that brightens the smoky flavors.
How to marinate grilled chicken?
Why we love this
A great marinade is the secret weapon behind any viral food board, transforming a simple piece of poultry into a tender, flavor-packed masterpiece that everyone asks for the recipe for. We love how the acid in the marinade breaks down the fibers of the chicken, ensuring every bite is incredibly juicy and infused with herbs and spices. The way the marinade caramelizes on the grill creates a sticky, savory glaze that smells absolutely divine as it hits the hot grates.
Ingredients
- 1/2 cup extra virgin olive oil
- 1/4 cup fresh lemon juice
- 3 cloves garlic, minced
- 1 tbsp dried oregano
- 1 tsp smoked paprika
- 1 tsp honey or agave
How to make it
- In a medium-sized glass bowl or a heavy-duty resealable plastic bag, whisk together the olive oil, lemon juice, minced garlic, oregano, smoked paprika, and honey until well combined.
- Place your chicken breasts or thighs into the marinade, ensuring every surface is thoroughly coated; the honey in the mixture will help with browning, while the lemon juice acts as the tenderizer.
- Seal the container and refrigerate for at least 30 minutes, though 2 to 4 hours is ideal for the flavors to penetrate deep into the meat; avoid marinating for more than 12 hours as the acid can start to make the texture mushy.
- Remove the chicken from the fridge 20 minutes before grilling to take the chill off, which helps the meat cook more evenly across the entire piece.
- When ready to cook, lift the chicken from the marinade and let the excess drip off to prevent flare-ups on the grill.
- Grill over medium heat, flipping only once, until the exterior is golden and caramelized and the center is no longer pink, providing a robust base for your food board.
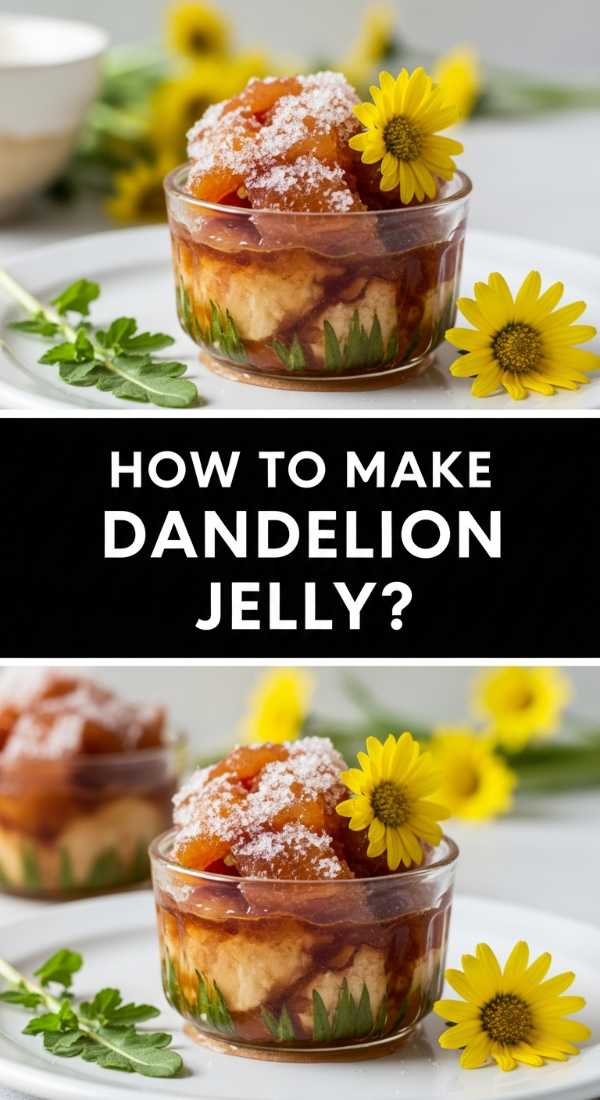
How to make dandelion jelly?

Why we love this
Dandelion jelly is like spreading bottled sunshine onto a piece of toast, offering a delicate, honey-like flavor that feels incredibly special and artisanal. We love the foraging aspect of this recipe, turning a common “weed” into a golden, translucent treasure that surprises and delights guests. Its subtle floral notes and bright yellow hue make it a stunning addition to any spring-themed board, providing a unique conversation starter that tastes as lovely as it looks.
Ingredients
- 2 cups dandelion petals (yellow parts only, no green)
- 4 cups boiling water
- 1 box (1.75 oz) powdered fruit pectin
- 2 tbsp lemon juice
- 4 cups granulated sugar
How to make it
- Begin by gathering fresh dandelions from a clean, unsprayed area; remove the green sepals so you are left with only the yellow petals, as the green parts can make the jelly bitter.
- Place the petals in a heat-proof jar and pour the boiling water over them; let this steep overnight in the refrigerator to create a potent “dandelion tea” base.
- Strain the liquid through a fine-mesh sieve or cheesecloth, pressing on the petals to extract all the golden liquid, then pour 3 3/4 cups of this liquid into a large pot.
- Stir in the lemon juice and the powdered pectin, bringing the mixture to a rolling boil over high heat, stirring constantly so it doesn’t scorch the bottom of the pan.
- Add the sugar all at once and return to a full rolling boil (one that cannot be stirred down) for exactly one minute to ensure the pectin activates correctly.
- Remove from heat, skim off any foam from the surface with a metal spoon, and pour into sterilized jars; let cool completely until set into a beautiful, wobbly jelly.
How to make summer desserts?

Why we love this
Summer desserts should be all about ease, elegance, and the celebration of seasonal fruit at its peak. We love the concept of a dessert board because it allows guests to customize their sweet ending, mixing and matching textures like silky whipped cream, crunchy shortbread, and juicy berries. The scent of fresh mint and macerated strawberries creates a refreshing atmosphere that perfectly caps off a warm evening without the heaviness of traditional cakes.
Ingredients
- 2 cups fresh strawberries, hulled and quartered
- 1 pint blueberries or blackberries
- 1 cup heavy whipping cream (chilled)
- 1 package of shortbread cookies or meringue nests
- Fresh mint leaves
- 2 tbsp powdered sugar
How to make it
- In a small bowl, toss the quartered strawberries with a teaspoon of sugar and let them sit for 15 minutes; this process, called maceration, draws out the juices to create a natural syrup.
- In a cold metal mixing bowl, beat the heavy whipping cream and powdered sugar on high speed until stiff peaks form; the cream should be thick and hold its shape when the whisk is lifted.
- Arrange your shortbread cookies or meringues in a circular pattern around the edges of a round board, leaving a large open space in the middle for your “dips.”
- Place the whipped cream in a decorative bowl in the center, and surround it with small piles of the blackberries and the macerated strawberries.
- Garnish the entire board with small sprigs of fresh mint, which adds a pop of green and a refreshing aroma that cuts through the richness of the cream.
- Serve with small spoons and napkins, encouraging guests to top a cookie with a dollop of cream and a selection of berries for a DIY dessert experience.
How to make pea salad?

Why we love this
Pea salad is the quintessential spring dish, bringing a bright pop of green and a satisfying snap to your food board. We love the combination of the sweet, tender peas with the salty crunch of bacon and the sharp bite of red onion, all bound together in a creamy, tangy dressing. It’s a nostalgic classic that feels updated and fresh when served in a beautiful glass bowl as part of a larger spread, offering a cool contrast to grilled meats.
Ingredients
- 4 cups frozen peas, thawed (or blanched fresh peas)
- 1/2 cup sharp cheddar cheese, cubed small
- 1/4 cup red onion, finely diced
- 6 strips of bacon, cooked crisp and crumbled
- 1/2 cup mayonnaise and 2 tbsp sour cream
- 1 tbsp apple cider vinegar
How to make it
- If using frozen peas, place them in a colander and run warm water over them until thawed, then pat them completely dry with paper towels; excess moisture will make the dressing runny.
- In a large mixing bowl, whisk together the mayonnaise, sour cream, and apple cider vinegar until the dressing is smooth and tangy.
- Add the dried peas, cubed cheddar cheese, and finely diced red onion to the bowl, folding gently with a spatula to coat every pea in the creamy dressing.
- Taste the mixture and add a pinch of salt and black pepper as needed, keeping in mind that the bacon will add a significant amount of saltiness later.
- Cover and refrigerate the salad for at least one hour; this chilling time allows the flavors to meld and the onion to soften slightly in the dressing.
- Just before serving on your board, fold in the crispy bacon crumbles to ensure they stay crunchy, and give it one final stir for a perfect, glossy finish.
How to brew dandelion tea?
[IMAGE_10]
Why we love this
Brewing dandelion tea is a beautiful ritual that connects you to the earth and provides a gentle, grounding beverage to serve alongside your food board. We love its earthy, toasted flavor profile that mimics coffee but without the caffeine jitters, making it a perfect transition drink from afternoon to evening. The warm, amber hue of the tea looks stunning in glass mugs, especially when garnished with a slice of lemon or a drizzle of local honey to enhance its natural sweetness.
Ingredients
- 1 tbsp roasted dandelion root (or 2 tbsp fresh petals for a lighter tea)
- 2 cups filtered water
- 1 cinnamon stick (optional)
- Fresh lemon slice
- 1 tsp raw honey
How to make it
- If using roasted dandelion root, place the root and a cinnamon stick into a small saucepan with 2 cups of filtered water to draw out the deepest flavors.
- Bring the water to a gentle boil, then reduce the heat to low and let the tea simmer for about 5-10 minutes; the longer it simmers, the more robust and “coffee-like” the flavor will become.
- If you prefer a lighter, more floral tea using petals, simply place the petals in a tea infuser and pour boiling water over them, steeping for 3-5 minutes until the water turns a pale yellow.
- Strain the liquid through a fine mesh strainer into your favorite mug to remove any woody bits or petals.
- Stir in a teaspoon of raw honey while the tea is still hot to help it dissolve completely, adding a touch of floral sweetness that complements the earthy base.
- Finish with a fresh lemon slice floated on top, providing a bright hit of vitamin C and a citrusy aroma that makes the tea feel incredibly refreshing.
Conclusion
Creating a viral-worthy food board is less about following strict rules and more about embracing the season’s natural beauty and the joy of sharing. By incorporating these diverse elements—from savory grilled meats and fresh salads to whimsical treats and floral teas—you create a multisensory experience that lingers in the memories of your guests long after the last crumb is gone. So, grab your favorite wooden board, head to the market, and start building your own masterpiece. Happy hosting!