
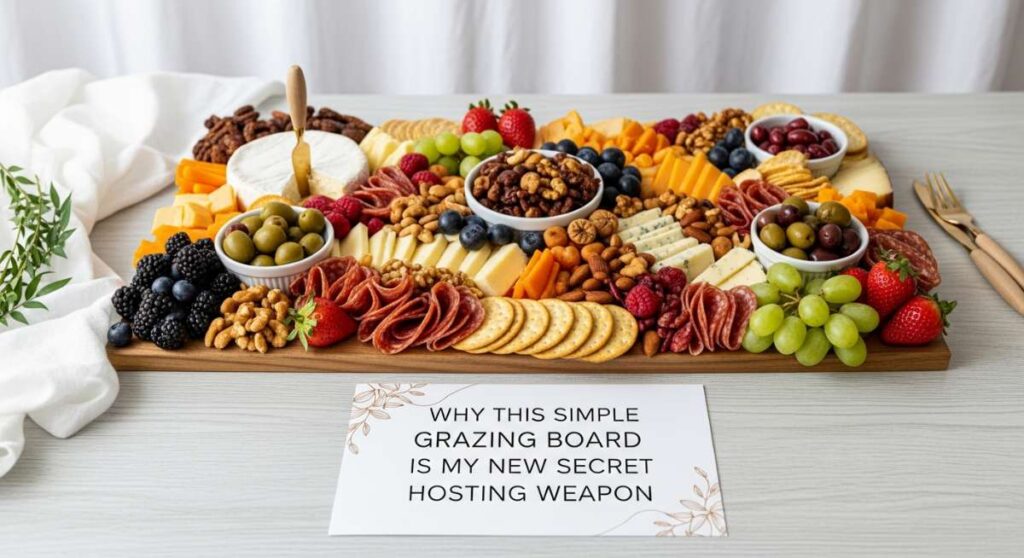
Why This Simple Grazing Board Is My New Secret Hosting Weapon
There is something magical about the way food brings people together, but for the longest time, I found myself stuck in the kitchen while my guests were laughing in the living room. I’d be hovering over a hot stove, checking timers, and losing out on those precious moments of connection. That all changed when I discovered the art of the intentional grazing board. It’s not just about throwing cheese on a plate; it’s about creating a landscape of flavors that invites people to linger, snack, and converse without the formality of a sit-down meal.
This simple food board has become my ultimate hosting secret because it’s adaptable, visually stunning, and surprisingly stress-free. Whether it’s a casual sun-drenched afternoon or a festive holiday gathering, having a central hub of delicious bites allows the host to actually be part of the party. Today, I’m sharing how this philosophy of easy, breezy summer hosting extends into every meal, from your Monday prep to your backyard cookouts, ensuring you spend less time at the oven and more time making memories.
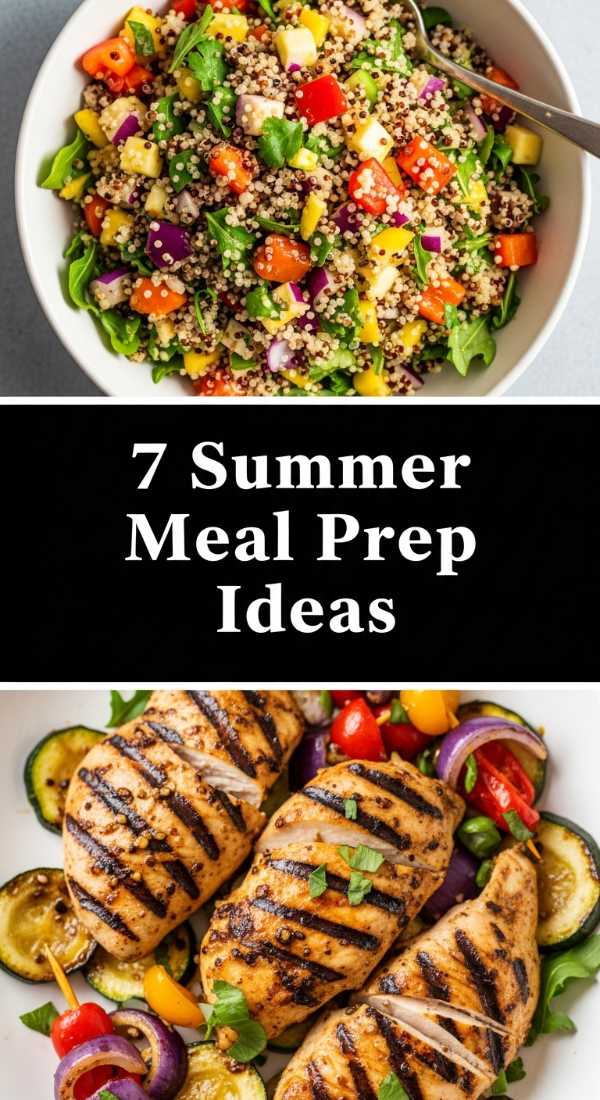
7 Best Summer Meal Prep Ideas
Why we love this
Summer meal prepping is all about capturing the vibrant essence of the season while keeping your kitchen cool and your schedule open for spontaneous adventures. There is a specific joy in opening your fridge to see rows of glass containers filled with crisp, colorful vegetables, zesty herb-infused grains, and perfectly chilled proteins that smell of lemon and garlic. The texture of a well-prepped summer bowl—think the crunch of a cucumber against the silkiness of avocado—provides a refreshing relief from the midday heat, making healthy eating feel like a luxurious treat rather than a chore.
Ingredients
- Quinoa or Farro
- Grilled Lemon-Herb Chicken Breasts
- English Cucumbers
- Cherry Tomatoes
- Kalamata Olives
- Feta Cheese
- Fresh Parsley and Mint
- Homemade Lemon Vinaigrette
How to make it
- Begin by cooking your grains (quinoa or farro) in vegetable broth instead of water to infuse them with extra depth. Use a 2:1 liquid-to-grain ratio, bringing it to a boil and then simmering on low for 15 minutes until the liquid is fully absorbed and the grains are fluffy.
- Season your chicken breasts with sea salt, cracked black pepper, dried oregano, and fresh lemon zest. Grill them over medium-high heat (about 375°F) for 6-7 minutes per side until the internal temperature reaches a safe 165°F. Let the meat rest for 10 minutes before slicing to keep the juices locked in.
- Wash and dice your vegetables into uniform, bite-sized pieces. Slicing the cucumbers into semi-circles and halving the tomatoes ensures every forkful has a bit of everything.
- Assemble your containers by layering the grains at the bottom, followed by the protein, then the fresh veggies. Keep the feta and olives in a small separate corner to maintain their distinct textures.
- Prepare a large jar of vinaigrette by whisking together 1/2 cup extra virgin olive oil, 1/4 cup fresh lemon juice, one minced garlic clove, and a pinch of honey. Store the dressing in a separate small jar; only dress the salad right before eating to prevent the greens from wilting.
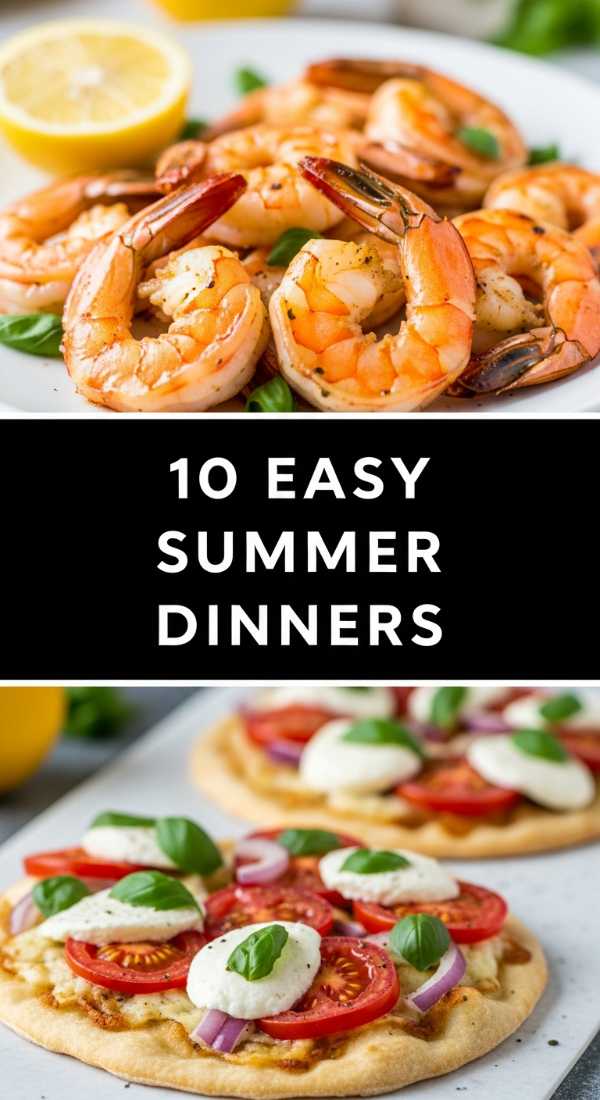
10 Easy Summer Dinner Recipes
Why we love this
When the sun is still high at 7 PM, the last thing anyone wants is a heavy, complicated meal that requires hours of stovetop attention. These easy summer dinners focus on the brilliance of fresh ingredients like vine-ripened tomatoes and flaky white fish, celebrating the natural sweetness that only peak-season produce provides. You can smell the aromatic waft of basil and lime from across the house, creating a sensory experience that feels like a coastal vacation. It’s about minimal effort and maximum flavor, allowing the ingredients to speak for themselves in a symphony of bright, clean tastes.
Ingredients
- White Fish Fillets (Cod or Tilapia)
- Corn Tortillas
- Shredded Cabbage Slaw
- Fresh Cilantro
- Lime Wedges
- Avocado Crema
- Pickled Red Onions
- Corn on the Cob
How to make it
- Pat your fish fillets completely dry with paper towels; this is the secret to getting a beautiful golden-brown sear rather than steaming the fish. Season lightly with cumin, smoked paprika, and salt.
- Heat a cast-iron skillet over medium-high heat with a tablespoon of avocado oil. Once the oil shimmers, place the fish in the pan. Cook for 3-4 minutes without moving it to develop a crust, then gently flip and cook for another 2 minutes until it flakes easily with a fork.
- While the fish rests, char your corn tortillas directly over a gas flame for 10-15 seconds per side using metal tongs. Look for slight blackening on the edges for that authentic smoky flavor.
- To assemble the tacos, flake the fish into large chunks and place them in the warm tortillas. Top with a generous handful of crunchy cabbage slaw for texture.
- Finish with a drizzle of avocado crema (blended avocado, sour cream, and lime) and a few slices of pickled red onion. Serve immediately with a side of grilled corn for a complete, effortless summer feast.
The Best 5-Minute Rotel Dip

Why we love this
There is a nostalgic, irresistible pull to a bowl of warm Rotel dip that makes it the undisputed king of party appetizers. The sight of that creamy, molten cheese swirled with bits of spicy green chilies and savory sausage is enough to make any guest hover by the snack table. It has a rich, velvety mouthfeel that coats every chip perfectly, offering a balanced kick of heat that wakes up the palate without being overwhelming. It’s the ultimate comfort food that feels like a celebration in every bite, sparking conversation as friends gather around for just one more scoop.
Ingredients
- 1 lb Velveeta Cheese
- 1 can (10 oz) Rotel Diced Tomatoes and Green Chilies
- 1 lb Ground Breakfast Sausage
- Tortilla Chips for serving
How to make it
- Place a large skillet over medium-high heat and add the ground sausage. Use a wooden spoon to break the meat into very small, uniform crumbles. Cook until browned and slightly crispy, ensuring no pink remains.
- Once the sausage is cooked, drain the excess fat thoroughly. This step is crucial; if you skip it, the dip will end up oily rather than creamy.
- Cube the Velveeta into 1-inch pieces to help it melt faster and more evenly. Add the cheese cubes and the entire can of Rotel (including the liquid!) to the skillet with the sausage.
- Turn the heat down to low. Stir constantly with a heat-resistant spatula. You want to see the cheese slowly transform from solid cubes into a smooth, flowing ribbon of gold. Do not rush this with high heat, or the cheese might scorch.
- Once fully melted and combined, transfer the dip to a small slow cooker set to the “warm” setting. This keeps the dip at the perfect dipping consistency throughout the duration of your party.
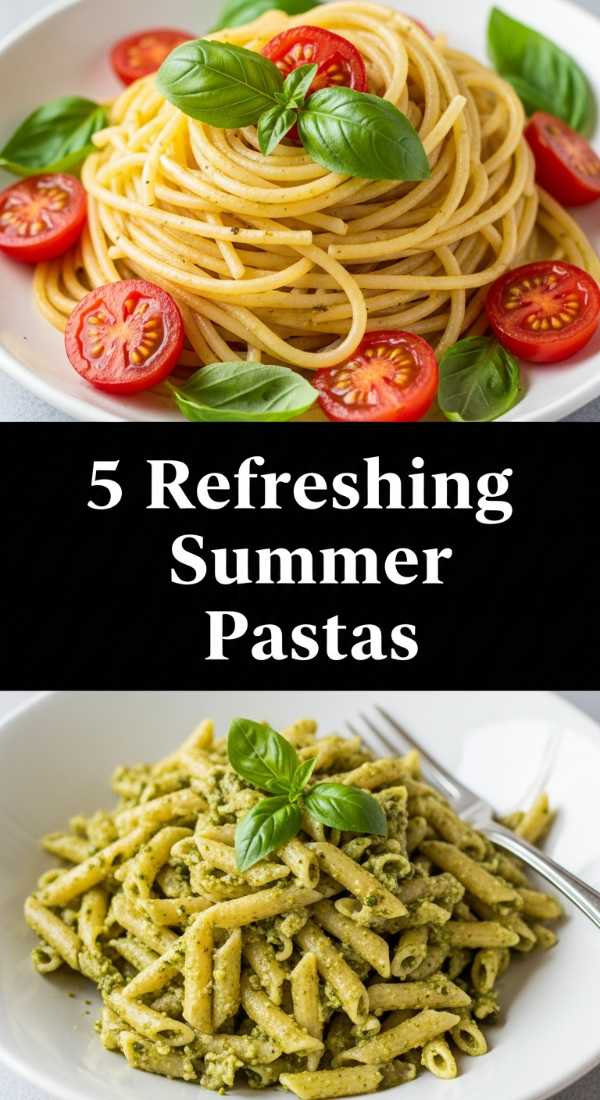
5 Refreshing Summer Pasta Dishes
Why we love this
Pasta doesn’t have to be heavy or wintery; when done right, it can be the most refreshing dish on a hot July day. Imagine the fragrance of torn sweet basil mingling with the zesty aroma of lemon zest and the tang of a balsamic reduction. These dishes are characterized by their lightness, using the pasta as a canvas for the brightest garden produce like bursting cherry tomatoes and crisp zucchini ribbons. The feeling of a chilled pasta salad against the roof of your mouth is cooling and satisfying, providing a base that is both filling and incredibly airy.
Ingredients
- Farfalle (Bowtie) or Rotini Pasta
- Mozzarella Pearls
- Heirloom Cherry Tomatoes
- Fresh Basil Leaves
- Balsamic Glaze
- Pine Nuts (Toasted)
- Extra Virgin Olive Oil
How to make it
- Boil a large pot of heavily salted water—it should taste like the ocean. Add your pasta and cook until it is just “al dente,” which usually takes 1-2 minutes less than the package directions. It needs to have a bit of a bite to hold up to the dressing.
- Drain the pasta and immediately rinse it under cold running water. This stops the cooking process and removes excess starch, which prevents the pasta from sticking together as it cools.
- In a large mixing bowl, toss the chilled pasta with a generous drizzle of high-quality olive oil. This acts as a barrier and keeps the pasta tender.
- Halve your cherry tomatoes and tear the basil leaves by hand rather than chopping them with a knife; this prevents the edges of the herbs from bruising and turning black.
- Add the tomatoes, basil, mozzarella pearls, and toasted pine nuts to the pasta. Just before serving, drizzle with a thick balsamic glaze and a sprinkle of flaky sea salt. The contrast between the creamy cheese and the acidic glaze is the key to this dish’s success.
How to Make Hummingbird Food

Why we love this
There is something deeply peaceful about sitting on a porch and watching the iridescent shimmer of a hummingbird’s wings as it visits your garden. Making your own hummingbird food is a small but meaningful way to connect with nature, offering a pure source of energy for these tiny, fast-moving marvels. The simple sweetness of the nectar mimics the flowers they love, and seeing them return day after day creates a sense of harmony in your outdoor space. It’s a gentle hobby that rewards you with the delicate, rhythmic sound of fluttering wings and a front-row seat to one of nature’s most beautiful displays.
Ingredients
- Granulated White Sugar
- Filtered Water
How to make it
- The Golden Ratio for hummingbird nectar is 1 part sugar to 4 parts water. For a standard feeder, mix 1 cup of white granulated sugar with 4 cups of water. Never use honey, brown sugar, or artificial sweeteners, as these can be fatal to the birds.
- Place the mixture in a pot over medium heat. Stir continuously until the sugar is completely dissolved. You don’t need to bring it to a rolling boil for long, but a gentle boil for 1-2 minutes helps eliminate any impurities in the water and sugar.
- Remove the pot from the heat and let the nectar cool to room temperature. This is vital; pouring hot liquid into a plastic feeder can warp the feeder and burn the birds’ delicate tongues.
- Do not add red food coloring. Most modern feeders have red parts to attract the birds, and the dye can actually be harmful to their digestive systems. The clear nectar is much safer and just as effective.
- Fill your clean feeder and store any extra nectar in a sealed jar in the refrigerator for up to two weeks. Remember to clean the feeder every 3-5 days to prevent mold growth, especially in high summer heat.
Classic Cucumber Tomato Onion Salad

Why we love this
This salad is the quintessential flavor of a summer garden, representing simplicity at its absolute finest. The refreshing, watery crunch of a chilled cucumber paired with the explosive sweetness of a sun-warmed tomato creates a textural masterpiece that cleanses the palate. When you add the sharp, crisp bite of red onion and a tangy vinegar dressing, you get a side dish that is bright, acidic, and incredibly vibrant. It’s the kind of dish that smells like a rainy afternoon in July—earthy, fresh, and revitalizing—and it only gets better the longer it sits in its own juices.
Ingredients
- 2 Large English Cucumbers
- 4 Roma Tomatoes
- 1 Small Red Onion
- 1/2 cup Apple Cider Vinegar
- 1/4 cup Water
- 2 tbsp Sugar (optional)
- Salt and Cracked Black Pepper
- Fresh Dill
How to make it
- Wash the cucumbers and slice them into thin, uniform rounds. If the skins are thick, you can peel alternating strips for a decorative “striped” look. Slice the Roma tomatoes into wedges of a similar size.
- Thinly slice the red onion into half-moons. To take the “bite” out of the raw onion, you can soak the slices in ice water for 10 minutes before adding them to the salad.
- In a small bowl, whisk together the apple cider vinegar, water, sugar, salt, and pepper until the sugar is fully dissolved. This creates a quick brine that will soften the vegetables just enough while keeping them crisp.
- Place the sliced vegetables in a large glass bowl and pour the dressing over them. Toss gently to ensure every piece is coated.
- Cover and refrigerate for at least one hour before serving. This “marinating” time allows the onions to mellow and the cucumbers to absorb the tang of the vinegar. Garnish with a generous handful of fresh, chopped dill just before bringing it to the table.
12 Crowd-Pleasing Cookout Sides

Why we love this
The side dishes are often the unsung heroes of a great cookout, providing the variety and color that turn a simple grill-out into a feast. There is a communal joy in seeing a table laden with different bowls—from the creamy, mustard-tinged heaviness of a classic potato salad to the light, zesty pop of a fruit skewer. The aroma of smoky paprika and fresh herbs fills the air, signaling to everyone that it’s time to slow down and enjoy the company. These sides offer something for everyone, ensuring that every plate is a personalized celebration of summer’s bounty and the spirit of sharing.
Ingredients
- Red Potatoes
- Mayonnaise and Yellow Mustard
- Celery and Green Onions
- Hard-Boiled Eggs
- Corn on the Cob with Herb Butter
- Watermelon Wedges
- Baked Beans with Bacon
How to make it
- For the perfect potato salad, boil cubed red potatoes in salted water until tender but not mushy (about 10-12 minutes). Drain and let them cool slightly so they absorb the dressing without breaking apart.
- Create the dressing by mixing mayo, a splash of mustard, diced celery, and chopped hard-boiled eggs. Fold this into the warm potatoes gently to maintain the texture of the cubes.
- Prepare the corn by peeling back the husks but leaving them attached. Remove the silk, then rub the kernels with a compound butter made of softened butter, chives, and garlic. Pull the husks back up to protect the corn while grilling.
- Grill the corn over medium heat, turning occasionally, for about 15 minutes until the husks are charred and the kernels are bright yellow and tender.
- Serve everything in large, chilled bowls. For fruit like watermelon, keep it on ice until the very last second to ensure that first bite is as refreshing as possible.
8 Fun Fourth of July Food Ideas

Why we love this
Nothing captures the patriotic spirit like a spread of food that mirrors the red, white, and blue of the fireworks overhead. There’s a playful, festive energy in serving dishes that are intentionally color-coded, from berry-laden trifles to star-shaped fruit platters. The visual appeal of bright red strawberries against snowy whipped cream and deep blue blueberries is enough to make anyone feel a surge of holiday excitement. These treats aren’t just food; they are part of the decor, adding a touch of whimsy and joy to the celebration while keeping guests cool and satisfied during the heat of the festivities.
Ingredients
- Strawberries and Raspberries
- Blueberries and Blackberries
- Angel Food Cake or Pound Cake
- Heavy Whipping Cream
- Powdered Sugar and Vanilla
- Star-shaped Cookie Cutters
- Watermelon
How to make it
- Start by creating a Red, White, and Blue Trifle. Cut your angel food cake into 1-inch cubes. These will act as the “white” layers of your dessert.
- In a cold bowl, whip the heavy cream with a few tablespoons of powdered sugar and a teaspoon of vanilla until stiff peaks form. Stiff peaks mean the cream holds its shape when the whisk is lifted; this is essential for a stable layered dessert.
- In a large glass trifle bowl, start with a layer of cake cubes, followed by a layer of whipped cream, then a layer of mixed red berries. Repeat the process, ending with a layer of cream topped with blueberries in the center to create a star pattern.
- For a healthy snack, use a star-shaped cookie cutter to cut shapes out of thick slices of watermelon. Thread these stars onto skewers alternating with blueberries and mini marshmallows.
- Keep all patriotic treats refrigerated until the moment of serving. The whipped cream is delicate and will melt in the summer sun, so timing is key for a picture-perfect presentation.
10 Best No-Bake Summer Desserts

Why we love this
The beauty of a no-bake dessert lies in its effortless elegance and the fact that it keeps your kitchen a sanctuary from the summer heat. These treats are often characterized by their silky, creamy textures—think of a chilled cheesecake filling or a smooth chocolate mousse that melts on the tongue. There is a quiet satisfaction in assembling a dessert the night before and letting the refrigerator do all the hard work, resulting in a perfectly set, refreshing finish to a meal. They feel lighter than traditional baked goods, offering a cool, sweet reprieve that perfectly complements a warm evening on the patio.
Ingredients
- Graham Cracker Crumbs
- Melted Butter
- Cream Cheese (Softened)
- Condensed Milk
- Lemon Juice
- Fresh Berries
- Whipped Topping
How to make it
- Create a sturdy base by mixing 1.5 cups of graham cracker crumbs with 6 tablespoons of melted butter. Press this mixture firmly into the bottom of a springform pan or pie dish. Use the bottom of a measuring cup to ensure the crust is even and packed tight.
- Chill the crust in the freezer for 15 minutes to set while you prepare the filling. This prevents the crust from crumbling when you add the wet ingredients.
- In a large bowl, beat the softened cream cheese until it is completely smooth and free of lumps. This is easier if the cheese is truly at room temperature. Slowly pour in the condensed milk and a 1/4 cup of lemon juice, which will cause the mixture to thicken naturally.
- Gently fold in a tub of whipped topping or 2 cups of freshly whipped cream. Folding is a slow, circular motion that incorporates air without deflating the mixture, keeping the dessert light and fluffy.
- Pour the filling over the crust and smooth the top with a spatula. Refrigerate for at least 6 hours, or ideally overnight. Garnish with a mountain of fresh berries just before serving to add a pop of color and natural acidity.
The Ultimate Grilled Kabob Guide

Why we love this
Kabobs are the ultimate interactive meal, bringing a sense of fun and customization to the grill that few other dishes can match. The sound of the sizzle as the meat hits the hot grates, combined with the charred, smoky aroma of onions and peppers, is the quintessential soundtrack to a summer evening. There is a delightful contrast between the juicy, tender interior of the marinated meat and the slightly blackened, caramelized edges of the vegetables. It’s a tactile way of eating that encourages people to gather around the fire, skewers in hand, enjoying the primitive and wonderful ritual of open-flame cooking.
Ingredients
- Sirloin Steak or Chicken Thighs
- Bell Peppers (all colors)
- Red Onion
- Zucchini
- Soy Sauce, Olive Oil, and Honey (for marinade)
- Garlic and Ginger
- Wooden or Metal Skewers
How to make it
- If you are using wooden skewers, soak them in water for at least 30 minutes before grilling. This prevents them from catching fire or splintering while over the heat.
- Cut your meat and vegetables into uniform 1-inch cubes. Consistency is the most important factor here; if the pieces are different sizes, some will burn while others remain raw.
- Whisk together 1/4 cup soy sauce, 1/4 cup olive oil, 2 tablespoons of honey, minced garlic, and grated ginger. Place the meat in a gallon-sized bag with half the marinade and let it sit for at least 2 hours (or up to 8) in the fridge.
- Thread the meat and vegetables onto the skewers, alternating colors for a beautiful presentation. Don’t pack them too tightly; a little space between pieces allows the heat to circulate and cook everything evenly.
- Preheat your grill to medium-high. Brush the grates with oil, then lay the kabobs down. Grill for 8-10 minutes, turning every 2-3 minutes, until the meat reaches your desired doneness and the veggies have those beautiful char marks. Brush with the remaining clean marinade during the last 2 minutes of cooking for a glossy, flavorful finish.
Conclusion
Mastering the art of summer hosting doesn’t mean spending your entire day in the kitchen. By focusing on simple, high-impact strategies like the viral grazing board and these easy, seasonal recipes, you can create an atmosphere of warmth and abundance that feels effortless. The goal is always the same: to feed the people you love with food that tastes like sunshine, all while keeping enough energy to enjoy the sunset yourself. Happy hosting!