
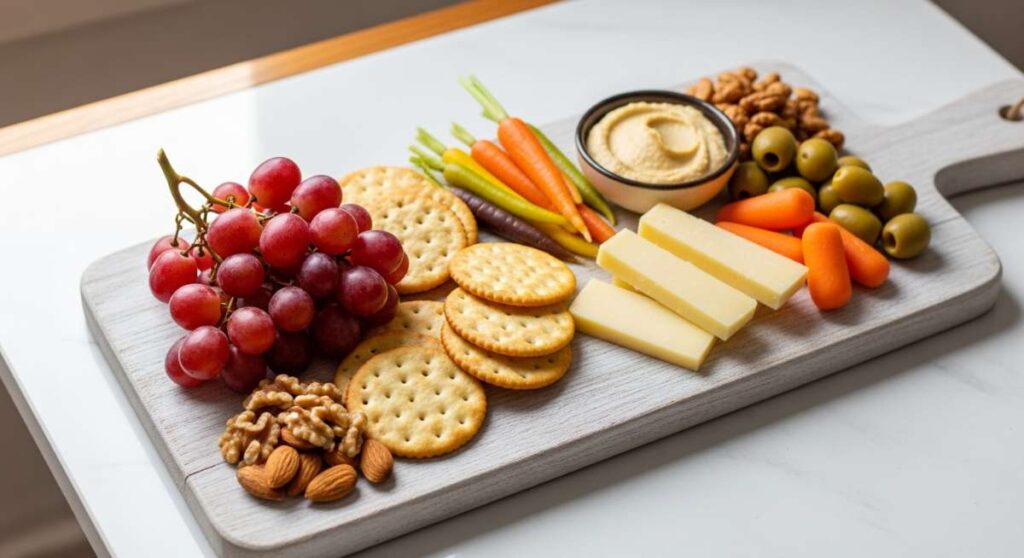
Why This Simple Food Board Trend is Taking Over Your Feed
There is something undeniably magnetic about a food board. It’s more than just a meal; it’s a visual story told through textures, colors, and the promise of a shared experience. Lately, my feed has been overflowing with these ‘Simple Food Boards’—artful arrangements that prioritize high-quality ingredients over complex preparation. It’s the ultimate lazy-girl (or guy!) hack to hosting, making every Tuesday night feel like a special occasion without the stress of a multi-course dinner. We are moving away from stiff, formal dining and toward the ‘graze-style’ life where the food looks just as good as it tastes.
When you place a board in the center of the table, the energy in the room shifts. People lean in, shoulders drop, and conversation flows naturally as hands reach for a crisp cracker or a perfectly ripe slice of fruit. This trend is taking over because it taps into our deep-seated need for connection and tactile joy. Whether you’re assembling a vibrant spring brunch or a cozy sourdough spread, the food board is the heartbeat of the modern home kitchen, turning simple staples into edible masterpieces.
I’ve curated the ultimate guide to the trends currently dominating the ‘board’ scene, from pasta-themed platters to dessert-centric displays. These aren’t just recipes; they are invitations to slow down and savor the season. Let’s dive into the viral inspirations that will make your next gathering (or solo lunch!) feel like a work of art.
7 Fresh Summer Pasta Recipes (Step-by-Step Guide)
Why we love this
There is nothing quite like the aroma of fresh basil and lemon zest wafting through a sun-drenched kitchen in July. This summer pasta board focuses on lightness, using high-quality olive oil and seasonal produce to create a dish that feels like a warm hug from the Mediterranean. Imagine the silky texture of perfectly al dente gemelli coated in a vibrant, emulsified sauce that tastes like pure sunshine. Every bite offers a satisfying crunch from toasted pine nuts and the creamy tang of fresh ricotta, making it the perfect centerpiece for a communal dinner under the stars.
Ingredients
- 1 lb Gemelli or Fusilli pasta
- 1/2 cup Extra virgin olive oil
- 4 cloves Garlic, thinly sliced
- 2 large Lemons (zest and juice)
- 1 bunch Fresh basil, chiffonade
- 1/2 cup Pine nuts, toasted
- 8 oz Whole milk ricotta cheese
- Red pepper flakes, sea salt, and cracked black pepper
How to make it
- Fill a large stockpot with water and add a generous amount of sea salt—it should taste like the ocean. Bring to a rolling boil over high heat.
- Add the pasta to the boiling water and cook for exactly 1 minute less than the package directions for ‘al dente’. This ensures the pasta won’t turn mushy when tossed with the hot sauce.
- While the pasta cooks, heat the olive oil in a wide skillet over medium-low heat. Add the sliced garlic and a pinch of red pepper flakes. Sauté gently until the garlic is translucent and fragrant, but not browned, which takes about 3 to 4 minutes.
- Before draining the pasta, reserve 1 full cup of starchy pasta water. This is the secret to a glossy, restaurant-quality sauce.
- Drain the pasta and add it directly to the skillet with the garlic oil. Increase the heat to medium and pour in half of the reserved pasta water along with the lemon juice.
- Toss vigorously with tongs or a wooden spoon for 2 minutes. The starch from the water will combine with the oil to create a creamy, emulsified coating. Add more water if it looks too dry.
- Remove from heat. Fold in the lemon zest, fresh basil, and toasted pine nuts. Transfer to a large wooden board or platter, dollop with fresh ricotta, and finish with a drizzle of olive oil and a sprinkle of cracked pepper.
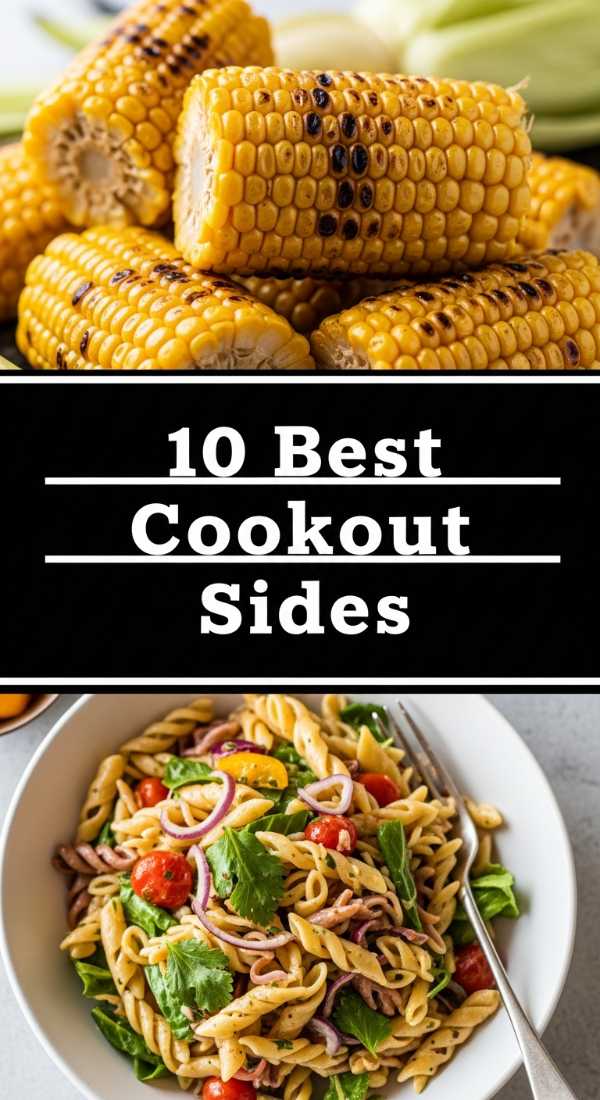
10 Best Cookout Side Dishes (Step-by-Step Guide)

Why we love this
A cookout is only as good as its side dishes, and this Grilled Street Corn (Elote) Salad board is the undisputed champion of the backyard barbecue. The smokiness of charred corn kernels pairs beautifully with the creamy, salty bite of cotija cheese and the zing of fresh lime juice. It’s a sensory explosion: the crunch of the corn, the velvety texture of the crema, and the spicy kick of ancho chili powder. It’s a bright, festive addition to any spread that feels incredibly indulgent yet surprisingly fresh, capturing the very essence of summer grilling in a single bowl.
Ingredients
- 6 ears Fresh sweet corn, husked
- 1/4 cup Mexican crema or sour cream
- 1/4 cup Mayonnaise
- 1/2 cup Cotija cheese, crumbled
- 1/4 cup Fresh cilantro, chopped
- 1 tsp Ancho chili powder
- 1 Lime, cut into wedges
- 1 tbsp Neutral oil (like avocado or grapeseed)
How to make it
- Preheat your grill to medium-high heat (about 400°F). Lightly brush the shucked corn with neutral oil to prevent sticking and encourage charring.
- Place the corn directly on the grill grates. Cook for 10-12 minutes, turning every 2-3 minutes, until the kernels are charred in spots all the way around. Look for deep golden colors and occasional black charred bits for maximum flavor.
- Remove the corn from the grill and let it cool just enough to handle. Stand an ear of corn upright in a large bowl and use a sharp knife to slice the kernels off the cob.
- In a small mixing bowl, whisk together the crema, mayonnaise, and half of the lime juice until smooth.
- Pour the dressing over the warm corn kernels and toss to coat thoroughly. The warmth of the corn will help the dressing seep into every crevice.
- Fold in half of the cotija cheese and the chopped cilantro.
- Transfer the mixture to a shallow serving board. Garnish with the remaining cotija, a heavy dusting of ancho chili powder, and the remaining lime wedges for guests to squeeze over their portion.
5 Refreshing Summer Dessert Recipes (Step-by-Step Guide)

Why we love this
When the humidity peaks, no one wants a heavy cake; enter the Frozen Yogurt Bark board. This dessert is a cooling, colorful masterpiece that looks like stained glass when snapped into shards. The tartness of the Greek yogurt is perfectly balanced by the natural sweetness of local honey and the burst of fresh, macerated berries. It’s a textural delight—crisp and cold at first, then melting into a creamy, luscious treat on the tongue. It’s the kind of guilt-free dessert that you can leave on a marble board for everyone to grab as they pass by, making it a viral favorite for a reason.
Ingredients
- 2 cups Full-fat Greek yogurt (plain or vanilla)
- 3 tbsp Honey or maple syrup
- 1 tsp Vanilla extract
- 1 cup Mixed berries (strawberries, blueberries, raspberries)
- 1/4 cup Shelled pistachios, roughly chopped
- 1/4 cup Dark chocolate chips or cacao nibs
How to make it
- Line a large rimmed baking sheet with parchment paper. This is crucial for easy removal once the bark is frozen.
- In a medium bowl, combine the Greek yogurt, honey, and vanilla extract. Whisk until the mixture is silky and the sweetener is fully incorporated.
- Pour the yogurt mixture onto the center of the parchment-lined sheet. Use an offset spatula to spread it into an even layer, about 1/4 to 1/2 inch thick. Do not go too thin, or it will shatter too easily.
- Prepare your toppings: slice any large strawberries and slightly crush a few blueberries to release their juices.
- Scatter the berries, chopped pistachios, and chocolate chips evenly across the surface of the yogurt. Use the back of a spoon to lightly press the toppings into the yogurt so they stay put once frozen.
- Place the tray in the freezer for at least 3 to 4 hours, or until the yogurt is completely solid to the touch.
- Once frozen, lift the parchment paper off the tray and break the bark into irregular, rustic pieces using your hands or a knife. Arrange the shards on a chilled board and serve immediately before they begin to melt.
8 Best Sourdough Discard Recipes (Step-by-Step Guide)

Why we love this
There’s a rustic, soulful satisfaction in using sourdough discard to create something as sophisticated as Herby Sourdough Crackers. These crackers are the ultimate addition to any charcuterie board, offering a complex, tangy flavor profile that store-bought versions simply cannot match. The snap of a perfectly baked cracker, the visible flecks of rosemary and sea salt, and the golden-brown hue make them a sensory treat. They smell like a boutique bakery and have a depth of flavor that lingers, pairing perfectly with sharp cheddars or creamy bries.
Ingredients
- 1 cup (approx. 200g) Sourdough discard (unfed)
- 1 cup All-purpose flour
- 1/4 cup Unsalted butter, softened
- 2 tbsp Fresh rosemary, finely chopped
- 1 tsp Fine sea salt
- 2 tbsp Extra virgin olive oil (for brushing)
- Flaky sea salt (for topping)
How to make it
- In a large mixing bowl, combine the sourdough discard, flour, softened butter, chopped rosemary, and fine sea salt. Use your hands or a sturdy spatula to mix until a cohesive dough forms.
- Turn the dough onto a lightly floured surface and knead gently for 1-2 minutes until smooth. Wrap in plastic wrap and refrigerate for 30 minutes to allow the flour to hydrate.
- Preheat your oven to 350°F (175°C). Prepare two large baking sheets with parchment paper.
- Divide the dough in half. Roll out one half directly onto a piece of parchment paper until it is paper-thin (about 1/16th of an inch). The thinner the dough, the crispier the cracker.
- Brush the surface lightly with olive oil and sprinkle generously with flaky sea salt.
- Use a pizza cutter or a sharp knife to score the dough into squares or diamonds. You don’t need to separate them; they will snap apart easily after baking.
- Bake for 15-20 minutes. Watch closely around the 12-minute mark; the edges should be golden brown and the centers should feel firm. If the edges brown too fast, lower the heat slightly. Let them cool completely on the pan for maximum crispness before breaking them along the score lines.
6 Perfect Spring Brunch Ideas (Step-by-Step Guide)

Why we love this
The Smoked Salmon Toast Board is the pinnacle of spring elegance. It’s a customizable feast that celebrates the season’s awakening with bright colors and fresh flavors. The contrast between the crunch of toasted sourdough, the velvety richness of whipped cream cheese, and the salty, silkiness of cold-smoked salmon is divine. Topped with capers and paper-thin radishes, it’s a dish that looks like a garden on a board. It invites guests to build their own perfect bite, making the brunch experience interactive, leisurely, and incredibly photogenic.
Ingredients
- 1 loaf Sourdough bread, sliced and toasted
- 8 oz Smoked salmon (Lox style)
- 1 cup Whipped cream cheese
- 2 tbsp Fresh dill, chopped
- 1 small Red onion, thinly sliced into rings
- 1 bunch Radishes, thinly sliced
- 2 tbsp Capers, drained
- Lemon wedges and microgreens for garnish
How to make it
- Start by preparing your ‘canvas.’ Slice the sourdough into 1-inch thick slices and toast them until they are golden brown and sturdy enough to hold toppings.
- Whip the cream cheese in a small bowl with a teaspoon of lemon juice and half of the chopped dill to make it light and airy.
- Arrange the toasted bread on one side of a large wooden board.
- On the other side, artfully drape the smoked salmon slices in loose ribbons. This makes them easier for guests to pick up with a fork.
- Place the whipped cream cheese in a small decorative bowl and set it in the center of the board.
- Nestle the sliced radishes, red onion rings, and capers in small clusters around the salmon.
- Garnish the entire board with fresh dill sprigs, microgreens, and lemon wedges. Encourage guests to spread the cheese first, then layer the salmon and veggies to their heart’s content.
10 Pretty Decorated Spring Cookies (Step-by-Step Guide)

Why we love this
Pressed Flower Shortbread cookies are quite literally edible art. They capture the delicate beauty of spring in a way that feels both vintage and modern. The cookie itself is buttery, crumbly, and subtly sweet, providing the perfect backdrop for the vibrant colors of pansies, violas, or lavender. When you bite into one, you get that classic melt-in-your-mouth shortbread texture followed by the faint, earthy floral notes. These cookies turn any dessert board into a focal point, sparking conversation and delight with their whimsical, fairy-tale aesthetic.
Ingredients
- 1 cup Unsalted butter, softened
- 1/2 cup Granulated sugar
- 2 cups All-purpose flour
- 1/2 tsp Vanilla extract
- 1/4 tsp Salt
- A variety of edible flowers (pansies, violas, herbs)
- 1 Egg white (lightly beaten, for ‘glue’)
- Granulated sugar for sprinkling
How to make it
- In a large bowl, cream together the softened butter and sugar until the mixture is pale and fluffy (about 3 minutes). Stir in the vanilla extract.
- Gradually add the flour and salt, mixing until a stiff dough forms. Do not overmix, or the shortbread will be tough.
- Roll the dough out between two sheets of parchment paper to a 1/4-inch thickness. Chill the rolled dough in the fridge for 30 minutes to help the cookies hold their shape.
- Preheat oven to 325°F (160°C). Use a round cookie cutter to stamp out circles and place them on a baking sheet.
- Bake for 10 minutes. Remove them briefly from the oven—they should be set but not yet browned.
- Gently press an edible flower onto the center of each warm cookie. Lightly brush the flower with a tiny bit of beaten egg white and sprinkle with a pinch of sugar.
- Return to the oven for another 5-8 minutes until the edges are just barely starting to turn golden. Cooling them completely on the sheet is vital to ensure they don’t break when handled.
7 Chilled Summer Soup Recipes (Step-by-Step Guide)

Why we love this
When the sun is blazing, a Chilled Watermelon Gazpacho board is the ultimate refresher. This isn’t your traditional tomato soup; it’s a sweet and savory revelation that cleanses the palate and cools the body. The soup has a vibrant ruby-red hue and a silky texture with just a hint of crunch from finely diced cucumbers and bell peppers. The aroma is incredibly fresh—think mown grass and sweet melon. Served in small glass shooters on a board surrounded by garnishes, it’s a sophisticated, modern way to serve a ‘soup course’ without any heat required.
Ingredients
- 6 cups Seedless watermelon, cubed
- 1 English cucumber, peeled and chopped
- 1 Red bell pepper, seeded and chopped
- 2 tbsp Red wine vinegar
- 1/4 cup Extra virgin olive oil
- 1/4 cup Fresh mint leaves
- 1 Jalapeño, seeded (optional for heat)
- Feta cheese and lime zest for garnish
How to make it
- Place the watermelon cubes, chopped cucumber, and red bell pepper into a high-powered blender. If you want a bit of a kick, add the seeded jalapeño now.
- Add the red wine vinegar and fresh mint leaves. Blend on high until the mixture is completely liquefied and smooth.
- While the blender is running on a low setting, slowly stream in the olive oil. This emulsifies the soup, giving it a luxurious, velvety mouthfeel.
- Taste and add a pinch of salt if needed. Pour the soup into a large glass pitcher and refrigerate for at least 2 hours. Gazpacho must be served ice-cold to be truly refreshing.
- To serve, pour the chilled soup into small glass shooters or bowls.
- Arrange the shooters on a serving board. Garnish each one with a small crumble of salty feta cheese, a tiny mint leaf, and a dusting of fresh lime zest to brighten the flavors.
10 Must-Try Viral Grilling Recipes (Step-by-Step Guide)

Why we love this
Nothing says ‘viral summer’ like Balsamic Glazed Peaches with Prosciutto. This board is a masterclass in the balance of sweet, salty, and smoky flavors. The peaches are grilled until their natural sugars caramelize, creating a soft, warm center that contrasts beautifully with the thin, salty ribbons of cured prosciutto. The smell of charred fruit and balsamic reduction is intoxicating. It’s a sophisticated appetizer that feels expensive but is incredibly simple to execute, making it the star of any outdoor gathering where guests can pick up a warm peach wedge and enjoy the sunset.
Ingredients
- 4 large Freestone peaches, halved and pitted
- 1/2 lb Thinly sliced Prosciutto di Parma
- 1/2 cup Balsamic glaze
- 4 oz Fresh burrata cheese
- Fresh basil leaves
- Olive oil for brushing
How to make it
- Preheat your grill to medium heat. Make sure the grates are very clean to ensure beautiful grill marks.
- Brush the cut side of each peach half lightly with olive oil. This prevents sticking and helps with the caramelization.
- Place the peaches cut-side down on the grill. Cook for 4-5 minutes without moving them. You are looking for distinct, dark grill marks and a slight softening of the fruit.
- Carefully flip the peaches and cook for another 2 minutes on the skin side, then remove from the grill.
- On a large serving board, arrange the warm peach halves. Tear the fresh burrata into pieces and nestle them between the fruit.
- Drape ribbons of prosciutto around the peaches and cheese.
- Generously drizzle the entire board with the balsamic glaze and scatter fresh basil leaves over the top. Serve while the peaches are still warm for the best experience.
8 Creative Viral Cupcake Ideas (Step-by-Step Guide)
Why we love this
Butterfly Pea Flower Tea Cupcakes are taking the internet by storm because of their natural, ethereal blue-to-purple hue. These cupcakes are as magical to look at as they are to eat. The cake is light, fluffy, and infused with a subtle floral tea flavor, while the frosting can be ‘activated’ with a drop of lemon juice to change color right before your eyes. They are the ultimate conversation starter for a garden party or a whimsical birthday. The texture is moist and tender, and the visual impact of that natural indigo color on a white marble board is absolutely stunning.
Ingredients
- 1.5 cups Cake flour
- 1 cup Granulated sugar
- 1/2 cup Unsalted butter, softened
- 2 Eggs
- 1/2 cup Whole milk
- 2 tbsp Dried Butterfly Pea Flowers (steeped in the milk)
- 1.5 tsp Baking powder
- Vanilla buttercream frosting
How to make it
- Start by making your ‘blue milk.’ Heat the milk until steaming, add the dried butterfly pea flowers, and let steep for 10 minutes until the milk is a deep, dark blue. Strain out the flowers and let the milk cool to room temperature.
- Preheat your oven to 350°F (175°C) and line a cupcake tin with paper liners.
- In a stand mixer, cream the butter and sugar together until light and fluffy. Add eggs one at a time, beating well after each addition.
- In a separate bowl, sift together the cake flour and baking powder.
- Alternately add the flour mixture and the blue milk to the butter mixture, beginning and ending with the flour. The batter will be a beautiful, natural blue color.
- Fill cupcake liners 2/3 full and bake for 18-20 minutes, or until a toothpick comes out clean.
- Once completely cool, pipe with vanilla buttercream. If you want a viral ‘magic’ effect, mist the frosting with a tiny bit of lemon juice, and watch parts of it turn from blue to purple!
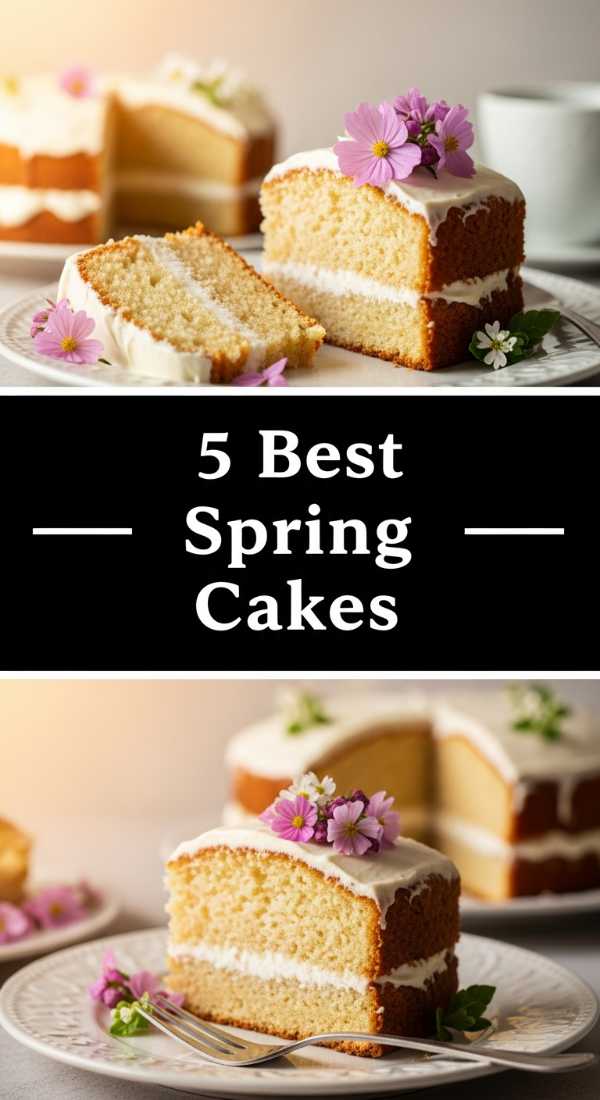
5 Best Spring Cake Recipes (Step-by-Step Guide)
[IMAGE_10]
Why we love this
The Strawberry Rhubarb Upside Down Cake is the quintessential spring dessert. It’s a rustic, beautiful cake that celebrates the short but sweet rhubarb season. The bottom (which becomes the top!) is a ruby-red mosaic of tart rhubarb and sweet strawberries bathed in a buttery caramel sauce. The cake itself is a moist, vanilla-scented sponge that soaks up all those delicious fruit juices. It’s a sensory delight of tart and sweet, with a soft, jammy topping that glistens in the light. This cake doesn’t need frosting; its natural beauty is enough to stop any scroll in its tracks.
Ingredients
- 1 cup Fresh rhubarb, cut into 1-inch pieces
- 1 cup Strawberries, hulled and halved
- 1/2 cup Unsalted butter, melted (for the topping)
- 1/2 cup Brown sugar (for the topping)
- 1.5 cups All-purpose flour
- 1 cup Granulated sugar (for the cake)
- 1/2 cup Softened butter (for the cake)
- 2 Eggs
- 1/2 cup Sour cream
- 1 tsp Vanilla extract
How to make it
- Preheat your oven to 350°F (175°C). Pour the melted butter into the bottom of a 9-inch round cake pan and sprinkle the brown sugar evenly over it.
- Arrange the rhubarb and strawberries in a decorative pattern over the sugar layer. This will be the top of your cake, so take your time making it look pretty!
- In a medium bowl, cream the softened butter and granulated sugar until light. Add the eggs, sour cream, and vanilla, mixing until smooth.
- Gently fold in the flour and a pinch of salt until just combined. The batter will be quite thick.
- Carefully dollop the batter over the fruit. Use a spatula to spread it gently so you don’t disturb the fruit pattern underneath.
- Bake for 40-45 minutes. The cake is done when the top is deep golden brown and a skewer inserted in the center comes out clean.
- Let the cake cool in the pan for exactly 10 minutes. This is the ‘magic window’—too soon and it falls apart, too late and the caramel sticks. Run a knife around the edge, place a board over the pan, and flip it confidently. Lift the pan to reveal the glistening fruit masterpiece.
The Art of the Board
The beauty of the simple food board trend is that there are no real rules—only guidelines for joy. It encourages us to look at our ingredients with fresh eyes and to treat the act of serving as an act of creativity. Whether you’re making a chilled soup or a batch of floral cookies, remember that the most important ingredient is the intention to share something beautiful with the people you love. So, grab your favorite wooden platter, find some seasonal inspiration, and start building your own viral-worthy spread today!