

I remember the first time I pulled a tray of roasted vegetables out of the oven and realized they weren’t just a side dish—they were the main event. There’s something incredibly soulful about the way high heat transforms humble, earthy produce into something sweet, charred, and utterly addictive. Lately, my social media feed has been flooded with these ‘Simple Food Boards,’ and honestly, I’m not even mad about it. They represent a shift toward slow living and intentional eating that feels like a warm hug for the kitchen.
This isn’t just about aesthetics; it’s about the ritual. The sound of the knife hitting the wooden board, the fragrant clouds of rosemary and garlic wafting through the house, and that final, glorious moment when you arrange everything into a colorful masterpiece. It’s a way to feed your soul and your family without the stress of a multi-course meal. Let’s dive into how you can master this viral trend and bring some of that cozy, rustic magic into your own home.
How to roast perfect vegetables?
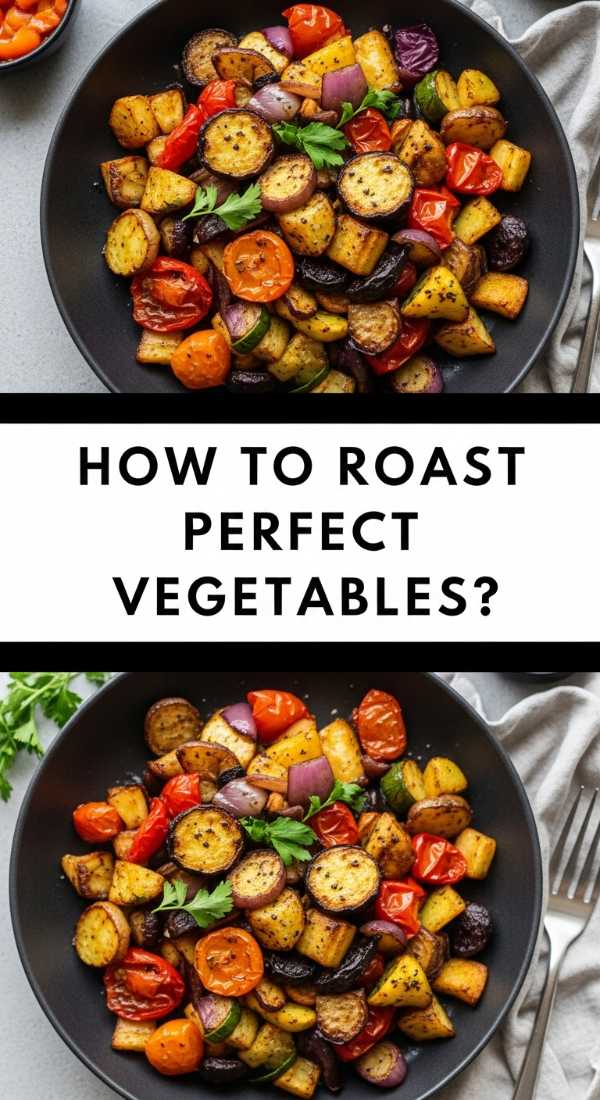
Why we love this
There is a magical transformation that happens in the oven when the dry heat begins to pull the natural sugars to the surface of a vegetable, creating a delicate, golden-brown crust. The aroma is intoxicating, filling your kitchen with a savory, caramelized scent that promises a depth of flavor raw veggies simply cannot match. You get that incredible contrast between a slightly crisp exterior and a center so tender it practically melts on your tongue. It is the ultimate comfort food that feels both indulgent and nourishing at the very same time.
Ingredients
- 2 lbs mixed sturdy vegetables (carrots, potatoes, parsnips)
- 3 tablespoons extra virgin olive oil
- 1 teaspoon sea salt
- 1/2 teaspoon cracked black pepper
- 2 sprigs fresh rosemary
How to make it
- Preheat your oven to 425°F (220°C). This high temperature is crucial for achieving caramelization rather than just steaming the vegetables.
- Peel and chop your vegetables into uniform 1-inch pieces. Consistency in size ensures that every piece finishes cooking at the exact same time, preventing the frustration of some pieces being mushy while others are still hard.
- In a large mixing bowl, toss the vegetables with olive oil, salt, pepper, and stripped rosemary leaves. Ensure every single surface is lightly glistening with oil; this acts as a heat conductor for that perfect sear.
- Spread the vegetables onto a large, rimmed baking sheet. CRITICAL TIP: Do not crowd the pan. If the vegetables are touching, they will release steam and become soggy. Use two pans if necessary to give each piece its own ‘personal space.’
- Roast for 25 to 35 minutes. Halfway through, use a wide metal spatula to aggressively flip and toss the vegetables. Look for deep golden edges and a fork-tender interior as your visual cue for doneness.
How to make crispy broccoli?

Why we love this
If you think you don’t like broccoli, you haven’t had it roasted until the tiny florets turn into crispy, salty ‘popcorn’ bits. The texture is a revelation—shattering delicately in your mouth before giving way to a nutty, concentrated green flavor that is far superior to boiling. The tips of the florets catch the heat and turn dark and brittle, creating a sophisticated bitterness that pairs perfectly with a squeeze of fresh lemon. It turns a standard healthy vegetable into a snackable treat that you will find yourself eating straight off the baking sheet.
Ingredients
- 2 large heads of broccoli
- 2 tablespoons avocado oil (high smoke point)
- 1/2 teaspoon garlic powder
- 1/4 teaspoon red pepper flakes
- Lemon wedges for serving
How to make it
- Wash your broccoli and, most importantly, dry it completely. Water is the enemy of crispiness; use a salad spinner or a clean kitchen towel to ensure no moisture remains in the crevices of the florets.
- Cut the broccoli into long, elegant spears including the stems. The stems provide a wonderful crunch that contrasts with the airy tops.
- Whisk the oil, garlic powder, and red pepper flakes in a bowl, then massage the mixture into the broccoli florets using your hands to ensure the oil reaches deep into the bushy tops.
- Arrange on a preheated baking sheet at 400°F (200°C). Position the florets so they are face down against the hot metal to maximize the browning surface area.
- Roast for 15-20 minutes. You are looking for the edges to be dark brown, almost black in some spots. This ‘char’ is where the flavor lives. Finish with a bright squeeze of lemon juice immediately after removing from the oven to cut through the richness.
How to bake sweet carrots?

Why we love this
Baking carrots brings out a candy-like sweetness that is completely natural and deeply satisfying. As they roast, the moisture evaporates, concentrating the earthy sugars and turning the texture into something silky and decadent. The vibrant orange hue intensifies, making them a stunning addition to any food board, especially when paired with green herbs. It’s a sensory delight that starts with the snap of the vegetable and ends with a mellow, honey-toned finish that lingers on the palate.
Ingredients
- 1 bunch of whole carrots (with greens for aesthetic)
- 1 tablespoon maple syrup or honey
- 2 tablespoons melted butter or ghee
- 1/2 teaspoon kosher salt
- Fresh thyme sprigs
How to make it
- Trim the green tops, leaving about an inch of the stem for a rustic, ‘farm-to-table’ look. Scrub the carrots well, but leave the skin on if they are organic for extra texture and nutrients.
- If the carrots are very thick, slice them in half lengthwise so they cook at the same rate as the thinner ones. Aim for a thickness of about half an inch.
- In a small bowl, whisk the melted butter, maple syrup, and salt. Lay the carrots on a parchment-lined tray and brush the glaze over them generously, ensuring they are well-coated.
- Place in a 400°F (200°C) oven. The parchment paper is essential here because the sugar in the glaze will stick to a bare metal pan.
- Bake for 20-25 minutes. Use a paring knife to test for doneness; it should slide in with zero resistance. The carrots should look slightly shriveled and glossy.
How to cook vegetable soup?

Why we love this
A pot of vegetable soup simmering on the stove is the ultimate soundtrack to a cozy afternoon. The steam carries the scent of sautéed onions, garlic, and bay leaves throughout the house, creating an atmosphere of pure warmth and security. Every spoonful is a complex medley of flavors that have had time to marry and develop into a rich, savory broth. It’s a forgiving, soulful dish that rewards patience and fills your kitchen with the most inviting, homey aroma imaginable.
Ingredients
- 1 large onion, diced
- 3 cloves garlic, minced
- 4 cups vegetable stock
- 2 cups chopped mixed vegetables (celery, squash, cabbage)
- 1 can fire-roasted tomatoes
How to make it
- Begin by ‘sweating’ your aromatics. Heat a heavy-bottomed pot over medium heat with a splash of oil. Add the onions and celery, cooking until they are translucent and soft—about 8 minutes. Do not brown them; you want sweetness, not bitterness.
- Add the garlic and stir for just 60 seconds until fragrant. Adding garlic too early can cause it to burn and turn the whole soup bitter.
- Pour in your vegetable stock and the canned tomatoes, scraping the bottom of the pot to release any flavorful bits (fond).
- Add your hard vegetables (like squash or potatoes) first, simmering for 15 minutes, then add softer vegetables (like cabbage or spinach) in the last 5 minutes of cooking.
- Taste your broth! This is the most important step. Add salt, pepper, or a splash of apple cider vinegar to brighten the flavors if it tastes flat.
How to season roasted vegetables?
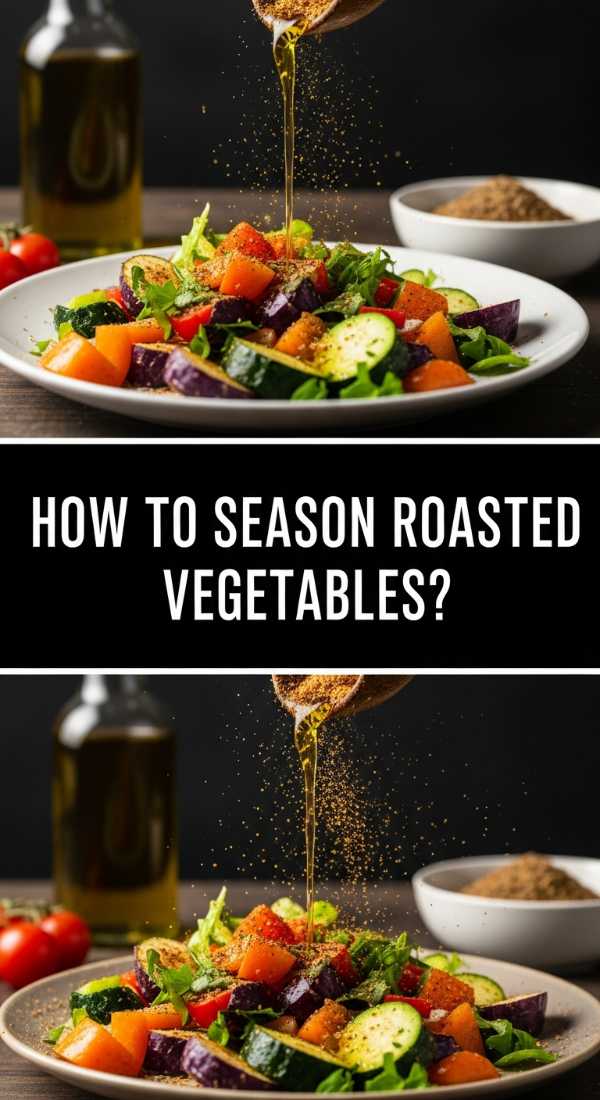
Why we love this
Seasoning is the difference between a bland side dish and a culinary experience that dances on your tongue. The right blend of spices creates a multi-layered profile of heat, smoke, and earthiness that highlights the natural beauty of the produce. When spices hit the hot oil during roasting, they bloom, releasing essential oils that permeate the vegetables from the inside out. It transforms the kitchen into a spice market, filling the air with exotic and comforting notes that make your mouth water before the tray even leaves the oven.
Ingredients
- 1 tablespoon smoked paprika
- 1 teaspoon cumin powder
- 1 teaspoon onion powder
- 1/2 teaspoon dried oregano
- 1/2 teaspoon flaky sea salt
How to make it
- Create a ‘dry rub’ by mixing all your spices in a small jar. Using a pre-mixed blend ensures even distribution across all the vegetables.
- Wait to season until after you have applied your oil. The oil acts as the glue that holds the spices to the surface of the vegetables.
- Toss the vegetables in a large bowl with the spice mix before putting them on the tray. Use your hands to rub the spices into the nooks and crannies of things like cauliflower or broccoli.
- For a deeper flavor profile, reserve a small pinch of the seasoning to sprinkle on the vegetables the moment they come out of the oven. This provides a hit of ‘fresh’ spice flavor alongside the toasted ones.
- Always finish with flaky sea salt. The large crystals provide a satisfying crunch and a burst of salinity that makes the other flavors pop.
How to roast autumn vegetables?
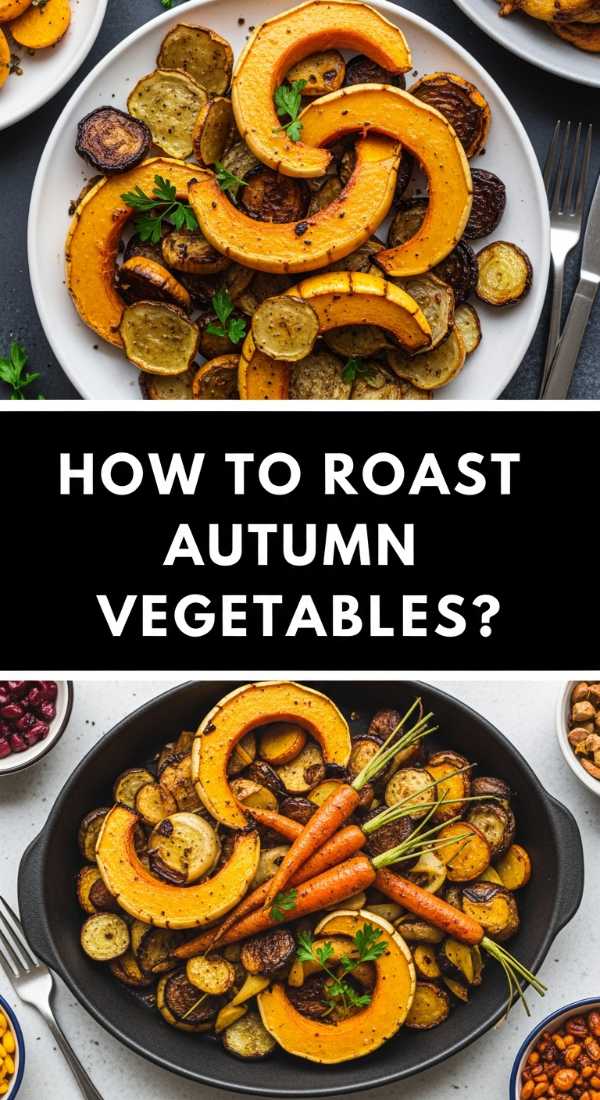
Why we love this
Autumn vegetables like butternut squash, parsnips, and beets bring a heavy, grounding energy to the table that perfectly matches the cooling weather. Their colors are the palette of a changing forest—deep oranges, creamy yellows, and rich purples that look stunning on a wooden board. As they roast, they develop a dense, almost creamy interior that feels like the culinary equivalent of a cashmere sweater. The smell of roasting squash mixed with woody herbs like sage or rosemary is the quintessential scent of the harvest season.
Ingredients
- 1 butternut squash, cubed
- 3 parsnips, peeled and sliced
- 2 red beets, peeled and wedged
- 3 tablespoons olive oil
- 4 fresh sage leaves
How to make it
- Prep is key for these dense vegetables. Ensure your cubes of squash and parsnips are roughly the same size (about 3/4 inch) so they soften at the same rate.
- Beets bleed color, so toss them in a separate small bowl with oil before adding them to the tray if you want to keep the other vegetables from turning pink.
- Roast at 400°F (200°C). These denser roots need a slightly longer time—usually 35 to 45 minutes—to fully tenderize and develop a crust.
- Add the whole sage leaves to the tray in the last 10 minutes of roasting. They will fry in the oil and become incredibly crispy and fragrant.
- Check for a ‘blistered’ appearance on the squash. When the edges start to puff up and turn dark brown, the sugars have fully developed.
How to char broccoli perfectly?
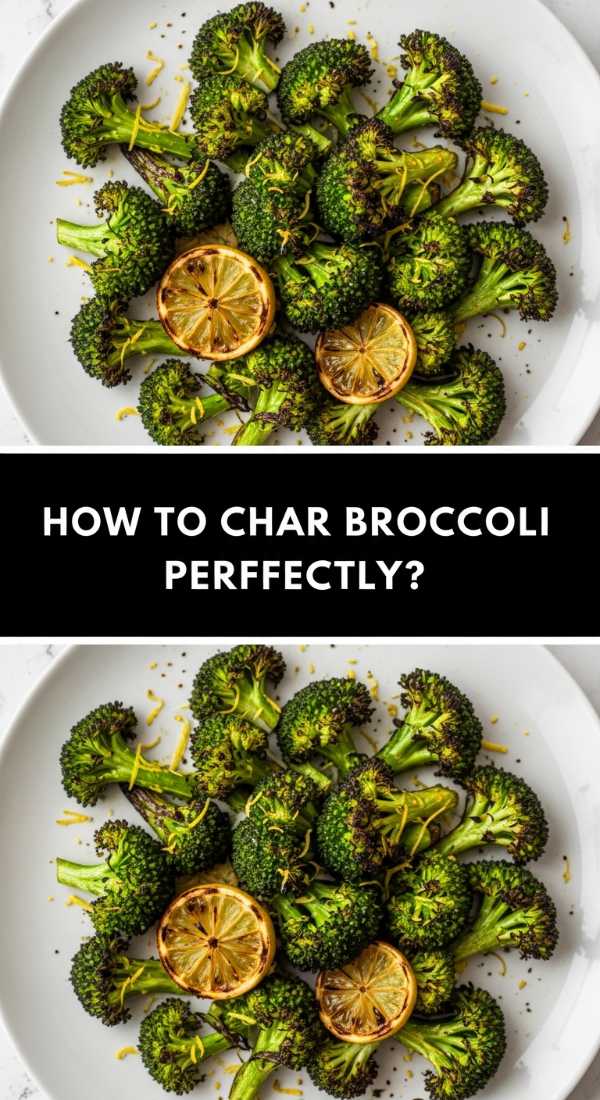
Why we love this
Perfectly charred broccoli offers a sophisticated, smokey profile that feels like it came out of a professional wood-fired oven. It’s that ‘burnt’ edge that provides a complex bitterness which contrasts beautifully with the tender, juicy stems. This method is all about high-intensity heat and quick timing, resulting in a dish that has an incredible ‘snap’ and a deep, umami-rich flavor. It turns the humble broccoli into a bold, main-character ingredient that demands attention on any food board.
Ingredients
- 2 heads of broccoli, cut into flat-edged florets
- 3 tablespoons high-heat oil (grapeseed or avocado)
- 1/2 teaspoon coarse sea salt
- Optional: 1 tablespoon nutritional yeast for ‘cheesy’ umami
How to make it
- Preheat your baking sheet inside the oven at 450°F (230°C). Placing the broccoli onto a screaming-hot tray creates an immediate sear, which is the secret to a great char.
- Cut your florets so they have at least one large, flat side. Maximizing contact with the hot metal is the only way to get that deep, dark browning.
- Lightly coat the broccoli in oil and salt. Avoid using too much oil, as excess oil can lead to frying rather than charring.
- Carefully pull out the hot tray and arrange the broccoli flat-side down. You should hear a distinct sizzle.
- Roast for only 10-12 minutes on the highest rack of the oven. Keep a close eye on it; you want the edges to be black and crispy, but the stems should remain bright green and ‘al dente.’
How to glaze roasted carrots?

Why we love this
A glazed carrot is a thing of beauty—shiny, jewel-toned, and coated in a sticky-sweet reduction that makes every bite feel like a celebration. The glaze clings to the ridges of the carrot, creating a concentrated burst of flavor that balances the vegetable’s natural earthiness with a touch of acidity or sweetness. The texture becomes almost jammy on the outside while staying succulent on the inside. It’s the kind of dish that disappears in seconds because it perfectly satisfies that craving for something savory, sweet, and tangy all at once.
Ingredients
- 1 lb slender carrots
- 2 tablespoons balsamic vinegar
- 1 tablespoon brown sugar
- 1 tablespoon butter
- A pinch of salt
How to make it
- Start by roasting the carrots plain with just a bit of oil and salt at 400°F (200°C) for the first 15 minutes. If you add the glaze too early, the sugars will burn before the carrots are cooked through.
- While the carrots are roasting, simmer the balsamic vinegar, brown sugar, and butter in a small pan over medium-low heat until it reduces into a thick, syrupy consistency.
- Open the oven and drizzle the reduction over the partially cooked carrots. Use tongs to roll them around so they are completely lacquered in the glaze.
- Return to the oven for another 5-7 minutes. Watch for the glaze to start bubbling and thickening further; it should look like a shiny coat of paint.
- Remove and let them rest for 2 minutes on the tray. This ‘cool down’ period allows the glaze to set and become beautifully tacky.
How to roast medley vegetables?

Why we love this
The medley is a celebration of diversity on a single tray. You get the soft, silkiness of roasted peppers, the juicy pop of cherry tomatoes, and the satisfying crunch of zucchini all in one forkful. It’s a visual and textural feast that feels vibrant and energetic. The way the different vegetable juices mingle on the pan creates a ‘built-in’ sauce that ties the whole board together. It’s an effortless way to eat the rainbow and ensure that every person at the table finds their favorite bite.
Ingredients
- 1 zucchini, sliced into half-moons
- 1 red bell pepper, chopped
- 1 cup cherry tomatoes
- 1 red onion, cut into wedges
- 2 tablespoons olive oil and dried basil
How to make it
- Because these are ‘soft’ vegetables, they cook much faster than roots. Keep your heat at 400°F (200°C) to ensure they brown before they turn to mush.
- Keep the pieces relatively large. Zucchini and peppers shrink significantly as they lose water; starting with larger chunks ensures you have something substantial to bite into.
- Toss everything together with the oil and herbs, but leave the cherry tomatoes for last so they don’t burst prematurely during the mixing phase.
- Spread in a single layer. The red onion wedges should be separated slightly to allow the heat to penetrate each layer, turning them sweet and translucent.
- Roast for 18-22 minutes. You’ll know they are done when the tomatoes have collapsed and the zucchini shows golden ‘grill marks’ from the pan.
How to blend roasted soup?

Why we love this
Blending roasted vegetables into a soup creates a texture that is impossibly silky and luxurious without needing a drop of heavy cream. The roasting process adds a background ‘toastiness’ that you simply can’t get from boiling, resulting in a soup with incredible depth and a vibrant, concentrated color. As the blender whirls, the aroma of the concentrated vegetables fills the air, and the result is a golden, pourable liquid that feels like pure liquid sunshine. It’s the ultimate way to use up a big board of leftovers and turn them into a sophisticated, warming meal.
Ingredients
- 4 cups roasted vegetables (squash, carrots, and onions work best)
- 2 cups warm vegetable broth
- 1/2 cup coconut milk (optional for extra creaminess)
- Salt and pepper to taste
How to make it
- Let your roasted vegetables cool for about 5 minutes. Placing boiling-hot items into a closed blender can create steam pressure that forces the lid off—be safe!
- Transfer the vegetables to your blender carafe. Add half of the broth initially; it’s easier to thin a thick soup than to thicken a thin one.
- Start the blender on the lowest speed and gradually increase to high. This ‘slow start’ prevents splattering and ensures a more even emulsion.
- Blend for a full 60-90 seconds. Most people stop too early. For that professional, velvety texture, you need to let the blades truly pulverize every fiber.
- Pour the soup back into a pot to reheat and stir in the coconut milk. Do a final taste test—roasted soups often need an extra pinch of salt to balance the concentrated sweetness of the vegetables.
Bringing the Board to Life
The beauty of the Simple Food Board is that it’s never the same twice. Whether you’re piling it high with charred broccoli for a quick weeknight dinner or meticulously glazing carrots for a festive gathering, it’s a style of cooking that honors the ingredients. These techniques—roasting, charring, and blending—are the building blocks of a kitchen that feels alive and inspired. So, clear off your counter, grab your favorite wooden board, and start creating your own edible masterpiece. Your feed (and your stomach) will thank you.