

There is something undeniably magical about a shared meal that looks as good as it tastes. We have all seen those stunning food boards taking over our feeds—the ones that look like a work of art but feel like a warm hug. It is not just about the food; it is about the way a beautifully arranged platter invites people to linger a little longer, share a laugh, and savor every bite. This simple food board is going viral because it celebrates the joy of variety and the beauty of seasonal ingredients without the stress of formal plating.
I remember the first time I set one of these out for a Sunday brunch. Within minutes, the room fell silent as everyone reached for their favorites, the vibrant colors of the fruits and the savory aroma of freshly grilled corn filling the air. It felt effortless yet intentional, a perfect reflection of a lifestyle that prioritizes connection over perfection. Today, I am showing you exactly how to recreate this viral sensation so you can bring that same sense of wonder and warmth to your own kitchen table.
How to grill perfect corn?

Why we love this
There is nothing quite like the smoky, charred sweetness of corn straight off the grill. As the kernels caramelize over the open flame, they develop a deep, nutty flavor that contrasts beautifully with the juicy, popping texture of every bite. The aroma of toasted husks and melting butter evokes memories of summer barbecues and golden hour sunsets, making this a quintessential addition to any festive food board. It is the ultimate finger food—rustic, messy in the best way, and bursting with sunshine.
Ingredients
- 4-6 ears of fresh sweet corn
- 2 tablespoons unsalted butter, softened
- 1 teaspoon smoked paprika
- Salt and freshly cracked black pepper
- Fresh cilantro or parsley for garnish
- Lime wedges
How to make it
- Begin by prepping the corn; you can choose to grill it in the husk for a steamed effect or shuck it completely for those iconic char marks. If shucking, ensure all the silk is removed.
- Preheat your grill to medium-high heat (about 400°F). Lightly oil the grates to prevent sticking.
- Place the corn directly onto the hot grates. Close the lid and cook for about 10-12 minutes, turning every 2-3 minutes. You are looking for even charring on all sides—the kernels should turn a vibrant yellow with dark brown spots.
- While the corn is grilling, mix your softened butter with paprika, salt, and pepper in a small bowl.
- Once the corn is tender and charred, remove it from the grill and immediately brush with the spiced butter while it is still steaming hot.
- Finish with a squeeze of lime and a sprinkle of fresh herbs before placing it on your board.
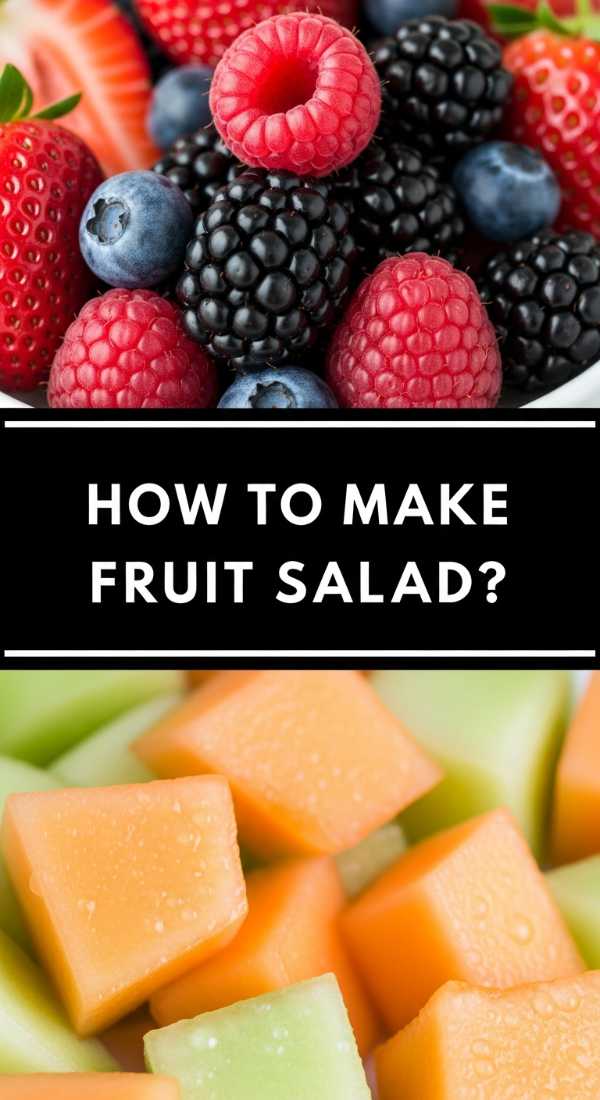
How to make fruit salad?
Why we love this
A truly great fruit salad is a symphony of textures and brightness that cleanses the palate and delights the eyes. Imagine the crunch of fresh apples, the silky sweetness of ripe mango, and the explosive pop of blueberries all coated in a light, citrusy glaze. It’s a refreshing centerpiece that feels incredibly indulgent despite being naturally healthy. The way the colors pop against the board makes it an instant visual highlight, promising a cooling burst of energy with every spoonful.
Ingredients
- 2 cups strawberries, hulled and halved
- 1 cup fresh blueberries
- 2 kiwis, peeled and sliced
- 1 mango, cubed
- 1 cup pineapple chunks
- 1 tablespoon honey or agave
- Juice of half a lime
- Fresh mint leaves
How to make it
- Select fruit that is ripe but still firm; overripe fruit will become mushy and release too much juice, making the salad soggy.
- Wash all berries and dry them thoroughly with a paper towel to ensure the dressing adheres properly.
- Cut larger fruits like mango and pineapple into uniform bite-sized cubes. Consistency in size ensures a balanced bite every time.
- In a small whisking bowl, combine the lime juice and honey. This simple dressing prevents browning and enhances the natural sugars of the fruit.
- Place all the fruit in a large glass bowl and drizzle the dressing over the top. Toss very gently with a silicone spatula to avoid bruising the delicate berries.
- Garnish with torn mint leaves right before serving to maintain that bright, aromatic herb scent.
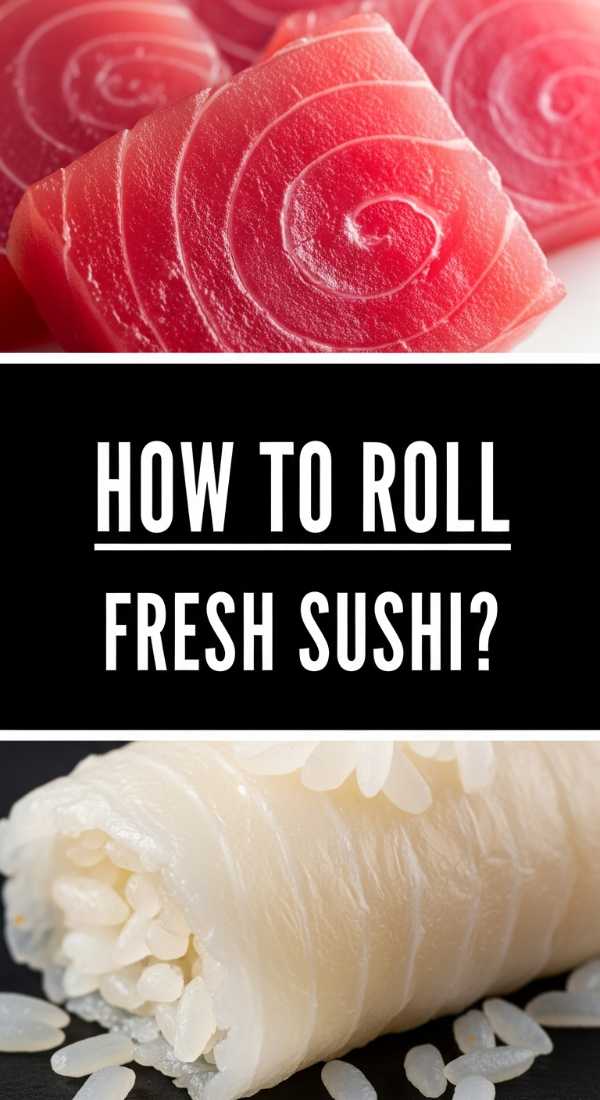
How to roll fresh sushi?
Why we love this
Sushi brings an element of sophisticated craftsmanship to your food board, offering a delicate balance of vinegared rice and crisp vegetables. The texture is a journey—from the slight chew of the seaweed (nori) to the creamy richness of avocado and the clean snap of cucumber. It feels like a special occasion treat that is surprisingly light and satisfying. Plus, the precise, colorful spirals of the rolls add a professional, high-end aesthetic that guests find absolutely irresistible.
Ingredients
- 2 cups sushi rice (short-grain)
- 3 tablespoons rice vinegar
- 1 tablespoon sugar
- Nori (seaweed) sheets
- Fillings: Cucumber, avocado, smoked salmon, or crab sticks
- Soy sauce, wasabi, and pickled ginger for serving
How to make it
- Prepare the sushi rice by rinsing it until the water runs clear, then cooking it with a 1:1.25 ratio of water. Once cooked, fold in the vinegar and sugar mixture while the rice is warm, then let it cool to room temperature.
- Place a nori sheet, shiny side down, on a bamboo rolling mat. Pro tip: Cover your mat in plastic wrap for easier cleanup.
- Wet your hands with water to prevent sticking. Spread a thin, even layer of rice over the nori, leaving a 1-inch border at the top edge.
- Lay your sliced fillings in a neat horizontal line about an inch from the bottom edge.
- Using the mat, lift the bottom edge of the nori and roll it over the fillings, tucking it tightly. Continue rolling until you reach the top border.
- Dampen the top border with a little water to seal the roll. Use a very sharp, wet knife to slice the roll into 6-8 even pieces, wiping the knife between every cut.
How to brew detox water?

Why we love this
Hydration has never felt more luxurious than with a beautifully infused detox water. The subtle infusion of cucumber and lemon creates a crisp, spa-like aroma that immediately relaxes the senses. As you sip, the cool liquid feels incredibly revitalizing, with the faint citrus notes cutting through the richness of other board components. It’s a visual treat as well, with floating slices of fruit and herbs acting like liquid jewels in a glass carafe, making wellness feel like an effortless part of the party.
Ingredients
- 1 liter chilled filtered water
- 1/2 cucumber, thinly sliced
- 1 lemon, sliced into rounds
- A handful of fresh mint sprigs
- 1 inch fresh ginger, peeled and sliced (optional)
- Ice cubes
How to make it
- Start with the freshest organic produce possible, as the skins will be soaking in your drinking water. Wash everything thoroughly.
- Slice the cucumber and lemon into very thin rounds to maximize the surface area for infusion.
- Gently bruise the mint leaves by clapping them between your hands; this releases the essential oils without making the leaves look tattered.
- Place the fruit, ginger, and mint at the bottom of a large glass pitcher.
- Fill the pitcher with filtered water. For the best flavor, let it sit in the refrigerator for at least 2 to 4 hours. This allows the subtle essences to permeate the water deeply.
- Serve over plenty of ice, ensuring a few slices of cucumber and lemon make it into each glass for a beautiful presentation.
How to cook foil packets?

Why we love this
Foil packets are like little gifts of flavor waiting to be opened. Inside the silver parchment, ingredients steam in their own juices, creating a moist, tender result that is impossible to achieve with open roasting. The aroma that wafts out when you first tear into the foil is intoxicating—a mix of garlic, herbs, and savory proteins. It’s the ultimate low-maintenance cooking method that yields high-impact results, making it perfect for a board where you want a warm, savory element without the mess of multiple pans.
Ingredients
- 1 lb shrimp or diced chicken breast
- 1 cup cherry tomatoes
- 1 zucchini, sliced
- 2 tablespoons olive oil
- 3 cloves garlic, minced
- Dried oregano and red pepper flakes
- Heavy-duty aluminum foil
How to make it
- Preheat your oven to 400°F (200°C) or prep your grill for medium-high heat.
- Cut large squares of heavy-duty aluminum foil (about 12×12 inches). Using heavy-duty foil prevents tearing and leaks.
- In a bowl, toss your protein and vegetables with olive oil, minced garlic, and seasonings until every piece is well-coated.
- Place a portion of the mixture in the center of each foil square. Do not overfill, as this will prevent even cooking.
- Fold the sides of the foil up over the food and crimp the edges tightly to create a sealed pouch. Leave a little headspace for steam to circulate.
- Bake for 15-20 minutes. The visual cue for doneness is the pouch puffing up with steam. Carefully open one packet to ensure the protein is cooked through before serving.
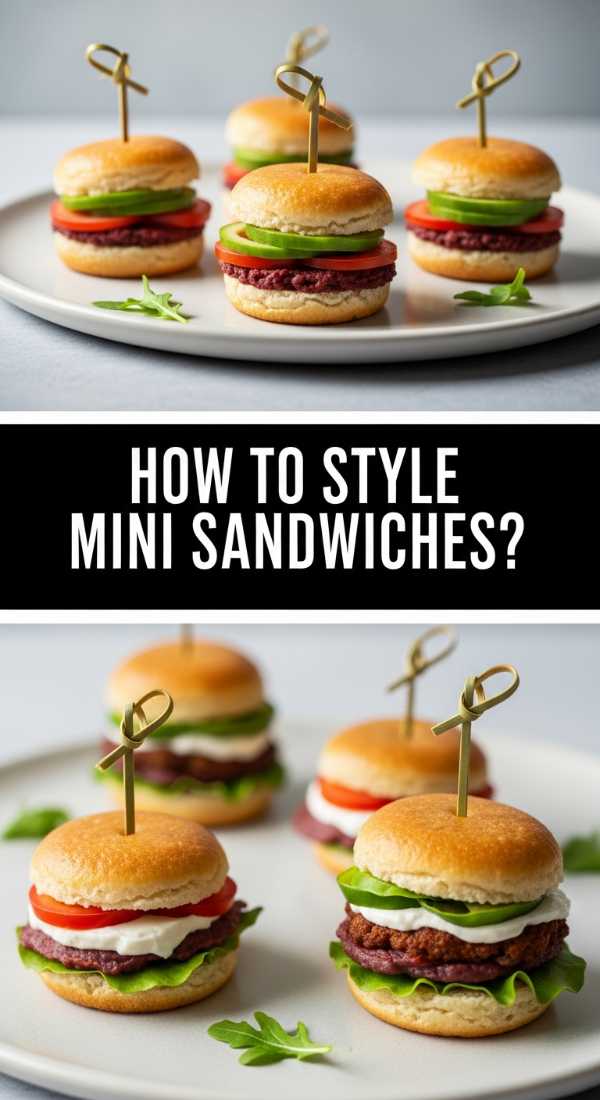
How to style mini sandwiches?
Why we love this
Mini sandwiches bring a nostalgic, tea-party charm to any food board, offering perfect two-bite portions that encourage grazing. There is something so satisfying about the soft, pillowy bread contrasting with crisp lettuce or creamy spreads. When styled correctly, they look like dainty little soldiers lined up on the board, adding structure and height. They are the ultimate versatile canvas—whether filled with savory ham or light cucumber and cream cheese, they offer a comforting, familiar bite that everyone gravitates toward.
Ingredients
- 1 loaf of soft white or whole wheat sandwich bread
- Fillings: Thinly sliced turkey, deli ham, or cucumber
- Spreads: Herbed cream cheese, mayonnaise, or dijon mustard
- Microgreens or butter lettuce
- Decorative toothpicks
How to make it
- Start with very fresh bread. If the bread is too dry, the sandwiches will crumble when you try to trim them.
- Apply a thin, even layer of your chosen spread from edge to edge on each slice of bread. This acts as a moisture barrier to keep the bread from getting soggy.
- Layer your fillings thinly and evenly. For a professional look, ensure the fillings don’t hang over the edges too much.
- Close the sandwiches and use a long, serrated knife to gently saw off the crusts. Use a light touch to avoid squishing the soft bread.
- Cut the resulting square into four smaller squares or two triangles. Ensure your knife is clean for every cut to keep the edges sharp and white.
- Secure each mini sandwich with a decorative toothpick and top with a sprig of microgreens for a pop of color and an upscale finish.
How to roast juicy chicken?

Why we love this
A perfectly roasted chicken is the soul of a savory food board. We love the contrast between the golden, crackling skin and the succulent, herb-infused meat underneath. The aroma of roasting poultry with rosemary and thyme fills the entire home, creating an atmosphere of comfort and abundance. It’s a classic for a reason—hearty enough to be a main feature but versatile enough to be sliced thin and tucked into other elements of the board. It’s the ultimate crowd-pleaser that feels both rustic and refined.
Ingredients
- 1 whole chicken (approx. 4 lbs)
- 3 tablespoons butter, softened
- Fresh rosemary, thyme, and sage
- 1 lemon, halved
- 1 head of garlic, halved crosswise
- Salt and black pepper
How to make it
- Remove the chicken from the fridge 30 minutes before cooking to bring it to room temperature; this ensures even cooking. Pat the skin extremely dry with paper towels.
- Preheat your oven to 425°F (220°C). High heat is the secret to that crispy, golden skin.
- Season the cavity with salt and pepper, then stuff it with the lemon halves, garlic, and a bundle of fresh herbs.
- Rub the softened butter all over the skin and under the skin of the breast meat. Generously season the exterior with salt.
- Place the chicken in a roasting pan and cook for about 1 hour to 1 hour and 15 minutes. Use a meat thermometer to check the thickest part of the thigh—it should read 165°F (74°C).
- Crucial Step: Let the chicken rest for at least 15-20 minutes before carving. This allows the juices to redistribute, ensuring every slice is incredibly moist and juicy.
How to bake sweet potatoes?

Why we love this
Baking sweet potatoes transforms them into something almost dessert-like, with a velvety interior and caramelized, slightly charred edges. The natural sugars intensify in the oven’s heat, creating a rich, earthy sweetness that pairs perfectly with both savory and sweet toppings. We love the vibrant orange hue they add to the board, providing a warm, grounded aesthetic. Whether served in halves or thick rounds, they offer a satisfying, fiber-rich bite that feels wholesome and indulgent all at once.
Ingredients
- 4 medium-sized sweet potatoes
- 1 tablespoon olive oil
- Sea salt
- Optional toppings: Greek yogurt, honey, or pumpkin seeds
How to make it
- Preheat your oven to 400°F (200°C) and line a baking sheet with parchment paper for easy cleanup.
- Scrub the sweet potatoes thoroughly under cold water to remove any dirt, then pat them dry.
- Use a fork to prick the potatoes 5-6 times all over. This allows steam to escape so the potatoes don’t burst in the oven.
- Rub the skins lightly with olive oil and a sprinkle of sea salt. This helps the skin get slightly crispy and flavorful.
- Place the potatoes on the baking sheet and bake for 45-60 minutes. You’ll know they are done when a knife slides into the center with zero resistance.
- Once cooked, slice them open lengthwise and gently fluff the insides with a fork. Add a dollop of yogurt or a drizzle of honey to make them board-ready.
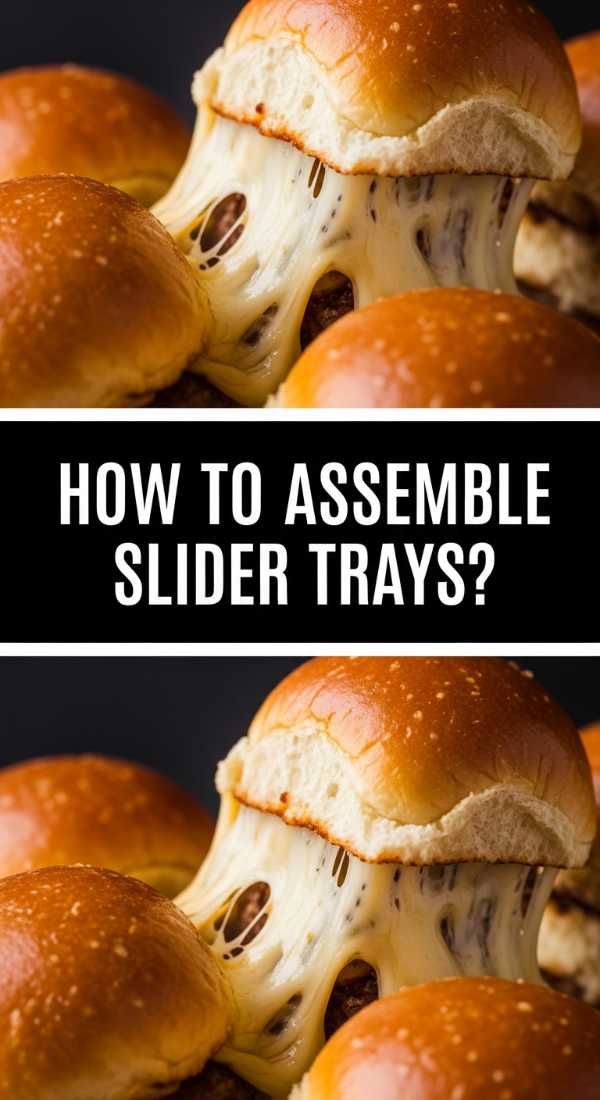
How to assemble slider trays?
Why we love this
Slider trays are the ultimate communal food, designed for sharing and built for flavor. There is an irresistible joy in seeing a tray of glossy, golden buns all nestled together, holding melty cheese and savory fillings. The texture is a delightful mix of soft bread and hot, juicy interiors, often topped with a buttery glaze that makes them finger-licking good. They bring a fun, casual energy to the board, making them the perfect centerpiece for a game night or a relaxed family gathering.
Ingredients
- 1 pack of slider buns (12-count)
- 1 lb cooked protein (shredded chicken, pulled pork, or ground beef)
- 6 slices of cheddar or swiss cheese
- 1/4 cup melted butter
- 1 tablespoon poppy seeds or sesame seeds
- 1/2 teaspoon garlic powder
How to make it
- Keep the slider buns attached and slice the entire block in half horizontally. This allows you to build all 12 sliders at once.
- Place the bottom half of the buns in a baking tray. Layer your cooked protein evenly across the bread.
- Top the protein with a layer of cheese slices, ensuring they overlap slightly so every bite gets some melted goodness.
- Place the top half of the buns back on. In a small bowl, whisk the melted butter with garlic powder and seeds.
- Brush the butter mixture generously over the tops of the buns. Cover the tray with foil.
- Bake at 350°F (175°C) for 10 minutes, then remove the foil and bake for another 5 minutes until the tops are golden and the cheese is bubbling. Slice into individual sliders before serving.
How to prep bento boxes?

Why we love this
The art of the bento box is all about balance, color, and mindful portioning, which translates beautifully onto a larger food board. We love the organized aesthetic of little compartments filled with vibrant veggies, protein, and grains. It turns eating into a discovery process where every corner offers a new flavor profile. The neatness of the preparation feels intentional and caring, making the food look as though it was prepared by a professional chef. It’s the perfect way to incorporate variety without the board feeling cluttered.
Ingredients
- Cooked rice or quinoa
- Sliced raw vegetables (carrots, radishes, snap peas)
- Hard-boiled eggs
- Edamame beans
- Small fruit portions (grapes or berries)
- Dividers (silicone cups or lettuce leaves)
How to make it
- Start with a clear plan for your colors. A great bento-inspired section should have at least four different colors to look visually appealing.
- Use silicone cupcake liners or large lettuce leaves as “walls” to keep different foods from touching. This prevents flavors from mingling and keeps the board looking tidy.
- Pack the densest items first, like rice or protein, to create a sturdy base for the lighter items.
- Use small cookie cutters to turn vegetables like carrots or cucumbers into fun shapes like stars or hearts. This adds that signature “viral” touch.
- Ensure everything is bite-sized. The goal is for someone to be able to pick up any element with chopsticks or their fingers easily.
- Fill any small gaps with tiny items like blueberries or edamame to create a sense of lushness and abundance within the section.
Conclusion
Creating a viral-worthy food board is less about following strict rules and more about embracing the textures, colors, and flavors that make you happy. Whether you are charring corn to perfection or meticulously rolling sushi, the effort you put into these details shines through when the board is finally assembled. Remember, the best boards are those that invite people in and spark conversation. So, grab your favorite platter, try out these techniques, and don’t forget to take a photo before it all disappears!
Frequently Asked Questions
Find answers to common questions about creating the perfect food board and mastering these recipes below.