

There is something almost magical about the way a simple wooden board can transform a scattered collection of ingredients into a masterpiece of connection and flavor. I remember the first time I set out a viral food board for my closest friends; the room immediately filled with a warmth that had nothing to do with the oven. It was the collective gasp of delight, the immediate reaching for a piece of crusty bread, and the way the conversation flowed as naturally as the honey drizzled over the brie.
In a world that often feels rushed and digital, the ‘Food Board’ trend has captured our hearts because it celebrates the tactile, the visual, and the shared experience of eating. It’s not just about the food; it’s about the permission to slow down, to graze, and to savor the seasonal bounty that makes life so sweet. This hack is currently trending because it removes the stress of formal plating and replaces it with a beautiful, edible canvas that invites everyone to the table.
How to make sourdough discard?

Why we love this
There is an incredible sense of satisfaction in watching a simple mixture of flour and water begin to bubble and come to life right on your kitchen counter. The aroma is earthy and complex, a gentle tang that promises a depth of flavor you just can’t find in store-bought loaves. Holding a jar of active starter feels like tending to a tiny, living piece of culinary history, and the way the texture transforms from a thick paste to a light, airy mousse is truly a domestic miracle that grounds you in the rhythm of the kitchen.
Ingredients
- Organic all-purpose or bread flour
- Filtered room temperature water
- A clean glass jar
- A breathable cover (cheesecloth or loose lid)
How to make it
- On day one, combine exactly 50g of flour and 50g of filtered water in your glass jar, stirring vigorously until no dry clumps remain to oxygenate the mixture.
- Place the jar in a warm spot (ideally between 70-75°F) out of direct sunlight and let it rest for 24 hours until you see the first signs of activity.
- On day two, remove half of the mixture (this is your first discard) and add another 50g of flour and 50g of water, mixing thoroughly to provide fresh food for the developing yeast.
- Repeat this ‘feed and discard’ process every 24 hours; by day five or seven, you will notice a predictable rise and fall, a pleasant sour smell, and a bubbly, honeycomb-like texture throughout the jar.
- Once the starter consistently doubles in size within 4-6 hours of feeding, you have successfully created your base, and the leftover ‘discard’ from each feeding can now be saved in the fridge for viral board recipes.
How to cook summer pasta?

Why we love this
Summer pasta is the ultimate celebration of the sun, featuring tomatoes so ripe they practically burst at the touch and basil that perfumes the entire house with its peppery sweetness. When you toss al dente noodles into a pan of shimmering olive oil and garlic, the way the juices create a light, silky emulsion is nothing short of liquid gold. It’s a dish that feels light yet deeply satisfying, capturing the essence of an alfresco dinner where the air is warm and the wine is perfectly chilled.
Ingredients
- 500g High-quality Spaghetti or Linguine
- 2 cups Cherry tomatoes, halved
- 4 cloves Garlic, thinly sliced
- 1/2 cup Extra virgin olive oil
- Handful of fresh basil leaves
- Flaky sea salt and cracked black pepper
How to make it
- Bring a large pot of heavily salted water—it should taste like the sea—to a rolling boil over high heat to ensure the pasta seasoned from the inside out.
- Add the pasta and cook for exactly two minutes less than the package instructions; this ‘molto al dente’ stage allows the pasta to finish cooking in the sauce for better flavor absorption.
- While the pasta boils, heat the olive oil in a wide skillet over medium-low heat and add the garlic, swirling gently until it is translucent and fragrant but not browned, which would turn it bitter.
- Increase the heat to medium and add the halved tomatoes, sautéing for 4-5 minutes until they begin to collapse and release their vibrant juices into the oil.
- Transfer the pasta directly from the water into the skillet, add a splash of starchy pasta water, and toss vigorously for 60 seconds until a glossy, emulsified sauce clings to every strand, then finish with torn basil and a final drizzle of oil.
How to prepare spring brunch?

Why we love this
A spring brunch board is like a garden party on a platter, overflowing with the delicate colors of soft pink radishes, vibrant green asparagus, and the pale gold of perfectly poached eggs. The contrast between the salty, silkiness of smoked salmon and the crisp, cool snap of seasonal vegetables creates a sensory journey that feels both indulgent and refreshing. It’s the kind of meal that lingers for hours, encouraging guests to build their own perfect bites while the soft morning light filters through the windows.
Ingredients
- Soft-boiled or poached eggs
- Smoked salmon lox
- Cream cheese with fresh chives
- Assorted mini bagels or crusty baguette
- Thinly sliced radishes and cucumber
- Fresh dill and capers
How to make it
- Start by preparing your ‘anchors’ on the board: place small bowls of cream cheese and capers in opposite corners to create a balanced visual foundation.
- Cook your eggs to a perfect 6.5-minute soft boil, then immediately plunge them into an ice bath to stop the cooking and ensure a gorgeous, jammy yolk.
- Gently fold the smoked salmon into ribbon-like shapes and arrange them in a flowing line across the center of the board to create a sense of movement.
- Nestle the sliced cucumbers and radishes in the gaps, ensuring they are sliced paper-thin using a mandoline for a professional, delicate appearance.
- Toast the bagels or baguette slices just before serving so they are warm to the touch, and scatter fresh dill fronds over everything to provide a final pop of aromatic green color.
How to decorate spring cookies?

Why we love this
Decorating spring cookies is a form of edible meditation, where the rhythmic flow of icing and the vibrant palette of pastels bring a sense of quiet joy to the kitchen. There is a sheer delight in seeing a plain sugar cookie transformed into a miniature work of art, adorned with delicate royal icing flowers or a subtle ombre wash that mimics a clear April sky. The smooth, matte finish of the icing against the buttery, golden crumb of the cookie offers a satisfying crunch that tastes like pure nostalgia and celebration.
Ingredients
- Baked sugar cookies (chilled)
- Royal icing in various pastel colors
- Piping bags with small round tips
- Edible dried flowers or gold leaf
- Scribe tool or toothpick
How to make it
- Prepare your royal icing to two consistencies: a thick ‘outline’ icing that holds its shape and a thinner ‘flood’ icing that has the texture of warm honey.
- Pipe a precise border around the edge of the chilled cookie using the outline icing, ensuring there are no gaps that would allow the flood icing to leak over the sides.
- Fill the center of the cookie with the flood icing, using a scribe tool or toothpick to gently guide the icing into the corners and pop any tiny air bubbles for a glass-smooth surface.
- While the icing is still ‘wet,’ drop tiny dots of a contrasting color into the flood to create a marble effect, or wait 4 hours for it to dry completely if you want to pipe 3D floral details on top.
- For a viral professional look, lightly press a single edible viola or a flake of gold leaf onto the drying icing to add organic texture and a high-end finish.
How to make summer soup?

Why we love this
When the heat of summer peaks, a chilled soup like Gazpacho becomes a literal breath of fresh air, offering a cooling explosion of raw, vibrant garden flavors. The texture is a beautiful balance of velvety smoothness and tiny, crisp bites of cucumber and bell pepper that dance on the tongue. It smells like a sun-drenched vegetable patch, with the sharp tang of sherry vinegar cutting through the richness of the olive oil, making every spoonful feel like an instant revitalization of the senses.
Ingredients
- 2 lbs Ripe Roma or heirloom tomatoes
- 1 English cucumber, peeled
- 1 Red bell pepper
- 2 cloves Garlic
- 1/4 cup Sherry vinegar
- 1/2 cup High-quality olive oil
How to make it
- Roughly chop all the vegetables, ensuring you remove the seeds from the pepper but keep the tomato skins for the most intense color and nutrient profile.
- Place the tomatoes, half the cucumber, the pepper, and garlic into a high-speed blender, adding the sherry vinegar and a generous pinch of sea salt.
- Blend on high until the mixture is completely liquefied; for an ultra-sophisticated texture, pass the liquid through a fine-mesh sieve to remove any remaining fibers.
- With the blender running on low, slowly stream in the olive oil to create a stable emulsion that gives the soup a creamy, luxurious mouthfeel without any dairy.
- Chill the soup in the refrigerator for at least 4 hours—this step is non-negotiable as it allows the flavors to meld and the temperature to drop to a refreshing crispness before serving in chilled bowls.
How to master grilling recipes?

Why we love this
Grilling is as much about the ritual as it is about the food; it’s the sound of the initial sear, the intoxicating scent of hardwood smoke, and the visual beauty of those perfect, charred cross-hatch marks. There is something primal and deeply satisfying about cooking over an open flame, watching as the heat caramelizes sugars and renders fats into juicy perfection. It brings a rustic, smoky depth to everything from peaches to prime cuts, creating a flavor profile that evokes memories of backyard gatherings and golden hour laughter.
Ingredients
- Your choice of protein or sturdy vegetables
- High-smoke point oil (avocado or grapeseed)
- Coarse Kosher salt
- Fresh herbs for finishing (rosemary or thyme)
- Wood chips for extra smoke (optional)
How to make it
- Preheat your grill for at least 15-20 minutes on high heat; a truly hot grate is the secret to preventing sticking and achieving those iconic, deep brown sear marks.
- Thoroughly pat your food dry with paper towels—moisture is the enemy of a good crust—and season generously with salt just minutes before placing on the heat.
- Clean the grates with a wire brush and lightly oil them using a folded paper towel dipped in oil held by tongs to create a non-stick surface.
- Place the food on the grill and leave it undisturbed for 3-4 minutes; if it resists when you try to lift it, the crust hasn’t formed yet, so give it another minute until it releases naturally.
- Use a meat thermometer to check for internal doneness, and always allow your grilled items to rest on a warm plate for 5-10 minutes to let the juices redistribute throughout the fibers.
How to frost gourmet cupcakes?

Why we love this
A perfectly frosted cupcake is a triumph of texture and technique, where the frosting sits like a silky, weightless cloud atop a moist, decadent base. The mouthfeel of a professional-grade Swiss meringue buttercream is incomparable—rich and buttery, yet so light it practically melts upon contact. There is an artistic thrill in the steady pressure of the piping bag, watching a simple swirl emerge into a sophisticated rose or a towering peak that makes a humble dessert look like it belongs in a high-end Parisian patisserie.
Ingredients
- 1 cup Unsalted butter (room temperature)
- 3-4 cups Sifted powdered sugar
- 2 tbsp Heavy cream
- 1 tsp Pure vanilla bean paste
- Pinch of fine salt
How to make it
- In a stand mixer fitted with the paddle attachment, beat the softened butter on medium-high speed for a full 5 minutes until it turns almost white in color and looks incredibly fluffy.
- Reduce the speed to low and gradually add the powdered sugar one cup at a time, ensuring each addition is fully incorporated before adding the next to avoid a sugar cloud in your kitchen.
- Once the sugar is in, add the heavy cream, vanilla, and salt, then turn the mixer back up to medium-high and whip for another 2-3 minutes to achieve a smooth, spreadable consistency.
- Fit a large piping bag with a star tip (like the 1M) and fill it only halfway to maintain better control and prevent the warmth of your hands from melting the butter.
- Starting in the center of the cupcake, pipe a small mound, then spiral outward and upward in one continuous motion, releasing pressure quickly at the top to create a clean, professional point.
How to bake spring cake?

Why we love this
The perfect spring cake is a delicate balance of lightness and moisture, featuring a crumb so tender it feels like a soft embrace. Infused with the bright, citrusy zing of lemon and the floral notes of high-quality vanilla, it captures the very essence of a garden in bloom. Every slice reveals a pale, golden interior that smells of sunshine and sugar, providing the ideal base for fresh berries or a whisper-thin glaze that crackles slightly when bitten into, making it the crowning jewel of any seasonal food board.
Ingredients
- 2 1/2 cups Cake flour (sifted)
- 1 1/2 cups Granulated sugar
- 1 cup Unsalted butter
- 4 Large eggs (room temperature)
- 1 cup Whole milk
- Zest of 2 lemons
- 1 tbsp Baking powder
How to make it
- Preheat your oven to 350°F (175°C) and grease your pans thoroughly, lining the bottoms with parchment paper to ensure an effortless release after baking.
- Cream the butter and sugar together for at least 4-5 minutes; look for the mixture to become light, airy, and noticeably increased in volume—this incorporates the air needed for a springy texture.
- Add the eggs one at a time, beating well after each addition so the emulsion doesn’t break, then stir in the lemon zest and vanilla for maximum aromatic impact.
- Alternately add the dry ingredients and the milk in three batches, beginning and ending with the flour; mix only until the last streaks of flour disappear to prevent over-developing the gluten.
- Bake for 25-30 minutes, or until a wooden skewer inserted into the center comes out clean with just a few moist crumbs, then cool completely on a wire rack before attempting to frost.
How to use sourdough discard?

Why we love this
Using sourdough discard is the ultimate ‘waste-not’ kitchen hack that yields surprisingly gourmet results with very little effort. The discard adds a subtle, sophisticated tang and a tenderizing acidity to baked goods, creating crackers that are incredibly crisp or pancakes that are unbelievably fluffy. It’s a way to honor the slow fermentation process even when you aren’t baking a full loaf, turning what would be kitchen waste into a savory, salty snack that provides the perfect crunch alongside soft cheeses on your viral food board.
Ingredients
- 1 cup Sourdough discard
- 2 tbsp Melted butter or olive oil
- 1/2 tsp Sea salt
- 1 tsp Dried herbs (rosemary or za’atar)
- Flaky salt for topping
How to make it
- Preheat your oven to 325°F (160°C) and line a large baking sheet with a silicone mat or parchment paper for easy removal.
- In a small bowl, whisk together the sourdough discard, melted butter, and dried herbs until the mixture is smooth and the fat is fully incorporated.
- Pour the mixture onto the prepared baking sheet and use an offset spatula to spread it as thin as possible—ideally paper-thin—to ensure maximum crispness.
- Bake for 10 minutes, then remove the tray and use a pizza cutter to score the dough into squares or diamonds; this ensures the crackers will snap into clean shapes later.
- Return to the oven for another 15-20 minutes until the edges are deep golden brown and the center is firm; let them cool completely on the tray to finish crisping up before breaking them apart.
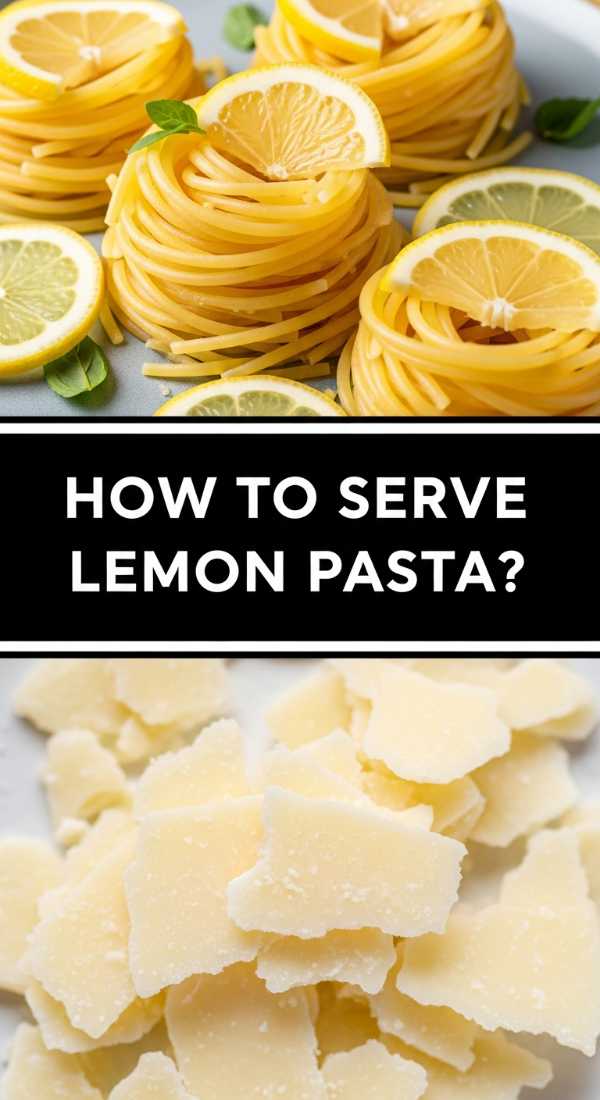
How to serve lemon pasta?
Why we love this
Serving lemon pasta is like presenting a bowl of pure liquid sunshine; it is bright, zesty, and incredibly elegant in its simplicity. The aroma of fresh lemon zest hitting warm cream and salty parmesan is intoxicating, promising a flavor profile that is both sharp and comforting. When served correctly, the sauce is never heavy; instead, it provides a silky, citrus-forward coating that makes the pasta feel celebratory and light, making it the perfect centerpiece for a warm-weather dinner party.
Ingredients
- Cooked Al Dente Pasta
- Zest and juice of 2 organic lemons
- 1/2 cup Heavy cream or pasta water for a lighter version
- 1/2 cup Grated Pecorino or Parmesan
- Fresh black pepper and parsley
How to make it
- While your pasta is finishing its final minute of boiling, zest your lemons directly over a large, warm serving bowl to capture all the essential oils that spray out during the process.
- In a small saucepan over low heat, gently warm the heavy cream and lemon juice together, whisking constantly to prevent the acid from curdling the dairy.
- Transfer the hot pasta directly into the serving bowl with the zest, pour over the warm lemon cream, and add a generous handful of finely grated cheese.
- Use a pair of tongs to toss the pasta vigorously, adding small splashes of reserved starchy pasta water as needed to create a light, glossy emulsion that coats every strand perfectly.
- Top with a final dusting of fresh black pepper and chopped parsley, and serve immediately in warmed bowls to maintain the delicate temperature of the citrus sauce.
Conclusion: The Heart of the Board
At the end of the day, these viral food board hacks are popular for a reason: they bring us back to the basics of hospitality. Whether you are using sourdough discard to make artisanal crackers or serving a zesty lemon pasta, the goal is always the same—to create a space where people feel welcome to share, taste, and enjoy. The beauty of the food board is its flexibility and its ability to turn any meal into a memorable event. So, grab a board, pick your favorite seasonal ingredients, and start your own trending tradition tonight.