
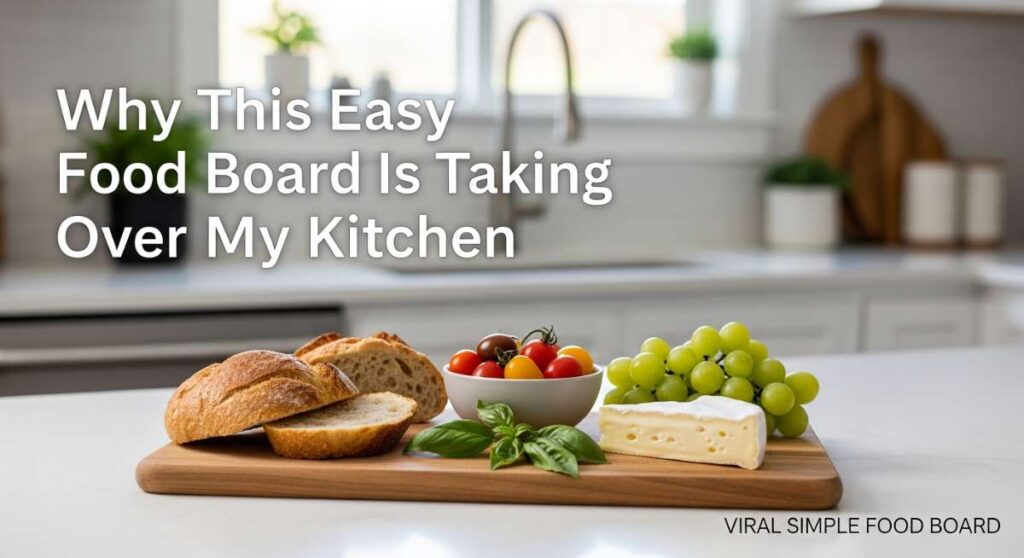
I used to spend my weekends stressed out in the kitchen, juggling three different pans while trying to hold a conversation with my friends. We’ve all been there—the frantic checking of the oven while your guests sip wine in the other room. But lately, everything has changed. I’ve discovered the magic of the ultimate ‘Simple Food Board,’ and honestly, my kitchen has never felt more like the heart of the home. It’s not just about the food; it’s about the ritual of gathering around a spread that looks like a work of art but feels as cozy as a Sunday morning.
The beauty of this viral food board trend is how it democratizes deliciousness. You aren’t stuck serving one heavy meal; instead, you’re offering a landscape of textures and flavors that cater to every craving. From the crunch of gold-crusted potatoes to the sweetness of a fresh strawberry cake, it’s a sensory journey that invites everyone to dig in with their hands and stay a little longer. This is the way we were meant to eat—slowly, joyfully, and together.
How to make crispy potatoes?

Why we love this
There is something fundamentally soul-soothing about a perfectly crispy potato. When you bite through that shatteringly thin, golden-brown crust into the fluffy, cloud-like interior, it’s an instant hit of nostalgia. The aroma of roasting rosemary and garlic infuses the air, making your kitchen smell like a rustic bistro. These potatoes provide the perfect salty, earthy anchor for any food board, offering a satisfying crunch that keeps everyone reaching back for just one more.
Ingredients
- 2 lbs Yukon Gold potatoes, peeled and cubed
- 1/4 cup extra virgin olive oil
- 3 cloves garlic, smashed
- 2 sprigs fresh rosemary
- 1 tsp sea salt
- 1/2 tsp black pepper
- 1/2 tsp baking soda
How to make it
- Start by par-boiling your cubed potatoes in a large pot of heavily salted water with the half-teaspoon of baking soda; the soda breaks down the starch on the surface, creating more surface area for maximum crunch.
- Boil for about 8-10 minutes until the edges are soft but the potatoes aren’t falling apart, then drain them thoroughly in a colander.
- Shake the colander vigorously to ‘scuff up’ the edges of the potatoes—this creates a starchy paste that will crisp up beautifully in the oven.
- Preheat your oven to 425°F (220°C) and place a large rimmed baking sheet inside to get screaming hot.
- Toss the scuffed potatoes with olive oil, salt, pepper, smashed garlic, and rosemary in a bowl until every piece is coated.
- Carefully spread the potatoes onto the hot baking sheet in a single layer (it should sizzle!) and roast for 45-50 minutes, turning them every 20 minutes with a metal spatula until they are deep mahogany and exceptionally crunchy.
How to prep breakfast sliders?

Why we love this
Breakfast sliders are the ultimate crowd-pleaser because they pack every morning favorite into one handheld bite. The contrast between the sweet, buttery Hawaiian rolls and the savory, salty layers of fluffy eggs and melted cheese is pure breakfast magic. As they bake, the butter glaze seeps into the bread, creating a soft, decadent texture that melts in your mouth. They are warm, inviting, and make the perfect centerpiece for a brunch-themed board.
Ingredients
- 1 pack (12 count) Sweet Hawaiian rolls
- 6 large eggs, scrambled
- 6 slices sharp cheddar cheese
- 8 slices cooked bacon or breakfast sausage patties
- 1/4 cup melted butter
- 1 tsp poppy seeds or bagel seasoning
- 1/2 tsp garlic powder
How to make it
- Preheat your oven to 350°F (175°C) and line a baking dish with parchment paper for easy cleanup.
- Use a long serrated knife to slice the entire block of Hawaiian rolls in half horizontally, keeping the individual rolls attached so you have one large top and one large bottom.
- Place the bottom half in the baking dish and layer it with the pre-scrambled eggs (ensure they are slightly underdone as they will finish in the oven), followed by your choice of protein and the slices of cheddar cheese.
- Place the top half of the rolls back on, pressing down gently to secure the ‘sandwich’ structure.
- Whisk together the melted butter, garlic powder, and poppy seeds, then brush the mixture generously over the tops of the rolls using a pastry brush, making sure to hit the edges.
- Cover with foil and bake for 10 minutes to melt the cheese, then remove the foil and bake for another 5 minutes until the tops are golden brown and slightly toasted.
How to cook garlic shrimp?

Why we love this
Garlic shrimp is the epitome of quick elegance, bringing a bright, zesty, and sophisticated energy to your food board. The scent of garlic sizzling in butter is perhaps the most intoxicating smell in cooking, instantly drawing people toward the table. Each shrimp is succulent and snappy, coated in a silky, lemon-infused sauce that begs to be mopped up with a piece of crusty bread. It’s a light yet luxurious addition that balances out heavier board elements.
Ingredients
- 1 lb large shrimp, peeled and deveined
- 4 cloves garlic, minced
- 2 tbsp unsalted butter
- 1 tbsp olive oil
- 1/2 lemon, juiced
- 1/4 tsp red pepper flakes
- Fresh parsley for garnish
How to make it
- Pat the shrimp completely dry with paper towels to ensure they sear rather than steam when they hit the hot fat.
- Heat the olive oil and 1 tablespoon of butter in a large skillet over medium-high heat until the butter foam subsides and begins to slightly brown.
- Add the shrimp in a single layer, making sure not to overcrowd the pan; cook for 1-2 minutes until the bottoms turn pink and opaque.
- Flip the shrimp over and immediately add the minced garlic and the remaining tablespoon of butter, along with the red pepper flakes.
- Sauté for another 1-2 minutes, tossing constantly so the garlic browns lightly but doesn’t burn, which would make the dish bitter.
- Once the shrimp have curled into a ‘C’ shape and are opaque throughout, remove from heat, squeeze over the fresh lemon juice, and toss with chopped parsley before serving immediately while the butter is still bubbling.
How to bake fluffy pancakes?

Why we love this
A stack of fluffy pancakes is like a warm hug on a plate, offering a soft, airy texture that is the perfect canvas for syrups and berries. The gentle aroma of vanilla and malted flour creates an atmosphere of pure comfort and leisure. When done right, these pancakes have a delicate golden exterior and an interior that is so light it almost dissolves. They bring a playful, whimsical element to your food board that delights both children and adults alike.
Ingredients
- 1 1/2 cups all-purpose flour
- 3 1/2 tsp baking powder
- 1 tbsp sugar
- 1/2 tsp salt
- 1 1/4 cups milk
- 1 egg
- 3 tbsp melted butter
- 1 tsp vanilla extract
How to make it
- Whisk the dry ingredients together in a large bowl, ensuring the baking powder is evenly distributed for a consistent rise.
- In a separate jug, whisk the milk, egg, melted butter, and vanilla until smooth, then pour the wet ingredients into the dry.
- Mix with a spatula until just combined; it is crucial to leave small lumps in the batter to keep the pancakes tender—overmixing develops gluten and makes them rubbery.
- Heat a non-stick griddle over medium-low heat and lightly grease with butter; you want a steady, gentle heat that won’t burn the outside before the inside is cooked.
- Ladle about 1/4 cup of batter per pancake onto the griddle and wait for bubbles to form on the surface and the edges to look set and matte.
- Carefully flip and cook for another 1-2 minutes until golden brown on both sides, then serve in a stacked arrangement on your board to retain heat.
How to sear perfect steak?

Why we love this
A perfectly seared steak is the ultimate showstopper, offering a deep, savory umami depth that satisfies like nothing else. The Maillard reaction creates a dark, flavorful crust that contrasts beautifully with the tender, juicy, pink center. When basted with garlic and thyme, the meat takes on an aromatic complexity that feels like high-end restaurant dining. Slicing it thin for a food board makes it approachable and easy for guests to graze on throughout the evening.
Ingredients
- 1 lb Ribeye or New York Strip steak
- 2 tbsp high-smoke point oil (like grapeseed or avocado oil)
- 2 tbsp butter
- 3 cloves garlic, crushed
- 3 sprigs fresh thyme
- Coarse kosher salt and cracked black pepper
How to make it
- Take the steak out of the fridge at least 30-45 minutes before cooking to bring it to room temperature, which ensures even cooking throughout the cut.
- Generously season all sides of the steak with salt and pepper, pressing the seasoning into the meat to help form a crust.
- Heat a cast-iron skillet over high heat until it is just starting to smoke, then add the oil.
- Place the steak in the pan and press down firmly; sear for 3-4 minutes without moving it until a deep brown crust has formed.
- Flip the steak and immediately add the butter, garlic, and thyme to the pan; once the butter melts and foams, use a large spoon to continuously pour the flavored butter over the steak (basting) for the remaining 3 minutes.
- Use a meat thermometer to pull the steak at 130°F (54°C) for medium-rare, then let it rest on a cutting board for at least 10 minutes to allow the juices to redistribute before slicing against the grain.
How to decorate strawberry cake?

Why we love this
Strawberry cake is the crown jewel of any dessert spread, offering a bright, fruity sweetness and a stunning pop of color. The sight of vibrant red berries nestled in snowy white cream is inherently celebratory and fresh. It provides a light, airy finish to a meal, with the tartness of the fruit cutting through the richness of the cake. Decorating it is a creative joy, turning a simple dessert into a centerpiece that looks almost too good to eat—but tastes even better.
Ingredients
- 1 prepared sponge or vanilla cake (cooled)
- 2 cups heavy whipping cream
- 1/4 cup powdered sugar
- 1 tsp vanilla bean paste
- 1 lb fresh strawberries, washed and sliced
- Mint leaves for garnish
How to make it
- Ensure your cake layers are completely cold before starting; if they are even slightly warm, the cream will melt and slide off.
- Whip the heavy cream with powdered sugar and vanilla bean paste until you achieve stiff peaks that hold their shape but still look glossy and smooth.
- Spread a generous layer of cream on the first cake layer, then arrange a ring of sliced strawberries around the edge for a structured look, filling the center with more berries.
- Place the second cake layer on top and apply a ‘crumb coat’—a very thin layer of cream to seal in crumbs—then chill for 15 minutes.
- Apply the final layer of cream using an offset spatula, creating rustic swirls and swoops for a modern, textured appearance rather than a flat surface.
- Finish by piling whole and halved strawberries in the center and tucking in small mint leaves for a professional, vibrant contrast that looks stunning on a board.
How to roast lemon salmon?
Why we love this
Lemon salmon is the perfect balance of healthy and indulgent, offering a buttery, flaky texture that feels light on the palate. The citrusy brightness of the lemon enhances the natural richness of the fish without overpowering it. As it roasts, the salmon develops a beautiful glaze, and the lemon slices caramelize, adding a sweet and tangy depth to every bite. It’s a sophisticated, colorful protein that adds a touch of wellness and elegance to your food board.
Ingredients
- 1.5 lb side of salmon (or individual fillets)
- 1 lemon, thinly sliced
- 2 tbsp olive oil
- 2 tbsp honey
- 1 tsp dried oregano
- Salt and pepper to taste
- Fresh dill for serving
How to make it
- Preheat your oven to 400°F (200°C) and line a baking sheet with parchment paper or foil lightly greased with oil.
- Place the salmon skin-side down on the sheet and pat the top dry with a paper towel to help the seasonings stick.
- Whisk together the olive oil, honey, oregano, salt, and pepper in a small bowl, then brush this glaze generously over the entire surface of the fish.
- Lay the thin lemon slices across the top of the salmon, overlapping them slightly like scales to protect the meat and infuse it with juice.
- Roast for 12-15 minutes depending on thickness; you are looking for the salmon to be opaque and just beginning to flake when tested with a fork in the thickest part.
- For a professional finish, turn on the broiler for the last 60 seconds to slightly char the lemon edges, then garnish with fresh dill sprigs before moving the whole side to your board.
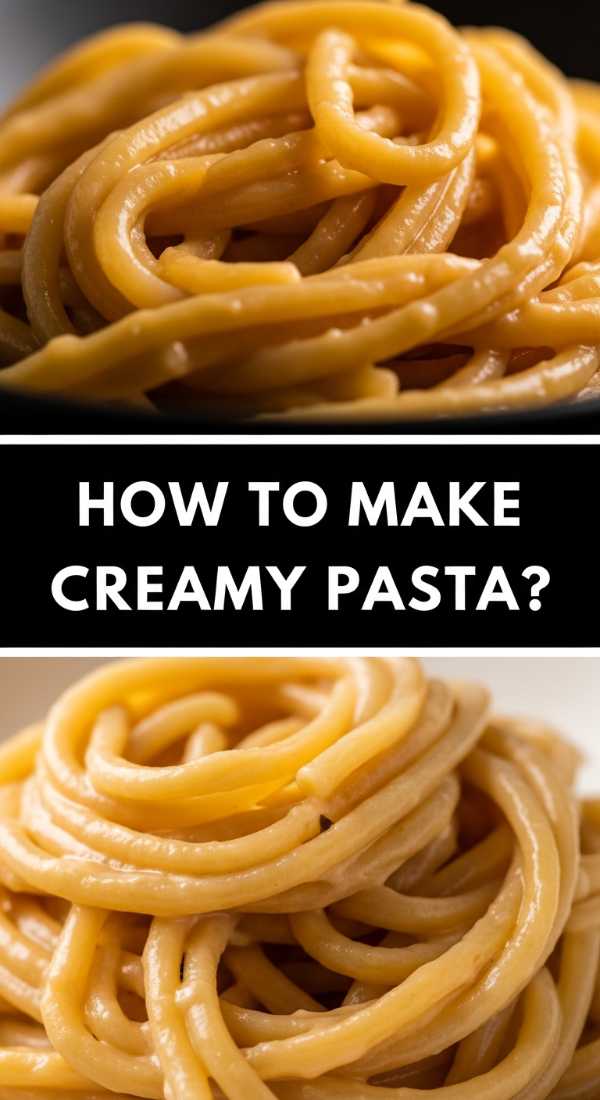
How to make creamy pasta?

Why we love this
There is an undeniable decadence to creamy pasta that makes it the ultimate comfort food. The way the silky, velvet-like sauce clings to every strand of noodle is pure culinary bliss. It’s rich, savory, and carries the flavors of parmesan and garlic beautifully. Serving a small bowl of creamy pasta on a food board adds a hearty, satisfying element that feels substantial and deeply nourishing, acting as the perfect bridge between lighter snacks and heavier proteins.
Ingredients
- 8 oz pasta (fettuccine or penne)
- 1 cup heavy cream
- 1/2 cup freshly grated Parmesan cheese
- 2 cloves garlic, minced
- 2 tbsp butter
- 1/2 cup reserved pasta water
- Pinch of nutmeg
How to make it
- Boil a large pot of water and salt it generously (it should taste like the sea) before adding the pasta; cook until just before ‘al dente’ as it will finish in the sauce.
- While the pasta cooks, melt the butter in a wide skillet over medium heat and sauté the minced garlic for about 30 seconds until fragrant but not browned.
- Pour in the heavy cream and bring to a gentle simmer, allowing it to reduce and thicken slightly for about 3-4 minutes.
- Just before draining the pasta, use a mug to scoop out at least a cup of the starchy pasta water—this is the secret to a smooth, cohesive sauce.
- Add the cooked pasta and grated Parmesan to the skillet, tossing constantly and adding splashes of the pasta water to emulsify the cheese and cream into a silky coating.
- Finish with a pinch of nutmeg and extra cheese, serving it in a warm bowl nestled into the corner of your food board for easy scooping.
How to assemble street tacos?

Why we love this
Street tacos bring a festive, vibrant energy to the kitchen, offering a customizable experience that everyone loves. The combination of charred corn tortillas, tender meat, and the sharp bite of raw onions and cilantro is a masterclass in flavor balance. They are small, punchy, and incredibly satisfying, encouraging guests to build their own perfect bite. The bright colors of radishes, limes, and salsas make this section of the board look like a celebration of flavor.
Ingredients
- 10 small corn tortillas
- 1 lb prepared protein (carnitas, grilled chicken, or steak)
- 1/2 white onion, finely diced
- 1/2 cup fresh cilantro, chopped
- 2 limes, cut into wedges
- 1/2 cup crumbled cotija cheese
- Sliced radishes and salsa verde
How to make it
- Warm your corn tortillas directly over a low gas flame for 10-15 seconds per side or in a dry cast-iron skillet until they show small charred spots and become pliable.
- Stack the warm tortillas and wrap them in a clean kitchen towel to steam slightly; this keeps them from cracking when folded.
- Prepare your protein by finely chopping it so it fits comfortably inside the small tortillas without falling out.
- Set up a ‘taco station’ on your board by placing the stack of tortillas in the center and surrounding them with small bowls of onion, cilantro, and cotija.
- Top each tortilla with a small mound of meat, then add a pinch of onions and a generous sprinkle of cilantro for that authentic street-style look.
- Arrange the lime wedges and radish slices around the tacos to provide that essential hit of acidity and crunch that cuts through the richness of the meat.
How to bake soft cookies?
[IMAGE_10]
Why we love this
A soft, chewy cookie is the gold standard of treats, providing a sweet, buttery finish that lingers on the palate. The scent of vanilla and browning butter wafting through the house is enough to bring anyone to the kitchen. These cookies have that elusive ‘melt-in-your-mouth’ quality, with slightly crisp edges and a center that is dense and fudgy. They are the perfect finger food for a board, offering a bit of handheld indulgence that pairs beautifully with coffee or wine.
Ingredients
- 1/2 cup softened unsalted butter
- 1/2 cup brown sugar (packed)
- 1/4 cup white sugar
- 1 egg
- 1 tsp vanilla extract
- 1 1/2 cups all-purpose flour
- 1/2 tsp baking soda
- 1 cup chocolate chips
How to make it
- Cream the softened butter and both sugars together using a mixer for at least 3-4 minutes until the mixture is pale, light, and fluffy; this aerates the dough for a softer texture.
- Beat in the egg and vanilla extract until fully incorporated, scraping down the sides of the bowl to ensure no streaks remain.
- Sift in the flour and baking soda, then mix on the lowest speed just until the flour streaks disappear—avoid overworking the dough.
- Fold in the chocolate chips by hand, then cover the dough and chill in the fridge for at least 30 minutes; chilling prevents the cookies from spreading too thin and keeps the centers soft.
- Scoop rounded tablespoons of dough onto a parchment-lined baking sheet and bake at 350°F (175°C) for only 8-10 minutes.
- Crucially, remove the cookies when the edges are just barely golden but the centers still look slightly underbaked and ‘wet’—they will firm up on the hot pan and stay soft for days.
Conclusion
Building a food board like this isn’t just about following recipes; it’s about creating an atmosphere of abundance and ease. By focusing on these high-impact, simple-to-execute dishes, you turn your kitchen into a destination where flavor meets community. Whether you’re hosting a big party or just making a special Tuesday night dinner, these techniques will ensure every bite is memorable. So grab a board, start cooking, and watch how quickly your kitchen becomes everyone’s favorite place to be.