
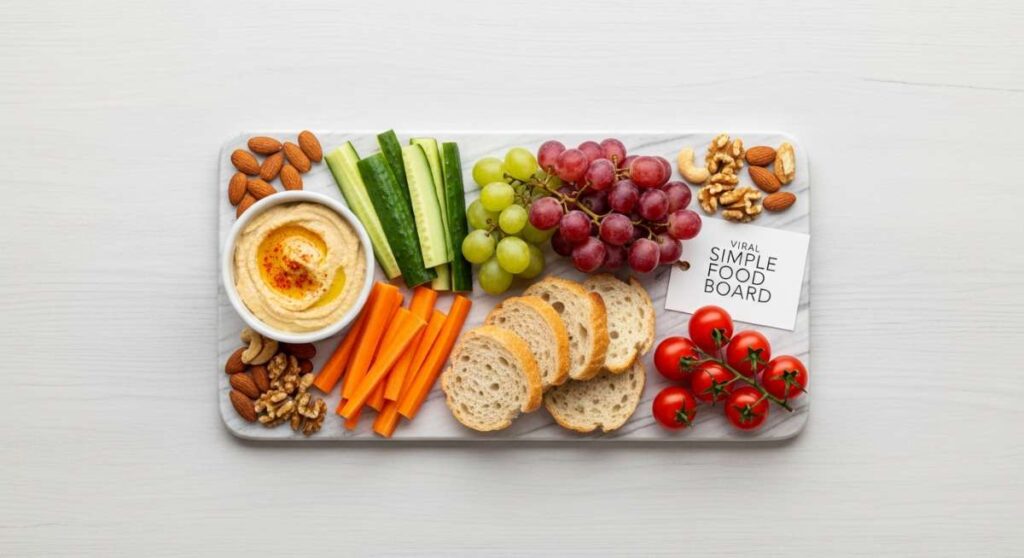
Why Everyone is Obsessed with This Simple Food Board Trend
There is something inherently magical about a table filled with tiny bites, vibrant colors, and the promise of a long afternoon spent grazing with the people you love. We’ve all seen the rise of the charcuterie board, but the new ‘Simple Food Board’ trend takes it a step further by ditching the fancy, expensive cheeses in favor of real, soulful, homemade comfort foods. It’s about creating a tapestry of flavors that tells a story of the season—a way to turn a Tuesday night dinner or a Saturday gathering into a sensory experience that feels intentional and warm.
I remember the first time I set out a board like this; the room immediately felt lighter. Instead of everyone being hunched over their individual plates, there was a shared rhythm of reaching, dipping, and passing. It turns eating into an interactive event where the textures of a crispy crust or the aroma of fresh basil become the conversation starters. This trend isn’t just about the food; it’s about reclaiming the joy of the communal table in a way that is accessible, beautiful, and deeply satisfying.
How to make summer slow cooker chicken?

Why we love this
This slow cooker chicken is the ultimate summer hack because it delivers that tender, fall-off-the-bone texture without heating up your entire kitchen. Imagine the savory aroma of garlic and citrus wafting through your home all afternoon, promising a meal that is both light and incredibly succulent. The meat becomes so velvety that it practically melts in your mouth, infused with a bright, zesty lime finish that cuts through the richness of the natural juices. It’s the perfect protein base for any board, offering a warm, shredded texture that contrasts beautifully with cold salads and crisp vegetables.
Ingredients
- 2 lbs boneless skinless chicken thighs
- 2 tablespoons olive oil
- 3 cloves minced garlic
- 1 teaspoon cumin
- 1/2 cup chicken broth
- Juice of 2 fresh limes
- Salt and pepper to taste
- Fresh cilantro for garnish
How to make it
- Begin by patting your chicken thighs dry with a paper towel; this ensures the seasonings stick better and the meat doesn’t just steam in its own moisture.
- In a small bowl, whisk together the olive oil, minced garlic, cumin, salt, and pepper to create a thick rub. Massage this mixture thoroughly into each piece of chicken until evenly coated.
- Place the seasoned chicken into the bottom of the slow cooker, layering them slightly but trying to keep them in a relatively flat layer for even cooking.
- Pour the chicken broth and lime juice around the edges of the chicken—avoid pouring directly over the meat so you don’t wash off the rub.
- Set your slow cooker to the ‘Low’ setting and cook for 5 to 6 hours. You will know it is done when the internal temperature reaches 165°F and the meat pulls apart easily with a fork.
- Once cooked, transfer the chicken to a large bowl and use two forks to shred it into bite-sized pieces. Toss the shredded meat back into the residual juices for 10 minutes to soak up all that concentrated flavor before serving.
How to make tomato cucumber salad?

Why we love this
Nothing screams summer quite like the sharp, refreshing crunch of a cucumber paired with the explosive sweetness of a vine-ripened tomato. This salad is the ‘cool’ factor of your food board, providing a vibrant acidity that cleanses the palate between heavier bites. The scent of red onion and balsamic vinaigrette creates an earthy, garden-fresh perfume that instantly transports you to an outdoor patio at sunset. Every bite is a burst of hydration and texture, with the salty creaminess of feta cheese providing a perfect counterpoint to the crisp, water-rich vegetables.
Ingredients
- 3 large English cucumbers, sliced
- 1 pint cherry tomatoes, halved
- 1/2 red onion, thinly sliced
- 1/2 cup crumbled feta cheese
- 1/4 cup extra virgin olive oil
- 2 tablespoons red wine vinegar
- 1 teaspoon dried oregano
- Salt and cracked black pepper
How to make it
- Start by prepping your vegetables with precision; slice the English cucumbers into 1/4 inch rounds, then quarter the rounds into triangles for a rustic look that holds dressing well.
- Place the sliced cucumbers in a colander and sprinkle lightly with salt, letting them sit for 10 minutes to draw out excess water—this prevents your salad from becoming soggy.
- In a large mixing bowl, combine the halved cherry tomatoes and the thinly sliced red onion. To take the ‘bite’ out of the onion, you can soak the slices in ice water for 5 minutes before adding them.
- In a separate small jar, vigorously shake the olive oil, red wine vinegar, oregano, salt, and pepper until the dressing is emulsified and creamy-looking.
- Pat the cucumbers dry and add them to the bowl with the tomatoes and onions. Pour the dressing over the vegetables and toss gently with large spoons.
- Fold in the crumbled feta cheese at the very last second to ensure the white cheese doesn’t turn pink from the tomato juices. Chill in the refrigerator for at least 30 minutes before placing on your food board.
How to make cheesy rotel dip?

Why we love this
The cheesy rotel dip is the nostalgic, gooey heart of any successful food board, acting as the ultimate anchor for chips, bread, and even the grilled meats. There is something deeply comforting about the sight of golden, melted cheese swirled with bits of spicy green chilies and savory sausage. The aroma is bold and smoky, filling the air with the promise of a rich, velvety indulgence that coats the back of a spoon perfectly. It’s a warm, indulgent contrast to the fresh produce on the board, offering a satisfying, salty kick that keeps everyone coming back for ‘just one more dip.’
Ingredients
- 1 lb Velveeta cheese, cubed
- 1 can (10 oz) Ro-Tel Diced Tomatoes and Green Chilies
- 1/2 lb ground breakfast sausage or chorizo
- 1/4 cup whole milk (optional, for thinning)
- Fresh jalapeños for topping
How to make it
- Place a medium skillet over medium-high heat and add the ground sausage. Break it apart with a wooden spoon into very small crumbles as it browns.
- Cook the sausage until it is completely browned and slightly crispy, then drain the excess fat thoroughly on a paper towel-lined plate to ensure the dip isn’t greasy.
- Cut the Velveeta into 1-inch cubes; small, uniform cubes are essential because they melt at the same rate, preventing the cheese from scorching or becoming lumpy.
- In a heavy-bottomed saucepan or a small slow cooker, combine the cheese cubes and the undrained can of Ro-Tel. The juice from the tomatoes is key to the texture.
- Heat on low, stirring constantly with a silicone spatula. Once the cheese begins to liquify, fold in the cooked sausage.
- If the dip feels too thick, whisk in the milk one tablespoon at a time until you reach a silky, pourable consistency. Keep it on the lowest heat setting until you are ready to assemble your board.
How to make blackstone grill dinner?

Why we love this
Cooking a full dinner on a Blackstone grill is pure theater, bringing a charred, smoky depth to your food board that only a flat-top can provide. The sound of the sizzle as the steak hits the hot steel and the sight of rising steam creates an atmosphere of rustic, outdoor luxury. You get those beautiful, caramelized edges on the peppers and onions that are sweet and savory all at once, while the meat remains incredibly juicy. It adds a ‘charred’ element to the board that bridges the gap between raw freshness and cooked comfort, providing a hearty, protein-packed centerpiece.
Ingredients
- 1.5 lbs flank steak, thinly sliced against the grain
- 2 bell peppers (any color), sliced into strips
- 1 large yellow onion, sliced
- 3 tablespoons avocado oil (high smoke point)
- 2 tablespoons soy sauce
- 1 tablespoon garlic powder
- Coarse sea salt and black pepper
How to make it
- Preheat your Blackstone griddle to medium-high heat. You want the surface to be hot enough that a drop of water dances and evaporates instantly.
- In a bowl, toss your thinly sliced flank steak with 1 tablespoon of oil, soy sauce, and garlic powder. Let it marinate for at least 15 minutes while the grill heats.
- Once the griddle is hot, apply a thin layer of oil to one side of the surface using a squeeze bottle. Lay the peppers and onions down first, as they take longer to soften.
- Use your spatulas to move the vegetables constantly, letting them pick up the brown bits from the griddle surface. Move them to a cooler zone of the grill once they are tender-crisp.
- Apply more oil to the hottest part of the griddle and spread the steak slices out in a single layer. Let them sear undisturbed for 2-3 minutes to get a dark crust.
- Flip the meat and cook for another 2 minutes. Toss the meat and vegetables together for one final mix before removing them from the heat. This high-heat, fast-moving technique locks in the moisture perfectly.
How to make fresh strawberry pie?
Why we love this
This fresh strawberry pie is a visual masterpiece on any food board, with its glossy, ruby-red glaze and mounds of whole, sun-ripened berries. The scent is intoxicatingly sweet, reminiscent of a summer farmers’ market, while the buttery, flaky crust provides a structural crunch that grounds the fruit’s lightness. Every slice offers a cold, refreshing burst of strawberry juice that feels like pure sunshine on a plate. It’s the perfect dessert component for a board, offering a vibrant pop of color and a sophisticated sweetness that isn’t overly heavy.
Ingredients
- 1 pre-baked 9-inch pie crust
- 6 cups fresh strawberries, hulled
- 1 cup granulated sugar
- 3 tablespoons cornstarch
- 1 cup water
- 1 small box (3 oz) strawberry gelatin powder
- Whipped cream for garnish
How to make it
- Ensure your pie crust is fully baked and completely cooled before you begin. A warm crust will turn soggy once the fruit and glaze are added.
- Select the most beautiful strawberries to remain whole; place about 4 cups of the whole berries, pointed ends up, into the cooled pie crust.
- In a small saucepan, crush the remaining 2 cups of strawberries using a potato masher or fork. Add the sugar, cornstarch, and water to the pan.
- Bring the mixture to a boil over medium heat, stirring constantly with a whisk. The mixture will thicken and become somewhat translucent after about 3 to 5 minutes of boiling.
- Remove the pan from the heat and stir in the dry strawberry gelatin powder until it is completely dissolved. This provides the ‘set’ and that iconic vibrant red color.
- Let the glaze cool for about 10 minutes (it should still be pourable), then slowly pour it over the strawberries in the pie crust, ensuring every berry is coated. Refrigerate for at least 4 hours to allow the glaze to firm up into a sliceable consistency.
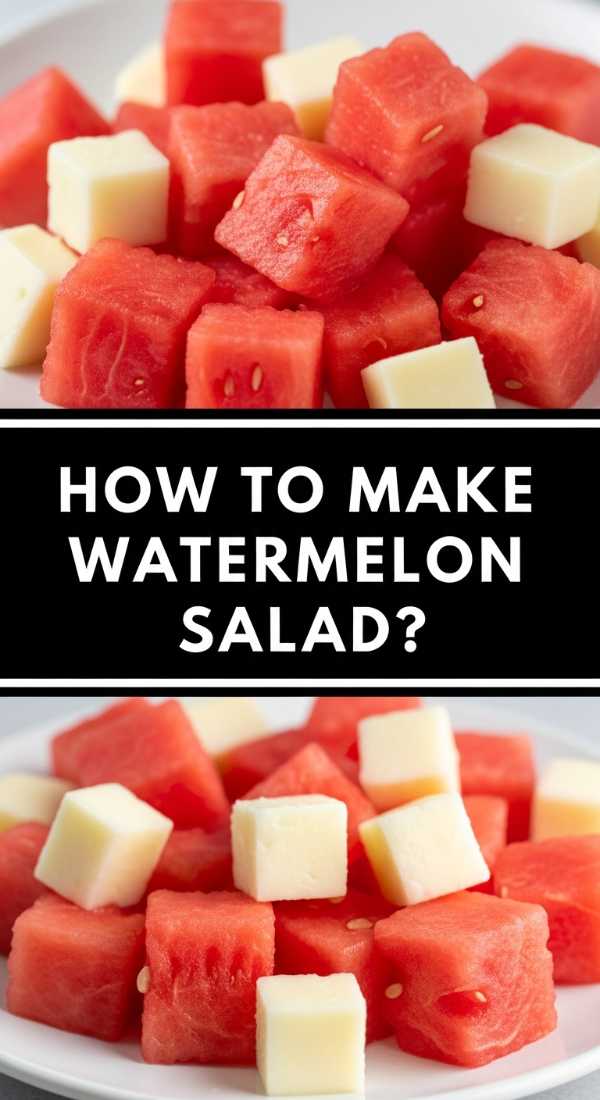
How to make watermelon feta salad?
Why we love this
The watermelon feta salad is the ultimate ‘unexpected’ delight on a food board, offering a sophisticated play between salt and sugar. The cold, crisp cubes of watermelon are incredibly hydrating, while the sharp, briny feta adds a sophisticated depth that elevates the fruit. When you add the aromatic lift of fresh mint and a drizzle of balsamic, the dish becomes a complex sensory experience that is both herbal and sweet. It’s a stunningly beautiful dish that adds a modern, gourmet feel to the board without requiring any actual cooking.
Ingredients
- 6 cups cubed seedless watermelon (cold)
- 1 cup block feta cheese, crumbled by hand
- 1/2 cup fresh mint leaves, chiffonade
- 1/4 cup extra virgin olive oil
- 2 tablespoons balsamic glaze
- Flaky sea salt
How to make it
- Cube your watermelon into uniform 1-inch squares. For the best texture, keep the watermelon in the refrigerator until the very moment you are ready to assemble.
- Instead of buying pre-crumbled feta, purchase a block in brine and crumble it yourself. This yields larger, creamier chunks that don’t dry out.
- Stack your mint leaves, roll them tightly like a cigar, and slice them into thin ribbons (chiffonade). This technique releases the oils without bruising the leaves.
- In a wide, shallow bowl or directly on your board tray, layer the watermelon cubes first, followed by a generous sprinkling of the feta.
- Drizzle the olive oil over the top to add a silky mouthfeel, then scatter the mint ribbons evenly across the dish.
- Just before serving, drizzle the thick balsamic glaze in a zig-zag pattern and add a pinch of flaky sea salt to make the watermelon’s sweetness really pop.
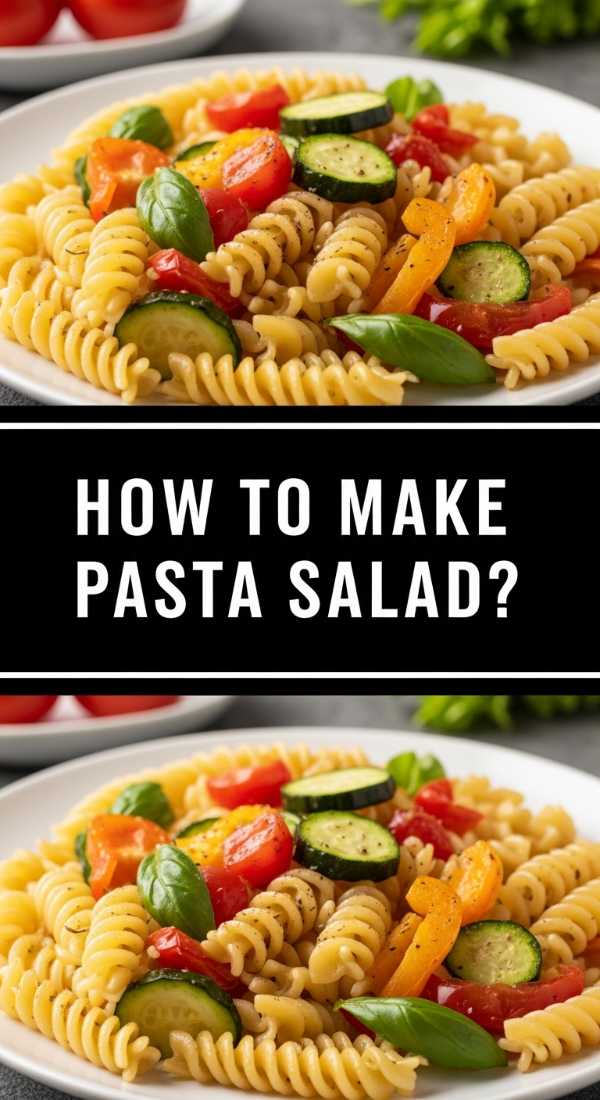
How to make summer pasta salad?
Why we love this
A classic summer pasta salad is the reliable workhorse of the food board, providing a satisfying, chewy texture and a zesty, vinegar-forward flavor profile. The rotini spirals are perfect for catching the herbs and dressing, ensuring every bite is a concentrated explosion of Italian seasonings. The aroma is bright and punchy, thanks to the combination of olives and bell peppers, while the cold temperature makes it incredibly refreshing on a hot day. It’s a crowd-pleaser that adds bulk and variety to the board, making the meal feel complete and well-rounded.
Ingredients
- 1 lb rotini or fusilli pasta
- 1 cup Italian vinaigrette dressing
- 1/2 cup sliced black olives
- 1 bell pepper, finely diced
- 1/2 cup mini pepperoni or chopped salami
- 1/4 cup freshly grated Parmesan cheese
- 2 tablespoons fresh parsley, chopped
How to make it
- Boil a large pot of heavily salted water. Cook the pasta for exactly 1 minute less than the package instructions for ‘al dente.’ You want it firm so it doesn’t get mushy after soaking in dressing.
- Immediately drain the pasta and rinse it under cold running water to stop the cooking process and wash away excess starch.
- In a large bowl, toss the cooled pasta with half of the Italian dressing. Letting it sit for 20 minutes allows the pasta to absorb the flavor into its core.
- Add the diced bell peppers, sliced olives, and pepperoni. The small dice on the vegetables is important so that they distribute evenly throughout the spirals.
- Add the remaining half of the dressing, the Parmesan cheese, and the fresh parsley. Toss thoroughly until everything is glossy and well-coated.
- Cover and refrigerate for at least 2 hours. Before serving on your board, give it one last toss and add a splash of extra dressing if the pasta has soaked up too much moisture.
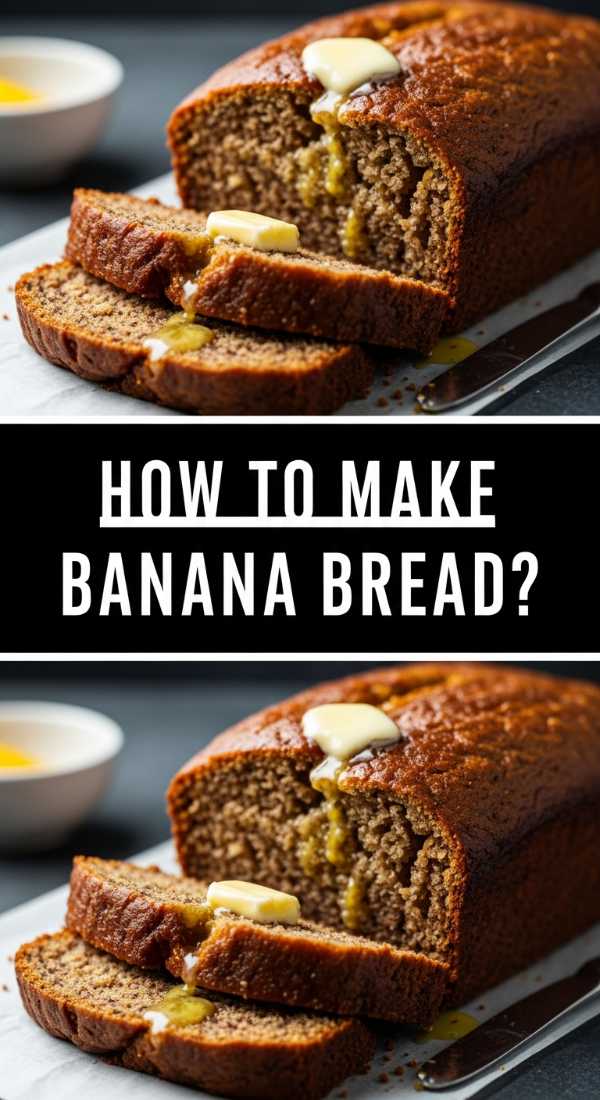
How to bake moist banana bread?

Why we love this
The scent of baking banana bread is perhaps the most welcoming aroma in the world, filled with notes of caramelized sugar and warm cinnamon. This bread is incredibly moist, with a dense yet soft crumb that feels like a warm hug in food form. When sliced and added to a food board, it serves as a wonderful semi-sweet element that pairs beautifully with both the savory meats and the fresh fruits. The crust is slightly tacky and sweet, while the interior is buttery and rich, providing a comforting texture that balances the lighter elements of the meal.
Ingredients
- 3 very ripe bananas, mashed
- 1/2 cup melted butter (unsalted)
- 3/4 cup brown sugar (packed)
- 1 large egg, room temperature
- 1 teaspoon vanilla extract
- 1.5 cups all-purpose flour
- 1 teaspoon baking soda
- 1/2 teaspoon cinnamon
- Pinch of salt
How to make it
- Preheat your oven to 350°F (175°C) and grease a 9×5 inch loaf pan thoroughly with butter or non-stick spray.
- In a large mixing bowl, mash the bananas with a whisk or potato masher until they are mostly smooth with only a few small lumps remaining.
- Stir the melted butter into the mashed bananas. Add the brown sugar, egg, and vanilla, and whisk vigorously until the mixture is light and well-combined.
- In a separate bowl, whisk together the flour, baking soda, cinnamon, and salt. This ensures the leavening agent is evenly distributed so the bread rises uniformly.
- Gently fold the dry ingredients into the wet ingredients using a spatula. Stop the moment you see no more streaks of flour—overmixing will develop gluten and make the bread tough.
- Pour the batter into the prepared pan and bake for 50 to 60 minutes. Use a toothpick to test the center; it should come out clean or with just a few moist crumbs. Let it cool in the pan for 10 minutes before transferring to a wire rack.
How to make creamy pina coladas?

Why we love this
A creamy pina colada is the ultimate ‘vacation in a glass’ addition to your food board spread, offering a frosty, tropical escape with every sip. The texture is like velvet—thick, icy, and incredibly smooth thanks to the rich coconut cream. The aroma of toasted coconut and sweet pineapple is instantly transportive, evoking images of white sand and blue water. It’s a decadent, frothy treat that acts as both a beverage and a palate cleanser, with its chilled temperature providing a sharp contrast to any warm grilled items on the board.
Ingredients
- 2 cups frozen pineapple chunks
- 1/2 cup cream of coconut (like Coco Lopez)
- 1/2 cup pineapple juice
- 2 oz white rum (optional)
- 1 cup ice cubes
- Maraschino cherries for garnish
How to make it
- Place your blender jar in the freezer for 10 minutes before starting; a cold jar helps maintain the frozen ‘slushy’ consistency of the drink.
- Add the frozen pineapple chunks to the blender first. Using frozen fruit instead of just ice prevents the drink from becoming watered down.
- Pour in the cream of coconut and the pineapple juice. If you are making an adult version, add the rum at this stage as well.
- Add the ice cubes last. Pulse the blender several times to break up the large chunks of fruit and ice before switching to a high-speed ‘liquify’ or ‘smoothie’ setting.
- Blend until the mixture is completely uniform and has a thick, soft-serve ice cream-like consistency. If it’s too thick to pour, add a splash more pineapple juice and blend for 5 seconds.
- Pour into chilled glasses and garnish with a cherry and a pineapple wedge. Serve immediately alongside your food board for a refreshing tropical punch.
How to make homemade fruit popsicles?
[IMAGE_10]
Why we love this
Homemade fruit popsicles are a whimsical, colorful addition to a summer food board, offering a pure and healthy way to cool down. The texture is icy and refreshing, with real bits of fruit frozen inside providing a delightful chew. They smell like a concentrated garden, with the scent of fresh berries and honey lingering in the air. These popsicles are visually stunning, acting as icy jewels that capture the light and draw everyone to the dessert end of the board. They are the perfect ‘clean’ finish to a meal, leaving you feeling refreshed rather than weighed down.
Ingredients
- 2 cups fresh berries (strawberries, blueberries, or raspberries)
- 1 cup white grape juice or coconut water
- 1 tablespoon honey or agave nectar
- 1 tablespoon fresh lemon juice
- Whole fruit slices for aesthetic
How to make it
- In a blender, combine the berries, honey, and lemon juice. Puree until smooth, or leave it slightly chunky if you prefer a more rustic texture.
- Stir in the white grape juice or coconut water by hand. Using coconut water adds electrolytes and a subtle tropical flavor without masking the fruit.
- Place a few thin slices of whole fruit (like a slice of strawberry or a few whole blueberries) into each popsicle mold to create a beautiful visual effect once frozen.
- Pour the fruit mixture into the molds, leaving about 1/4 inch of space at the top, as the liquid will expand as it turns into ice.
- Tap the molds firmly on the counter several times to force any trapped air bubbles to the surface; this prevents ‘ice pockets’ from forming.
- Insert the popsicle sticks and freeze for at least 6 hours, or overnight. To unmold, run the outside of the plastic mold under warm water for 10 seconds to loosen the edges before gently pulling the stick.
Conclusion
The magic of the simple food board isn’t just in the recipes themselves, but in the way they come together to create a relaxed, joyous atmosphere. By combining the warmth of a slow-cooked chicken with the icy snap of a fruit popsicle, you are offering your guests a full spectrum of summer experiences. This trend proves that you don’t need a formal five-course meal to make an impression; you just need fresh ingredients, a bit of heart, and a large enough board to hold it all. So, clear off your table, gather your ingredients, and start building your own edible masterpiece today.