

Why Everyone is Obsessed With These Simple DIY Food Boards
There is something inherently magical about the moment you pull a hot, sizzling sheet pan out of the oven and see the vibrant colors of perfectly charred vegetables. For years, we relegated roasting to a side-dish afterthought, but the rise of the ‘Harvest Board’ has changed everything. These DIY food boards are more than just a meal; they are a visual celebration of texture, season, and soul-warming comfort that turns a humble Tuesday night into a gourmet experience. It’s about the way the house smells like caramelized garlic and sweet roots, inviting everyone to lean over the counter and pick off a crispy floret before the board even hits the table.
The obsession stems from the beautiful simplicity of it all. In a world that feels increasingly complicated, there is deep satisfaction in taking raw, earthy ingredients and transforming them with nothing but high heat and a drizzle of olive oil. When you arrange these roasted gems on a large wooden board—nestled next to creamy dips, crunchy nuts, and fresh herbs—you aren’t just serving dinner; you’re creating a centerpiece for connection. It’s tactile, it’s rustic, and it’s undeniably social.
10 Best Roasted Vegetable Recipes
Why we love this
This master collection represents the absolute pinnacle of garden-to-table eating, offering a symphony of textures that range from the tender, buttery interior of a gold potato to the crisp, lacy edges of a roasted sprout. Each bite is an explosion of concentrated natural sugars, heightened by the smoky kiss of the oven and a delicate balance of sea salt and cracked pepper. There is a profound sense of abundance when you see ten different varieties of produce mingling on one board, providing a rainbow of nutrients and a complex flavor profile that satisfies every craving from savory to sweet. It feels like a celebration of the earth’s bounty, wrapped in the warmth of a home kitchen.
Ingredients
- Brussels sprouts, halved
- Sweet potatoes, cubed
- Red onion, wedged
- Bell peppers, thick sliced
- Zucchini, coins
- Asparagus spears
- Butternut squash, diced
- Extra virgin olive oil
- Kosher salt and black pepper
- Fresh rosemary and thyme
How to make it
- Preheat your oven to 425°F (220°C). This high temperature is crucial for achieving caramelization without turning the vegetables into mush; you want that immediate sear when they hit the pan.
- Prep each vegetable to a uniform size based on its density; cut heartier roots like squash into smaller 1/2 inch cubes, while softer vegetables like zucchini should be kept in thicker slices to ensure they all finish at the same time.
- In a massive mixing bowl, toss the vegetables with enough olive oil to coat every surface lightly but thoroughly—look for a glistening sheen rather than a pool of oil at the bottom.
- Spread the vegetables across two large, rimmed baking sheets, ensuring they are in a single layer with at least half an inch of space between each piece; overcrowding causes steaming rather than roasting.
- Roast for 25-35 minutes, rotating the pans halfway through the cooking time to account for oven hot spots.
- Check for doneness by piercing the thickest root vegetable with a fork; it should slide in effortlessly while the edges of the onions and peppers show dark, charred bits.
- Remove from the oven and immediately toss with fresh herbs while the residual heat helps release the aromatic oils of the rosemary and thyme.
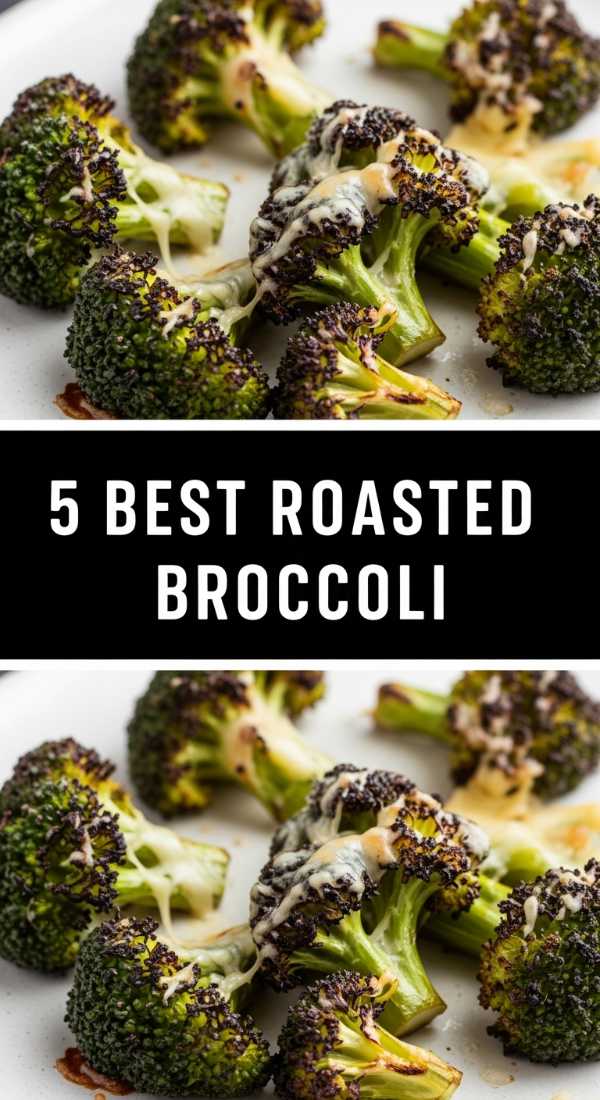
5 Best Ways To Roast Broccoli
Why we love this
Roasted broccoli is the ultimate gateway vegetable, turning a once-maligned green into a crispy, salty snack that rivals potato chips in addictiveness. When broccoli meets high heat, the tiny florets act like sponges for flavor while the tips become incredibly crunchy and almost nutty in taste. The contrast between the firm, tender stems and the frizzy, charred tops provides a rhythmic eating experience that is both light and deeply satisfying. It’s the kind of dish that makes you forget you’re eating something healthy, as the deep umami notes developed in the oven create a savory profile that lingers beautifully on the palate.
Ingredients
- 2 large heads of broccoli
- Avocado oil (high smoke point)
- Lemon zest
- Red pepper flakes
- Sea salt
- Optional: Tahini or nutritional yeast
How to make it
- Cut the broccoli into long, elegant spears rather than small nuggets; including the stem increases the surface area for browning and provides a better texture.
- Ensure the broccoli is bone-dry after washing; any moisture will create steam, preventing the florets from reaching that coveted ‘burnt-edge’ crispiness.
- Whisk your oil with red pepper flakes and salt before drizzling, ensuring the spice is evenly distributed across all the nooks and crannies of the florets.
- Place the broccoli on a preheated baking sheet at 400°F (200°C); the hot metal gives the underside an immediate head start on browning.
- Roast for 15-20 minutes, keeping a close eye on the tips; you want them to turn dark brown, almost black, but not turn to ash.
- Test for a ‘tender-crisp’ feel in the stems—they should be easily pierced but still have a slight bite.
- Finish with a bright zest of lemon immediately upon removal to cut through the richness of the oil and enhance the green, earthy flavors.
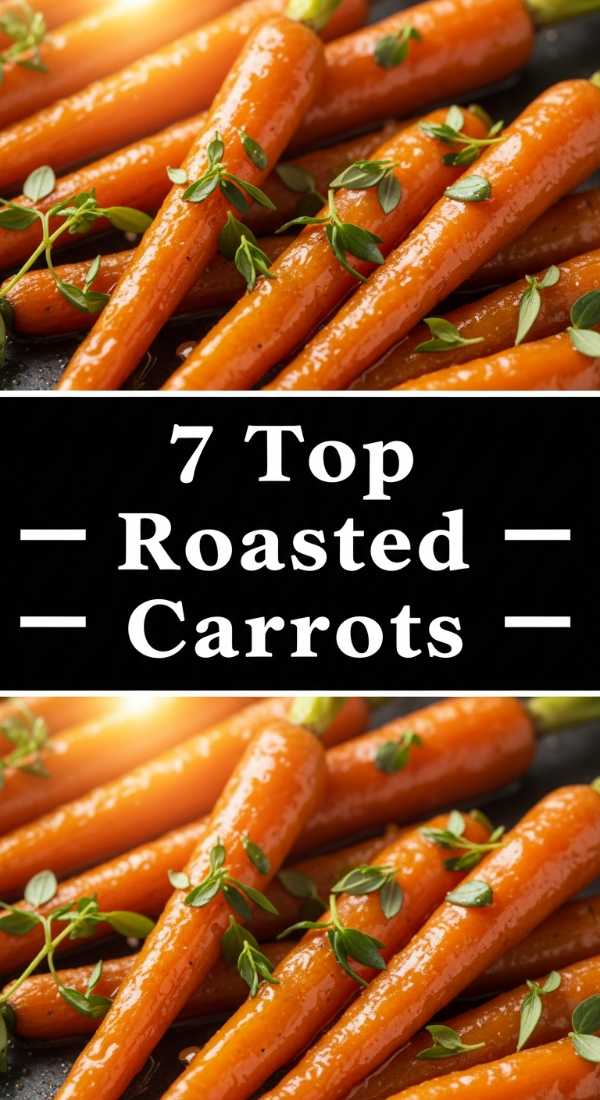
7 Top Rated Roasted Carrots

Why we love this
Carrots undergo a stunning metamorphosis in the oven, shedding their crunchy, raw bite for a texture that is silken, concentrated, and almost candy-like in its sweetness. When roasted whole with their tops partially intact, they bring a rustic, sophisticated aesthetic to any food board that feels straight out of a high-end bistro. The way the natural sugars migrate to the surface and caramelize into a sticky, golden glaze is a visual and culinary delight, offering a grounding, earthy flavor that pairs perfectly with cooling yogurt dips or sharp feta cheese. It is a humble vegetable elevated to a true art form through the simple application of heat.
Ingredients
- Bunch of heirloom carrots (multi-colored)
- Honey or maple syrup
- Cumin seeds
- Olive oil
- Flaky sea salt
- Fresh parsley for garnish
How to make it
- Scrub the carrots thoroughly but avoid peeling if they are young and tender; the skin holds incredible flavor and helps maintain the shape during the long roast.
- Trim the green tops to about an inch long for a professional presentation, then slice any particularly thick carrots in half lengthwise so they cook at the same rate as the thinner ones.
- In a small bowl, whisk together the oil, honey, and toasted cumin seeds until emulsified, then massage this mixture into the carrots until they are fully lacquered.
- Lay them out on a parchment-lined sheet, making sure they aren’t touching, which allows the hot air to circulate and create that sticky exterior.
- Roast at 400°F (200°C) for 25 to 30 minutes, turning them over once with tongs at the 15-minute mark to ensure even glazing on all sides.
- Look for the carrots to look slightly wrinkled and deeply golden with some caramelized charring on the tips.
- Sprinkle with flaky sea salt while still hot so the crystals stick to the honey glaze, providing a crucial salty-sweet contrast.
5 Cozy Roasted Vegetable Soups
Why we love this
There is no comfort quite like a bowl of soup made from vegetables that have first been roasted to perfection, as it adds a layer of smoky depth that boiling simply cannot achieve. The aroma that fills the kitchen as the roasted roots are blended with warm broth is intoxicating—sweet, savory, and deeply nourishing all at once. The texture is incredibly velvety, with the roasted sugars providing a natural thickness and a complex flavor profile that feels like a warm hug on a cold afternoon. Every spoonful carries the essence of the oven, making the soup taste richer, darker, and more sophisticated than any standard vegetable broth.
Ingredients
- Roasted squash or tomatoes
- Roasted garlic cloves
- Roasted onions
- Vegetable stock
- Heavy cream or coconut milk
- Fresh sage or basil
How to make it
- Begin by roasting your base vegetables (like butternut squash or tomatoes) at 400°F until they are very soft and the edges are blackened; this ‘char’ is where the deep soup flavor lives.
- In a large Dutch oven, sauté the roasted onions in a bit of butter or oil over medium heat just to wake up their flavors.
- Add the soft, roasted vegetable flesh (scooped out of the skins if using squash) and the roasted garlic to the pot.
- Pour in just enough warm vegetable stock to cover the ingredients, then simmer gently for 10 minutes to allow the flavors to marry together.
- Use an immersion blender to process the soup until it is completely smooth and glossy; if it’s too thick, add stock half a cup at a time until you reach your desired consistency.
- Stir in the cream or coconut milk at the very end, keeping the heat low so it doesn’t break or curdle the fats.
- Taste and adjust seasoning with salt, pepper, and a tiny splash of apple cider vinegar to brighten the heavy, roasted notes before serving.
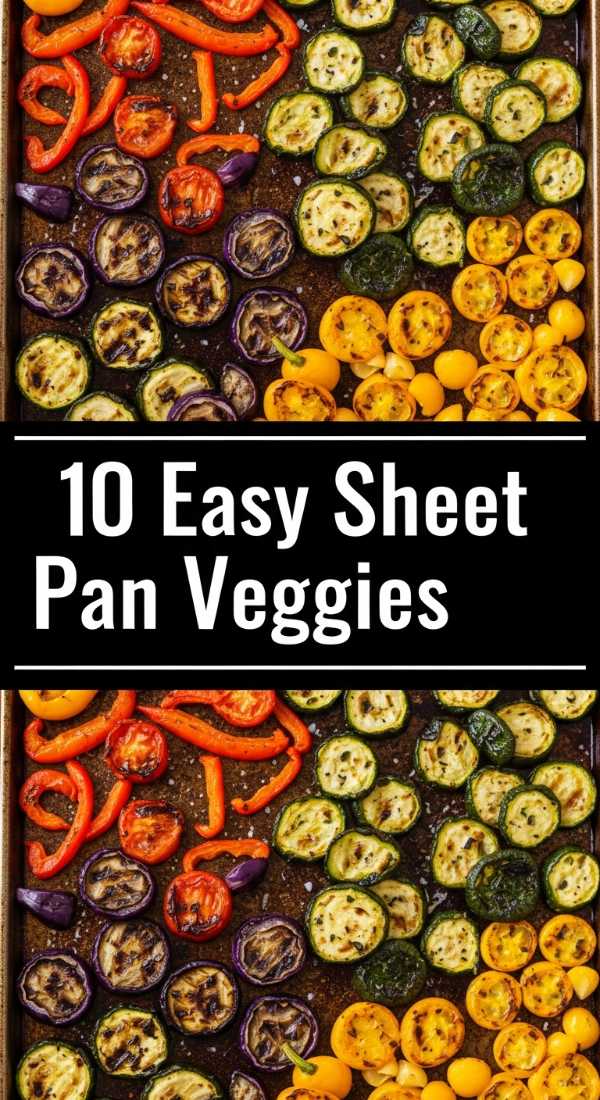
10 Easy Sheet Pan Vegetables
Why we love this
The sheet pan method is the ultimate ‘lazy-luxe’ way to eat, offering a stunning variety of flavors with almost zero cleanup, making it a staple for busy but health-conscious foodies. There is a specific joy in seeing a mix of potatoes, peppers, and green beans all roasting together, sharing their juices and creating a unified flavor profile that is greater than the sum of its parts. The vegetables come out with crisp, blistered skins and tender interiors, providing a diverse mouthfeel that keeps every bite interesting and vibrant. It is the perfect foundation for a food board, offering a ready-made feast that looks as good as it tastes with minimal effort.
Ingredients
- Fingerling potatoes
- Green beans, trimmed
- Cherry tomatoes
- Red onion, sliced
- Zucchini, cubed
- Smoked paprika
- Garlic powder
- Olive oil
- Lemon wedges
How to make it
- Preheat your oven to 425°F (220°C) and place the empty baking sheet inside for 5 minutes; this prevents the vegetables from sticking and helps the bottoms crisp immediately.
- Start with the potatoes, as they take the longest; toss them in oil and seasonings and roast for 15 minutes alone.
- Pull the tray out and add the remaining vegetables—the tomatoes, beans, and zucchini—tossing them directly on the hot pan with the potatoes.
- Ensure everything is spread out; the tomatoes should have enough space so that when they burst, they roast rather than boil in their own juice.
- Continue roasting for another 15-20 minutes until the tomatoes are blistered and the potatoes are golden and crispy on the outside.
- Check that the green beans are still vibrant but have small brown ‘blister’ marks, indicating they have developed flavor without becoming mushy.
- Squeeze fresh lemon over the entire pan immediately after removing from the oven to brighten the smokiness of the paprika.
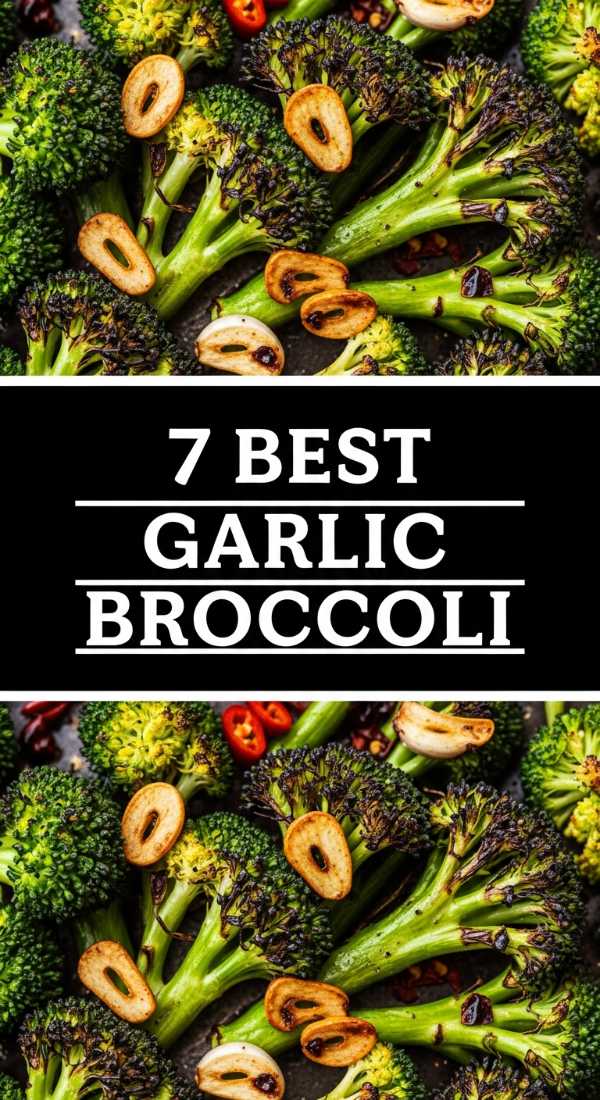
7 Best Garlic Roasted Broccoli

Why we love this
Adding garlic to roasted broccoli is like turning the volume up on a favorite song; it transforms a simple green into a pungent, savory powerhouse that commands attention. The garlic slices become golden and crisp—almost like tiny chips—while the infused oil permeates every single branch of the broccoli florets. The aroma is legendary, a warm and inviting scent that signals a truly savory meal is about to happen, making it a crowd-favorite on any vegetable board. It’s the perfect balance of bitter greens and sweet, mellowed garlic, finished with a hit of salt that makes it nearly impossible to stop eating.
Ingredients
- 3 heads of broccoli
- 6 cloves of garlic, thinly sliced (not minced)
- Extra virgin olive oil
- Red pepper flakes
- Kosher salt
- Lemon juice
How to make it
- Preheat the oven to 400°F (200°C) and prepare a large baking sheet with parchment paper for easy cleanup.
- Slice the garlic cloves into very thin ‘coins’ rather than mincing them; minced garlic burns too quickly at high roasting temperatures, whereas slices mellow and crisp beautifully.
- Toss the broccoli florets and the garlic slices in a bowl with a generous amount of oil, ensuring the garlic is well-coated so it roasts rather than fries.
- Spread the mixture on the pan, making sure the garlic slices are distributed among the broccoli rather than clumped in one spot.
- Roast for 20-25 minutes, but start checking at the 15-minute mark; you are looking for the garlic to be light golden brown—if it turns dark brown, it will become bitter.
- Toss the vegetables halfway through the time to ensure the garlic doesn’t get stuck to the bottom of the pan and overcook.
- Remove when the broccoli tips are charred and the garlic is crisp, immediately finishing with a splash of lemon juice to balance the heavy garlic flavor.
5 Simple Balsamic Roasted Carrots

Why we love this
The addition of balsamic vinegar to roasting carrots creates a sophisticated, tangy glaze that cuts through the root vegetable’s natural sugar with a sharp, elegant acidity. As the vinegar reduces in the oven’s heat, it becomes thick and syrupy, coating each carrot in a dark, glossy lacquer that looks stunning against a wooden serving board. The flavor profile is a complex dance of sweet and sour, with a deep fruitiness from the grapes that elevates the humble carrot to something that feels appropriate for a holiday feast. It is a sensory delight, from the sticky-sweet texture to the dark, rich aroma of the reducing glaze.
Ingredients
- 1 lb slender carrots
- 2 tbsp high-quality balsamic vinegar
- 1 tbsp maple syrup
- 2 tbsp olive oil
- 1 tsp dried thyme
- Salt and pepper
How to make it
- Preheat your oven to 400°F (200°C). If the carrots are thick, slice them in half lengthwise to ensure the glaze penetrates deep into the vegetable.
- In a small bowl, whisk together the balsamic vinegar, maple syrup, olive oil, and thyme until the mixture is thick and fully integrated.
- Place the carrots in a shallow dish and pour the glaze over them, using your hands or a brush to ensure every millimeter is covered.
- Arrange the carrots on a baking sheet, making sure to pour any leftover glaze from the bowl over the top of the carrots on the tray.
- Roast for 25 to 30 minutes; you must turn the carrots every 10 minutes to prevent the sugars in the balsamic and maple from burning on the bottom of the pan.
- The carrots are done when the glaze has thickened into a sticky syrup and the carrots are tender enough to be cut with a dull fork.
- Let them rest for 2 minutes on the pan after removal; this allows the glaze to set and become even stickier before you transfer them to your food board.
10 Hearty Winter Roasted Vegetables

Why we love this
This is the ultimate cold-weather comfort food, featuring a robust lineup of root vegetables that provide a grounding, earthy energy when the temperature drops. The combination of parsnips, rutabaga, and beets creates a dense, satisfying meal that feels incredibly substantial, with each vegetable offering a different level of sweetness and starch. Roasting them together allows the colors—deep purples, creamy whites, and golden oranges—to bleed slightly into one another, creating a rustic and beautiful palette. There is a primal satisfaction in these slow-roasted gems, offering a deep, roasted flavor that lingers and warms you from the inside out.
Ingredients
- Parsnips, peeled and sliced
- Beets, peeled and wedged
- Rutabaga, cubed
- Red potatoes, halved
- Whole garlic cloves, peeled
- Fresh rosemary
- Olive oil
- Coarse sea salt
How to make it
- Set your oven to 400°F (200°C). Because these are dense root vegetables, they require a consistent, medium-high heat to cook through the center without burning the exterior.
- Cut all vegetables into roughly 1-inch chunks; consistency in size is the most important factor for success with winter roots.
- If using beets, toss them in a separate small bowl with oil first before adding to the rest of the mix to prevent their purple juice from dyeing every other vegetable immediately.
- Spread the vegetables on a heavy-duty roasting pan; these hold heat better than thin sheets and provide a more even cook for dense items.
- Toss in the whole garlic cloves and rosemary sprigs, ensuring they are nestled among the vegetables so they don’t burn in the direct heat.
- Roast for 45 to 55 minutes, tossing every 20 minutes; you are looking for a deep golden crust on the potatoes and parsnips.
- The vegetables are ready when a knife meets zero resistance in the center of the largest rutabaga or beet chunk.
5 Creamy Roasted Vegetable Soups

Why we love this
Creamy roasted vegetable soups are the height of luxury, offering a silk-smooth texture that feels indulgent while being packed with the concentrated nutrition of the oven. By roasting the vegetables until they are nearly collapsing, you unlock a depth of flavor that is both sweet and slightly charred, which blends into a sophisticated, multi-layered broth. Whether it’s a golden cauliflower or a deep orange carrot base, these soups carry a natural richness that often requires very little added dairy to feel substantial. It’s a sensory experience of warmth, smoothness, and the comforting, toasted notes of a kitchen filled with love and heat.
Ingredients
- Roasted cauliflower or parsnips
- 1 large white onion, roasted
- Vegetable or chicken bone broth
- 1/2 cup heavy cream
- Nutmeg, freshly grated
- White pepper and sea salt
- Chives for garnish
How to make it
- Roast your choice of white vegetables (cauliflower and parsnips work best for the ‘creamy’ look) at 425°F until they have very dark brown edges—this provides the ‘roasted’ flavor against the cream.
- In a large pot, combine the roasted vegetables with a high-quality bone broth and bring to a very gentle simmer for 15 minutes.
- Add a pinch of freshly grated nutmeg; this is the secret ingredient that enhances the nuttiness of roasted vegetables.
- Transfer the mixture to a high-speed blender rather than using an immersion blender if you want a truly professional, silk-like texture.
- Blend on the highest setting for a full minute to aerate the soup, making it light and fluffy yet incredibly rich.
- Return the soup to the pot over low heat and slowly whisk in the heavy cream, being careful not to let the soup boil once the cream is added.
- Serve in warm bowls, topped with a drizzle of olive oil and fresh chives to contrast the deep, creamy roasted base.
7 Best Parmesan Roasted Broccoli
[IMAGE_10]
Why we love this
Parmesan roasted broccoli is a masterclass in the power of umami, combining the sulfurous depth of the green vegetable with the salty, nutty crunch of aged cheese. As the broccoli roasts, the parmesan melts and then crisps into little ‘frico’ wafers that cling to the florets, providing a texture that is both tender and shatteringly crisp. It is a sophisticated take on a classic side that feels elevated enough for a dinner party but simple enough for a midnight snack. The smell of browning cheese and roasting greens is universally beloved, making this the undisputed star of any food board it graces.
Ingredients
- 2 large heads of broccoli
- 1/2 cup finely grated high-quality Parmesan cheese
- 3 tbsp olive oil
- 1 tsp garlic powder
- 1/2 tsp black pepper
- Lemon wedges for serving
How to make it
- Preheat your oven to 425°F (220°C). A higher heat is necessary here to ensure the cheese crisps up before the broccoli becomes too soft.
- Toss the broccoli florets with olive oil, garlic powder, and pepper in a large bowl until the oil is evenly distributed.
- Add the finely grated parmesan last, tossing gently so the cheese sticks to the oiled surfaces of the broccoli.
- Spread the broccoli onto a baking sheet, making sure to scrape out any loose cheese bits from the bowl and sprinkle them over the top.
- Roast for 15 to 20 minutes, resisting the urge to stir too often; you want the cheese to form a crust on the side of the broccoli touching the pan.
- The broccoli is done when the cheese has turned a deep golden brown and the florets are crisp-tender.
- Serve immediately while the cheese is at its peak crispness, with a final squeeze of lemon to cut through the salty richness of the parmesan.
Conclusion
The beauty of the viral food board trend lies in its accessibility and the way it honors the simple act of eating. Whether you are piling up garlic-heavy broccoli or sticky, balsamic-glazed carrots, you are creating a tapestry of flavor that celebrates the season. These boards prove that you don’t need complicated techniques or expensive ingredients to create a viral-worthy meal—you just need a hot oven, fresh produce, and a little bit of love. So, grab your favorite wooden board, roast up a storm, and watch as your guests (and your family) become absolutely obsessed with the magic of simple DIY food boards.