

There is something inherently primal and deeply comforting about the flicker of an open flame as the sun begins to dip below the horizon. It’s that magical hour where the air turns crisp, the shadows grow long, and the world seems to quiet down just enough for us to finally hear our own thoughts—or better yet, the laughter of our favorite people. A backyard fire pit isn’t just a home improvement project; it’s a portal to a slower, more intentional way of living where the only thing on the agenda is watching the embers dance and feeling the gentle warmth seep into your bones.
I remember the first night we lit ours. The scent of seasoned oak filled the air, that nostalgic, earthy aroma that instantly transports you back to childhood camping trips and simpler times. We sat there for hours, wrapped in oversized knit blankets, our faces glowing in the amber light. It transformed our basic patch of grass into a sanctuary. If you’ve been scrolling through Pinterest feeling that tug of envy over those gorgeous outdoor setups, you’re in the right place. We’re diving deep into why everyone is currently obsessed with these designs and how you can bring that same magic to your own slice of the outdoors.
How to Create a Cozy Fire Pit Backyard for Magical Evenings
Why we love this
This design is all about the tactile experience of warmth and softness. Imagine the feeling of plush, weather-resistant velvet pillows against your back and the sight of delicate fairy lights twinkling in the overhead branches like grounded stars. The air is heavy with the sweet, resinous scent of cedar wood burning, and the gentle crackle of the logs provides a rhythmic soundtrack that soothes the soul. It creates an intimate, cocoon-like atmosphere where time feels suspended, making every evening feel like a special occasion rather than just another night at home.
Essential Elements:
- Deep-seated Adirondack chairs or outdoor sofas
- Weatherproof floor cushions and chunky knit throws
- Overhead string lighting or Moroccan lanterns
- A central stone or metal fire bowl
- Potted lavender or jasmine for evening fragrance
How to make it
- Foundation Prep: Begin by clearing a 10-foot diameter circle. Remove grass and level the soil using a hard rake until the surface is perfectly flat. This ensures your seating won’t wobble.
- The Heat Source: Place your fire bowl exactly in the center. If using wood, ensure the bowl is elevated to prevent heat damage to the ground. For gas, professional line installation is recommended for a seamless finish.
- Layering Textures: Arrange your seating in a tight semi-circle. Add high-pile outdoor rugs to ground the space. This acts as the “crust” of your design, providing a base for the comfort to follow.
- Lighting the Mood: String Edison bulbs in a zigzag pattern overhead, at least 8 feet high. Use a dimmer switch to keep the light “low and slow,” mimicking the natural glow of the fire.
- Final Garnish: Drape blankets over every chair and place small side tables within arm’s reach for mugs of cocoa or glasses of wine.
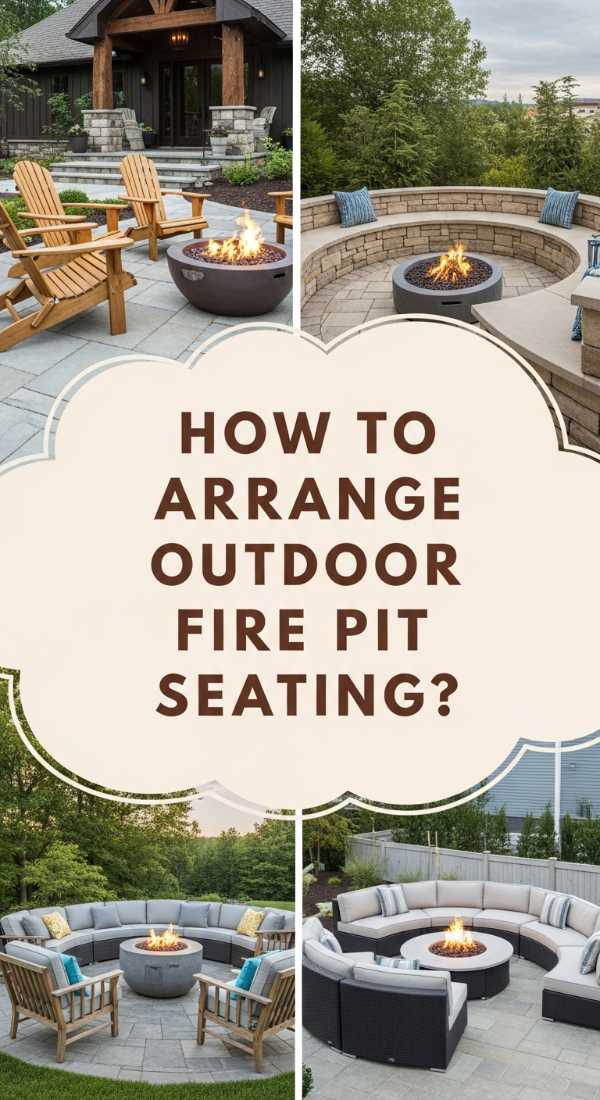
How to Arrange Outdoor Fire Pit Seating for Total Comfort
Why we love this
There is a specific science to comfort that this layout masters perfectly. It’s the feeling of total relaxation when your feet are propped up at just the right height and the distance to the flame is close enough for warmth but far enough to avoid the smoke’s sting. The visual symmetry of curved benches or perfectly spaced chairs creates a sense of order that calms the mind. You can feel the supportive embrace of ergonomic design, allowing you to sink in and stay for hours without a single ache or restless shift.
Essential Elements:
- Curved sectional seating or high-back chairs
- A designated “foot zone” with smooth gravel or pavers
- Consistent spacing (approx. 2-3 feet from the fire)
- Side tables for every two seats
- Lumbar support pillows
How to make it
- Measuring the Radius: Use a string tied to a center stake to mark a 3-foot safety zone around the pit. This is your “hot zone” where no furniture should sit.
- Mapping the Flow: Place your primary seating units opposite the prevailing wind direction so guests aren’t constantly dodging smoke. This is the “prep phase” for long-term comfort.
- Leveling the Base: Use a spirit level on each chair or bench. If the ground is uneven, excavate small sections under the legs and backfill with crushed stone to create a solid, non-shift foundation.
- The Arm’s Reach Rule: Position side tables approximately 18 inches from the seat edge. This height should align with the armrest for effortless access to refreshments.
- Testing the Heat: Light a small test fire to check the heat radiation. Adjust the seating inward or outward by 6-inch increments until the temperature feels like a warm embrace.
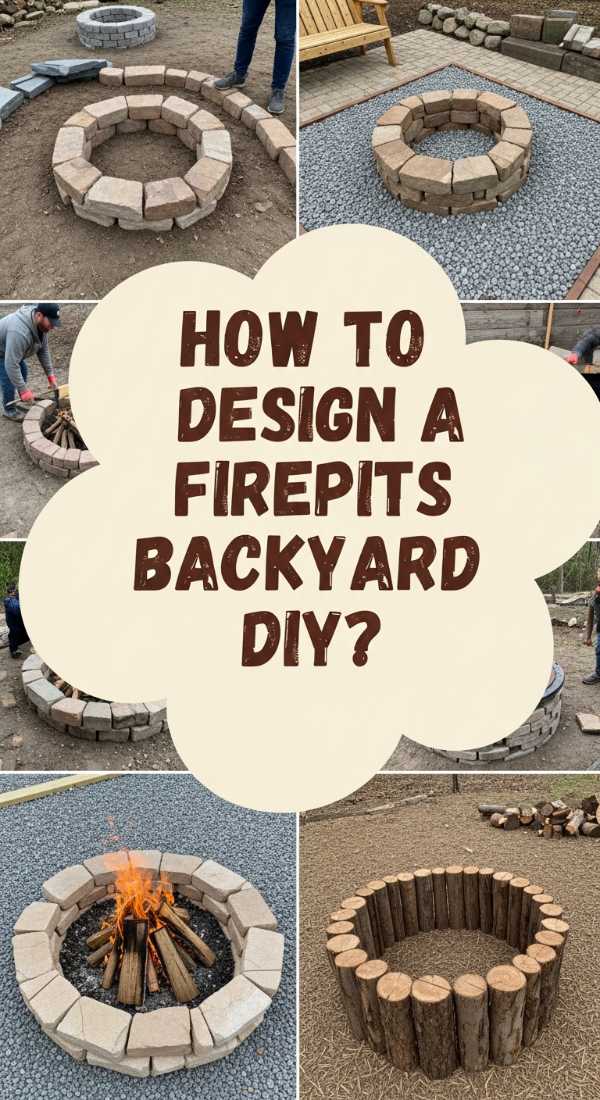
How to Design a Firepits Backyard DIY for a Personal Touch
Why we love this
A DIY fire pit carries the soul of the maker in every hand-placed stone and carefully leveled layer of gravel. The texture is intentionally rustic—perhaps the stones are slightly irregular or the path is lined with smoothed river rocks you collected yourself. There’s a profound sense of pride in the tactile roughness of the masonry and the way the firelight highlights the unique mineral veins in the rocks. It feels grounded, authentic, and uniquely yours, offering a sensory connection to the earth that store-bought kits simply cannot replicate.
Essential Elements:
- Retaining wall blocks or natural fieldstone
- Fire-rated inner steel ring
- Paver sand and crushed gravel (3/4 inch)
- High-temperature masonry adhesive
- Landscaping fabric
How to make it
- Excavation: Dig a hole 6 inches deep and slightly wider than your intended pit. This is the “pan” of your project, essential for stability and drainage.
- The Drainage Layer: Fill the hole with 4 inches of crushed gravel. Tamp it down firmly until it sounds like a solid thud when stepped on. This prevents shifting during freeze-thaw cycles.
- The First Ring: Lay your first circle of blocks. Use a level on every single block. This is the most critical phase—if the first layer is off, the whole structure will lean.
- Stacking and Bonding: Apply beads of masonry adhesive between layers in a staggered pattern (like bricks). Insert the steel ring to protect the stones from direct thermal shock.
- The Curing Process: Allow the adhesive to cure for at least 48 hours before lighting your first fire. This ensures the chemical bonds are set for high-heat endurance.
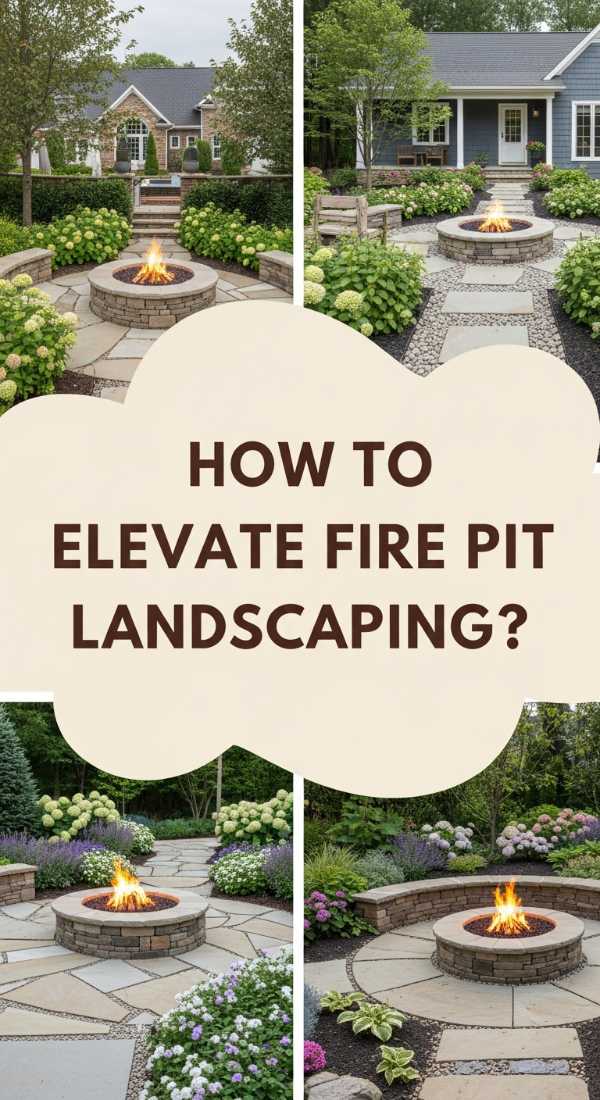
How to Elevate Fire Pit Landscaping for a High-End Look
Why we love this
This approach treats the fire pit as the crown jewel of a sophisticated outdoor gallery. Imagine the contrast between the sharp, clean lines of a basalt fire table and the soft, feathery movement of ornamental grasses swaying in the breeze. The scent is refined—think boxwood and structured greenery rather than wild brush. Underfoot, large-format slate pavers provide a cool, smooth texture that feels luxurious even when barefoot. It’s an aesthetic that speaks of curated elegance, where every plant and stone serves to highlight the fire’s golden glow.
Essential Elements:
- Architectural plants (Agave, Boxwood, or Miscanthus)
- Multi-level stone patio surfacing
- Integrated LED step lighting
- Monochromatic color palette (grays, blacks, whites)
- Polished Mexican beach pebbles for infill
How to make it
- Defining the Border: Use metal edging to create crisp, geometric lines between the fire pit area and the surrounding garden. This provides the “plating” for your landscape.
- Sub-Base Perfection: Install a 6-inch compacted lime-rock base followed by a 1-inch sand bedding for your pavers. Use a plate compactor to ensure zero settling over time.
- The Inlay Technique: Lay your pavers with 1/4 inch gaps. Fill these gaps with polymeric sand, which hardens when wet, preventing weed growth and maintaining that “high-end” clean look.
- Specimen Planting: Place structural plants at the corners of the patio. Use uplighting on these plants to create depth and drama when the sun goes down.
- Surface Finishing: Polish the fire pit rim with a stone sealer to give it a slight sheen that reflects the flames, adding a layer of visual depth and protection.
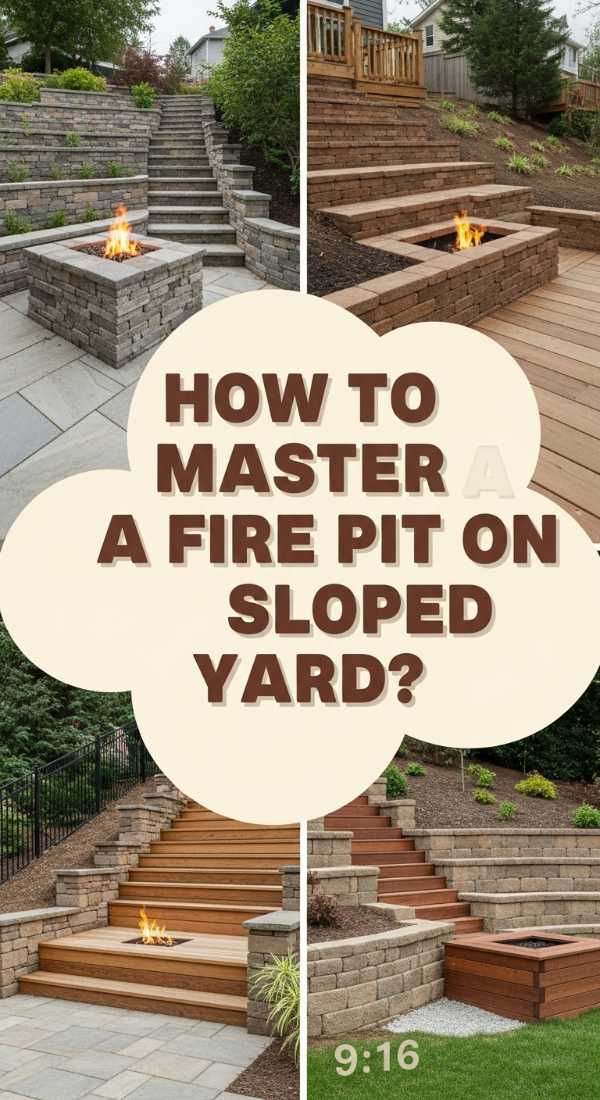
How to Master a Fire Pit on Sloped Yard for Level Relaxation
Why we love this
There is a hidden architectural beauty in a terraced fire pit area. It feels like a secret mountain retreat, nestled into the earth rather than sitting on top of it. The sensation of being slightly “sunken” on one side provides a natural sense of security and intimacy. The aroma of damp earth and moss from the retaining walls mixes with the woodsmoke to create a rugged, forest-like experience. It’s a masterclass in turning a landscape challenge into a stunning multi-dimensional focal point that invites you to climb up and wind down.
Essential Elements:
- Semi-circular retaining wall
- Built-in drainage pipes (French drain style)
- Natural stone steps
- Heavy-duty wall caps for extra seating
- Erosion control groundcover
How to make it
- The Cut and Fill: Dig into the slope to create a flat “shelf.” Use the dirt you removed to level out the lower side of the circle, effectively creating a balanced terrace.
- Retaining Wall Foundation: Dig a trench 12 inches deep at the back of the cut. Fill with 6 inches of road base. This wall is the “skeleton” that holds back the weight of the hill.
- Drainage Management: Place a perforated pipe behind the first layer of wall blocks, covered in filter fabric and gravel. This prevents water pressure from “cooking” your wall and causing it to burst.
- Tiered Access: Install at least three wide stone steps leading down into the pit area. Ensure each step has a slight 1% pitch forward to shed rainwater.
- The Cap Finish: Use smooth, flat flagstones to cap the retaining wall. This creates a secondary seating ledge that is perfect for those who want to stay a bit further from the heat.
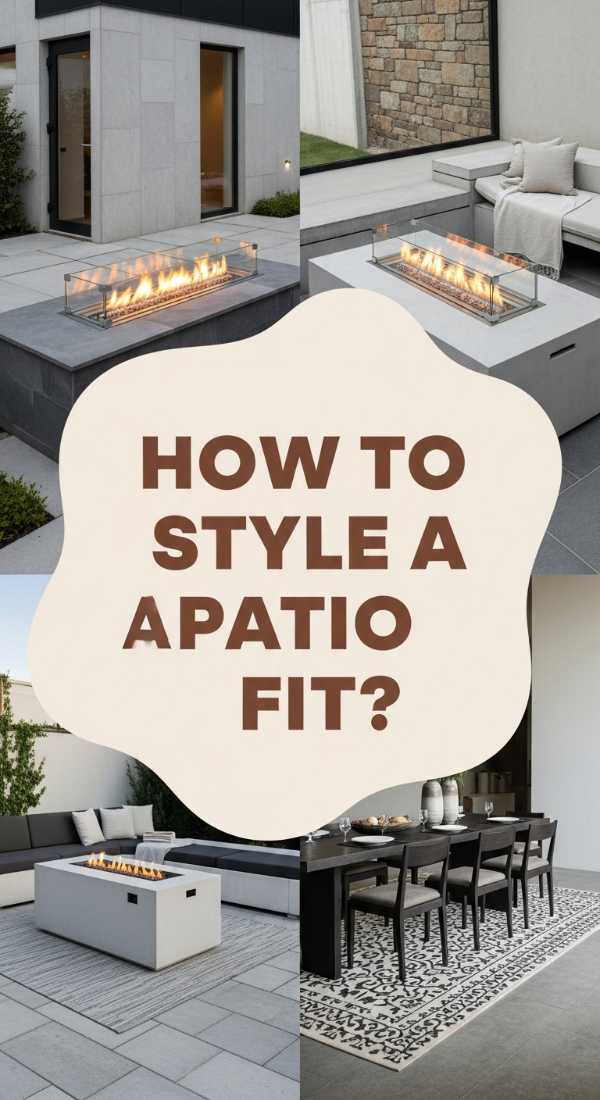
How to Style a Patio Fire Pit for Seamless Entertaining
Why we love this
This design is the ultimate host’s dream, where the transition from the indoor kitchen to the outdoor flame is fluid and effortless. The air is filled with the mingled scents of grilled appetizers and the clean burn of a gas fire. Everything feels within reach—the texture of a smooth granite countertop nearby and the rhythmic clink of ice in glasses. It’s an environment built for movement, where guests can drift from the dining table to the fire pit without breaking the conversation, all while bathed in a consistent, flattering amber light.
Essential Elements:
- Propane or Natural Gas fire table
- Integrated bar seating or nearby buffet table
- Matching patio furniture set
- Outdoor speakers or sound system
- All-weather storage for cushions
How to make it
- Traffic Flow Mapping: Ensure there is a minimum 4-foot walkway between the fire pit and other patio features. This “cool-down” space prevents congestion during busy parties.
- Gas Integration: If using a permanent gas line, have it roughed in before the patio stones are laid. This hides the “veins” of the system for a cleaner aesthetic.
- Coordinated Sourcing: Choose a fire table that matches the height of your existing coffee table or dining set. This creates visual continuity that makes the space feel like a professional “room.”
- Heat Deflection: If the patio is covered, ensure a minimum 10-foot ceiling height and use a heat deflector on the fire pit to protect the overhead structure.
- The Serving Station: Position a rolling bar cart or a stationary sideboard nearby. Stock it with fire-safe glassware and prep items to minimize trips back inside the house.
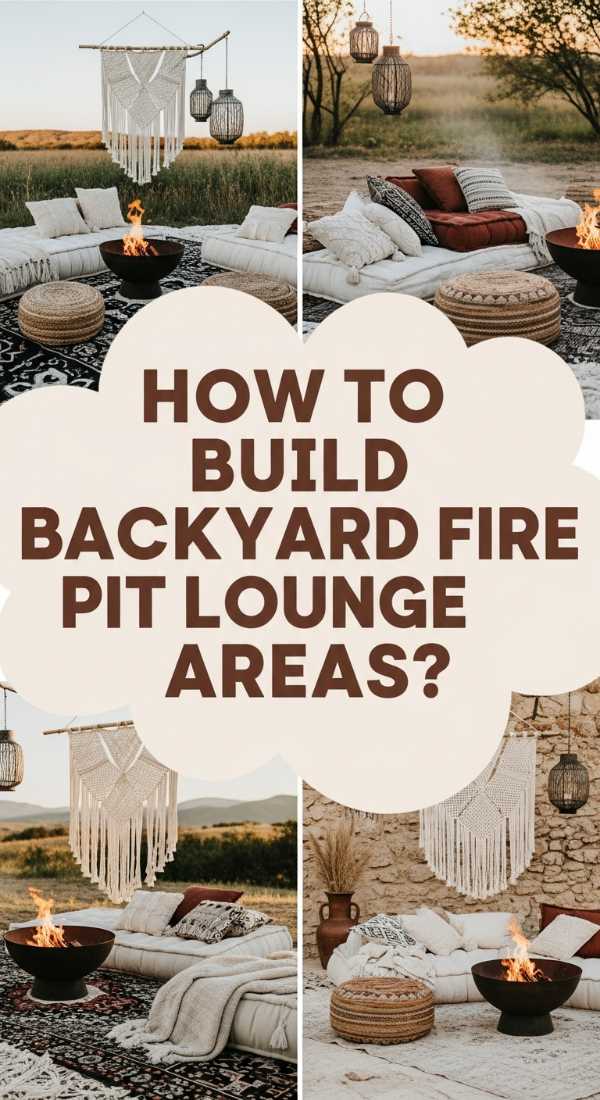
How to Build Backyard Fire Pit Ideas Lounge Areas for Ultimate Zen
Why we love this
Entering this space feels like an immediate exhale. The design uses minimalism to quiet the chatter of the day, focusing on the simple, mesmerizing movement of fire against a backdrop of smooth, pale river stones and dark, matte metals. The sound of a small trickling water feature nearby balances the fire’s crackle, creating a sensory yin-yang. The texture is all about clean, cool surfaces—bamboo, polished concrete, and smooth pebbles—that invite you to kick off your shoes and reconnect with the present moment in total stillness.
Essential Elements:
- Low-profile concrete fire pit
- Bamboo or privacy screening
- White or gray river rocks
- Minimalist wooden benches
- Small fountain or bubbler nearby
How to make it
- Defining the Void: Create a square or rectangular footprint. Minimalism thrives on geometric precision. Use stakes and string to ensure every corner is exactly 90 degrees.
- The Texture Base: Lay a weed barrier and cover with 3 inches of white Mexican beach pebbles. This “blank canvas” reflects the firelight and provides a clean, bright aesthetic.
- Centralizing the Flame: Place a square concrete fire unit in the exact center. Use a low-profile model (12-15 inches high) to keep the line of sight low and grounded.
- Screening for Privacy: Install tall bamboo fencing or horizontal slat wood screens on the windward side. This acts as a “flavor seal,” keeping the tranquility in and the neighborhood noise out.
- Minimal Seating: Use simple, backless cedar benches. Sand them to a 220-grit finish so they feel like silk to the touch, and leave them unpainted to silver naturally over time.
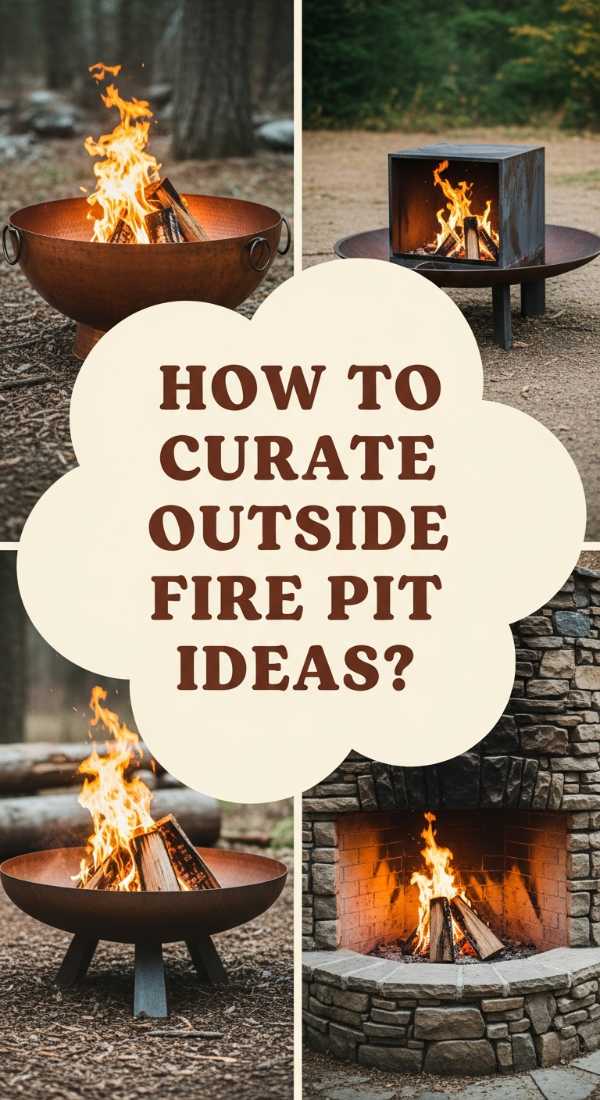
How to Curate Outside Fire Pit Ideas for an Inviting Sanctuary
Why we love this
This is the design equivalent of a warm hug. It’s a sanctuary hidden away from the prying eyes of the world, where the boundaries are defined by lush greenery and soft, dappled light. The smell of blooming jasmine or honeysuckle trails through the air, mixing with the woody depth of the fire. You can feel the privacy—the way the high hedges dampen the sound of the street and the way the soft grass feels underfoot. It’s a secret garden where the fire pit is the heart, pumping warmth and light into a secluded paradise.
Essential Elements:
- High-back wicker or rattan chairs
- Living walls or tall evergreen hedges (like Arborvitae)
- Solar-powered path lights
- Hanging plants or floral baskets
- Natural wood fire pit table
How to make it
- Enclosure Strategy: Plant tall evergreens in a horseshoe shape around the fire area. This creates a “natural oven” effect that traps heat and provides 365-day privacy.
- The Pathway: Create a winding path of irregular flagstones leading to the pit. This intentional journey makes the arrival at the fire feel like a discovery.
- Softening the Edges: Plant low-growing thyme or moss between the path stones. When stepped on, these release a subtle aroma that enhances the “sanctuary” vibe.
- Hanging Ambiance: If you have overhanging branches, hang glass orbs with tea lights. This adds a vertical dimension to the glow, making the space feel fully enveloped in light.
- Cushion Curation: Use overstuffed, deep-seated cushions in earthy tones like sage or terracotta to blend the furniture into the surrounding flora.
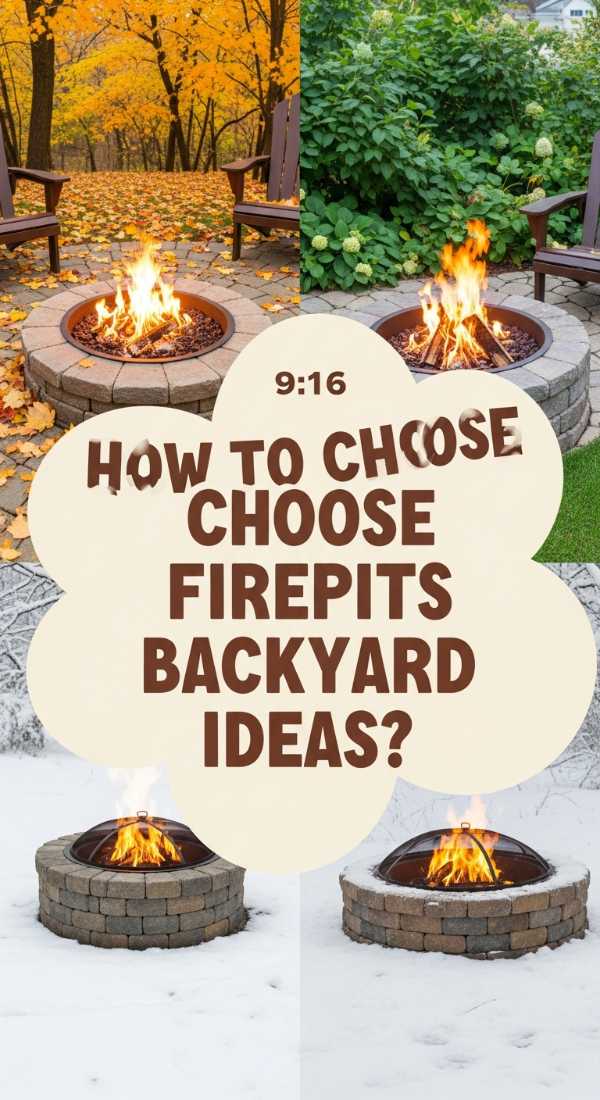
How to Choose Firepits Backyard Ideas for Every Season
Why we love this
A multi-season fire pit is the ultimate gift to your future self. In the autumn, it’s a theater for changing leaves and crisp air; in the winter, it’s a fierce defiance of the frost, radiating a dry, intense heat that turns a snowy night into a cozy adventure. The versatility is the draw—the ability to swap out lightweight linen throws for heavy wool rugs. The sensory experience evolves, from the bright, clear air of a spring evening to the heavy, woodsmoke-filled nights of December. It ensures your backyard is never “closed for the season.”
Essential Elements:
- Dual-fuel fire pits (gas with wood backup)
- All-weather furniture covers
- Interchangeable decor (seasonal pillows/plants)
- Portable wind guards
- High-output BTU burners
How to make it
- Component Selection: Choose a stainless steel or marine-grade aluminum fire pit. These materials won’t rust or “break down” regardless of snow or rain exposure.
- The Heat Control: Install a fire pit with adjustable flame heights. High flames for winter warmth; low, simmering embers for summer ambiance.
- Storage Integration: Build a weatherproof bench with a hollow interior. This is where you “store your ingredients”—blankets in summer, snow shovels in winter.
- Seasonal Planting: Surround the area with pots that can be swapped. Evergreens for winter structure, and bright geraniums for summer heat.
- Covering Up: Use a custom-fit, heavy-duty vinyl cover when the pit is not in use. This keeps the burner clean and the wood dry, ensuring a “perfect start” every time you light it.
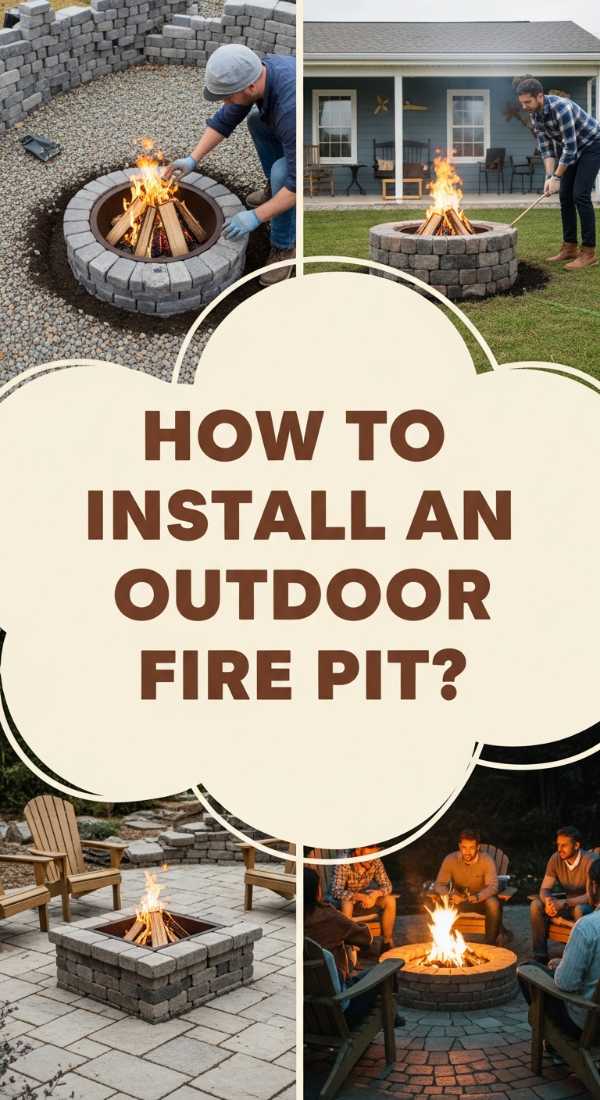
How to Install an Outdoor Fire Pit for the Perfect Gathering Spot
[IMAGE_10]
Why we love this
This is the classic, quintessential gathering spot that feels like the community hub of the home. It’s designed for the tactile joy of roasting marshmallows—the sticky sweetness in the air, the golden-brown char of the sugar, and the shared task of finding the perfect stick. There’s a raw, energetic feeling to a well-installed pit; it feels solid, safe, and ready for a crowd. The scale is generous, the air is full of chatter, and the warmth is shared equally by everyone sitting in the circle, creating a collective memory that lingers long after the fire dies down.
Essential Elements:
- Large 36-48 inch diameter fire pit
- Circular paver surround (at least 12 feet total)
- Heavy-duty spark screen
- Permanent stone bench seating
- Dedicated wood storage rack
How to make it
- The Safety Perimeter: Ensure the pit is at least 15-20 feet away from any structures or low-hanging trees. This is the first rule of “safe prep” for any gathering.
- Sub-Floor Compaction: Dig out the area and lay 4 inches of crushed stone. Use a tamper until the ground is as hard as concrete. This prevents the heavy stone blocks from sinking over time.
- The Ring Assembly: Place the fire ring and build the stone walls around it, leaving 1-2 small gaps (weep holes) at the bottom. These allow oxygen to feed the fire from below—the secret to a smoke-free burn.
- The Seating Circle: Install a circular paver patio around the pit. Use a “soldier course” (stones standing on end) at the edge to lock everything in place and provide a professional finish.
- Finishing the Hearth: Fill the bottom of the pit with 2 inches of lava rock. This protects the base and helps distribute heat evenly, ensuring every guest stays warm from their toes to their nose.
The Warmth That Lingers
At the end of the day, a fire pit is more than just a landscape feature—it’s an investment in your well-being and your relationships. Whether you choose a sleek, high-end gas table or a rugged, hand-built stone ring, you’re creating a space where stories are told, stars are watched, and life slows down just enough to be savored. So, pick the design that speaks to your soul, gather your favorite people, and let the magic begin.