
Whimsy in the Weeds: How to Bring Garden Magic to Every Corner of Your Home
Do you remember that feeling as a child, crouching low in the tall grass and being absolutely certain that if you looked long enough, you’d spot a tiny door at the base of an old oak tree? There is a specific kind of magic that lives in the garden—a blend of damp earth, sun-dappled leaves, and the quiet promise of growth. As we grow older, we often trade that sense of wonder for practicality, but I believe our homes are meant to be more than just functional shelters. They should be sanctuaries of story and soul.
Bringing the garden inside, or elevating our outdoor spaces with whimsical touches, isn’t just about aesthetics; it’s about creating a lifestyle that celebrates the small, the magical, and the organic. Whether you have a sprawling backyard or a sunny windowsill in a city apartment, you can weave a thread of enchantment through your living space. Let’s roll up our sleeves and rediscover the joy of playing in the dirt, crafting miniature worlds, and making our homes feel like a living, breathing fairy tale.
How to Build Custom Planter Boxes for Instant Curb Appeal
Why we love this
There is nothing quite like the scent of freshly cut cedar and the tactile satisfaction of smooth, raw wood under your fingertips. Custom planter boxes serve as the architectural jewelry of your home’s exterior, framing your favorite blooms in a way that feels intentional and grounded. When you walk up your driveway, the sight of vibrant petunias spilling over hand-built edges offers a warm, tactile greeting that says, ‘Someone loves this place.’ It’s the perfect blend of rugged craftsmanship and delicate botanical beauty.
Essential Elements:
- Pressure-treated lumber or cedar planks
- Galvanized wood screws
- Exterior-grade wood glue
- Power drill and miter saw
- Landscape fabric for lining
- Coarse gravel for drainage
- High-quality potting mix
How to make it
- Measure your space carefully and cut four side panels to your desired length using a miter saw; for a classic look, use 1×6 cedar planks.
- Apply a thin, even bead of exterior wood glue to the butt joints before drilling pilot holes to prevent the wood from splitting.
- Secure the corners with two-inch galvanized screws, ensuring the box is perfectly square by measuring diagonally from corner to corner.
- Cut a bottom panel to fit inside the frame and drill half-inch drainage holes every six inches to prevent root rot.
- Attach small wooden blocks or ‘feet’ to the bottom to elevate the box, allowing air to circulate and water to drain freely away from your porch surface.
- Staple landscape fabric to the interior walls to protect the wood from direct soil contact, then add a two-inch layer of gravel before filling with soil.
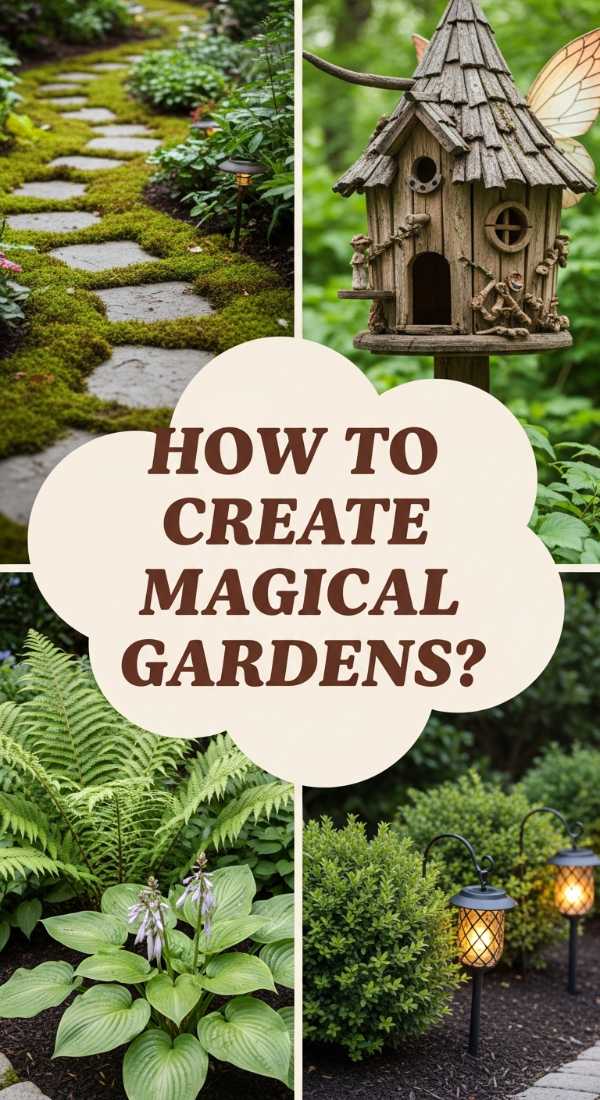
How to Design Large Fairy Garden Ideas for a Magical Backyard Escape

Why we love this
Stepping into a large-scale fairy garden feels like entering a portal where the rules of the ordinary world no longer apply. The lush, damp scent of moss under a shady canopy and the way sunlight catches on miniature glass lanterns creates an atmosphere of pure tranquility. It’s an immersive experience where you can lose yourself in the details—a tiny pebble path leading to a hollow log or a miniature bridge arching over a dry creek bed of blue sea glass. It turns a simple backyard corner into a sprawling epic of the imagination.
Essential Elements:
- A designated shaded garden plot
- Large weathered stones or boulders
- Assorted mosses (Sheet moss, Irish moss)
- Miniature architectural structures (Hollow logs, birdhouses)
- Groundcover plants like creeping thyme
- Low-voltage fairy lights or solar lanterns
- Peat moss and compost blend
How to make it
- Select a location under a tree or near a shrub where the soil stays naturally cool and damp, which is the ideal habitat for moss and shade-loving miniatures.
- Clear the area of weeds and debris, then muffle the ground with a rich mixture of compost and peat moss to create a soft, undulating topography.
- Place your largest elements first—the ‘anchor’ pieces like a stump or a large rock—to establish the scale of your miniature kingdom.
- Carve out winding pathways using small flat river stones, tucking creeping thyme between the cracks to create the illusion of ancient, weathered trails.
- Plant various textures of greenery around your structures, using taller ferns in the back to act as ‘forest trees’ and flat mosses in the foreground for ‘meadows.’
- Install solar-powered fairy lights along the path, ensuring the sensors are exposed to enough light during the day to trigger a soft, magical glow at dusk.
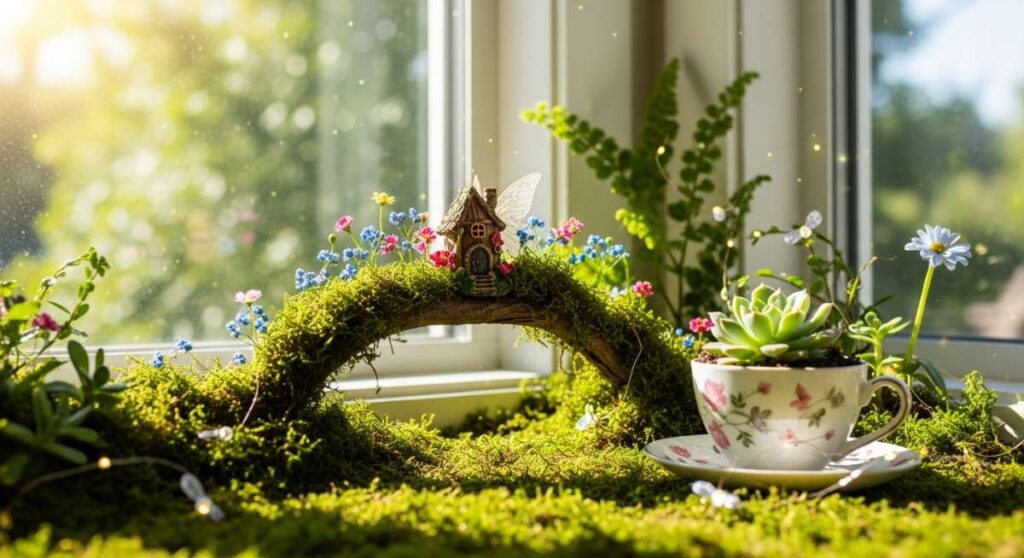
How to Craft DIY Fairy Garden Ideas for a Whimsical Home
Why we love this
Bringing the whimsy indoors allows you to enjoy a slice of nature even when the weather turns grey. There’s something incredibly soothing about the earthy aroma of damp potting soil inside a cozy living room. These indoor gardens act as living sculptures, catching the eye with their intricate details and soft, velvet-textured leaves. They invite guests to lean in close, sparking conversation and a shared sense of wonder that brightens the entire mood of a room with organic charm and playful artistry.
Essential Elements:
- Wide-mouthed ceramic or wooden bowl
- Activated charcoal (for drainage health)
- Miniature succulents or air plants
- Small decorative pebbles
- Handcrafted twig furniture
- Fine-mist spray bottle
- Decorative sand or colored gravel
How to make it
- Clean your container thoroughly and add a one-inch layer of activated charcoal to the bottom to filter standing water and prevent odors.
- Layer potting soil specifically designed for indoor plants, tamping it down lightly to remove large air pockets while keeping it fluffy enough for root growth.
- Choose a focal point, such as a tiny ceramic cottage or a miniature gazebo, and nestle it slightly off-center for a more natural, balanced composition.
- Arrange small-scale plants like Pilea or miniature ferns around the focal point, ensuring their leaves don’t touch the sides of the container to prevent rot.
- Create a ‘stream’ or ‘path’ using colored sand or fine pebbles, using a small paintbrush to refine the edges and keep the lines crisp.
- Add the final whimsical touches, like a tiny ladder made from glued twigs or a ‘pond’ made from a small blue marble, and lightly mist the greenery to settle the dust.
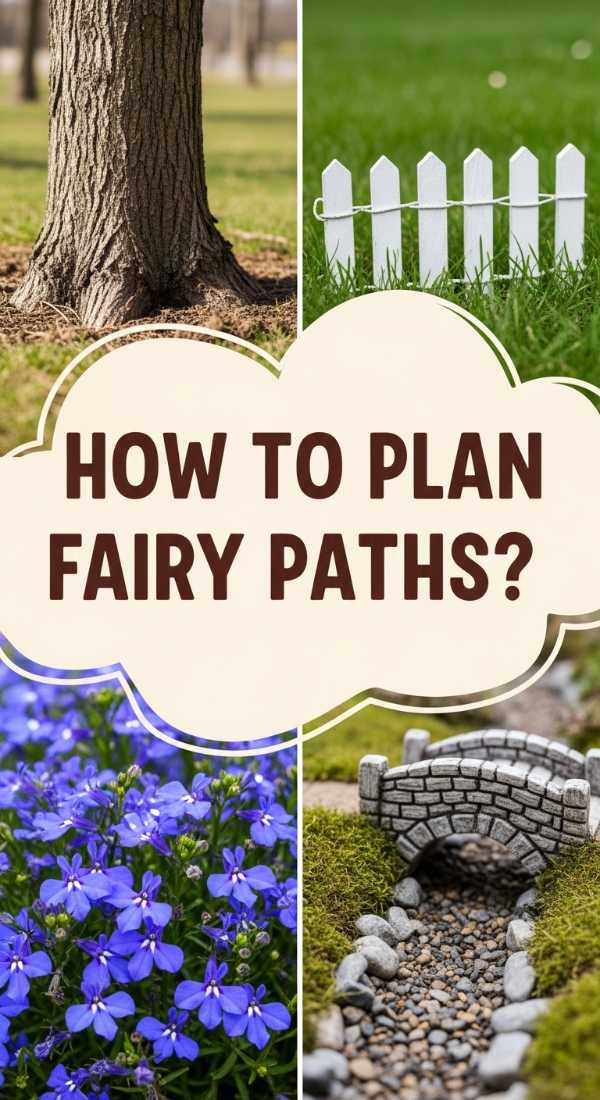
How to Arrange Outdoor Fairy Garden DIY for an Enchanted Pathway
Why we love this
An enchanted pathway transforms a mundane walk through the yard into a journey of discovery. The soft crunch of gravel underfoot paired with the sight of tiny ‘villages’ tucked along the flower borders creates a sensory delight that appeals to the inner child in everyone. It encourages you to slow down, look down, and appreciate the micro-beauty of the garden. The contrast between the rugged garden path and the delicate, purposeful placement of tiny accessories creates a narrative that feels both ancient and alive.
Essential Elements:
- Flagstones or large pavers
- Fine pea gravel or crushed shells
- Miniature ‘Street’ signs or lampposts
- Hardy low-growing succulents
- Solar-powered path markers
- Weatherproof adhesive (for DIY structures)
- Sturdy garden trowel
How to make it
- Layout your main walkway using flagstones, leaving two-inch gaps between them to be filled with tactile materials like pea gravel or moss.
- Dig small ‘alcoves’ into the soil along the edge of the path where the fairy dwellings will sit, ensuring the ground is level so the accessories don’t tip.
- Line the path edges with low-growing plants like Sedum ‘Stonecrop’ to soften the hard lines of the stones and provide a lush, green border.
- Place miniature lampposts at intervals along the path, securing them into the soil with long floral pins or small stakes to withstand wind.
- Use weatherproof adhesive to glue small pebbles onto the roofs of birdhouses to give them an organic, ‘hidden’ look that blends with the landscape.
- Backfill the gaps between your main pavers with your chosen gravel, packing it down firmly with a rubber mallet so it creates a stable, walkable surface.
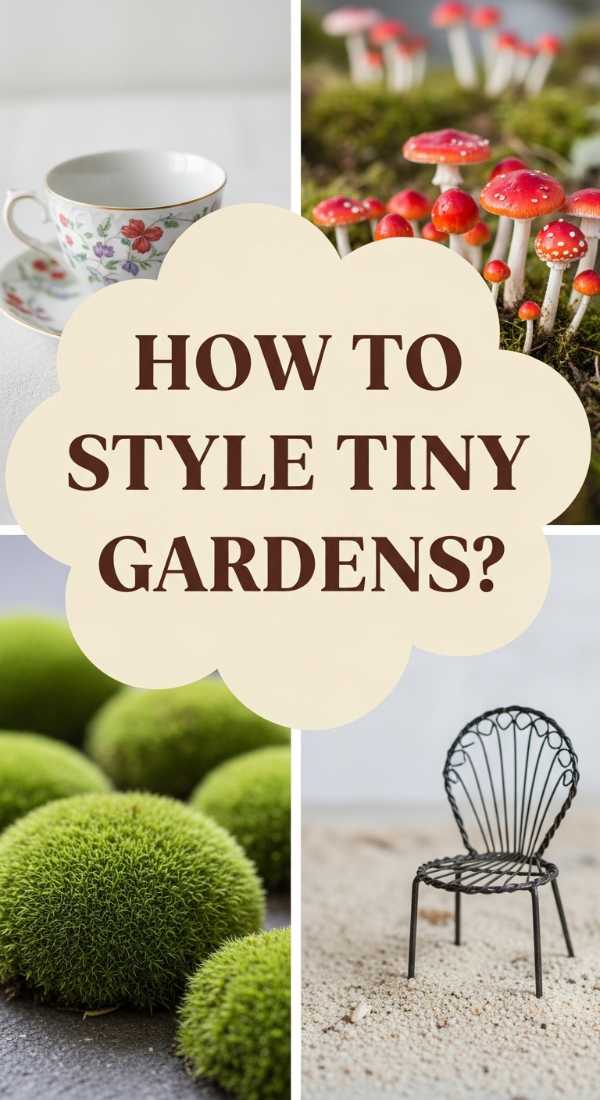
How to Style Miniature Fairy Gardens for a Tiny World of Wonder

Why we love this
The beauty of miniature gardens lies in the absolute precision of the scale—it is a tiny world of wonder held within the palms of your hands. The fine texture of miniature mosses, the microscopic detail on a tiny teapot, and the way a single petal can look like a giant umbrella for a fairy are all part of the charm. This style of gardening is a meditative practice, requiring a gentle touch and a keen eye, resulting in a display that feels like a precious heirloom frozen in time.
Essential Elements:
- Shallow terracotta or porcelain dish
- Dwarf plant varieties (like Boxwood basil)
- Microminiature accessories (1:12 scale)
- Fine-grain sand or silt
- Tweezers for precise placement
- Polished river stones
- Small moss clumps
How to make it
- Select a very shallow dish and fill it with a mixture of fine sand and organic potting soil to allow for delicate root systems of dwarf plants.
- Use your tweezers to place individual clumps of moss, pressing them firmly into the soil to ensure they make good contact for moisture absorption.
- Plant a ‘centerpiece’ tree using a woody-stemmed herb like rosemary or boxwood basil, pruning it carefully to look like a gnarled, ancient oak.
- Create a tiny patio area using flat, polished stones, using the tweezers to arrange them like a mosaic so they sit perfectly flush with one another.
- Incorporate ‘hidden’ details that only someone looking closely would see, such as a tiny pair of boots by a door or a microscopic book on a bench.
- Water using a medicine dropper rather than a watering can to avoid disturbing the delicate sand or washing away the tiny accessories.
How to Curate Lush Plants for a Zen Indoor Oasis
Why we love this
Curating a Zen indoor oasis is about more than just decoration; it’s about creating a breathing space that purifies the air and calms the mind. The deep, waxy greens of a Monstera or the soft, feathery fronds of a Parlor Palm create a visual landscape that feels cool and refreshing. There is a specific acoustic quality to a room filled with plants—they dampen noise and add a soft, rustling sound that makes your home feel like a secluded retreat from the buzzing world outside.
Essential Elements:
- High-oxygen plants (Snake plant, Peace Lily)
- Natural fiber pots (Clay, seagrass, ceramic)
- Humidifier or pebble trays
- Organic liquid fertilizer
- Decorative mulch or river rocks
- Full-spectrum grow lights (if natural light is low)
- A comfortable chair or meditation cushion
How to make it
- Group your plants by their humidity and light requirements; placing high-moisture plants together creates a ‘microclimate’ that keeps them all healthier.
- Choose pots with drainage holes, but nestle them inside decorative ‘cache pots’ to maintain a clean, high-end look while protecting your floors.
- Top the soil with a layer of smooth river rocks or decorative moss to retain moisture and provide a polished, Zen-like aesthetic to the pots.
- Set up a consistent watering schedule, checking the soil depth with your finger; if the top inch is dry, it’s usually time for a thorough soak.
- Incorporate a small water fountain nearby to increase ambient humidity and provide the soothing sound of trickling water, which complements the lush greenery.
- Rotate your plants every week by 90 degrees to ensure they grow evenly and don’t lean too heavily toward the light source.
How to Construct a Mini Fairy Garden for Interior Accents

Why we love this
Interior accents like mini fairy gardens are the ultimate ‘surprise and delight’ elements for your decor. Tucked onto a bookshelf between leather-bound volumes or placed as a centerpiece on a dining table, they invite a moment of pause and a smile. We love the way they break up the hard lines of furniture with soft, organic shapes and vibrant pops of green. They act as living art pieces that change and grow over time, offering a dynamic alternative to static home accessories.
Essential Elements:
- Glass terrariums or cloches
- Layered substrate (Rock, charcoal, soil)
- Fittonia (Nerve plant) or Ferns
- Small decorative crystals or quartz
- Miniature resin animals or figurines
- Long-handled tools for narrow openings
- Distilled water
How to make it
- Clean the glass of your terrarium inside and out using a vinegar-water solution to ensure maximum light penetration and clarity.
- Create clear visible layers of white sand, black charcoal, and brown soil to add an educational and aesthetic geological look to the base.
- Choose plants with high contrast, like the white-veined Fittonia, to ensure the greenery pops against the darker soil and decorative elements.
- Use a long spoon or specialized terrarium tongs to nestle your plants into the soil, making sure to tap the soil down around the roots firmly.
- Place a few sparkling crystals or pieces of sea glass near the plants to catch the light and add a touch of ‘magical energy’ to the display.
- Clean the inside glass of any stray soil using a soft brush or a damp paper towel attached to a stick before sealing or placing the lid.
How to Master Fairy Garden DIY for Family Bonding Moments

Why we love this
There is nothing quite like the shared laughter of a family project where everyone’s hands are covered in dirt. This activity bridges the gap between generations, allowing kids to lead with their imagination while adults provide the structural know-how. The smell of cedar, the tickle of moss, and the hunt for the ‘perfect’ pebble create memories that are rooted in the earth. It’s a chance to step away from screens and build something together that lives, grows, and tells a story of collaboration.
Essential Elements:
- A large shared container or garden bed
- Kids’ gardening gloves and tools
- A ‘treasure box’ of found items (acorns, shells, buttons)
- Quick-growing seeds (like Radishes or Alyssum)
- Acrylic paints and small brushes
- Waterproof sealant for painted rocks
- Shared snacks and a playlist of folk music
How to make it
- Start by going on a ‘nature hunt’ in the backyard or a local park to collect natural building materials like interesting twigs, smooth stones, and fallen bark.
- Let each family member pick a ‘theme’ for a different corner of the garden—perhaps one is a fairy beach and another is a gnome forest.
- Paint small flat stones to look like ladybugs or tiny welcome mats, allowing them to dry completely before applying a waterproof clear coat.
- Work together to plant fast-growing seeds that provide instant gratification for younger children, teaching them how to gently press seeds into the soil.
- Designate one person as the ‘Master Architect’ to help glue more complex structures like twig fences or stone walls while the kids arrange the foliage.
- Create a ‘garden ritual’ where the family gathers once a week to water the garden, pull any tiny weeds, and move the fairies to new ‘adventures.’
How to Refresh Window Planter Boxes for a Vibrant Street View

Why we love this
Window boxes are like a smile for your house. They provide a burst of color and fragrance that drifts through open windows, filling your home with the scent of jasmine or lavender. From the street, they add layers and life to your architecture, softening the edges of the home and making it look lived-in and loved. We love the seasonal versatility of window boxes—the ability to swap out spring tulips for summer petunias and autumn kales keeps your home’s ‘face’ fresh and exciting all year long.
Essential Elements:
- Sturdy window box brackets
- Lightweight potting mix (to reduce weight)
- Thriller plants (tall spikes or snapdragons)
- Filler plants (mounding petunias or geraniums)
- Spiller plants (Sweet potato vine or ivy)
- Slow-release fertilizer granules
- Water-soluble bloom booster
How to make it
- Install heavy-duty brackets into the wall studs or window casing, ensuring they are perfectly level and can support the weight of wet soil and plants.
- Fill the boxes with a lightweight potting mix containing perlite or vermiculite to ensure the window box doesn’t become too heavy for the mounting hardware.
- Use the ‘Thriller, Filler, Spiller’ method: place your tallest plant in the center-back, mounding flowers in the middle, and trailing vines along the front edge.
- Pack the plants in more tightly than you would in the ground; this creates an immediate ‘lush’ look that fills the window frame perfectly.
- Incorporate some fragrant herbs like rosemary or lemon thyme near the window opening so their scent can be caught by the breeze and carried indoors.
- Water every morning during the heat of summer, as window boxes dry out much faster than ground soil due to the increased air circulation around the container.
How to Personalize Fairy Garden Ideas for a Unique Garden Statement
[IMAGE_10]
Why we love this
Personalization is where a garden becomes a home. Using non-traditional containers—like a vintage leather boot, a rusted wheelbarrow, or an old porcelain sink—adds a layer of wit and history to your whimsy. These unique statements tell a story of your personality and your ability to see beauty in the discarded. It’s about taking the ‘rules’ of fairy gardening and throwing them out the window in favor of something that feels authentically *you*, turning your garden into a curated gallery of living art.
Essential Elements:
- Unique upcycled containers (Old boots, teapots, suitcases)
- Drill with masonry or metal bits (for drainage)
- Personal mementos (Old jewelry, ceramic shards)
- Plants that match the container’s vibe (Cactus for boots, delicate herbs for teacups)
- Heavy-duty clear epoxy
- Multi-colored moss or lichen
- Artist’s imagination
How to make it
- Select a container that has character but is sturdy enough to hold soil; if using metal or ceramic, drill at least three drainage holes in the bottom.
- If the container is deep (like a boot), fill the bottom half with empty plastic water bottles or packing peanuts to keep the overall weight manageable.
- Choose a theme that matches the history of the object—for example, a vintage teapot might house a ‘high tea’ fairy scene with lace-like ferns.
- Incorporate personal items like a broken piece of a favorite childhood plate to create a ‘mosaic’ path or a ’tiled’ floor for a miniature patio.
- Use epoxy to secure small elements that might shift, like gluing a tiny bird to the handle of the container to ensure the scene stays intact during movement.
- Finish the look by tucking colorful lichen into the gaps around the edges, which adds a pop of unnatural-looking color that enhances the whimsical, ‘otherworldly’ vibe.
Conclusion
Bringing garden magic into your home is a journey of reclaiming your sense of wonder. Whether you start with a single window box or a sprawling backyard fairy kingdom, the goal is the same: to create a space that feels alive, intentional, and just a little bit enchanted. As you nurture these small worlds, you’ll find that they nurture you in return, offering a quiet place for your mind to rest and your imagination to roam. So, grab your trowel, find a little patch of dirt, and start building your own slice of whimsy today.