

Unlock Your Best Nails Yet: The 2026 Ultimate Guide & Step-by-Step Tutorials
Hey there, my loves. Welcome back to our cozy little corner of the internet. I want you to take a deep breath, feel the warmth around you, and imagine your hands—the ones that hold your coffee, type those emails, and touch the faces of the people you love—transformed into tiny canvases of pure joy. As we step into 2026, I’ve been feeling this beautiful shift toward self-expression that feels like a cloud-soft embrace for the soul.
Nails are more than just a beauty routine; they’re a ritual of self-love. This year, it’s all about textures that catch the light and colors that tell your story before you even say a word. I’ve spent weeks dreaming up this guide to help you find that perfect sparkle. Whether you’re celebrating a milestone or just want to feel a little more ‘you’ on a Tuesday morning, I’m right here with you, holding your hand through every stroke and polish.
Prepare your graduation nails in 5 easy steps

Why to love this Design:
This look is all about that bittersweet magic of moving forward. It’s sophisticated enough for the ceremony but has just enough shimmer to dance the night away. It’s a celebration of every late night and every dream realized.
Essential Elements:
- Sheer milky white base
- Micro-fine gold glitter
- High-gloss top coat
- Precision file for an almond shape
How to Prepare:
- Shape your nails into a soft almond to elongate the fingers.
- Apply a thin layer of milky base to hide any imperfections.
- Sweep micro-glitter only on the tips for a ‘graduated’ shimmer effect.
- Cure under your LED lamp for a full 60 seconds.
- Seal with a non-wipe top coat for maximum durability during handshakes.
Budget Range
- Essie ‘Marshmallow’ Polish – $10
- Holler and Glow Gold Dust – $8
- Sensationail UV Gel Top Coat – $12
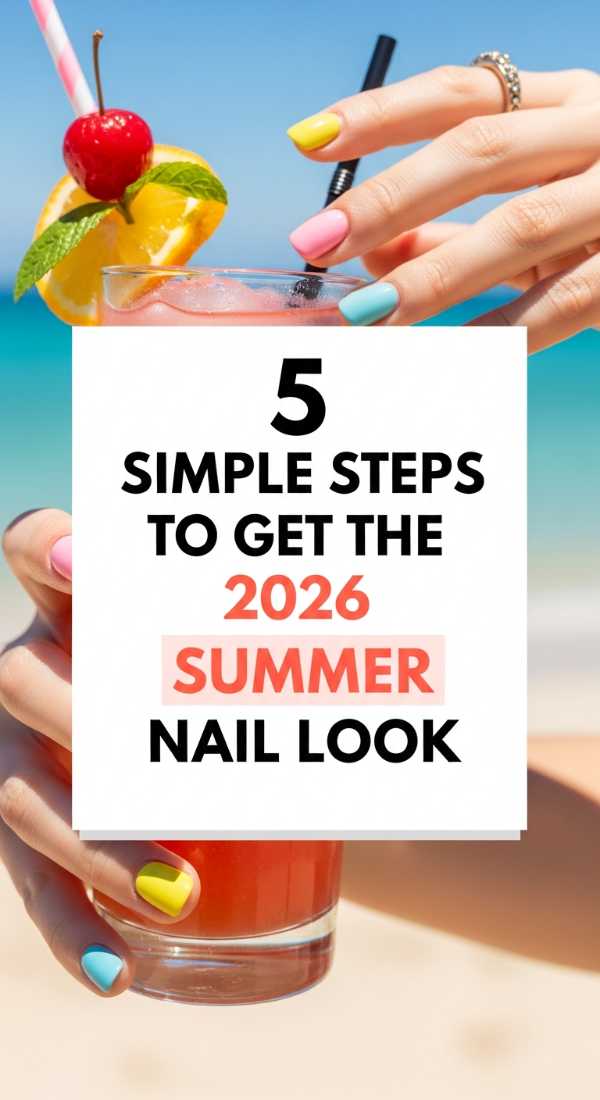
5 simple steps to get the 2026 summer nail look
Why to love this Design:
2026 summer is all about ‘Jelly-Pop’ aesthetics. It’s translucent, juicy, and looks like a literal sunset trapped on your fingertips. It’s youthful, vibrant, and perfectly matches a chilled glass of lemonade.
Essential Elements:
- Translucent neon polishes
- Hydrating cuticle oil
- Buffing block
- UV-resistant top coat
How to Prepare:
- Buff the nail surface gently to create a smooth, ‘glassy’ canvas.
- Apply one thin layer of clear base to protect the natural nail.
- Layer two coats of jelly polish to build the ‘depth’ without losing transparency.
- Use a clean brush dipped in acetone to crisp up the edges.
- Apply a thick ‘plumping’ top coat to mimic the look of acrylics.
Budget Range
- Cirque Colors Jelly Collection – $14
- Sally Hansen Vitamin E Cuticle Oil – $7
- Seche Vite Dry Fast Top Coat – $9
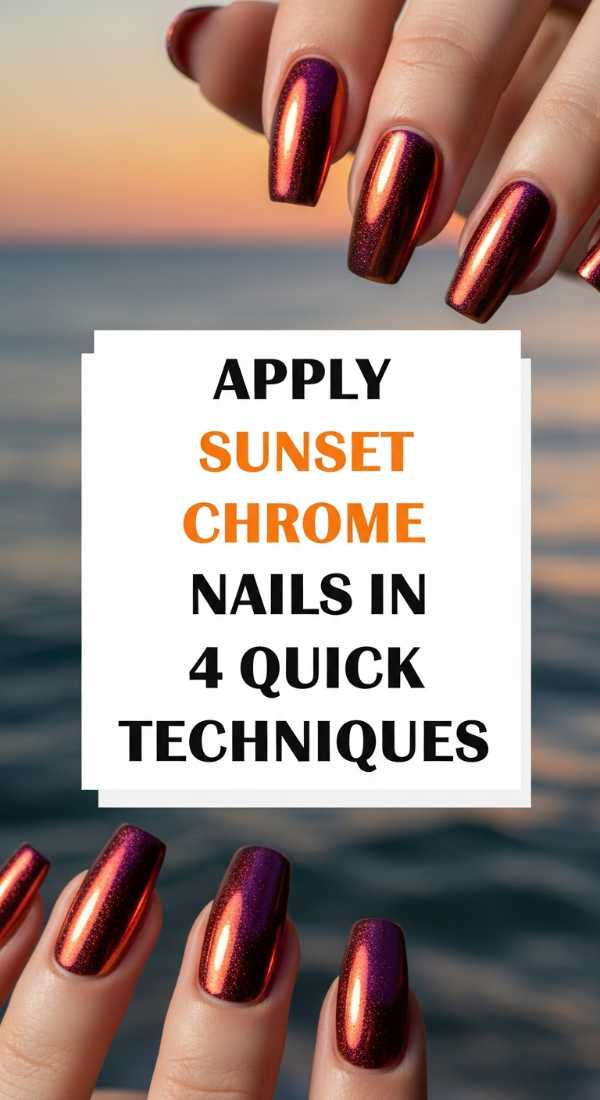
Apply sunset chrome nails in 4 quick techniques
Why to love this Design:
There is nothing quite like the way chrome reflects the golden hour. This design uses warm oranges and pinks to create a metallic sheen that feels futuristic yet deeply organic.
Essential Elements:
- Sunset orange gel base
- Holographic chrome powder
- Sponge applicator
- Silicone tool
How to Prepare:
- Apply your warm base color and cure until it is 90% dry (still slightly tacky).
- Use the sponge to burnish the chrome powder from the center outward.
- Use the silicone tool to buff the powder until it achieves a mirror finish.
- Seal with a dedicated chrome-safe top coat to prevent dulling.
Budget Range
- Artdone Chrome Powder Set – $15
- Beetles Gel Polish in ‘Sunset Glow’ – $8
- Makartt No Wipe Top Coat – $11
Design your May birthday nails in 6 creative ways

Why to love this Design:
May babies, this is your time to bloom! These designs celebrate the Emerald birthstone and the awakening of spring with lush greens and delicate floral accents.
Essential Elements:
- Emerald green cream polish
- Pressed dried flowers
- Gold foil flakes
- Dotting tool
How to Prepare:
- Paint your thumb and pinky in solid deep emerald.
- On the middle nail, place tiny dried flowers into a wet clear coat.
- Create a ‘negative space’ half-moon on the ring finger.
- Add gold foil flecks to the edges of the floral nail.
- Use a dotting tool to create tiny daisy patterns on the index finger.
- Finish all nails with a matte top coat for a modern, velvety feel.
Budget Range
- OPI ‘Stay Off the Lawn!!’ – $11
- Wokoto Dried Flower Kit – $9
- Maniology Gold Foil Flakes – $6
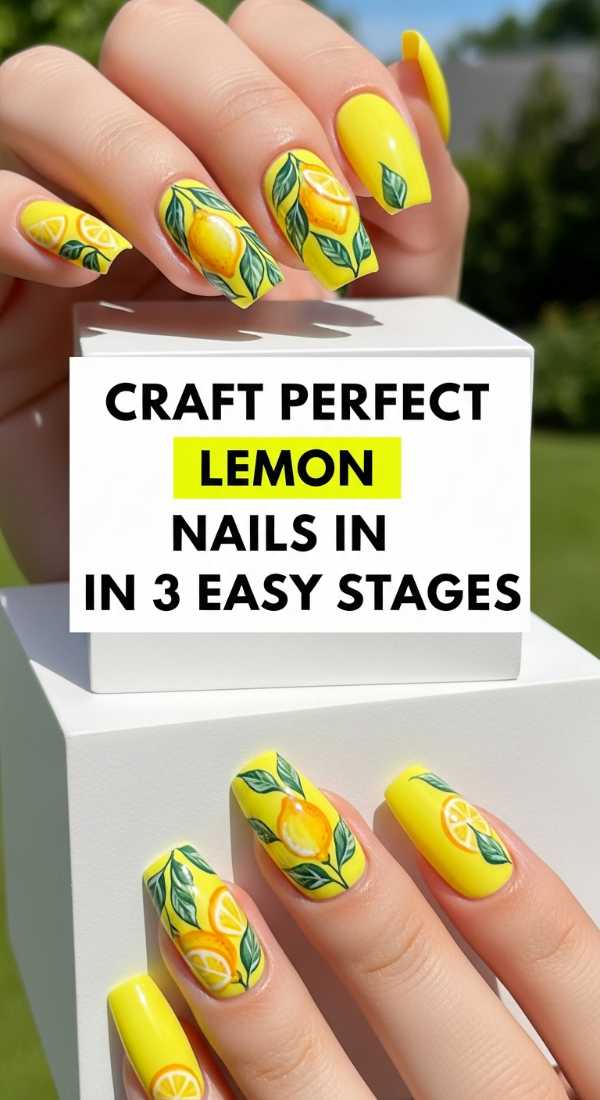
Craft perfect lemon nails in 3 easy stages
Why to love this Design:
Zesty, fresh, and oh-so-cute! Lemon nails are the ultimate ‘clean girl’ twist for 2026. It’s like a breath of fresh air for your hands.
Essential Elements:
- Pastel yellow polish
- White art gel
- Fine liner brush
How to Prepare:
- Apply two coats of creamy pastel yellow as your foundation.
- Use the fine liner brush to draw small white ‘lemon slices’ on the accent nails.
- Add a tiny drop of clear builder gel on the fruit for a ‘dewy’ 3D effect.
Budget Range
- Zoya ‘Darcy’ Yellow – $12
- Saviland Nail Art Liner Set – $13
- Modelones Builder Gel – $9
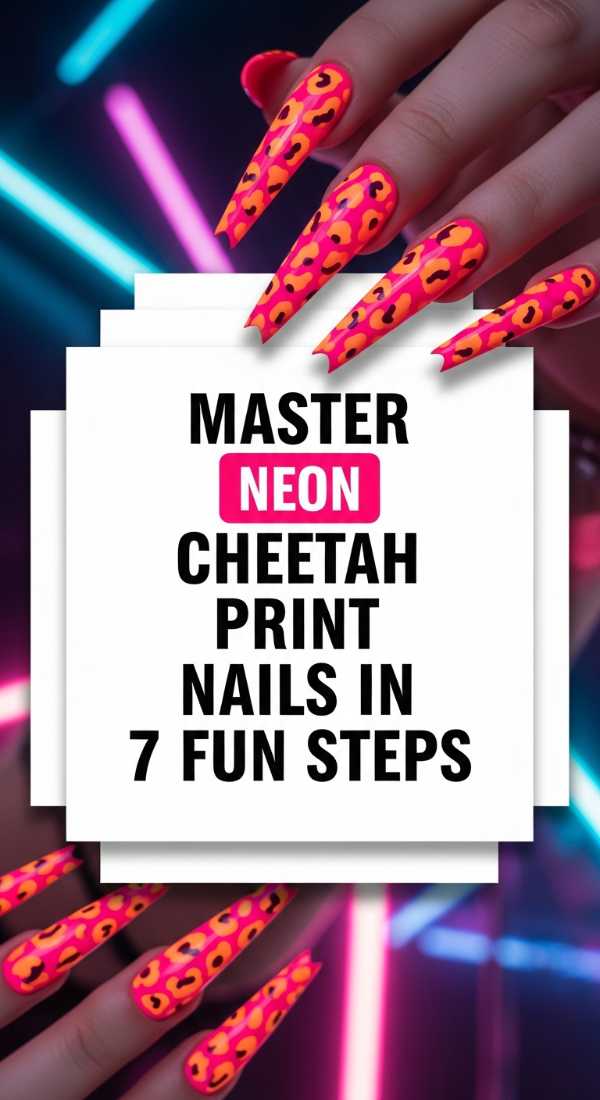
Master neon cheetah print nails in 7 fun steps
Why to love this Design:
Who says neutrals have to be boring? We’re taking the classic animal print and drenching it in 2026 neon vibes. It’s fierce, fun, and totally unapologetic.
Essential Elements:
- Neon pink or lime base
- Black acrylic paint
- Iridescent glitter
- Fine detail brush
How to Prepare:
- Paint your base in the brightest neon you can find.
- Drop small, irregular blobs of a slightly darker shade on the nail.
- Outline the blobs with ‘C’ and ‘U’ shapes using black paint.
- Add tiny black dots in the empty spaces to fill the pattern.
- Place a single speck of iridescent glitter in the center of a few spots.
- Let the art air dry completely to avoid smearing.
- Apply a heavy-duty top coat to protect the intricate detail.
Budget Range
- Orly Neon Heat – $15
- Apple Barrel Black Acrylic – $2
- Winstonia Detail Brush Set – $10
Create sunset aura nails using 5 blending tips
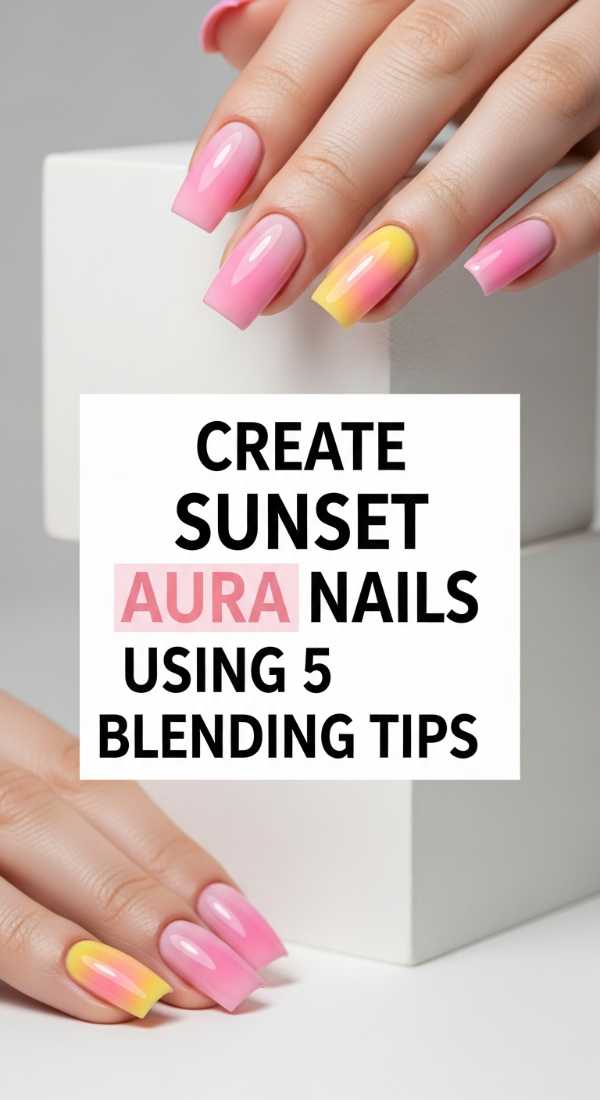
Why to love this Design:
Aura nails represent your energy, and the sunset palette brings a sense of peace and warmth. The soft gradient looks like it’s glowing from within.
Essential Elements:
- Makeup sponges
- Liquid latex (for skin protection)
- Peach and violet polishes
How to Prepare:
- Apply liquid latex around your cuticles to make cleanup a breeze.
- Paint a peach circle in the center of a makeup sponge.
- Surround that circle with a ring of violet polish on the sponge.
- Gently dab the sponge onto the center of the nail, repeating for opacity.
- Peel the latex and use a brush dipped in cleaner to soften the ‘aura’ edges.
Budget Range
- Pueen Liquid Latex – $9
- Essie ‘Soles on Fire’ – $10
- Beauty Blender Mini Sponges – $12
Style teal and coral nails in 4 trendy patterns
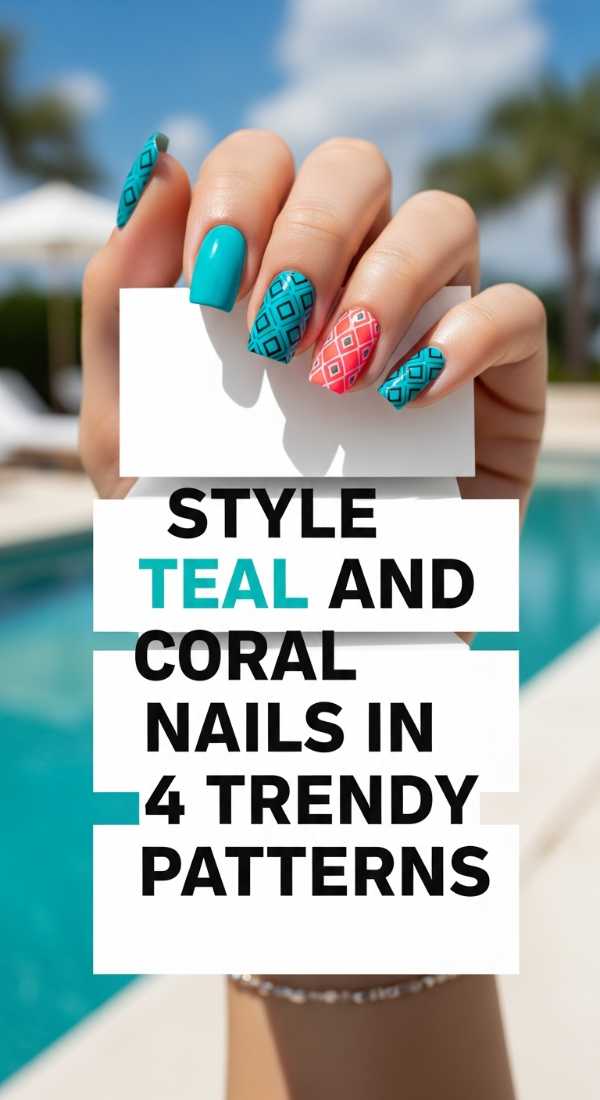
Why to love this Design:
This color combination is a 2026 staple—the coolness of teal meets the heat of coral. It’s balanced, stylish, and looks incredible on every skin tone.
Essential Elements:
- Deep teal cream
- Bright coral cream
- Striping tape
How to Prepare:
- Try a ‘Half-and-Half’ look by using striping tape vertically down the nail.
- Design a ‘Coral French’ with a teal base for a high-fashion contrast.
- Create ‘Abstract Blobs’ where the two colors overlap in the middle.
- Use a ‘Checkerboard’ pattern on the pinky nail for a playful touch.
Budget Range
- Deborah Lippmann ‘Deep Teal’ – $20
- Revlon ‘Coral Reef’ – $6
- Nail Art Striping Tape Roll – $5
Achieve 2026 Pucci nails with 6 artistic strokes

Why to love this Design:
Inspired by iconic Italian prints, these nails are high-art. They’re swirling, geometric, and look like you just stepped off a yacht in Capri. It’s pure luxury.
Essential Elements:
- Multi-color pastel set
- Black liner gel
- Stiff detail brush
How to Prepare:
- Paint organic, wavy ‘puddle’ shapes in three different colors.
- Ensure no two shapes touch until they are dry.
- Use the black liner gel to outline the perimeter of every shape.
- Add internal ‘loops’ within the larger shapes to create depth.
- Draw thin, straight lines through the curves for that retro-geometric look.
- Seal with a high-gloss finish to make the colors pop like silk.
Budget Range
- Gellen Pastel Gel Set – $16
- Riyacon Liner Gel – $8
- Kolinsky Detail Brush – $18
Match your hands and toes in 3 styling secrets
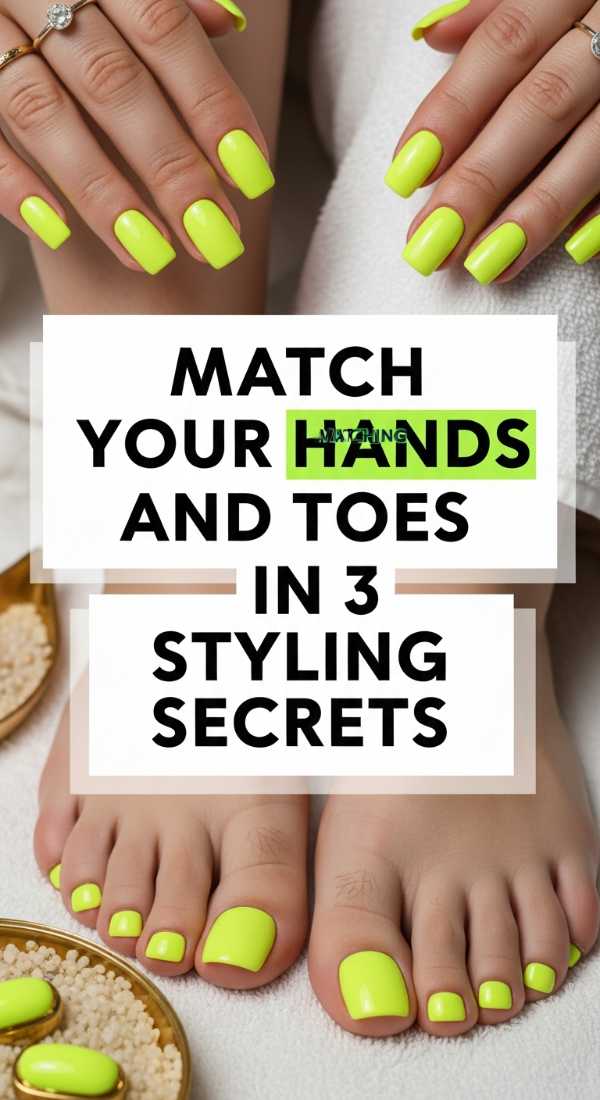
Why to love this Design:
There is a quiet confidence in a coordinated look. We aren’t doing identical matching anymore; we’re doing ‘sister, not twin’ coordination that feels effortless.
Essential Elements:
- Matching base tones
- Complementary finishes
- Consistent hardware (gems)
How to Prepare:
- Use the same color but different finishes (matte on hands, glossy on toes).
- Use a solid color on toes that appears as the ‘accent’ color on your hands.
- Apply the same rhinestone placement on the big toe and the thumb for a subtle link.
Budget Range
- Butter London ‘Patent Shine’ Set – $22
- Swarovski Nail Crystals – $12
- Dazzle Dry System – $35
Conclusion
My loves, I hope this guide feels like a warm invitation to play and explore. Your nails are a small part of you, but the joy they bring can ripple through your whole day. Remember, there are no mistakes in art—only ‘happy accidents’ that make your look uniquely yours. Go ahead, pick a tutorial that speaks to your heart, and let your creativity shine. You deserve to feel beautiful, from your head right down to your perfectly polished fingertips. I can’t wait to see what you create!
Frequently Asked Questions
Q: How can I make my DIY manicure last longer?
A: The secret is in the prep! Always dehydrate your nail plate with a little alcohol before applying base coat, and never skip sealing the free edge (the tip) of your nail.
Q: Is the 2026 chrome look safe for natural nails?
A: Absolutely! As long as you use a high-quality base coat and don’t over-buff the natural nail, chrome powders are a wonderful, non-damaging way to add shine.
Q: What if I don’t have a steady hand for the Pucci designs?
A: Lean into the ‘organic’ nature of the shapes! The beauty of that style is that it’s meant to look fluid. You can also use a toothpick if a brush feels too intimidating.