
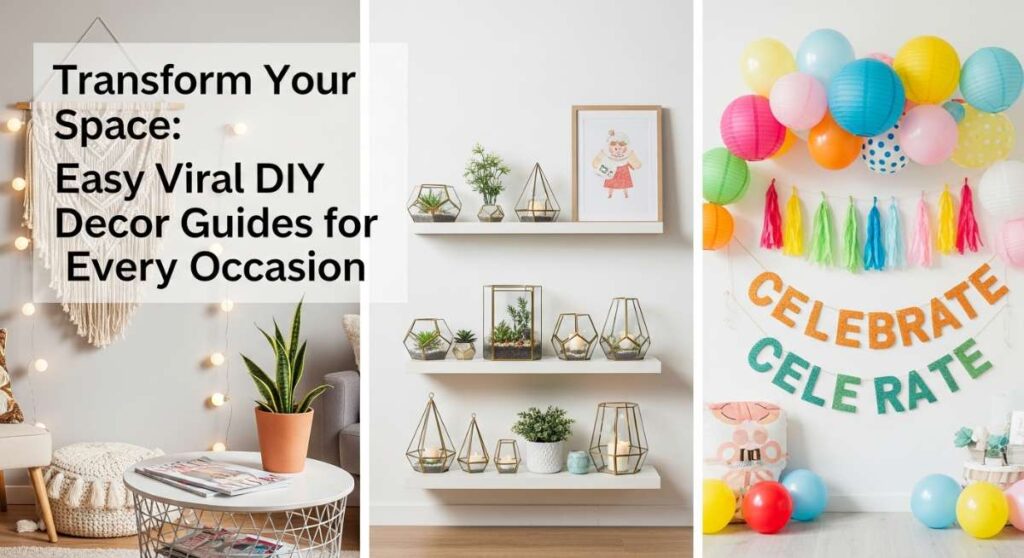
Transform Your Space: Easy Viral DIY Decor Guides for Every Occasion
Hello, my loves! There is something so incredibly special about the way a space can hold a feeling, isn’t there? It’s like a warm, cloud-soft embrace for our memories. I’ve always believed that the most magical moments aren’t just found in the big milestones, but in the tiny, hand-painted details and the love we pour into the corners of our homes. Whether you are celebrating a new beginning or just adding a little sparkle to a Tuesday, I want to help you create that magic with your own two hands.
Lately, I’ve been inspired by the beautiful, viral trends that make hosting look like a dream, but I know how overwhelming it can feel to start. That is why I’ve gathered my favorite DIY guides today—simple, heartfelt, and oh-so-pretty. Let’s take a deep breath together, grab a cup of something cozy, and dive into these easy ways to make your next gathering feel like a warm hug for every guest who walks through your door.
Style a Vibrant Mexican Fiesta

Why to love this recipe:
This style is all about energy and soul. It brings a burst of sunshine into any room, making your guests feel instantly welcomed by the rhythm and color of a culture that celebrates life so beautifully. It’s perfect for those who want their party to feel like a big, warm laugh.
Essential Ingredients:
- Bright Papel Picado banners
- Woven Serape table runners
- Potted succulents and cacti
- Fresh marigolds or paper flowers
- Colorful ceramic plates
How to Prepare:
- Hang Papel Picado across the ceiling to create height and movement.
- Layer a vibrant serape over a neutral tablecloth for a pop of texture.
- Arrange mini cacti as centerpieces along the middle of the table.
- Scatter bright marigold petals around the base of the plants.
- Set the table with mismatched, colorful glassware for a boho feel.
- String up warm bistro lights to mimic a summer evening in Mexico.
- Add a few hand-painted ‘Bienvenidos’ signs at eye level.
Budget Range
- Papel Picado Banners ($10-$15)
- Mexican Table Runner ($12-$18)
- Mini Faux Succulents ($20 for a set)
Quick Ways to Make a Viral Taco Bar

Why to love this recipe:
A taco bar is the ultimate way to show love through food. It’s interactive, inclusive, and looks absolutely stunning on camera. It turns dinner into a shared experience where everyone gets to create their own perfect bite.
Essential Ingredients:
- Tiered wooden serving stands
- Small ceramic bowls for toppings
- Chalkboard labels
- Colorful linen napkins
- Mini tortilla warmers
How to Prepare:
- Use tiered stands to create different levels, making the spread look abundant.
- Place proteins in the center in warming dishes.
- Group cold toppings like salsas and cremas in matching small bowls.
- Label every ingredient clearly with cute chalkboard stakes.
- Fan out colorful napkins at the start of the line for a polished look.
Budget Range
- Chalkboard Labels ($8)
- Wooden Serving Crate ($25)
- Colorful Ceramic Dipping Bowls ($15)
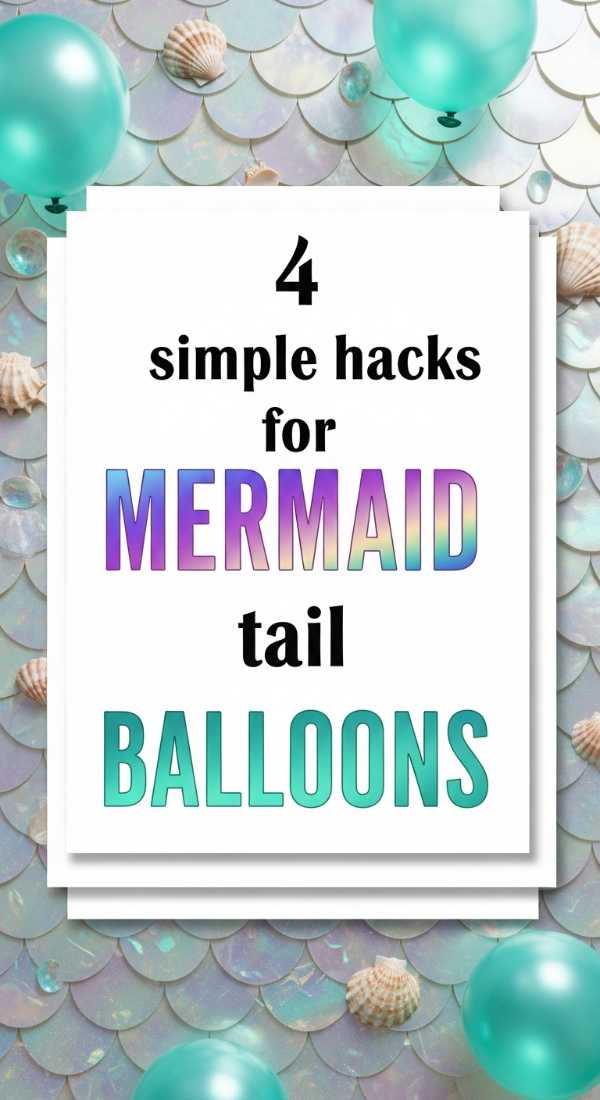
Simple Hacks for Mermaid Tail Balloons
Why to love this recipe:
There is something so whimsical and ethereal about the shimmer of a mermaid theme. These balloon hacks take a simple party staple and turn it into a piece of underwater art that feels like a shimmering dream come true.
Essential Ingredients:
- Iridescent purple and teal balloons
- Long ‘twister’ balloons for tails
- Holographic vinyl scraps
- Clear fishing line
How to Prepare:
- Inflate a large teal balloon as the base of the tail.
- Twist two long balloons into a ‘V’ shape and tape them to the top to create fins.
- Apply holographic vinyl circles to the base balloon to mimic scales.
- Use fishing line to hang them at varying heights so they ‘swim’ in the air.
Budget Range
- Iridescent Balloon Kit ($12)
- Holographic Sticker Paper ($9)
- Clear Fishing Wire ($5)
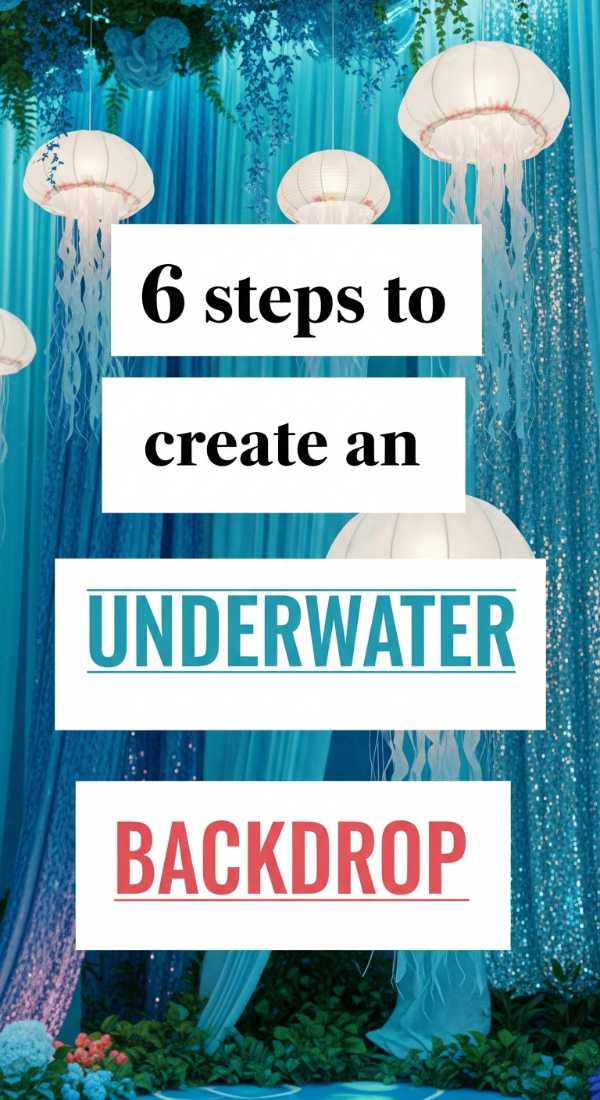
Steps to Create an Underwater Backdrop
Why to love this recipe:
Transforming a plain wall into an ocean floor is like stepping into another world. This backdrop creates a soft, immersive atmosphere that makes every photo look like it was taken in a hidden grotto under the sea.
Essential Ingredients:
- Light blue and seafoam green streamers
- White paper plates (for bubbles)
- Netting or cheesecloth
- Double-sided tape
- Green ribbon for seaweed
How to Prepare:
- Hang streamers vertically, twisting them slightly to look like moving water.
- Drape fishnetting over the top of the streamers for texture.
- Cut circles out of white plates and tape them in clusters like bubbles.
- Spiral green ribbons from the floor upward to look like kelp.
- Layer sheer fabric at the bottom to mimic sand and foam.
- Add a few metallic fish cutouts for a touch of shimmer.
Budget Range
- Crepe Paper Streamer Pack ($8)
- Decorative Fish Net ($10)
- Seafoam Tulle ($12)
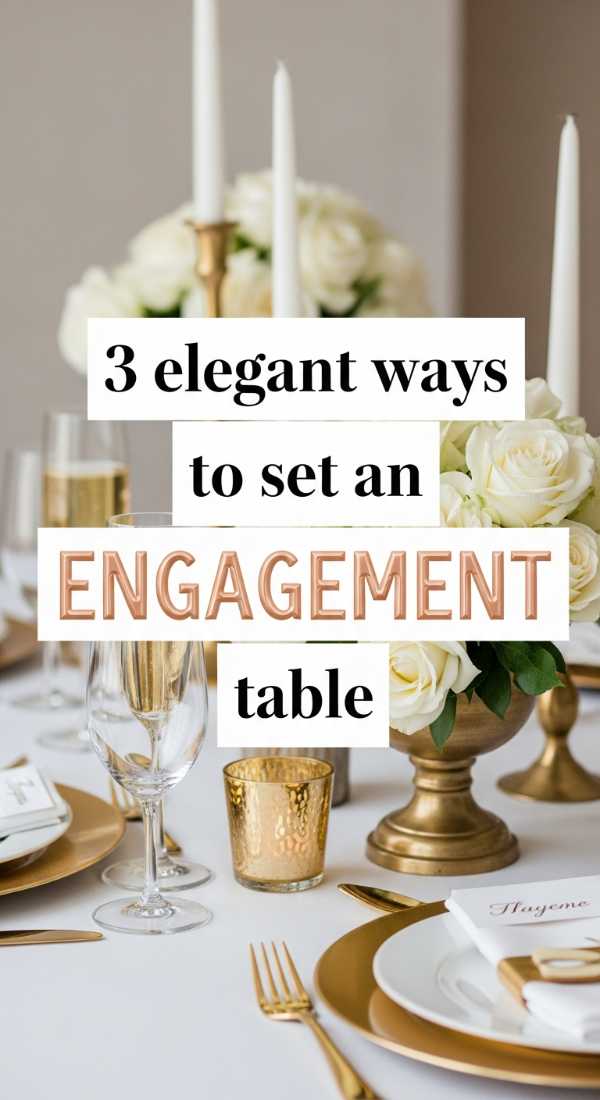
Elegant Ways to Set an Engagement Table
Why to love this recipe:
Engagement dinners are so tender and intimate. These styling methods focus on soft textures and candlelight, creating a space where the focus stays on the love and the beautiful promise being celebrated.
Essential Ingredients:
- Cream linen napkins
- Tapered candles in gold holders
- Fresh eucalyptus sprigs
How to Prepare:
- Lay a soft linen runner down the center, letting it bunch slightly for a romantic look.
- Place staggered gold candle holders with tall white tapers to provide a soft glow.
- Tuck a single sprig of eucalyptus into a knotted napkin at each place setting.
Budget Range
- Gold Taper Candle Holders ($20)
- Linen Table Runner ($18)
- Faux Eucalyptus Garland ($15)
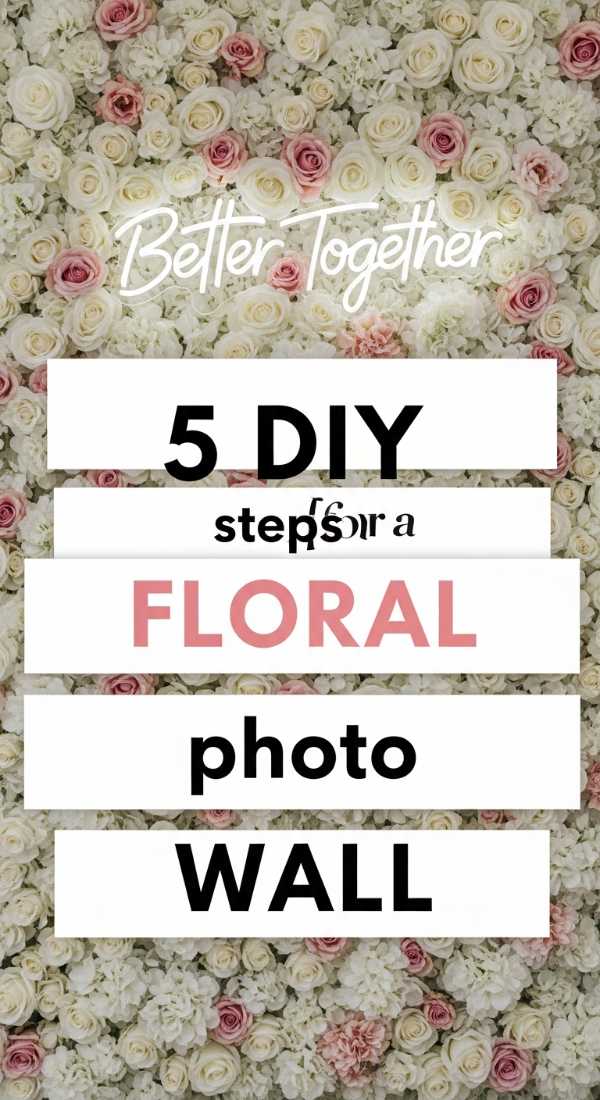
DIY Steps for a Floral Photo Wall
Why to love this recipe:
A floral wall is a classic for a reason—it’s a breathtaking focal point that feels like an indoor garden. It’s the perfect way to make your guests feel like royalty while capturing memories they will cherish forever.
Essential Ingredients:
- Large foam boards or mesh wire
- Bulk silk flowers (roses, peonies)
- Hot glue gun or floral wire
- Fairy lights
- Command hooks
How to Prepare:
- Secure your mesh wire or foam boards to the wall using heavy-duty hooks.
- Trim the stems of your silk flowers so they are easy to attach.
- Start at the corners with larger blooms and work your way inward.
- Fill in the gaps with smaller buds and green leaves for a lush look.
- Weave fairy lights through the petals for a magical evening sparkle.
Budget Range
- Bulk Silk Peonies ($35)
- Foam Insulation Boards ($15)
- LED Fairy Lights ($10)
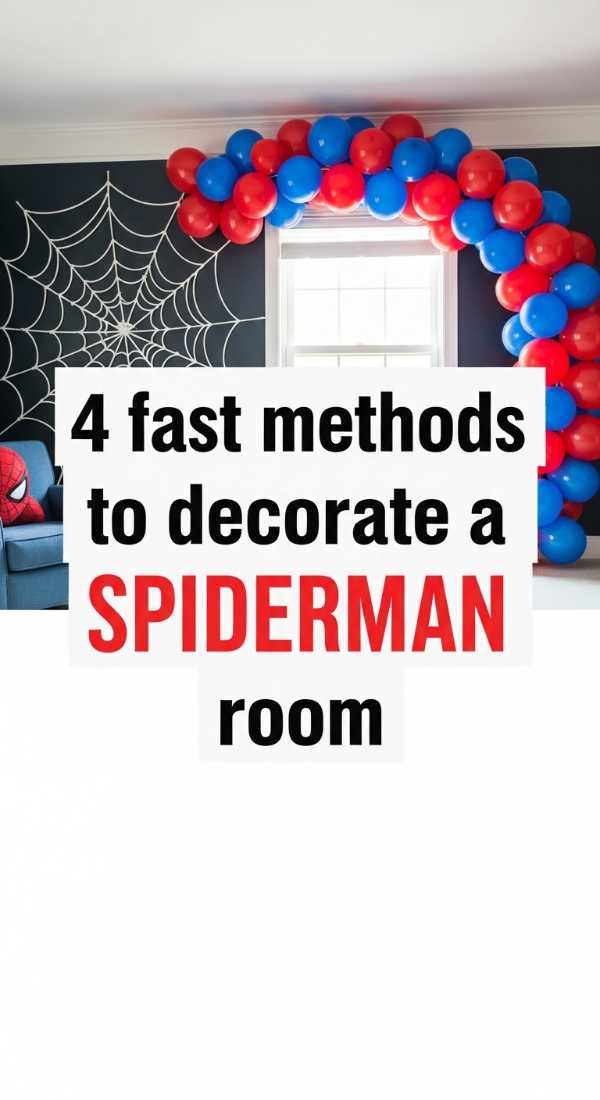
Fast Methods to Decorate a Spiderman Room
Why to love this recipe:
For the little heroes in our lives, Spiderman is a symbol of bravery and fun. These quick methods bring that comic-book excitement into their space without needing a total renovation, making their world feel a little more super.
Essential Ingredients:
- Red and blue felt
- White yarn for webbing
- Action figure wall shelves
- Cityscape wall decals
How to Prepare:
- Apply removable cityscape decals along the baseboards of the room.
- Criss-cross white yarn across a corner of the ceiling to create a ‘giant web’.
- Mount small floating shelves to display favorite Spiderman figures.
- Drape a red and blue felt banner over the headboard for instant color.
Budget Range
- Cityscape Wall Decals ($14)
- Spiderman Plush Throw ($15)
- White Crafting Yarn ($4)
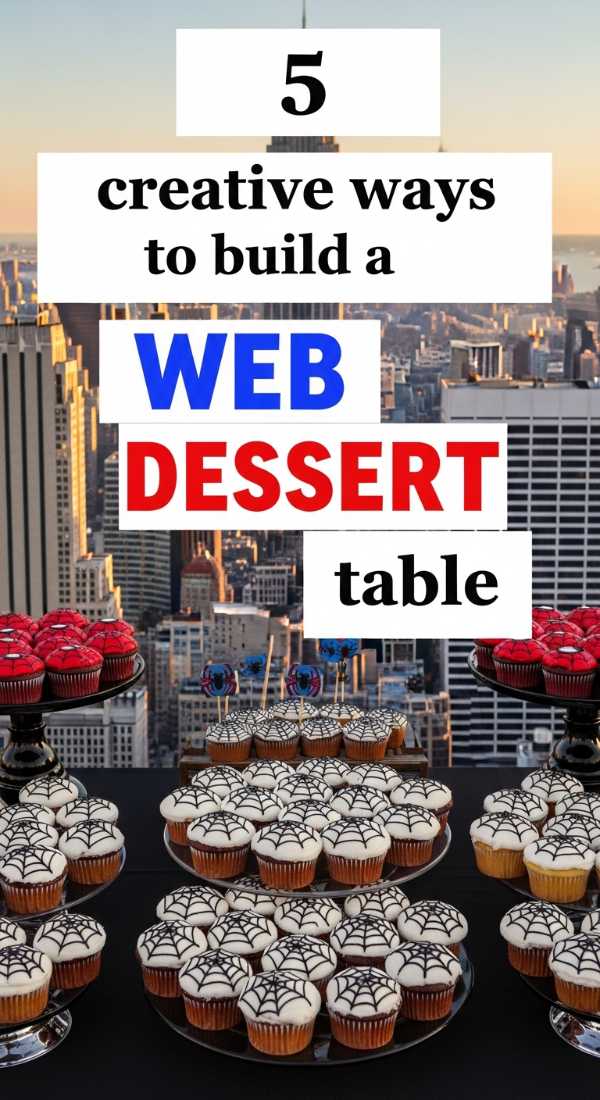
Creative Ways to Build a Web Dessert Table
Why to love this recipe:
This is where spooky meets stylish. A web-themed dessert table is graphic, bold, and incredibly easy to put together. It adds a touch of mystery and ‘wow’ factor to any superhero or Halloween-themed gathering.
Essential Ingredients:
- White stretchy spiderweb material
- Black cake stands
- Red velvet cupcakes
- Plastic spiders
- Black tablecloth
How to Prepare:
- Cover the table in a sleek black cloth to make the webbing pop.
- Stretch the web material thinly across the surface and up the sides of stands.
- Place red treats on black tiers to create a high-contrast look.
- Scatter small plastic spiders among the plates for a creepy-crawly touch.
- Add a backdrop of ‘webbed’ balloons for extra dimension.
Budget Range
- Stretchy Spiderweb Pack ($6)
- Black Cupcake Tier ($12)
- Plastic Spiders ($5)
Easy Steps to Build a Balloon Arch

Why to love this recipe:
The balloon arch is the undisputed queen of viral party decor. It’s grand, festive, and surprisingly therapeutic to build once you get into the rhythm. It’s the ultimate ‘I did this!’ moment for any host.
Essential Ingredients:
- Balloon decorating strip
- Electric balloon pump (a lifesaver!)
- Balloons in three sizes
- Glue dots
- Ribbon
How to Prepare:
- Inflate all your balloons in various sizes before you start assembling.
- Insert the knots of the largest balloons into the holes of the decorating strip.
- Continue adding medium balloons, alternating colors to balance the look.
- Attach the strip to your wall or frame using ribbon and hooks.
- Use glue dots to fill in small gaps with the tiniest balloons.
- Tuck in bits of greenery or flowers for an organic feel.
- Adjust the curve until it frames your space perfectly.
- Step back and admire the volume and color!
Budget Range
- Electric Balloon Pump ($22)
- Balloon Garland Kit ($10)
- Assorted Latex Balloons ($15)
10 Minute Guide to Style a Party Entrance

Why to love this recipe:
First impressions are everything, my loves. Styling your entrance says ‘I’ve been waiting for you’ before you even open your mouth. It sets the tone for the entire evening in just a few beautiful moments.
Essential Ingredients:
- Welcome chalkboard or sign
- Layered doormats
- Seasonal wreath or floral spray
- Scented candle or diffuser
How to Prepare:
- Layer a patterned rug under your standard welcome mat for a designer look.
- Write a personal greeting on a small chalkboard and lean it by the door.
- Hang a simple floral spray on the handle or center of the door.
- Light a candle just inside the entryway so guests are greeted with a soft scent.
- Clear away any clutter to make the path feel open and inviting.
Budget Range
- Small Chalkboard Sign ($12)
- Patterned Outdoor Rug ($18)
- Scented Soy Candle ($14)
Creating Memories One Detail at a Time
My heart feels so full just thinking about you all creating these beautiful spaces. Remember, it doesn’t have to be perfect to be meaningful. The ‘viral’ part is just the icing on the cake—the real magic is the laughter that will fill the room and the love your guests will feel because you took the time to make things special. I hope these guides feel like a helping hand as you plan your next celebration. Go forth and create something beautiful, my loves!