

Transform Your Space: 10 DIY Home Decor Hacks You Can Do in a Weekend
There is a unique kind of magic that happens when you stop looking at your house as just a building and start seeing it as a living, breathing canvas for your soul. We’ve all been there—scrolling through endless feeds of perfect homes, feeling a slight pang of envy, and then looking at our own four walls wondering where to even start. But the truth is, the most beautiful homes aren’t the ones with the highest price tags; they are the ones filled with the warmth of handmade projects and the stories of weekends spent getting your hands a little dirty.
This weekend, I want to challenge you to reclaim your space. Whether it’s the way the sunlight hits a freshly painted mural on your garden shed or the satisfying sound of a glass jar clicking onto a perfectly organized pantry shelf, these small shifts create a ripple effect of joy in your daily life. Let’s dive into ten transformative projects that will turn your home into the sanctuary you’ve always dreamed of, one hammer swing and brush stroke at a time.
How to Style Rock Flower Beds for Instant Curb Appeal

Why we love this
There is something incredibly grounding about the earthy, textured look of a well-designed rock flower bed. Imagine the sun-warmed scent of smooth river stones paired with the vibrant, lush greenery of hostas or the delicate purple of creeping phlox. It provides a clean, modern aesthetic that looks professional year-round, offering a crisp contrast against the soft blades of your lawn. The visual weight of the stones creates a sense of permanent, timeless beauty that anchors your home’s exterior and makes every arrival feel like a grand entrance.
Essential Elements:
- Landscape fabric (heavy-duty)
- Metal or plastic garden edging
- A variety of river rocks, lava rocks, or pea gravel
- Hardy perennials (lavender, grasses, or succulents)
- Garden staples and a rubber mallet
How to make it
- Begin by clearing the designated area of all weeds, grass, and debris using a sharp spade to ensure a level base for your stones.
- Install your edging material along the perimeter, tapping it firmly into the ground with a rubber mallet to create a clean, defined border that prevents rocks from migrating into the grass.
- Roll out your heavy-duty landscape fabric, overlapping pieces by at least six inches to prevent stubborn weeds from poking through, and secure it with garden staples every two feet.
- Cut ‘X’ shapes into the fabric where you intend to plant your greenery, dig a hole slightly larger than the root ball, and settle your plants into the earth with a bit of fresh compost.
- Pour your chosen rocks over the fabric, starting from the center and working outward, maintaining a consistent depth of 2-3 inches for full coverage and a polished, professional finish.
How to Build a Duck Enclosure for a Happy Backyard
Why we love this
Building a home for backyard feathered friends brings a whimsical, farm-to-table charm to your lifestyle that is hard to beat. The enclosure becomes a hub of activity, filled with the soft, rhythmic sounds of splashing water and the cheerful chatter of happy ducks. We love the rustic, hand-built aesthetic of cedar wood against a backdrop of green grass, creating a cozy nook that feels intentional and integrated into the landscape. It’s about creating a safe haven where nature meets home, providing a tranquil spot for you to enjoy your morning coffee while watching your ducks thrive.
Essential Elements:
- Pressure-treated lumber or cedar posts
- Hardware cloth (1/2 inch gauge for predator protection)
- Corrugated roofing panels
- Heavy-duty door latches and hinges
- A shallow pool or pre-formed pond liner
How to make it
- Frame out the base of your enclosure using 2×4 pressure-treated lumber, ensuring the footprint is large enough to provide at least 4 square feet per duck for optimal comfort.
- Secure vertical support posts at each corner and at 4-foot intervals along the walls, burying them at least 12 inches deep or using concrete anchors for stability.
- Attach hardware cloth to the exterior of the frame using heavy-duty staples, ensuring you bury the bottom 6 inches of the mesh underground to deter burrowing predators like foxes or raccoons.
- Construct a sloped roof using corrugated panels to ensure rainwater runoff, securing them with specialized roofing screws that feature rubber washers to prevent leaks.
- Install a secure door with a predator-proof latch and set up a dedicated splash zone using a pre-formed pond liner, surrounded by smooth stones to prevent the area from becoming a mud pit.
How to Update a Ranch Exterior for Timeless Charm

Why we love this
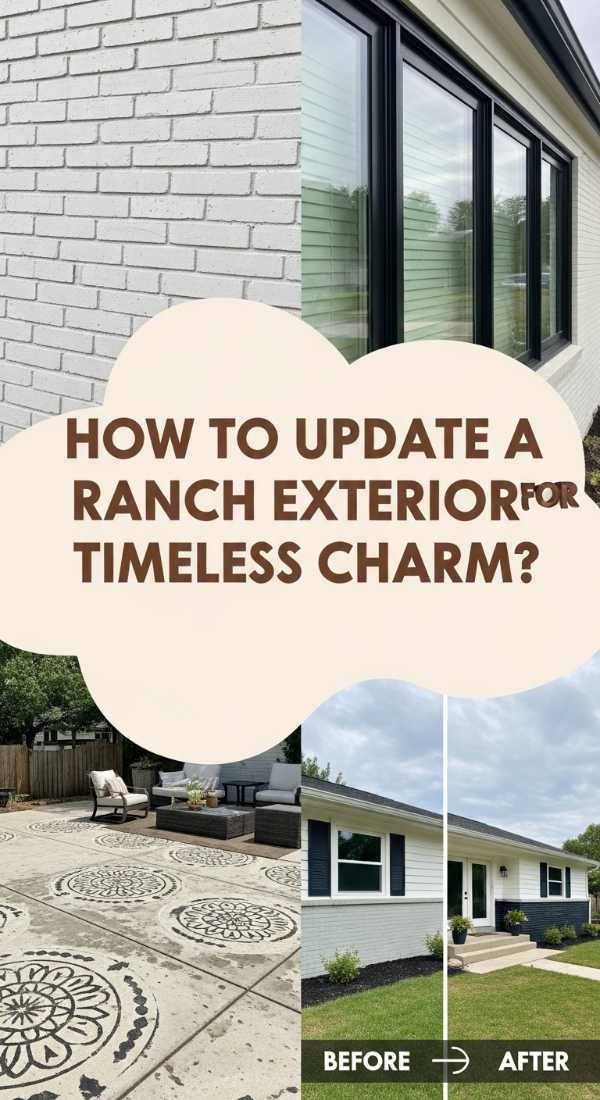
The classic ranch home is a masterpiece of mid-century design, but a few modern updates can elevate it from dated to darling. We love the transformation that occurs when you introduce a sophisticated color palette—think deep charcoals, creamy whites, or sage greens that harmonize with the surrounding nature. The addition of natural wood elements and modern lighting creates a warm, inviting glow that beckons you home after a long day. It’s about honoring the horizontal lines of the architecture while injecting a fresh, contemporary spirit that feels both nostalgic and brand new.
Essential Elements:
- High-quality exterior paint and primer
- Cedar shutters or wood slat accents
- Modern black or brass exterior light fixtures
- New house numbers with a clean font
- Power washer and high-grit sandpaper
How to make it
- Thoroughly power wash the entire exterior to remove years of dust and grime, allowing at least 48 hours for the siding to dry completely before any paint application.
- Sand down any rough wooden trim or previous paint drips to create a smooth surface, then apply a high-quality primer to ensure the new color bonds perfectly and lasts for years.
- Apply two coats of your chosen exterior paint using a combination of a professional-grade sprayer for large areas and a brush for intricate trim work, ensuring even coverage and sharp lines.
- Remove old, plastic shutters and replace them with custom-built cedar versions, staining them with a clear UV-protectant to let the natural wood grain shine through.
- Swap out dated porch lights for oversized modern lanterns and install floating house numbers near the entryway to provide a high-contrast, high-end finish.
How to Design Art Rooms for Boundless Inspiration

Why we love this
An art room is more than just a place to store supplies; it is a sanctuary for the imagination where the air feels thick with possibility and the scent of linseed oil and fresh paper. We love the organized chaos of rainbow-ordered paint tubes, the soft texture of canvases leaning against white walls, and the abundance of natural light that makes every color pop. It is a space designed specifically to say “yes” to your wildest ideas, providing a dedicated zone where you can get messy, explore new mediums, and lose yourself in the flow of creation.
Essential Elements:
- Large, sturdy work table (preferably adjustable height)
- Pegboards for vertical tool storage
- Rolling utility carts for mobile supplies
- Daylight-mimicking LED overhead lighting
- Inspirational mood board or gallery wall
How to make it
- Position your primary work table near the largest window in the room to take advantage of natural north-facing light, which provides the most consistent color rendering throughout the day.
- Install floor-to-ceiling pegboards on at least one wall, using various hooks and baskets to keep brushes, scissors, and palettes within arm’s reach while keeping the floor clear.
- Organize your mediums into rolling carts—one for paints, one for dry media, and one for textiles—so you can easily pull exactly what you need to your workspace and tuck it away later.
- Create a “drying station” using wire racks or a dedicated shelf where wet projects can sit undisturbed, preventing accidental smudges or spills on your active work area.
- Finish the space by hanging a large corkboard or wire grid where you can pin sketches, fabric swatches, and color palettes that spark your next big idea.
How to Master Pantry Organization for a Functional Kitchen

Why we love this
There is a profound sense of calm that washes over you when you open your pantry and see everything perfectly in its place. We love the visual harmony of uniform glass jars filled with grains, pastas, and flours, creating a boutique grocery store feel right in your own kitchen. It eliminates the friction of daily meal prep, turning a chore into a curated experience where you can see exactly what you have at a glance. The tactile satisfaction of a well-oiled turntable spinning smoothly and the crisp look of custom labels makes your kitchen feel like the heart of a truly organized home.
Essential Elements:
- Airtight glass or BPA-free plastic canisters
- Woven baskets or clear acrylic bins
- Lazy Susans (turntables) for corner access
- Label maker or custom vinyl decals
- Tiered spice racks or risers
How to make it
- Empty the entire pantry and wipe down every shelf with a mild cleaner, taking this opportunity to check expiration dates and donate any unopened, unexpired items you won’t use.
- Group your items into logical categories like “Baking,” “Snacks,” “Breakfast,” and “Dinner Prep” to determine how much space and what type of containers each category requires.
- Transfer dry goods from messy cardboard packaging into airtight glass jars, which not only looks beautiful but also keeps food fresher for significantly longer periods.
- Utilize tiered risers for canned goods so you can see the back row easily, and place a Lazy Susan in the corners for oils and vinegars to eliminate “hidden” items that go to waste.
- Apply consistent labels to every bin and jar at eye level, ensuring everyone in the household knows exactly where things belong, maintaining the system long after the weekend is over.
How to Elevate a Hot Tub Area for Ultimate Relaxation

Why we love this
A hot tub shouldn’t just be an appliance; it should be a private spa destination tucked away in your backyard. We love the sensory experience of rising steam, the gentle hum of the jets, and the soft glow of string lights reflecting off the water’s surface. By adding thoughtful surrounding elements like wood decking, plush towels, and aromatic greenery, you create a retreat that feels miles away from the stresses of daily life. It’s the ultimate way to embrace slow living, offering a warm embrace on chilly evenings and a place to reconnect with loved ones under the stars.
Essential Elements:
- Interlocking deck tiles or cedar skirting
- Outdoor string lights (Edison style)
- Weatherproof storage bench for towels
- Large potted plants (ferns or palms for privacy)
- All-weather outdoor rug
How to make it
- Clean the area around your hot tub thoroughly and lay down an all-weather outdoor rug or interlocking deck tiles to provide a soft, slip-resistant surface for bare feet.
- Install a privacy screen or strategically place large, leafy potted plants around the perimeter to create an intimate, secluded feel that blocks out neighboring views.
- String waterproof Edison lights overhead or along the fence line, using a timer or smart plug so the area is automatically bathed in a warm glow as soon as the sun sets.
- Place a sturdy weather-resistant bench nearby to serve as both a seat and a place to keep dry towels and robes within arm’s reach of the water.
- Add a small side table for drinks and a waterproof Bluetooth speaker to set the mood with soft music, completing the high-end resort aesthetic.
How to Make Rustic Birdhouses for a Whimsical Garden

Why we love this
There is something so enchanting about inviting wildlife into your garden with a handmade touch. These rustic birdhouses add a layer of story and character to your trees, looking like something plucked straight from a fairy tale. We love the rough-hewn texture of reclaimed wood and the way it weathers over time to a beautiful silvery gray. Hearing the first chirps of a new family moving in brings a sense of accomplishment and harmony with nature, making your outdoor space feel like a thriving, living ecosystem that is as charming as it is functional.
Essential Elements:
- Reclaimed wood or cedar planks (naturally rot-resistant)
- Galvanized nails or exterior wood screws
- Wood glue (exterior grade)
- Drill with a hole saw bit
- Natural jute twine or heavy-duty mounting brackets
How to make it
- Cut your wood into six pieces: a base, four walls, and a roof, ensuring the roof pieces are slightly longer to create an overhang that protects the entrance from rain.
- Use a hole saw bit to drill an entrance hole that is specifically sized for the birds you want to attract (e.g., 1.5 inches for bluebirds), placing it about 6 inches above the floor.
- Assemble the walls using exterior wood glue and galvanized nails, ensuring you leave a small gap at the top of the walls for ventilation and a few small holes in the floor for drainage.
- Attach the roof, but consider making one side hinged or easily removable so you can clean out the birdhouse at the end of every nesting season.
- Mount the birdhouse on a sturdy post or hang it from a high tree branch using jute twine, ensuring it is positioned away from direct wind and out of reach of curious cats.
How to Revive a Nostalgic Room for a Dreamy Aesthetic
Why we love this
Nostalgia is a powerful design tool that connects us to our favorite memories while creating a space that feels deeply personal and comforting. We love the mix of vintage textures—think velvet pillows, lace curtains, and the warm, golden light of antique lamps. It’s about creating a room that feels like a hug, where every object has a story and the overall vibe is one of dreamy, timeless elegance. This aesthetic encourages you to slow down, put on a vinyl record, and curl up with a book in a space that feels entirely separated from the fast-paced modern world.
Essential Elements:
- Thrifted vintage furniture (velvet chairs or ornate side tables)
- Floral or damask peel-and-stick wallpaper
- Warm-toned lighting (amber bulbs or brass lamps)
- Vintage-inspired textiles (fringe throws or embroidered pillows)
- Antique frames for a gallery wall
How to make it
- Select a focal point wall and apply a vintage-inspired floral wallpaper to set the tone, opting for peel-and-stick versions for an easy, weekend-friendly transformation.
- Source a statement piece of furniture from a local thrift store, such as a tufted velvet armchair or a dark wood vanity, and clean it thoroughly to restore its original luster.
- Layer your textiles by adding a thick, fringed rug over the carpet and tossing a mix of silk and wool pillows onto the seating to create a rich, multi-dimensional feel.
- Replace harsh overhead lighting with multiple small light sources, like a brass floor lamp and small table lamps with pleated shades, to create a soft, diffused amber glow.
- Curate a gallery wall using a mix of family photos in ornate gold frames and vintage botanical prints, arranging them in an asymmetrical layout for an effortlessly lived-in look.
How to Plant Front Porch Flower Pots for Seasonal Beauty

Why we love this
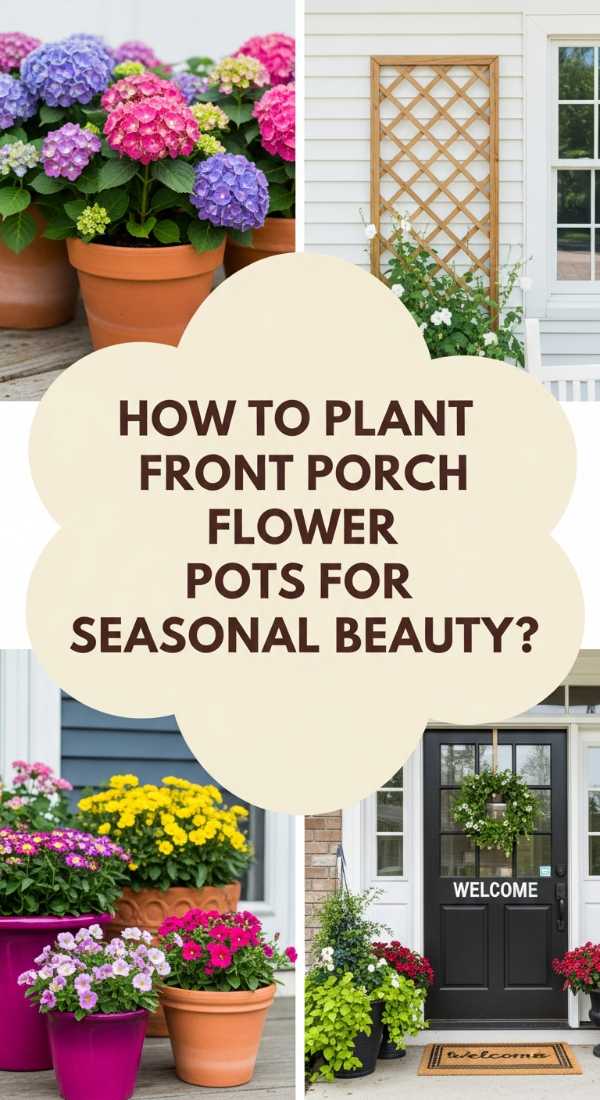
Your front porch is the first thing guests see, and nothing says “welcome” quite like a burst of living color. We love the tactile experience of digging into cool, damp soil and the immediate gratification of seeing vibrant petals against your front door. The scent of petunias or geraniums wafting through the air as you walk inside creates a sensory bridge between the outdoors and your home. It’s a low-effort, high-impact way to celebrate the changing seasons and show the world that there is a lot of love and care living behind your front door.
Essential Elements:
- Oversized decorative planters (varying heights)
- High-quality potting mix with slow-release fertilizer
- A “Thriller, Filler, and Spiller” selection of plants
- Hand trowel and watering can
- Mulch or decorative moss
How to make it
- Choose a color palette that complements your front door—try monochromatic whites for elegance or high-contrast purples and yellows for a cheery, energetic vibe.
- Fill your planters two-thirds full with high-quality potting soil, ensuring the containers have adequate drainage holes at the bottom to prevent root rot.
- Plant your “Thriller” (a tall, dramatic plant like a Dracaena or Grass) in the center or back of the pot to provide height and a strong focal point.
- Surround the thriller with “Fillers” (mounding plants like Geraniums or Begonias) to create volume and a lush, full appearance that hides the soil.
- Place “Spillers” (trailing plants like Sweet Potato Vine or Ivy) around the edges so they can gracefully cascade over the sides of the pot, creating a professional, layered look.
How to Finish Shed Murals for an Artistic Backyard
[IMAGE_10]
Why we love this
A shed mural is the ultimate expression of backyard personality, turning a functional storage building into a stunning piece of outdoor art. We love the way a large-scale painting can brighten up a dark corner of the yard and serve as a constant source of inspiration while you garden. The fluid motion of the paintbrush and the satisfaction of seeing a blank wall come to life with bold colors and shapes is incredibly rewarding. It’s a project that invites conversation and adds a touch of whimsical, gallery-worthy flair to your private outdoor oasis.
Essential Elements:
- Exterior-grade acrylic paints or specialized mural paint
- Assorted brushes and rollers
- Painter’s tape and drop cloths
- Clear UV-resistant sealer
- Graphite pencil or chalk for sketching
How to make it
- Clean the exterior of the shed thoroughly and apply a base coat of outdoor primer to create a smooth, durable canvas for your artwork.
- Sketch your design onto the shed wall using chalk or a light pencil; if you aren’t confident in freehanding, use a projector at night to trace your design onto the wall.
- Start by painting the largest background shapes first using a roller, then move to medium-sized elements before finishing with fine details using smaller brushes.
- Use painter’s tape to maintain clean edges where the mural meets the shed’s trim or doors, and work in thin layers to prevent drips and ensure even drying.
- Once the paint is completely dry, apply two coats of a clear, UV-resistant exterior sealer to protect your masterpiece from fading in the sun or peeling in the rain.
Creating Your Dream Home, One Weekend at a Time
As you look back on your handiwork, remember that the goal isn’t perfection—it’s presence. Every rock laid, every seed planted, and every brush stroke made is a testament to the life you are building within these walls. Your home is a reflection of your journey, and these weekend projects are the chapters that tell the story of your creativity and care. So, take a deep breath, look around at the beauty you’ve created, and enjoy the sanctuary you’ve built with your own two hands. You’ve earned it!