
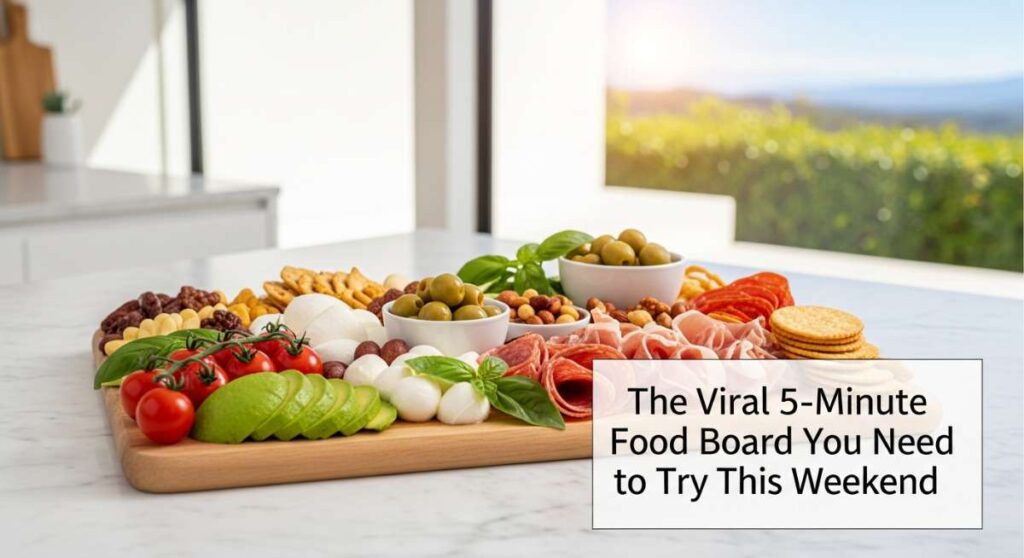
We have all been there—it’s Friday night, your friends are heading over in twenty minutes, and you want to serve something that feels elevated without spending three hours hovering over a hot stove. The magic of a modern lifestyle is finding those ‘viral’ moments that blend convenience with absolute indulgence. There is something deeply soulful about a gathering centered around a giant, shared board of food that invites everyone to dig in and stay a while.
Today, I’m sharing the ultimate secret to hosting: the 5-minute food board concept. By mastering a few quick-hit techniques—from the perfect sear on a steak to the ultimate gooey cookie—you can assemble a spread that looks like a professional caterer handled it. It’s about the colors, the textures, and that unmistakable aroma of home-cooked comfort that fills the room the moment your guests walk through the door.
How to make cheesy pasta?

Why we love this
There is nothing quite as comforting as a forkful of pasta swirled in a thick, velvety cheese sauce that clings to every curve of the noodle. The aroma of sharp cheddar and nutty parmesan melting together creates a nostalgic warmth that instantly makes any house feel like a home. We love the contrast between the tender, al dente bite of the pasta and the silky, golden pool of cheese that coats the palate with a rich, buttery finish. It is the ultimate soul food that looks just as good as it tastes when served in a rustic ceramic bowl.
Ingredients
- 1 lb Rigatoni or Shells
- 2 cups Sharp White Cheddar, shredded
- 1 cup Gruyère, shredded
- 1/2 cup Heavy Cream
- 3 tbsp Salted Butter
- 1 tsp Smoked Paprika
- Black pepper to taste
How to make it
- Boil a large pot of heavily salted water—it should taste like the sea to properly season the pasta from the inside out. Cook the noodles until they are just shy of al dente, usually 1-2 minutes less than the package instructions.
- Before draining, reserve exactly one cup of the starchy pasta water; this is the liquid gold that will emulsify your sauce into a glossy masterpiece.
- In a wide skillet over medium-low heat, melt the butter until it begins to foam but not brown, then whisk in the heavy cream and paprika until simmering gently.
- Gradually add the shredded cheeses one handful at a time, whisking constantly in a figure-eight motion to ensure a smooth melt without clumping or graininess.
- Add the drained pasta and the reserved pasta water to the cheese mixture, tossing vigorously with tongs over medium heat for 60 seconds until the sauce thickens and bubbles, perfectly coating every single noodle.
How to build dessert boards?

Why we love this
A dessert board is a visual symphony of sweetness that allows for endless grazing and conversation long after the main meal has ended. It’s the perfect way to cater to everyone’s cravings, offering a vibrant mix of decadent dark chocolates, tart fresh berries, and crunchy biscuits. We love the effortless elegance it brings to a table; it feels like an art piece where the textures of velvety truffles meet the crisp snap of a wafer. It encourages a shared experience where people can pick, choose, and discover new flavor combinations at their own pace.
Ingredients
- Assorted Chocolate Bars (Dark, Milk, Sea Salt)
- Fresh Strawberries and Raspberries
- Miniature Cookies or Macarons
- Salted Pretzels or Toffee Bits
- Honey or Chocolate Ganache for dipping
- Sprigs of Fresh Mint for garnish
How to make it
- Select a large wooden or marble board as your canvas, ensuring it is clean and dry to prevent any moisture from affecting the crispness of the cookies.
- Place small ‘anchor’ items first, such as ramekins or small bowls filled with honey, melted chocolate, or caramel sauce, spaced out across the board to create focal points.
- Add your largest items next, like stacks of gourmet chocolate bars or piles of brownies, creating a sense of height and abundance in the center.
- Fill the remaining large gaps with clusters of fresh fruit and cookies, swirling them around the bowls in a natural, flowing pattern rather than stiff rows.
- Finally, use the smallest items like nuts, pretzels, or individual berries to ‘fill the cracks,’ ensuring that no part of the board’s surface is visible for that true ‘viral’ overflowing aesthetic.
How to grill chicken sandwiches?

Why we love this
The scent of a charred, marinated chicken breast hitting a hot grill is the quintessential sound of a perfect weekend afternoon. We love this because it balances the smoky, rugged edges of the grill with the soft, pillowy texture of a toasted brioche bun and cool, crisp toppings. The juice from the chicken mingles with the melted cheese and tangy sauce, creating a messy, wonderful explosion of savory flavors in every bite. It’s a sophisticated take on backyard classics that feels both hearty and incredibly fresh.
Ingredients
- 4 Boneless Chicken Breasts, pounded thin
- Brioche Buns
- Sliced Pepper Jack Cheese
- Avocado Slices
- Spicy Mayo or Aioli
- Marinade: Olive oil, Lemon juice, Garlic, Oregano
How to make it
- Prepare your marinade by whisking the oil, lemon, garlic, and herbs together, then let the chicken soak for at least 30 minutes to tenderize the fibers and infuse deep flavor.
- Preheat your grill to a high heat (around 400°F); you want the grates to be hot enough to create immediate sear marks that lock in the natural juices.
- Place the chicken on the grill and cook for 5-6 minutes per side, resisting the urge to move them so they develop a beautiful, dark char and don’t stick to the metal.
- During the last minute of cooking, place a slice of cheese on each breast and close the grill lid to allow it to drape perfectly over the meat.
- Lightly butter the insides of your buns and toast them on the edge of the grill for 30 seconds until golden, then assemble immediately with the avocado and a generous swipe of spicy mayo.
How to bake crispy tacos?
Why we love this
Baked crispy tacos are a game-changer because they deliver that addictive, golden crunch without the greasy mess of traditional frying. We love how the heat of the oven melds the seasoned filling and the melting cheese directly into the shell, creating a unified, piping-hot bite that doesn’t fall apart. The aroma of toasted corn and cumin wafting through the kitchen is enough to bring everyone running to the table. It’s a texture-lover’s dream, where the brittle snap of the shell meets the tender, spiced interior for a perfect contrast.
Ingredients
- Hard Taco Shells
- Ground Beef or Shredded Chicken
- Taco Seasoning (Cumin, Chili Powder, Garlic)
- Shredded Mexican Blend Cheese
- Refried Beans
- Diced Tomatoes and Jalapeños
How to make it
- Preheat your oven to 400°F and line a baking dish with parchment paper; choose a dish where the tacos can stand upright, packed closely together to support each other.
- Smear a small spoonful of warm refried beans into the bottom of each taco shell to act as a ‘glue’ that keeps the meat and cheese from making the bottom soggy.
- Layer in your cooked, seasoned meat filling, followed by a very generous topping of shredded cheese, filling the shells almost to the brim.
- Bake for 10-12 minutes; watch for the cheese to become bubbly and slightly browned on the edges, while the shells turn a deeper shade of golden.
- Remove from the oven and immediately top with fresh, cold ingredients like tomatoes and jalapeños, creating a temperature contrast that makes the tacos feel gourmet.
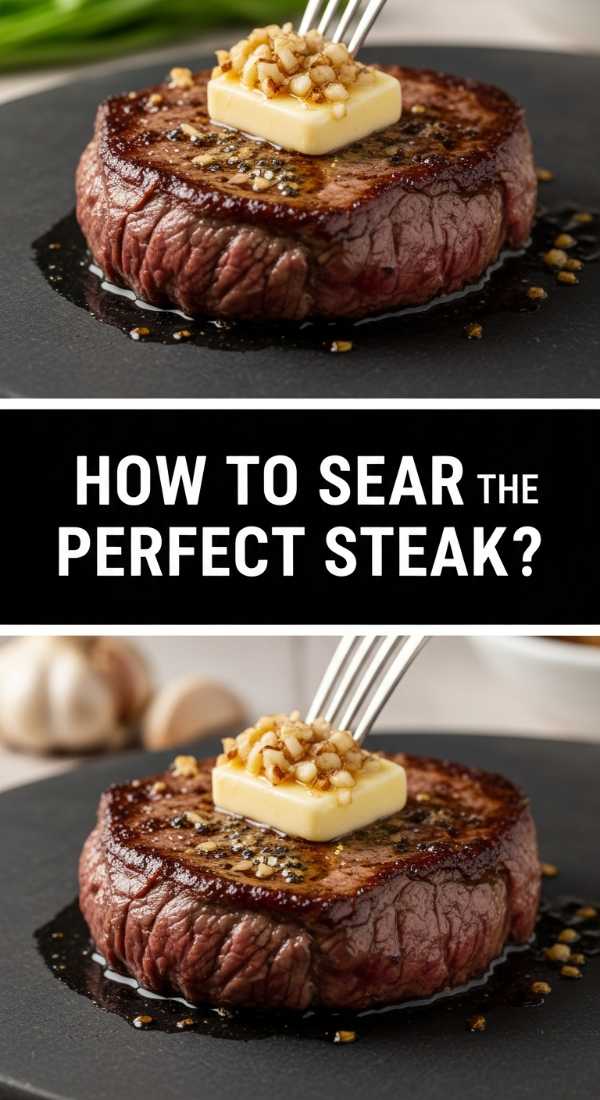
How to sear perfect steak?
Why we love this
There is an undeniable primal satisfaction in the sound of a steak hitting a cast-iron skillet, followed by the rich, savory aroma of butter and thyme. We love the Maillard reaction—that deep, caramelized crust that forms on the outside while the inside remains a tender, blushing pink that melts like butter. It feels like a celebration in every bite, offering a complex profile of salty, earthy, and umami notes. A perfectly seared steak transforms a simple dinner into a high-end steakhouse experience right in your own dining room.
Ingredients
- 1.5-inch Thick Ribeye or New York Strip
- Kosher Salt and Coarse Black Pepper
- 2 tbsp Grapeseed Oil (high smoke point)
- 3 tbsp Unsalted Butter
- 3 cloves Garlic, smashed
- Fresh Rosemary and Thyme sprigs
How to make it
- Pat the steak completely dry with paper towels; any surface moisture will create steam instead of a crust, preventing that viral golden-brown finish.
- Season aggressively with salt and pepper on all sides, including the edges, at least 15 minutes before cooking to allow the seasoning to penetrate the meat.
- Heat your cast-iron skillet over high heat until the oil is shimmering and just starting to smoke, then lay the steak away from you to avoid splattering.
- Sear for 3 minutes without touching it, then flip and add the butter, garlic, and herbs to the pan, letting the butter foam and turn nut-brown.
- Tilt the pan slightly and use a large spoon to continuously baste the steak with the hot herb-butter for the final 2-3 minutes, then let it rest for 10 minutes before slicing.
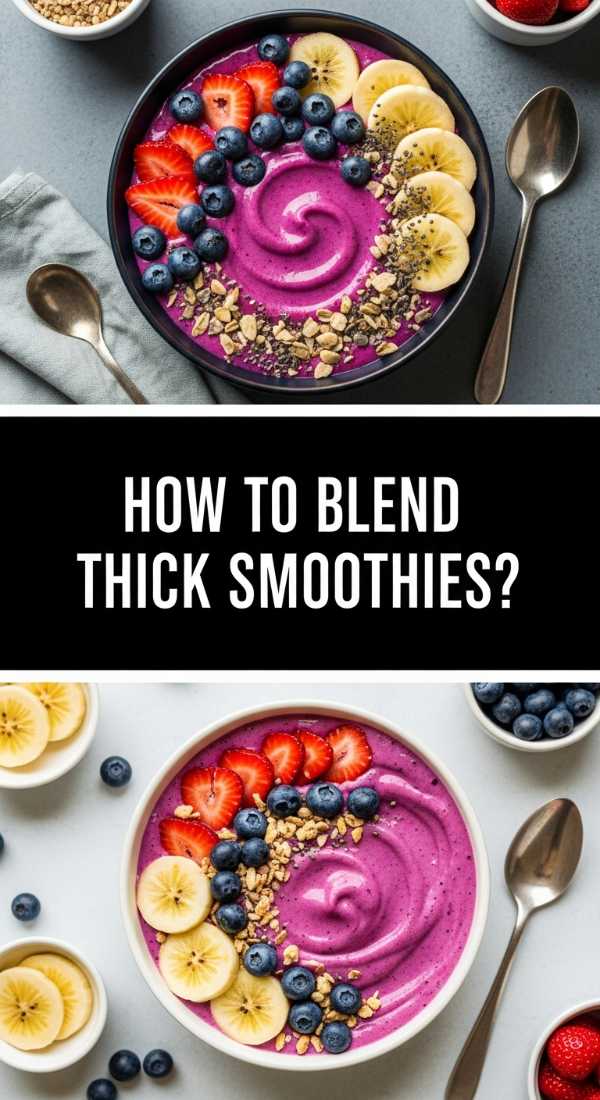
How to blend thick smoothies?
Why we love this
A truly thick smoothie feels more like an indulgent soft-serve treat than a simple drink, providing a frosty, velvet-smooth texture that is incredibly satisfying. We love the vibrant, jewel-toned colors that come from frozen fruits and the way a thick consistency allows for beautiful toppings like granola and seeds to sit right on top without sinking. It is refreshing, energizing, and has a dense, creamy mouthfeel that lingers. It turns a quick breakfast into a luxurious ritual that feels both healthy and decadent at the same time.
Ingredients
- 2 cups Frozen Mixed Berries or Mango
- 1 Frozen Banana (broken into chunks)
- 1/2 cup Greek Yogurt
- 1/4 cup Almond Milk (add sparingly)
- 1 scoop Protein Powder (optional)
- Toppings: Chia seeds, Hemp hearts, or Granola
How to make it
- Start by placing your frozen fruit and banana at the bottom of the blender, as the weight of the frozen items helps the blades engage more effectively.
- Add the yogurt and only half of your liquid; the secret to a ‘spoonable’ thickness is using the absolute minimum amount of liquid required to get the blades moving.
- Use a high-speed blender setting and the tamper tool to constantly push the frozen ingredients down into the blades, creating a vortex of cold fruit.
- Pulse the blender in short bursts if it gets stuck, adding one tablespoon of milk at a time only if necessary until the mixture is smooth but stiff.
- Pour the mixture into a chilled bowl immediately—it should be thick enough to hold a peak—and layer your toppings in decorative rows for that perfect social-media-ready look.
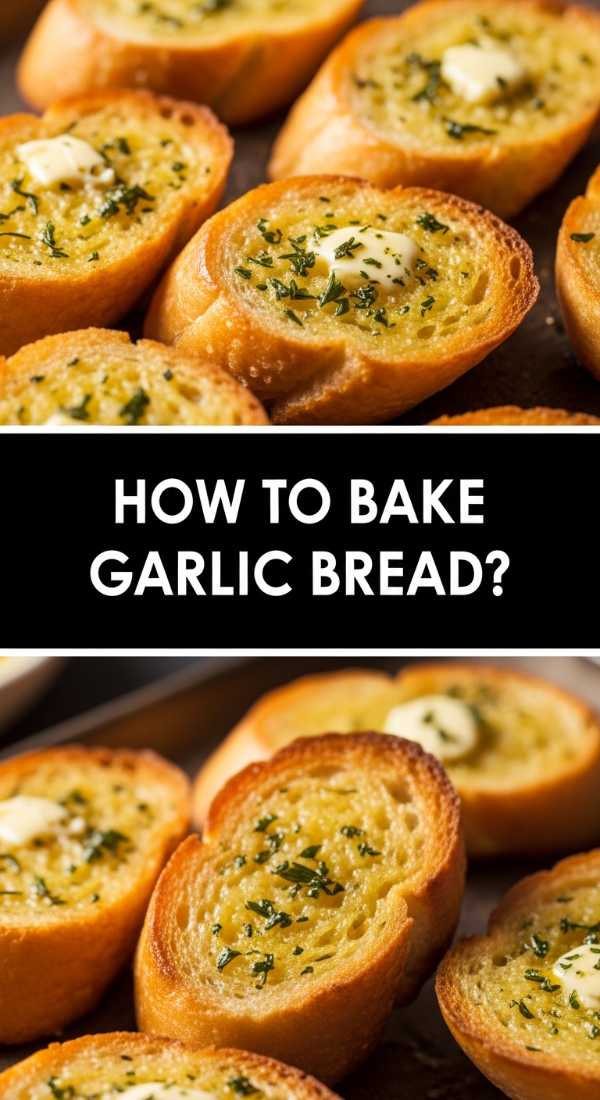
How to bake garlic bread?

Why we love this
The scent of garlic bread baking is perhaps the most universally loved kitchen aroma, promising a side dish that is crunchy, salty, and unapologetically bold. We love the contrast between the shatteringly crisp outer crust of the baguette and the soft, almost custard-like interior that has been saturated with herb-flecked butter. It is the ultimate vessel for dipping into sauces or simply enjoying on its own as the ultimate comfort snack. Every bite delivers a pungent, savory punch that is balanced by the sweetness of roasted garlic and fresh parsley.
Ingredients
- 1 large French Baguette or Italian Loaf
- 1/2 cup Unsalted Butter, softened
- 4 cloves Garlic, minced into a paste
- 2 tbsp Fresh Parsley, finely chopped
- 1/4 cup Grated Parmesan
- Pinch of Red Pepper Flakes
How to make it
- Slice the bread in half lengthwise, creating two long open faces, and place them on a baking sheet lined with foil for easy cleanup.
- In a small bowl, mash the softened butter with the garlic, parsley, parmesan, and pepper flakes until it forms a uniform, emerald-flecked spread.
- Slather the butter mixture generously across the cut sides of the bread, making sure to reach every single edge so no bite is left dry.
- Bake in a preheated oven at 375°F for 10 minutes to melt the butter into the crumb, then turn on the broiler for the final 1-2 minutes.
- Watch the bread intensely during the broiling phase; you want the edges to turn a dark golden brown and the cheese to bubble and char slightly before removing and slicing into thick batons.
How to roast crispy potatoes?

Why we love this
A perfectly roasted potato is a masterclass in texture, featuring an outer skin that is glass-like in its crunchiness and an interior that is as light and fluffy as a cloud. We love the way the edges get craggy and caramelized in the oven, trapping salt and herbs in every little nook and cranny. They are the ultimate crowd-pleaser, offering a rustic, earthy flavor that pairs beautifully with everything from steak to eggs. There’s a deep satisfaction in the ‘crunch’ sound when you bite into one, followed by the steaming, savory center.
Ingredients
- 3 lbs Yukon Gold Potatoes, peeled and cubed
- 1/4 cup Extra Virgin Olive Oil or Duck Fat
- 1 tsp Baking Soda
- Kosher Salt and Cracked Black Pepper
- Fresh Rosemary and Garlic Powder
How to make it
- Boil the potato chunks in water with the baking soda for about 8-10 minutes; the baking soda breaks down the starch on the surface, creating a starchy ‘mash’ on the outside of each cube.
- Drain the potatoes and let them steam-dry in the pot for 2 minutes, then shake the pot vigorously to roughen up the edges until they look fuzzy and coated in paste.
- Pour the oil onto a large baking sheet and heat it in a 425°F oven for 5 minutes until the oil is shimmering and hot.
- Carefully spread the potatoes onto the hot tray (it should sizzle!) and roast for 20 minutes, then flip them and continue roasting for another 20-30 minutes.
- Once they are deep mahogany and incredibly loud when tossed, remove them from the oven and immediately toss with fresh rosemary and extra salt while the oil is still wet.
How to bake gooey cookies?

Why we love this
There is something magical about a cookie that is crisp and golden on the very edge but transitions into a soft, molten, and gooey center that barely holds its shape. We love the pockets of melted chocolate that smear when you pull the cookie apart and the subtle hint of vanilla that perfumes the entire house. It’s a sensory experience that brings out the inner child in everyone, offering a warm, sugary hug in edible form. These cookies aren’t just a dessert; they are a decadent, buttery event that demands a cold glass of milk.
Ingredients
- 1 cup Brown Sugar (for chewiness)
- 1/2 cup White Sugar
- 1 cup Salted Butter, melted and slightly cooled
- 1 Egg + 1 Egg Yolk (for extra richness)
- 2 cups All-Purpose Flour
- 1.5 cups Dark Chocolate Chunks
- Sea Salt for sprinkling
How to make it
- Whisk the melted butter with both sugars for at least 2 minutes; the sugar should partially dissolve into the butter to create that signature shiny, crackly top.
- Add the egg and extra yolk, whisking just until combined, then gently fold in the flour using a spatula—do not overmix, or the cookies will become tough rather than gooey.
- Fold in the chocolate chunks and then chill the dough in the refrigerator for at least 30 minutes; this prevents the butter from spreading too fast in the oven.
- Scoop large balls of dough onto a baking sheet and bake at 350°F for only 9-10 minutes; the centers should still look slightly ‘underdone’ and wet when you pull them out.
- Let the cookies rest on the hot baking sheet for 5 minutes to finish setting, then sprinkle with sea salt to balance the intense sweetness.
How to prep fresh salads?
[IMAGE_10]
Why we love this
A truly fresh salad is a vibrant explosion of color and vitality that acts as the perfect palate cleanser for a rich food board. We love the rhythmic crunch of crisp greens paired with the juicy burst of ripe tomatoes and the creamy tang of a homemade dressing. It’s a celebration of seasonality, where every ingredient feels alive and intentional rather than an afterthought. The bright, zesty acidity of a well-balanced vinaigrette awakens the taste buds and makes every other dish on the table taste even better.
Ingredients
- Mixed Greens (Arugula, Spinach, Butter Lettuce)
- Thinly Sliced Radishes and Cucumbers
- Crumbled Feta or Goat Cheese
- Toasted Pine Nuts or Sunflower Seeds
- Dressing: Lemon juice, Dijon mustard, Honey, Olive oil
How to make it
- Wash your greens in ice-cold water and use a salad spinner to ensure they are bone-dry; any water left on the leaves will repel the dressing and make the salad soggy.
- Whisk your dressing in the bottom of a large wooden bowl first—lemon, mustard, and honey, slowly drizzling in the oil until the mixture is thick and emulsified.
- Layer your ‘sturdy’ vegetables like radishes and cucumbers into the dressing at the bottom of the bowl, allowing them to marinate for a few minutes before adding the greens.
- Place the dried greens on top but do not toss until the very second you are ready to serve; this keeps the leaves from wilting under the acidity of the lemon.
- Toss gently with clean hands or large spoons, then finish by sprinkling the cheese and toasted nuts over the top so they stay visible and crunchy.
The Final Touch: Bringing Your Board Together
Building a viral-worthy food board isn’t about perfection; it’s about the abundance and the joy of variety. When you take these ten elements—from the savory crunch of the potatoes to the sweet, gooey finish of the cookies—and arrange them on a large surface, you create a landscape of flavor that invites everyone to participate. Remember to keep the hot items central and use your fresh salads and fruits to add pops of color that break up the richness. Happy hosting!
Frequently Asked Questions
Got questions about mastering your weekend spread? Here are the answers to the most common queries from our community.