

The Ultimate Viral Food Ideas Board: Recipes That Broke the Internet
Hello, my sweet loves! There is something truly magical about a kitchen filled with the aroma of something wonderful cooking on the stove. It’s like a warm, cloud-soft embrace for the soul, isn’t it? I’ve spent countless hours scrolling through our favorite corners of the internet to find those recipes that don’t just look good, but actually change the way we feel about food and home life.
Today, I am so excited to share my ultimate viral food ideas board with you. These are the recipes and tips that have captured the hearts of millions, and for good reason—they bring a little bit of extraordinary into our everyday routines. Whether you’re looking for a quick bite or a slow-cooked masterpiece, consider this your invitation to create something beautiful in your own sanctuary today.
Secret Crispy Chicken Wrap Techniques

Why we love this
There is an absolute art to achieving that perfect, shatteringly crisp chicken wrap that we all crave during our midday slump. This technique ensures that every single bite is a symphony of textures, combining the warmth of a toasted tortilla with the satisfying crunch of golden breading. It’s the kind of meal that makes you feel like you’ve ordered from the trendiest bistro in town, right from your own cozy kitchen nook. It’s fast, fresh, and incredibly satisfying for the whole family.
Ingredients
- 2 large flour tortillas
- 2 breaded chicken breast fillets
- Shredded romaine lettuce
- Sliced cherry tomatoes
- Honey mustard or spicy mayo
- Cornflake crumbs for extra coating
- Avocado oil for frying
How to make it
- Begin by lightly pounding your chicken breast fillets to an even thickness to ensure they cook through perfectly and stay juicy.
- Dredge the chicken in a light flour dusting, then dip in egg wash, and finally press firmly into a mixture of panko and crushed cornflakes.
- Heat a thin layer of avocado oil in a heavy skillet until shimmering; fry the chicken for 4-5 minutes per side until deeply golden.
- Warm your tortillas in a dry pan for 30 seconds to make them pliable and release their natural sweetness.
- Layer your sauces first, followed by the crispy chicken and fresh vegetables, then fold the sides in and roll tightly.
- Place the finished wrap back in the hot pan for 30 seconds on each side to seal the edge and create a toasted exterior.
The Ultimate Melting Cheese Stick Secret

Why we love this
We have all experienced the disappointment of a cheese stick that doesn’t quite pull, but this secret method changes everything forever. By focusing on the temperature and the double-coating process, we create a barrier that keeps the cheese molten while the outside stays perfectly crisp. It is the ultimate comfort food for a movie night in or a rainy afternoon treat that feels like a warm hug. My loves, you will never go back to the store-bought frozen versions after trying this.
Ingredients
- 10-12 Mozzarella string cheese sticks
- 1 cup all-purpose flour
- 2 large eggs, beaten
- 1.5 cups seasoned Italian breadcrumbs
- 1/2 cup grated parmesan cheese
- Oil for deep frying
How to make it
- The absolute secret is to freeze your mozzarella sticks for at least two hours before you even begin the breading process.
- Prepare three bowls: one with flour, one with the beaten eggs, and one with a mixture of breadcrumbs and parmesan.
- Coat each frozen cheese stick in flour, dip in egg, and then roll in the breadcrumb mixture until fully covered.
- Repeat the egg and breadcrumb steps a second time; this double-coating is vital to prevent the cheese from leaking out.
- Place the breaded sticks back in the freezer for another 30 minutes to set the coating before frying.
- Heat your oil to 375 degrees and fry in small batches for only 60-90 seconds until they are a beautiful golden brown.
Melt In Your Mouth Crock Pot Beef
Why we love this
This recipe is the ultimate definition of slow living, allowing the flavors to develop over hours while you focus on what matters most. The beef becomes so tender that it literally falls apart at the touch of a fork, creating a rich and savory experience. It’s designed for those slow, relaxing days when all you want to do is curl up with something hearty and nourishing. The way the flavors meld together over hours of simmering is nothing short of pure kitchen alchemy in your home.
Ingredients
- 3 lb chuck roast, trimmed
- 1 cup beef bone broth
- 1/4 cup soy sauce
- 4 cloves minced garlic
- 2 tablespoons brown sugar
- 1 tablespoon sesame oil
- Fresh ginger, grated
How to make it
- Start by searing your beef roast in a hot pan with a splash of oil to lock in all those delicious, savory juices.
- Place the seared meat into the bottom of your slow cooker, ensuring it sits flat for even heat distribution.
- In a small bowl, whisk together the bone broth, soy sauce, garlic, brown sugar, sesame oil, and freshly grated ginger.
- Pour the liquid mixture over the beef, then cover the crock pot and set it to the low heat setting.
- Allow the beef to cook undisturbed for 8 to 10 hours, letting the connective tissue melt away into a rich sauce.
- Carefully remove the meat, shred it with two forks, and then toss it back into the juices for 15 minutes before serving.
Kitchen Style For Aspiring Home Chefs

Why we love this
Creating a beautiful environment is just as important as the food we cook, as it inspires our creativity and brings peace. When your kitchen reflects your personal style, every task from chopping vegetables to brewing tea feels like a mindful ritual of self-care. It’s about surrounding yourself with textures and tools that make you feel like the professional chef of your own beautiful life. This approach transforms the daily grind into a curated experience of joy and aesthetic harmony that we all deserve.
Ingredients
- Ceramic display bowls
- Wooden cutting boards
- Fresh herb pots
- Uniform spice jars
- Linen kitchen towels
- Magnetic knife strip
How to make it
- Begin by decluttering your countertops and leaving only the items that you use daily and truly love to look at.
- Group your wooden cutting boards by height against the backsplash to create a warm, textural focal point in the room.
- Transfer your most-used spices into uniform glass jars with minimalist labels to reduce visual noise and improve organization.
- Place a few pots of living herbs like basil or rosemary on the windowsill to bring life and fresh scents into the space.
- Incorporate soft elements like linen towels in neutral tones to soften the hard surfaces of the appliances and cabinets.
- Invest in a quality magnetic knife strip to display your tools as functional art, keeping them within reach and well-maintained.
Capturing The First Bite Moment

Why we love this
In our digital age, sharing the joy of a meal is a way to connect with our community and celebrate the beauty of food. Capturing that perfect “first bite” moment allows you to preserve the steam, the texture, and the genuine delight of a fresh dish. It’s about storytelling and showing the love you’ve poured into your cooking through a lens that others can almost taste. This practice helps us slow down and appreciate the visual artistry of our culinary creations before we dive in.
Ingredients
- Smartphone or DSLR camera
- Natural window lighting
- A beautiful plate or bowl
- Clean garnishes
- Neutral background surface
- A steady hand or tripod
How to make it
- Position your dish near a large window where the light is soft and indirect to avoid harsh shadows on your food.
- Garnish your meal at the very last second with fresh herbs or a drizzle of oil to ensure it looks vibrant and alive.
- Set your camera to a slightly lower angle to emphasize the height and layers of the dish, creating a more immersive feel.
- Use a “burst mode” setting on your camera to capture the exact second the fork breaks into the food or the steam rises.
- Focus on the texture—zoom in close enough that the viewer can see the crunch of the crust or the silkiness of the sauce.
- Edit with a light touch, enhancing the warmth and saturation just enough to make the colors pop without looking artificial.
Irresistible Cheesy Garlic Bread Recipe

Why we love this
There is nothing quite like the scent of garlic and melting butter wafting through the house to bring everyone to the table. This recipe takes the humble side dish and turns it into a show-stopping centerpiece that is crunchy, gooey, and packed with flavor. It is the ultimate crowd-pleaser that pairs perfectly with pasta or stands alone as a decadent snack for your late-night cravings. Every slice is a little piece of heaven that celebrates the simple joy of high-quality butter and fresh herbs.
Ingredients
- 1 large loaf of Italian bread
- 1/2 cup softened unsalted butter
- 4 cloves minced fresh garlic
- 2 cups shredded mozzarella
- 1/2 cup grated parmesan
- Fresh parsley, finely chopped
- Pinch of sea salt
How to make it
- Preheat your oven to 400 degrees and line a large baking sheet with parchment paper for easy cleanup later.
- In a small bowl, cream together the softened butter, minced garlic, chopped parsley, and sea salt until smooth and fragrant.
- Slice the loaf of bread in half lengthwise and spread the garlic butter generously over the entire cut surface of both halves.
- Place the bread in the oven for about 8 minutes to allow the butter to soak in and the edges to crisp up.
- Remove and pile on the mozzarella and parmesan cheeses, ensuring you cover every inch to the very edges of the crust.
- Bake for another 5-7 minutes, then switch to the broiler for 1 minute until the cheese is bubbly and spotted with gold.
Fast Dinner Without The Stress

Why we love this
We all have those days where time seems to slip through our fingers, but that doesn’t mean we have to sacrifice a nourishing meal. This approach to dinner is all about efficiency and flavor, proving that you can have a gourmet experience in under twenty minutes. It takes the pressure off the evening, allowing you to spend more time relaxing and less time hovering over a hot stove. It’s a gentle reminder that feeding ourselves well can be simple, fast, and completely stress-free every single night.
Ingredients
- Quick-cooking protein (shrimp or thin chicken)
- Pre-washed baby spinach
- Box of high-quality pasta or couscous
- Jarred pesto or marinara
- Lemon zest
- Red pepper flakes
How to make it
- Start your water boiling immediately; using a kettle to pre-heat the water can save you several precious minutes of waiting.
- While the pasta cooks, season your protein simply with salt and pepper and sear it in a hot pan for 3 minutes.
- As soon as the protein is cooked, toss in a few handfuls of baby spinach—it will wilt in the residual heat almost instantly.
- Drain the pasta, reserving a small splash of the starchy cooking water to help your sauce cling to the noodles.
- Stir in your high-quality jarred sauce, the protein, the spinach, and the reserved pasta water over low heat until combined.
- Finish with a bright grating of lemon zest and a pinch of red pepper flakes for a fresh, professional flavor profile.
Hearty Stews For Relaxing Sundays

Why we love this
Sunday afternoons were made for the rhythmic sound of a knife on a cutting board and the slow bubble of a pot. A hearty stew is more than just a meal; it is a labor of love that fills the home with warmth and comfort. It’s the perfect way to use up seasonal vegetables and create a dish that actually tastes even better as leftovers the next day. This is the food of memory and tradition, grounding us and preparing us for the busy week ahead with a full heart.
Ingredients
- 2 lbs beef or root vegetables (for vegetarian)
- 4 large carrots, thickly sliced
- 3 russet potatoes, cubed
- 1 large onion, diced
- 3 cups rich vegetable or beef stock
- 2 tablespoons tomato paste
- Fresh thyme and rosemary
How to make it
- Begin by sautéing your onions and base vegetables in a large heavy-bottomed pot until they are soft and translucent.
- Add your main protein or hearty vegetables and brown them slightly to develop a deep, caramelized base layer of flavor.
- Stir in the tomato paste and cook for two minutes until it turns a dark brick red, which removes any metallic taste.
- Pour in your stock and use a wooden spoon to scrape up all the flavorful bits from the bottom of the pot.
- Add the potatoes, carrots, and fresh herbs, then turn the heat down to the lowest setting for a gentle simmer.
- Cover and let the stew cook for at least two hours, checking occasionally to ensure the liquid hasn’t evaporated too much.
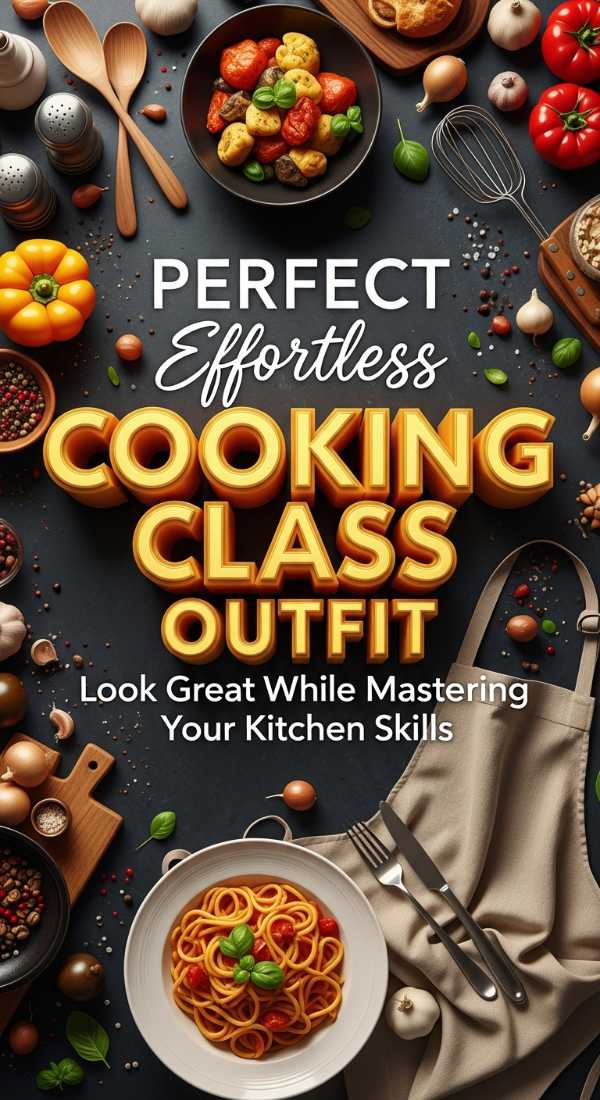
Professional Aprons For Home Cooks

Why we love this
Slipping on a beautiful, high-quality apron is the ultimate mental shift that signals it is time to create and nourish. It protects your favorite clothes, of course, but it also makes you feel capable and professional in your own culinary space. The weight of a good linen or canvas apron feels like a gentle hug, holding you in as you move through your kitchen. It’s a small investment in your hobby that pays off every time you feel that surge of confidence and style while cooking.
Ingredients
- Cross-back linen apron
- Heavy-duty cotton canvas
- Adjustable neck straps
- Deep utility pockets
- Reinforced stitching
- Neutral, timeless colors
How to make it
- Choose a fabric that matches your cooking style; linen is breathable for baking, while canvas is better for heavy roasting.
- Opt for a cross-back design if you find that traditional neck straps cause strain during long sessions in the kitchen.
- Ensure the apron has at least two deep pockets to hold your phone, a towel, or your most-used tasting spoons.
- Wash your apron with a high-quality fabric softener to give it that lived-in, soft feel that makes it comfortable for hours.
- Hang your apron on a visible hook in the kitchen so it becomes a part of the decor and is always ready for your next project.
- Personalize your apron with a small embroidered initial or a pin that reflects your personality and makes the piece truly yours.
The Joy Of Perfect Baking Results
[IMAGE_10]
Why we love this
There is a unique sense of accomplishment that comes from pulling a perfectly risen loaf or a batch of golden cookies from the oven. Baking is a science, but it is also a form of meditation that requires us to be present and precise with our movements. When the results are just right, it feels like a gift you’ve made for yourself and those you love the most. The joy of sharing something homemade and perfectly executed is a feeling that stays with you long after the last crumb is gone.
Ingredients
- Room temperature eggs and butter
- High-quality vanilla bean paste
- Weighted kitchen scale
- Fresh baking soda and powder
- Pre-heated oven thermometer
- Parchment paper or silicone mats
How to make it
- Always start by reading your recipe twice to ensure you understand the flow and have all your ingredients prepared.
- Use a digital scale to weigh your flour rather than using cups; this is the single most important step for consistent results.
- Ensure your eggs and dairy are truly at room temperature so they emulsify properly into the batter for a smooth texture.
- Check your oven’s actual temperature with an internal thermometer, as many ovens are off by ten to twenty degrees.
- Avoid over-mixing your dough or batter; stop as soon as the last streak of flour disappears to keep things light and airy.
- Allow your baked goods to cool completely on a wire rack to prevent the bottoms from becoming soggy and to set the crumb.
Conclusion
My dear ones, I hope this board inspires you to find the beauty in your kitchen this week. Whether you are mastering the perfect cheese pull or simply organizing your spices, remember that every small act of creation is a way of loving yourself and your home. Cooking isn’t just about the end result; it’s about the warmth, the light, and the memories we build along the way. I can’t wait to see what you create!