

The Ultimate Viral Food Board Hacks for Your Next Party
There is something truly magical about a house filled with the hum of laughter, the clinking of glasses, and the irresistible scent of something delicious wafting from the kitchen. Hosting used to feel like a high-stress performance, but lately, I’ve embraced the beauty of the ‘viral board’—that effortless, stunning spread where everyone can graze at their own pace. It’s about creating a moment of connection where the food serves as the centerpiece of a memory, making your guests feel cherished the second they walk through the door.
Today, I’m sharing my favorite hacks to take your hosting game from ‘standard’ to ‘Pinterest-perfect’ without the melt-down. Whether you’re celebrating a massive milestone like a graduation or just trying to elevate a weekend brunch, these recipes and styling tips are designed to be approachable yet show-stopping. Let’s dive into the art of the board and the sweet, tart, and savory treats that make them unforgettable.
How to decorate graduation cakes?
Why we love this
A graduation cake isn’t just a dessert; it’s a symbol of years of hard work and late-night study sessions, and decorating it should feel just as rewarding. We love this approach because it focuses on sophisticated textures and clean lines, using edible gold leaf and miniature mortarboards to create a high-end bakery look at home. The aroma of vanilla bean frosting mixing with the slight sweetness of fondant creates a sensory experience that feels celebratory and indulgent. Imagine the joy as the graduate sees their name scripted in elegant frosting atop a shimmering masterpiece.
Ingredients
- Tiered sponge cake (cooled completely)
- Swiss meringue buttercream
- Black fondant
- Edible gold leaf or gold luster dust
- Yellow embroidery thread (for tassels)
- Wooden skewers
How to make it
- Begin by applying a ‘crumb coat’ of buttercream to your cake; use an offset spatula to spread a thin layer, sealing in any loose crumbs, then chill for 30 minutes until firm.
- Apply the final layer of buttercream using a bench scraper held at a 90-degree angle to the cake while spinning your turntable to achieve perfectly smooth, sharp edges.
- Roll out the black fondant to a 1/4 inch thickness and cut out small squares and circles to assemble a miniature graduation cap; use a tiny drop of water to glue them together.
- Attach the edible gold leaf by using a dry, soft-bristled brush to gently lift the delicate sheets and press them onto the sides of the cake in an organic, cascading pattern.
- Finish by placing the fondant cap on top and piping the graduate’s name using a fine round tip; keep your hand steady and move with a consistent, slow pressure for professional lettering.
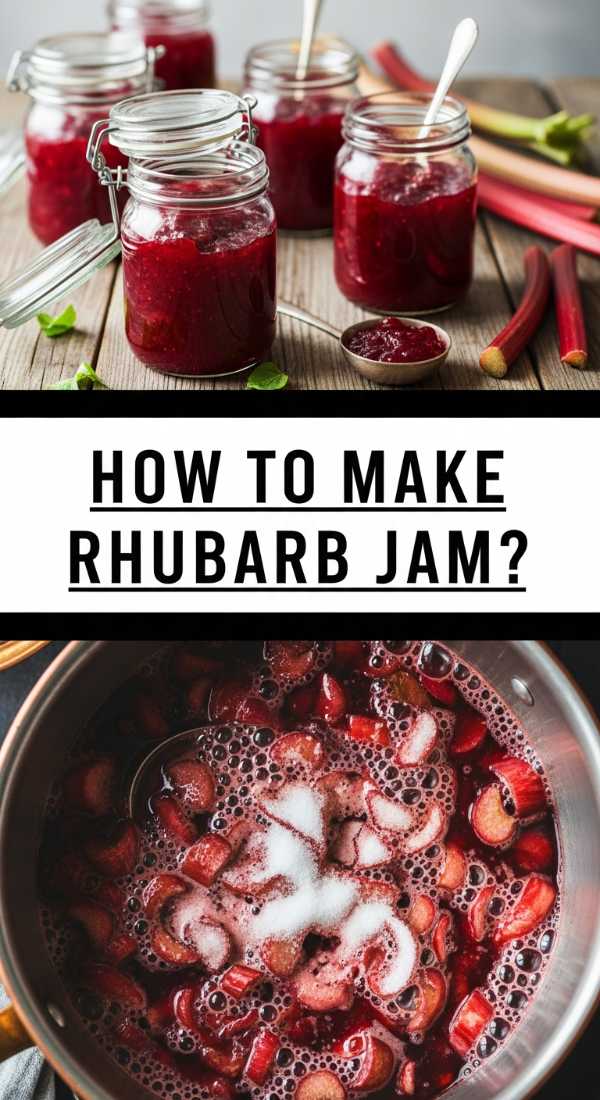
How to make rhubarb jam?

Why we love this
Rhubarb jam is the ultimate spring condiment, offering a vibrant, tart profile that cuts through the sweetness of any pastry or cheese board. The process of simmering the stalks down into a thick, ruby-red preserve fills your kitchen with a nostalgic, floral aroma that is absolutely intoxicating. We love the way the texture transforms from fibrous stalks into a silky, spreadable nectar that sparkles under the light. It’s the perfect balance of zing and sugar, making every bite of toast or cracker feel like a gourmet experience.
Ingredients
- 4 cups chopped fresh rhubarb
- 1.5 cups granulated sugar
- 1 tablespoon fresh lemon juice
- 1 teaspoon vanilla bean paste
- 1 pinch of sea salt
How to make it
- In a heavy-bottomed stainless steel pot, combine the chopped rhubarb and sugar, stirring well to coat the fruit; let it macerate for at least 30 minutes until juices begin to pool.
- Place the pot over medium heat and bring the mixture to a gentle boil, stirring frequently with a wooden spoon to prevent the sugar from scorching on the bottom.
- Once boiling, reduce the heat to medium-low and stir in the lemon juice and salt; the acid in the lemon helps the natural pectin set the jam.
- Simmer for 20-25 minutes, skimming off any foam that rises to the surface, until the rhubarb has completely broken down and the liquid has thickened to a syrupy consistency.
- To test for doneness, place a small spoonful on a chilled plate; if it wrinkles when you push it with your finger, it’s ready to be jarred and cooled.
How to style graduation cupcakes?
Why we love this
Cupcakes are the life of the party because they are individually portioned and offer endless opportunities for creative expression. Styling graduation cupcakes allows you to incorporate school colors and whimsical motifs that make the dessert table pop with personality. We love the contrast between a fluffy, moist cake base and a stiff, piped swirl that mimics the shape of a diploma or a cap. The tactile satisfaction of biting into a perfectly frosted cupcake, where the buttercream is airy and the cake is tender, is a highlight of any celebration.
Ingredients
- Batch of baked cupcakes
- Stiff buttercream frosting
- Mini chocolate squares (like Ghirardelli)
- Mini peanut butter cups
- Sour belt candies (cut into strips)
- M&Ms or sugar pearls
How to make it
- Frost each cupcake using a large open-star tip, starting from the outside edge and spiraling inward and upward to create a tall, stable mound of buttercream.
- To create mini graduation caps, invert a small peanut butter cup and place it in the center of the frosting swirl to act as the base of the hat.
- Apply a tiny dot of frosting to the top of the peanut butter cup and press a thin chocolate square onto it to form the mortarboard.
- Take a small strip of a sour belt candy or a piece of licorice and attach it to the center of the chocolate square with a dab of frosting to act as the tassel.
- Add a single M&M or a sugar pearl at the point where the tassel meets the center of the cap for a finished, polished look that will wow your guests.
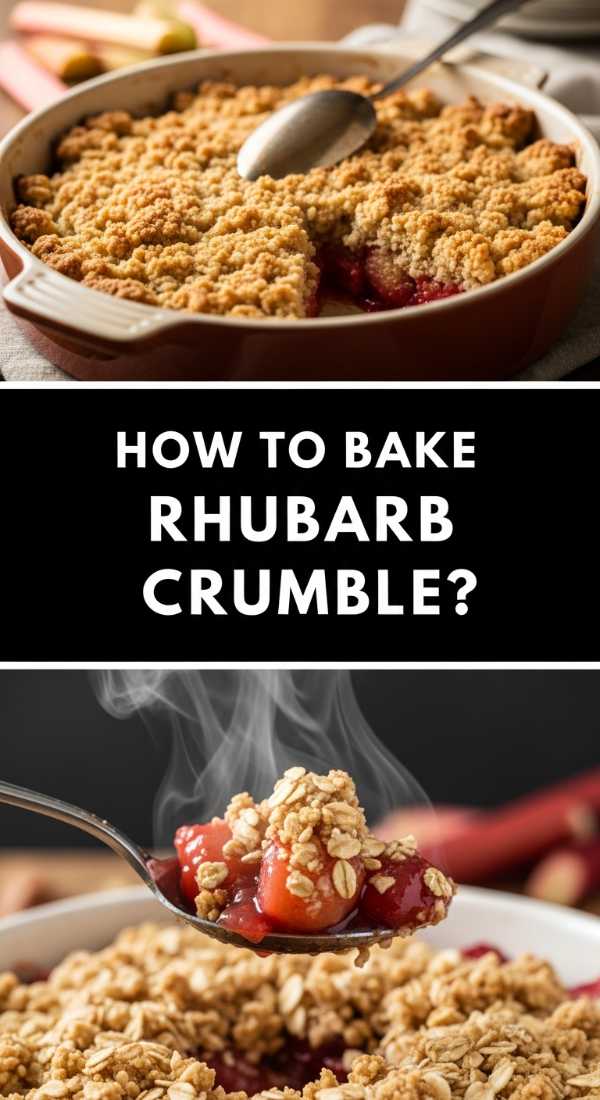
How to bake rhubarb crumble?

Why we love this
There is nothing quite as comforting as a warm rhubarb crumble straight from the oven, with its bubbly, tart filling and buttery, golden-brown topping. The smell of cinnamon and oats toasting in the oven creates an atmosphere of pure cozy bliss that draws everyone to the kitchen table. We love the contrast of the soft, melt-in-your-mouth fruit against the crunchy, salty-sweet crumble layer. It’s a rustic dessert that doesn’t require perfection, making it the ideal dish for a relaxed gathering where flavor is the priority.
Ingredients
- 6 cups rhubarb (cut into 1-inch pieces)
- 1 cup old-fashioned oats
- 1 cup brown sugar (packed)
- 1/2 cup all-purpose flour
- 1/2 cup cold unsalted butter (cubed)
- 1 teaspoon ground cinnamon
How to make it
- Preheat your oven to 375°F (190°C) and lightly grease a 9×9 inch baking dish with butter or non-stick spray to ensure easy serving later.
- Toss the rhubarb with a quarter cup of sugar and a tablespoon of flour in the baking dish until the fruit is evenly coated.
- In a medium bowl, combine the oats, remaining brown sugar, flour, and cinnamon; use a pastry cutter or your fingers to rub the cold butter into the dry ingredients.
- Continue mixing until the topping resembles coarse crumbs about the size of peas; avoid overworking it, as you want distinct chunks of butter for maximum crunch.
- Sprinkle the crumble evenly over the rhubarb and bake for 35-40 minutes until the fruit juices are bubbling at the edges and the top is a deep golden brown.
How to ice graduation cookies?
Why we love this
Icing graduation cookies is a therapeutic process that results in edible art pieces that guests almost feel guilty eating—almost! The smooth, matte finish of royal icing provides a sophisticated canvas for diploma bows and graduation years. We love the satisfying snap of a well-baked sugar cookie paired with the sweet, citrusy hint of lemon-flavored icing. It’s a wonderful way to personalize a food board, adding a touch of elegance and custom flair that makes the graduate feel truly celebrated.
Ingredients
- Sugar cookies (cut into squares or diploma shapes)
- Royal icing (stiff and flooding consistencies)
- Food coloring (school colors)
- Fine-tip piping bags
- Scribe tool or toothpick
How to make it
- Outline your cookies using the stiff consistency icing and a small round piping tip, keeping the line about 1/8 inch from the edge to prevent spills.
- Fill the center of the outlined area with the ‘flooding’ consistency icing; work quickly and use a scribe tool to pop any air bubbles and push the icing into the corners.
- Allow the base layer to dry completely—this usually takes 6 to 12 hours depending on humidity—before adding any decorative details.
- Once dry, use the stiff icing to pipe ‘Class of 2024’ or draw a small ribbon to represent a diploma tie; use steady, even pressure for a clean line.
- For a metallic finish, mix a drop of vodka with gold luster dust and paint over the dried icing details using a very fine, food-safe paintbrush.
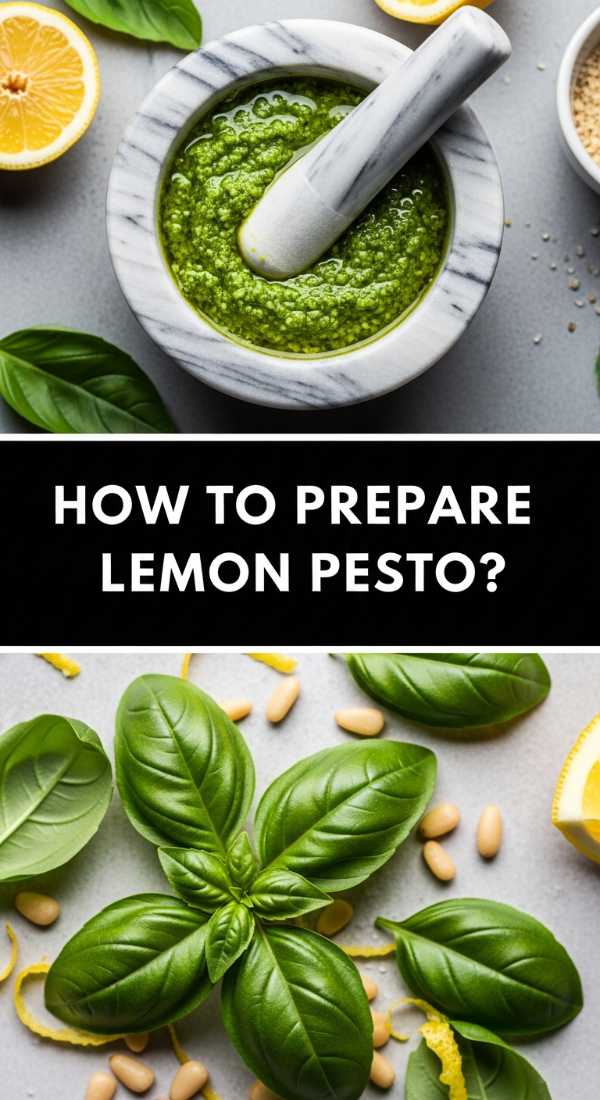
How to prepare lemon pesto?

Why we love this
Lemon pesto is a bright, sunshine-filled twist on the classic basil version, offering a zesty acidity that wakes up the palate. The aroma of freshly grated lemon zest combined with toasted pine nuts and pungent garlic is enough to make anyone’s mouth water. We love this recipe for its versatility; it’s just as delicious drizzled over grilled halloumi as it is tossed with pasta on a graduation board. The texture is thick and rustic, providing a burst of herbal freshness that balances out heavier, savory snacks on your spread.
Ingredients
- 2 cups fresh basil leaves (packed)
- 1/2 cup grated Parmesan cheese
- 1/3 cup toasted pine nuts
- 2 cloves garlic (minced)
- Zest and juice of 1 large lemon
- 1/2 cup extra-virgin olive oil
How to make it
- Place the toasted pine nuts and garlic in a food processor and pulse several times until they are finely minced but not yet a paste.
- Add the basil leaves, lemon zest, and Parmesan cheese; pulse again in short bursts to break down the leaves while maintaining a bit of texture.
- While the processor is running on low, slowly drizzle in the extra-virgin olive oil in a steady stream to emulsify the sauce into a rich, green paste.
- Add the lemon juice at the very end and pulse once more; adding the acid last helps preserve the vibrant green color of the basil.
- Season with a pinch of salt and cracked black pepper to taste, then transfer to a small bowl and top with a thin layer of olive oil to prevent oxidation before serving.
How to brew fun coffee?
Why we love this
Forget the standard drip—fun coffee is all about layers, textures, and the visual drama of a cafe-style drink at home. We love the ‘Dalgona’ or whipped coffee style because it creates a cloud-like topper that slowly melts into cold milk, creating a beautiful marbled effect. The scent of roasted coffee beans combined with a hint of vanilla or caramel syrup transforms your morning routine into a luxurious ritual. It’s a playful, caffeinated addition to any brunch board that invites guests to customize their drinks with sprinkles or cinnamon.
Ingredients
- 2 tablespoons instant coffee
- 2 tablespoons granulated sugar
- 2 tablespoons boiling water
- 1 cup cold milk (dairy or oat)
- Ice cubes
- Vanilla extract
How to make it
- In a medium mixing bowl, combine the instant coffee, sugar, and boiling water; the ratio must be exactly 1:1:1 for the foam to stabilize correctly.
- Using a hand mixer or a milk frother, whisk the mixture vigorously for 3 to 5 minutes until it transforms from a dark liquid into a thick, pale beige foam with stiff peaks.
- Fill a glass three-quarters of the way with ice and pour in your cold milk, adding a splash of vanilla extract if you prefer a sweeter profile.
- Gently dollop the whipped coffee foam onto the top of the milk using a spoon, smoothing it out to create a dramatic, airy layer.
- Serve with a long spoon or a straw so guests can stir the foam into the milk themselves, creating those signature viral swirls as they sip.
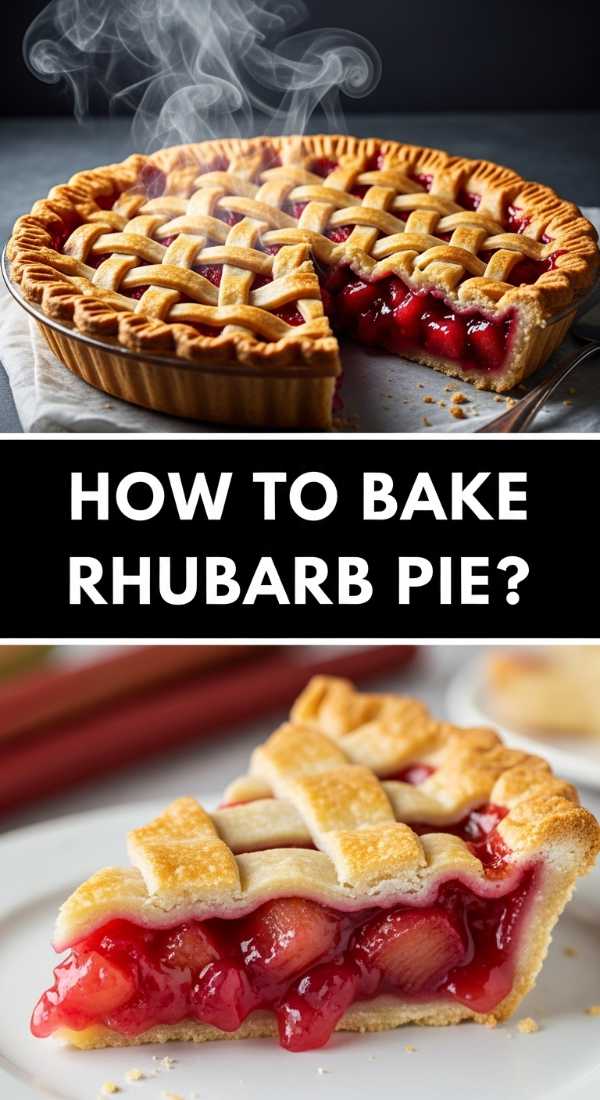
How to bake rhubarb pie?
Why we love this
Rhubarb pie is the quintessential summer dessert, boasting a flaky, buttery crust that houses a tart, jammy center. The way the rhubarb softens and releases its juices during baking, creating a naturally thickened sauce, is pure culinary magic. We love the classic lattice top, which allows the vibrant pink filling to peek through, promising a bite that is both crisp and tender. It’s a labor of love that fills the home with the scent of toasted pastry and cooked fruit, making it the perfect grand finale for a family gathering.
Ingredients
- Double pie crust (homemade or store-bought)
- 5 cups rhubarb (sliced 1/2 inch thick)
- 1 1/4 cups sugar
- 1/4 cup cornstarch
- 1 tablespoon butter (cubed)
- 1 egg (for egg wash)
How to make it
- Preheat your oven to 425°F (220°C). Roll out the bottom crust and fit it into a 9-inch pie plate, leaving an inch of overhang around the edges.
- In a large bowl, toss the rhubarb with the sugar and cornstarch until the fruit is fully coated; the cornstarch is vital for preventing a ‘soggy bottom’ by thickening the juices.
- Pour the fruit mixture into the prepared bottom crust and dot the top with small cubes of butter to add richness to the filling.
- Roll out the second crust and cut into strips to create a lattice top, weaving them over and under each other for a traditional look.
- Crimp the edges to seal, brush the top with a beaten egg wash, and bake at 425°F for 15 minutes, then reduce heat to 375°F and bake for another 40-45 minutes until the crust is golden.
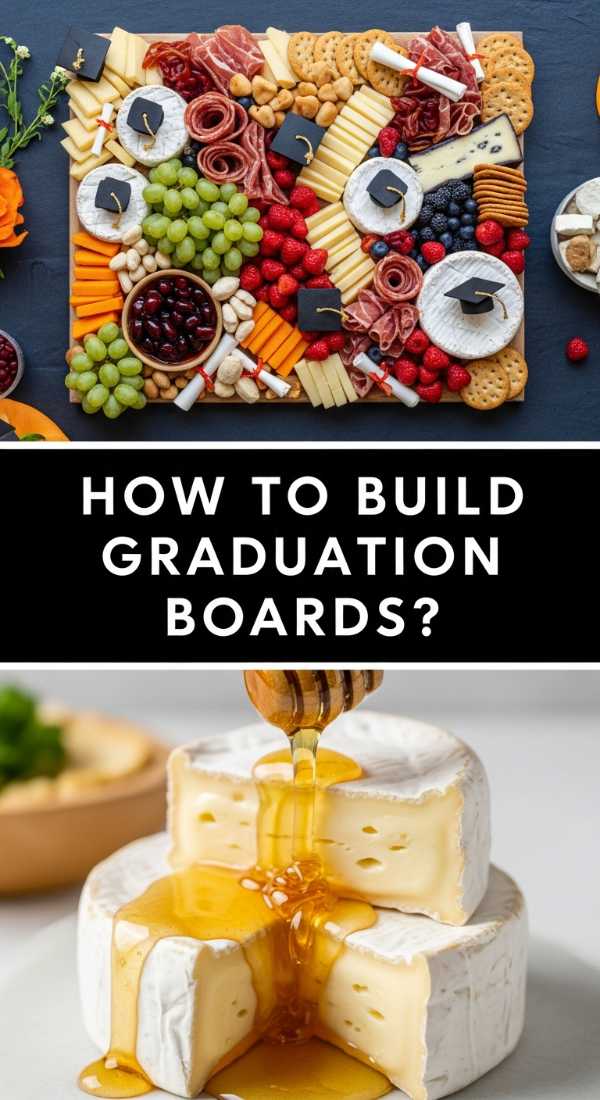
How to build graduation boards?

Why we love this
The graduation board is the hero of the party, a curated landscape of flavors that celebrates the graduate’s journey. We love this concept because it combines savory snacks like cheeses and crackers with themed sweets like the graduation cookies and cupcakes we’ve discussed. The visual impact of a well-organized board—with its clusters of grapes, swirls of salami, and pops of school colors—is immediate and inviting. It encourages guests to linger, chat, and sample a little bit of everything in a relaxed, communal atmosphere.
Ingredients
- Large wooden board or slate
- Assorted cheeses (Brie, Cheddar, Manchego)
- Cured meats (Salami, Prosciutto)
- Graduation cookies and cupcakes
- Fresh berries and nuts
- Lemon pesto and rhubarb jam
How to make it
- Start by placing your ‘anchors’ on the board: put the bowls of lemon pesto and rhubarb jam in opposite corners to create balance.
- Arrange the cheeses and meats around the bowls, using a ‘salami rose’ technique (folding slices over the rim of a glass) to add height and interest.
- Incorporate the themed items by placing the graduation cookies and cupcakes in the open spaces, ensuring they are easily accessible for guests.
- Fill in the smaller gaps with clusters of fresh grapes, strawberries, and a handful of marcona almonds to provide different textures and colors.
- Finish the board by tucking in a few sprigs of fresh rosemary or edible flowers to give it a professional, lush look that ties the whole display together.
How to make chocolate balls?
[IMAGE_10]
Why we love this
Chocolate balls are the ultimate bite-sized indulgence, offering a rich, velvety explosion of cocoa in every mouthful. These are fantastic for a party board because they don’t require silverware and can be coated in a variety of toppings to match any theme. We love the process of rolling the ganache in our hands—it’s tactile and fun, resulting in treats that look like professional truffles. The deep, dark chocolate aroma is intoxicating, and the way they melt slowly on the tongue makes them a favorite for kids and adults alike.
Ingredients
- 8 oz high-quality dark chocolate (chopped)
- 1/2 cup heavy cream
- 1/2 teaspoon vanilla extract
- Coating options: Cocoa powder, sprinkles, crushed nuts
- Pinch of sea salt
How to make it
- Place the chopped chocolate in a heat-proof glass bowl. Heat the heavy cream in a small saucepan until it just begins to simmer—do not let it reach a full boil.
- Pour the hot cream over the chocolate and let it sit undisturbed for 5 minutes to allow the chocolate to melt evenly from the residual heat.
- Gently stir the mixture with a whisk starting from the center and moving outward until a smooth, glossy ganache forms; stir in the vanilla and salt.
- Refrigerate the ganache for at least 2 hours until it is firm enough to handle. Use a melon baller or a teaspoon to scoop out small portions.
- Roll the portions quickly between your palms to form balls, then immediately roll them in your chosen toppings—cocoa powder or school-colored sprinkles—before the chocolate sets.
Elevate Your Celebration
Hosting doesn’t have to be overwhelming when you have a plan that focuses on flavor and presentation. By combining these viral hacks—from the tart zest of lemon pesto to the sentimental touch of decorated graduation cookies—you create a board that is more than just food; it’s a conversation starter. Remember, the best parties are the ones where the host is having just as much fun as the guests. So, pour yourself a fun coffee, grab a chocolate ball, and enjoy the beautiful spread you’ve created!