
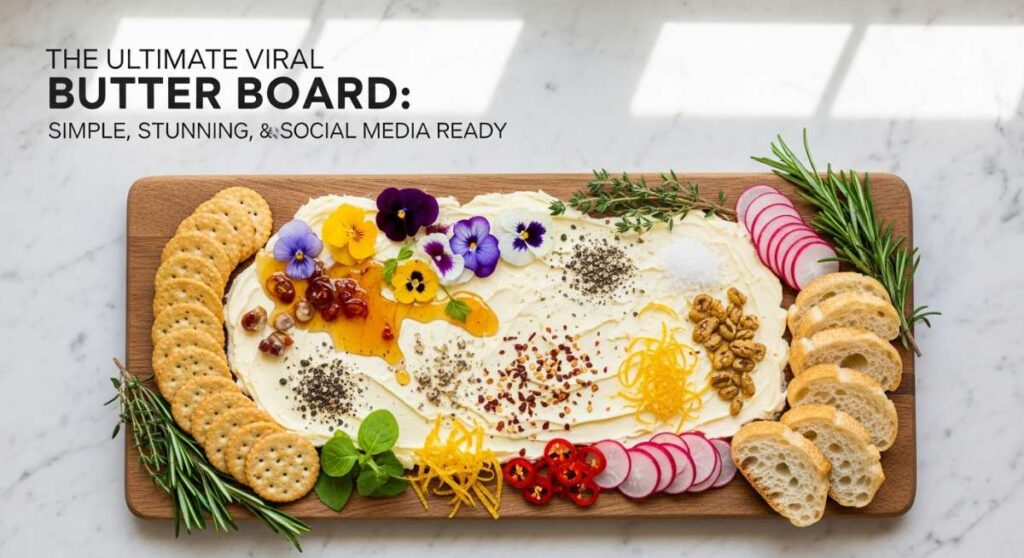
There is something undeniably magical about the way food brings us together, especially when it’s presented as a canvas of colors and textures. I remember the first time I set a butter board down on my farmhouse table; the room went quiet for a split second before the chatter erupted into excitement. It wasn’t just about the food; it was about the communal experience of dipping, sharing, and savoring something beautiful. In our fast-paced digital world, these tactile, visual feasts remind us to slow down and enjoy the art of the meal.
This season, I’ve been obsessed with finding that perfect balance between ‘Instagram-worthy’ aesthetics and ‘second-helpings’ flavor. Whether you’re hosting a backyard bash or just trying to survive a humid Tuesday night, having a repertoire of simple, stunning dishes is a total game-changer. From the forage-to-table charm of homemade jelly to the sizzle of a perfectly grilled chicken breast, these recipes are designed to make your kitchen the heart of your home.
How to make dandelion jelly at home
Why we love this
Capturing the essence of a sun-drenched meadow in a jar feels like performing a bit of culinary alchemy. This dandelion jelly tastes remarkably like light, floral honey with a hint of citrus that dances on the tongue. When you spread it over a warm, buttered biscuit, the aroma transports you straight to a spring afternoon, and the bright golden hue is simply mesmerizing through the glass. It is a labor of love that rewards you with a unique, nostalgic flavor profile that you simply cannot find in any grocery store aisle.
Ingredients
- 2 cups dandelion petals (yellow parts only)
- 4 cups boiling water
- 1/4 cup lemon juice
- 1 package (1.75 oz) powdered pectin
- 4 cups granulated sugar
How to make it
- Harvest your dandelions from a pesticide-free area, picking only the brightest yellow heads. Spend time carefully pulling the yellow petals away from the green sepals; this is crucial because the green parts are incredibly bitter and will ruin the delicate flavor of your jelly.
- Place the 2 cups of cleaned petals into a heat-proof quart jar and pour the 4 cups of boiling water over them. Once the mixture has cooled to room temperature, screw on a lid and place it in the refrigerator to steep for 24 hours, allowing the water to absorb the floral essence.
- Strain the liquid through a fine-mesh sieve or cheesecloth into a heavy-bottomed pot, squeezing the petals to get every drop of ‘dandelion tea.’ You should have roughly 3.5 to 4 cups of liquid.
- Stir in the lemon juice and the powdered pectin. Bring the mixture to a rolling boil over high heat, stirring constantly so the pectin doesn’t clump. A rolling boil is one that cannot be stirred down.
- Add the sugar all at once, stirring vigorously. Bring the mixture back to a full rolling boil and boil hard for exactly one minute. This timing is essential for the set; too short and it stays runny, too long and it becomes gummy.
- Remove from heat and skim off any foam with a metal spoon. Ladle the hot jelly into sterilized jars, leaving 1/4 inch of headspace, and process in a boiling water bath for 10 minutes to seal.
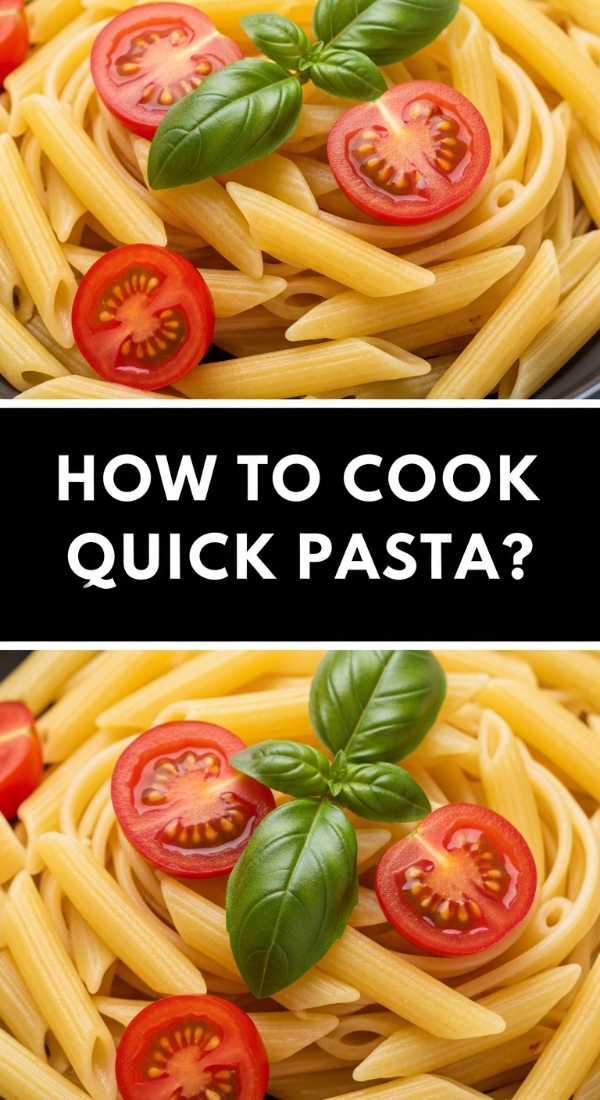
How to cook quick summer pasta

Why we love this
There is a specific joy in a meal that tastes like it took hours but actually came together in the time it took for the pasta water to boil. This quick summer pasta is the ultimate tribute to peak-season produce, utilizing the natural juices of bursting cherry tomatoes to create a silky, effortless sauce. The aroma of garlic sautéing in high-quality olive oil combined with the sharp, peppery scent of fresh basil creates a sensory experience that defines summer dining. It feels light enough for a hot evening yet remains deeply satisfying and comforting.
Ingredients
- 1 lb spaghetti or linguine
- 1/2 cup extra virgin olive oil
- 4 cups cherry tomatoes, halved
- 6 cloves garlic, thinly sliced
- 1/2 tsp red pepper flakes
- 1 cup fresh basil leaves, torn
- 1/2 cup grated Parmesan cheese
How to make it
- Bring a large pot of heavily salted water to a boil—it should taste like the sea to properly season the pasta from the inside out. Cook your pasta until it is just shy of al dente, as it will finish cooking in the sauce.
- While the water heats, place a large skillet over medium-low heat and add the olive oil. Add the thinly sliced garlic and red pepper flakes. Sauté slowly for 3-4 minutes; you want the garlic to become soft and translucent without turning brown or bitter.
- Increase the heat to medium-high and toss in the halved cherry tomatoes. Sauté them for about 5-7 minutes, stirring occasionally, until they begin to collapse and release their bright red juices, forming a chunky sauce.
- Before draining the pasta, reserve at least 1 cup of the starchy pasta water. This is your ‘liquid gold’ that helps emulsify the sauce.
- Add the pasta directly into the skillet with the tomatoes. Pour in half a cup of the reserved pasta water and toss vigorously with tongs. The starch will bind with the oil and tomato juice to create a glossy coating.
- Remove from heat, fold in the fresh basil and Parmesan cheese. If it looks too dry, add a splash more pasta water. Serve immediately with a final drizzle of olive oil.
How to prep camping meals early
Why we love this
Camping is all about the crackle of the fire and the stars overhead, not stressing over a cutting board in the dark. Prepping your meals early transforms a rustic trip into a gourmet getaway where the food tastes like a high-end steakhouse but is eaten with your hands under the pines. There’s a rugged satisfaction in pulling a perfectly seasoned foil packet out of the embers, knowing all the hard work was done in the comfort of your kitchen days ago. It allows you to actually be present for the adventure rather than being tethered to the cooler.
Ingredients
- Heavy-duty aluminum foil
- Pre-marinated proteins (steak tips, chicken thigh chunks)
- Hard vegetables (carrots, potatoes, bell peppers)
- Compound butter (butter mixed with garlic and herbs)
- Dry spice blends in small containers
How to make it
- Three days before your trip, decide on your menu and chop all ‘hard’ vegetables like potatoes and carrots into uniform 1/2 inch cubes. Store these in airtight containers or vacuum-sealed bags to prevent browning and save space in the cooler.
- Marinate your meats in leak-proof bags. For beef, use an oil-and-vinegar base; for chicken, try yogurt or citrus. Freezing these bags flat serves a dual purpose: they act as ice packs for the first 24 hours of your trip and will be perfectly thawed and marinated by the second night.
- Construct ‘Hobo Packets’ using two layers of heavy-duty foil. Place a portion of meat and veggies in the center, top with a generous dollop of compound butter, and fold the edges tightly to create a steam-tight seal. Label each packet with a permanent marker.
- Pre-crack eggs into a clean plastic water bottle using a funnel. This prevents messy shell breakage in the cooler and makes it incredibly easy to pour scrambled eggs directly into a cast-iron skillet over the campfire.
- Organize your cooler using the ‘First In, Last Out’ rule. Place the frozen meat packets at the bottom and the items for your first meal (like sandwiches or pre-washed salad greens) at the very top to minimize the time the lid stays open.
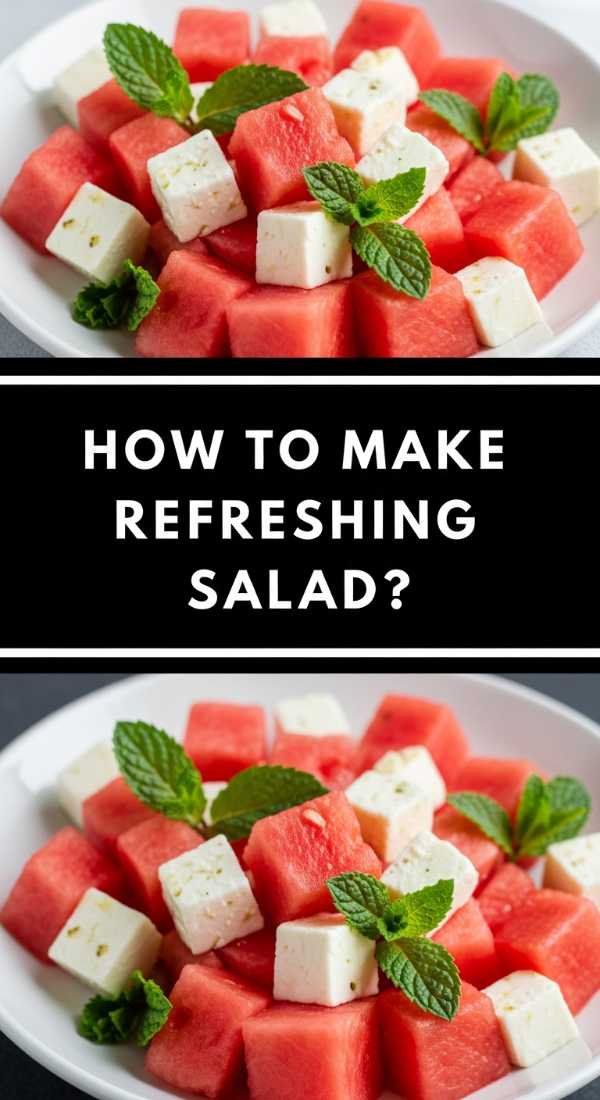
How to make refreshing summer salad
Why we love this
When the temperature climbs into the nineties, you need a dish that feels like a cool breeze for your palate. This refreshing summer salad relies on the contrast between the icy crunch of cucumber, the creamy tang of feta, and the surprising sweetness of ripe watermelon. Every bite is an explosion of hydration and flavor, perfectly balanced by a lime-heavy vinaigrette that keeps the palate bright. It’s the kind of dish that disappears in minutes at a potluck because it offers such a sharp, invigorating relief from traditional, heavy barbecue sides.
Ingredients
- 6 cups cubed seedless watermelon (chilled)
- 2 large English cucumbers, sliced into half-moons
- 1/2 red onion, very thinly sliced
- 1 cup crumbled feta cheese
- 1/2 cup fresh mint leaves, chiffonade
- Dressing: 3 tbsp lime juice, 2 tbsp olive oil, flakey sea salt
How to make it
- Start by slicing your red onion into paper-thin slivers. To take away the harsh ‘bite’ of the onion, soak the slices in a small bowl of ice water for 10 minutes, then pat them thoroughly dry before adding to the salad.
- Cut your chilled watermelon into uniform 1 inch cubes. It is vital that the watermelon is cold before you start; a room-temperature melon won’t have that signature crisp snap.
- Peel the English cucumbers partially (leaving some green strips for texture) and slice them into half-moons. The English variety is preferred here as the skin is thinner and the seeds are almost non-existent, preventing the salad from becoming watery.
- In a small jar, whisk together the fresh lime juice, olive oil, and a pinch of salt. Do not add the dressing until the very last second, as the salt will cause the watermelon and cucumber to release their juices immediately.
- In a large wide bowl (avoid deep bowls to prevent crushing the bottom layers), gently toss the watermelon, cucumbers, and onions.
- Sprinkle the crumbled feta and mint over the top. Drizzle the dressing just before serving and finish with a generous pinch of flakey sea salt to make the sweetness of the melon pop.
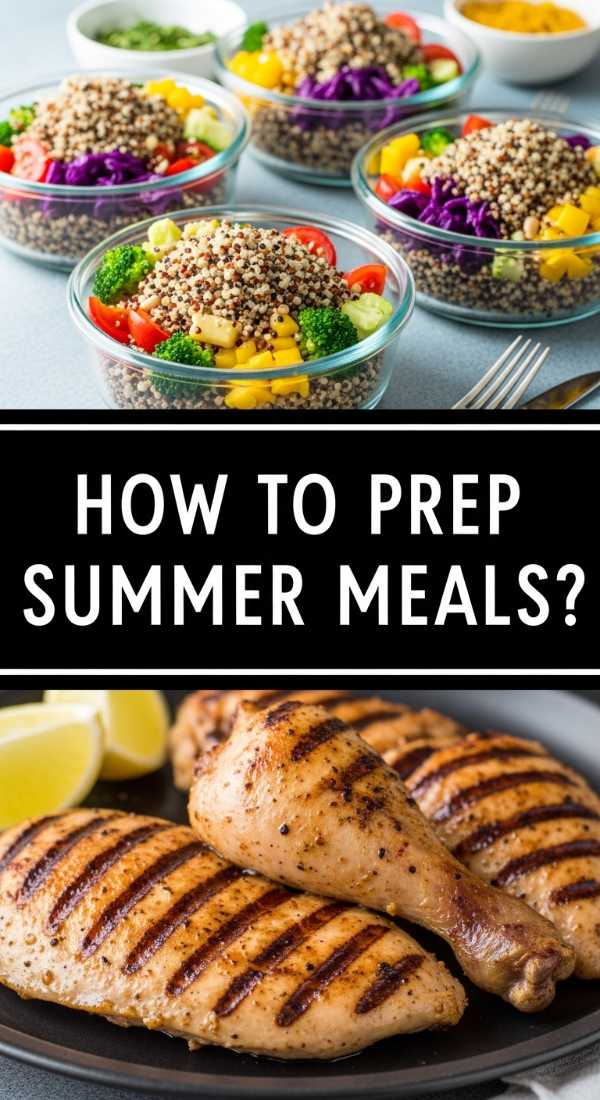
How to master summer meal prep

Why we love this
Mastering summer meal prep is like giving a gift to your future self—specifically, the version of you that is too tired from the sun to stand over a stove. It’s about creating a ‘capsule wardrobe’ for your fridge: versatile components that can be mixed and matched into bowls, wraps, or salads at a moment’s notice. The sight of organized, glass containers filled with colorful roasted veggies and prepped grains brings a sense of calm to the chaotic summer schedule. It ensures you’re fueled by whole, vibrant foods even when your calendar is packed with spontaneous beach trips.
Ingredients
- Grains (Quinoa, Farro, or Brown Rice)
- Roasted seasonal vegetables (zucchini, bell peppers, asparagus)
- Wash and dried greens (Kale or Arugula)
- Protein ‘Base’ (Hard-boiled eggs, chickpeas, or shredded chicken)
- 2 Versatile dressings (one creamy, one vinaigrette)
How to make it
- Start with your ‘Big Batch’ grain. Rinse 2 cups of quinoa or farro and cook it in vegetable broth instead of water to infuse flavor. Once cooked, spread it out on a baking sheet to cool quickly; this prevents it from becoming mushy in the fridge.
- Preheat your oven to 400°F (200°C). Chop zucchini, bell peppers, and red onions into bite-sized pieces. Toss them with olive oil, salt, and dried oregano. Roast for 20-25 minutes until the edges are slightly charred and caramelized.
- While things are in the oven, prep your ‘Green Base.’ Wash and thoroughly dry your greens using a salad spinner. Place a paper towel inside a large storage container, add the greens, and seal. The paper towel absorbs excess moisture, keeping the leaves crisp for up to 5 days.
- Prepare your proteins. Hard-boil a dozen eggs (9 minutes in boiling water, then an immediate ice bath for easy peeling) or roast two chicken breasts with simple salt and pepper. Shred the chicken while it’s still warm.
- Whisk together your dressings. A simple ‘Lemon Tahini’ (tahini, lemon, garlic, water) and a ‘Balsamic Vinaigrette’ cover almost every flavor profile. Store these in small glass jars.
- Assemble your ‘Prep Station.’ Store all components in separate clear containers. This allows you to build different meals throughout the week so you don’t get ‘recipe fatigue’ from eating the exact same thing five days in a row.
How to grill perfect summer chicken

Why we love this
Nothing says summer like the smoky, charred aroma of a grill heating up in the backyard. Perfect grilled chicken should be a study in contrasts: a deeply caramelized, crispy exterior that yields to an incredibly juicy, tender interior. When done right, it isn’t just a protein; it’s the star of the show, infused with the essence of woodsmoke and bright citrus. It’s the ultimate versatile staple that elevates everything from a simple Caesar salad to a complex grain bowl, providing a satisfying, hearty bite that feels quintessentially American.
Ingredients
- 2 lbs boneless, skinless chicken thighs (stay juicier than breasts)
- 1/4 cup olive oil
- 3 tbsp soy sauce
- 2 tbsp honey
- 1 tbsp Dijon mustard
- 3 cloves minced garlic
- Zest and juice of 1 lemon
How to make it
- Whisk the olive oil, soy sauce, honey, mustard, garlic, lemon zest, and juice in a bowl. Place the chicken thighs in a gallon-sized zip-top bag and pour the marinade over them. Massage the bag to coat and refrigerate for at least 30 minutes, but no longer than 4 hours (the lemon juice will start to ‘cook’ the meat fibers and make them mushy if left too long).
- Clean your grill grates thoroughly with a wire brush and then lightly oil them using a folded paper towel dipped in oil held by tongs. This prevents the lean meat from sticking and tearing.
- Preheat the grill to medium-high heat (about 400°F/200°C). You want a steady heat that will sear without burning the honey in the marinade too quickly.
- Place the chicken on the grill, smooth side down. Close the lid and cook undisturbed for 5-7 minutes. Look for the ‘release’—the meat will naturally pull away from the grates once a proper crust has formed. If it’s sticking, give it another minute.
- Flip the chicken and cook for another 5-6 minutes. Use an instant-read meat thermometer to check for doneness; you are looking for an internal temperature of 165°F (74°C). Chicken thighs are forgiving and stay moist even if they go slightly over.
- Transfer the chicken to a plate and tent loosely with foil. Let it rest for at least 5-8 minutes. This is the most critical step; resting allows the juices to redistribute back into the meat fibers rather than spilling out onto the cutting board.
How to make gourmet pasta salad

Why we love this
Forget the soggy, mayo-laden pasta salads of the past; this gourmet version is a vibrant, sophisticated celebration of Mediterranean flavors. The use of al dente orzo or fusilli provides a delightful chew, while sun-dried tomatoes and kalamata olives offer intense bursts of umami and brine. It’s a textural masterpiece where every forkful brings a new discovery—the crunch of toasted pine nuts, the creaminess of goat cheese, and the snap of fresh arugula. It’s elegant enough for a wedding shower yet hardy enough to stay fresh during a long afternoon at the park.
Ingredients
- 1 lb dry pasta (Orzo or Fusilli)
- 1/2 cup sun-dried tomatoes in oil, chopped
- 1/2 cup Kalamata olives, pitted and halved
- 1/4 cup toasted pine nuts
- 4 oz crumbled goat cheese or feta
- 2 cups fresh baby arugula
- Dressing: 1/4 cup balsamic vinegar, 1/2 cup olive oil, 1 tsp honey, 1 tsp dried oregano
How to make it
- Cook your pasta in a large pot of salted water until it is strictly al dente. Overcooked pasta will absorb too much dressing and turn into a mushy mess. Drain and immediately rinse with cold water to stop the cooking process and remove excess starch.
- In a small dry skillet over medium heat, toast the pine nuts for 2-3 minutes, shaking the pan constantly. Watch them like a hawk; they go from perfectly golden to burnt in seconds. Remove from the pan immediately once they smell nutty.
- In a large mixing bowl, whisk together the balsamic vinegar, olive oil, honey, oregano, salt, and pepper until the dressing is fully emulsified and thick.
- Add the cooled pasta to the bowl with the dressing and toss to coat thoroughly. Add the chopped sun-dried tomatoes (use a tablespoon of their packing oil for extra flavor), olives, and toasted pine nuts.
- Fold in the crumbled goat cheese gently. The goal is to keep some chunks intact rather than melting them into a paste.
- Wait until just before serving to fold in the baby arugula. The residual acidity in the dressing will wilt the greens over time, so adding them at the last minute ensures a fresh, peppery bite. Serve at room temperature for the best flavor profile.
How to create healthy summer bowls
Why we love this
Healthy summer bowls are the ultimate ‘choose your own adventure’ meal, offering a vibrant palette of nutrients that make you feel energized rather than weighed down. There is a deep satisfaction in the ‘bowl anatomy’—a base of earthy grains, a mountain of raw and roasted veggies, a punch of protein, and that final, velvety drizzle of sauce that ties it all together. The contrast between the warm components and the cold, crisp toppings creates a dynamic eating experience. It’s a beautiful, colorful way to eat the rainbow and utilize every bit of produce in your crisper drawer.
Ingredients
- Base: 1 cup cooked quinoa or cauliflower rice
- Protein: 1/2 cup roasted chickpeas or grilled tofu
- Veggie Mix: Shredded carrots, sliced radishes, steamed edamame
- Fat: 1/2 sliced avocado
- Sauce: Tahini, lemon juice, and a splash of maple syrup
- Topping: Hemp seeds or microgreens
How to make it
- Prepare your base by fluffing 1 cup of pre-cooked quinoa. If using cauliflower rice, sauté it briefly in a pan with a teaspoon of coconut oil and a pinch of salt until tender but not mushy (about 4 minutes). Place this at the bottom of a wide, shallow bowl.
- Roast your chickpeas for the ‘crunch’ factor. Drain and pat dry a can of chickpeas, toss with olive oil and smoked paprika, and roast at 400°F for 20 minutes. This provides a high-fiber, high-protein alternative to croutons.
- Arrange your ‘raw’ elements in distinct sections on top of the base. Grouping colors together (orange carrots, pink radishes, green edamame) makes the bowl visually stunning and ensures every bite can be customized.
- Prepare the ‘liquid gold’ sauce. In a small bowl, whisk 2 tablespoons of runny tahini with the juice of half a lemon and 1 teaspoon of maple syrup. Add warm water one teaspoon at a time until it reaches a pourable, ‘heavy cream’ consistency.
- Slice a ripe avocado just before serving to prevent browning. Fan the slices out over the center of the bowl and season them specifically with a tiny pinch of sea salt.
- Drizzle the sauce in a zig-zag pattern over the entire bowl and garnish with hemp seeds or microgreens for an extra boost of Omega-3s and a professional, finished look.
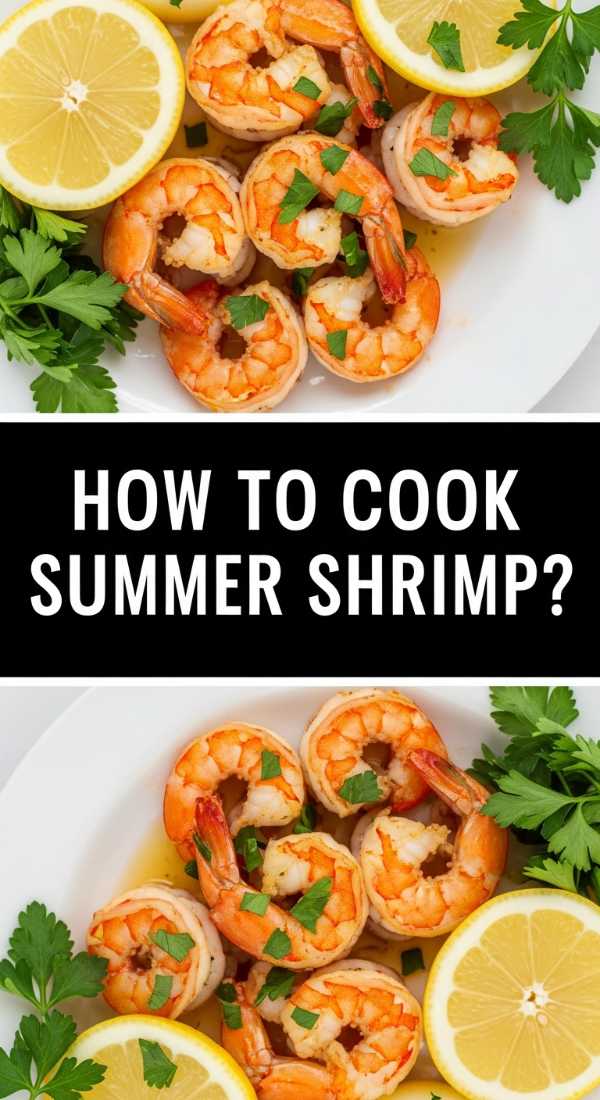
How to cook quick summer shrimp
Why we love this
Shrimp is the king of the ‘fast-food’ world when it comes to home cooking, going from frozen to fantastic in under ten minutes. When seared in a hot pan with plenty of butter and garlic, they develop a gorgeous pink hue and a slight snap that is incredibly satisfying. The addition of fresh lemon zest at the end cuts through the richness of the butter, creating a bright, coastal flavor that feels like a seaside vacation on a plate. It’s a high-protein, low-effort dish that looks sophisticated enough for a date night but is easy enough for a Monday.
Ingredients
- 1 lb large shrimp, peeled and deveined (tails on)
- 3 tbsp unsalted butter
- 2 tbsp olive oil
- 4 cloves garlic, minced
- 1/2 tsp red pepper flakes
- Zest of 1 lemon
- 2 tbsp chopped fresh parsley
How to make it
- Thaw your shrimp completely if frozen. Pat them extremely dry with paper towels; if the shrimp are wet, they will steam in the pan instead of getting that beautiful golden-brown sear. Season them lightly with salt and pepper.
- Place a large stainless steel or cast-iron skillet over medium-high heat. Add the olive oil and 1 tablespoon of the butter. The oil prevents the butter from burning at high temperatures.
- Once the butter is foaming, add the shrimp in a single layer. Do not crowd the pan; cook in two batches if necessary. Let them sear undisturbed for 2 minutes until the bottoms turn pink and opaque.
- Flip the shrimp using tongs. Immediately add the remaining 2 tablespoons of butter, the minced garlic, and the red pepper flakes to the center of the pan.
- As the butter melts and the garlic becomes fragrant (about 1-2 minutes), use a spoon to ‘baste’ the shrimp with the garlic butter. The shrimp are done when they form a ‘C’ shape; if they curl into a tight ‘O’, they are overcooked and will be rubbery.
- Remove the pan from the heat. Toss in the lemon zest and fresh parsley, stirring to coat the shrimp in the residual heat. Serve immediately, ideally with crusty bread to soak up the garlic butter sauce.
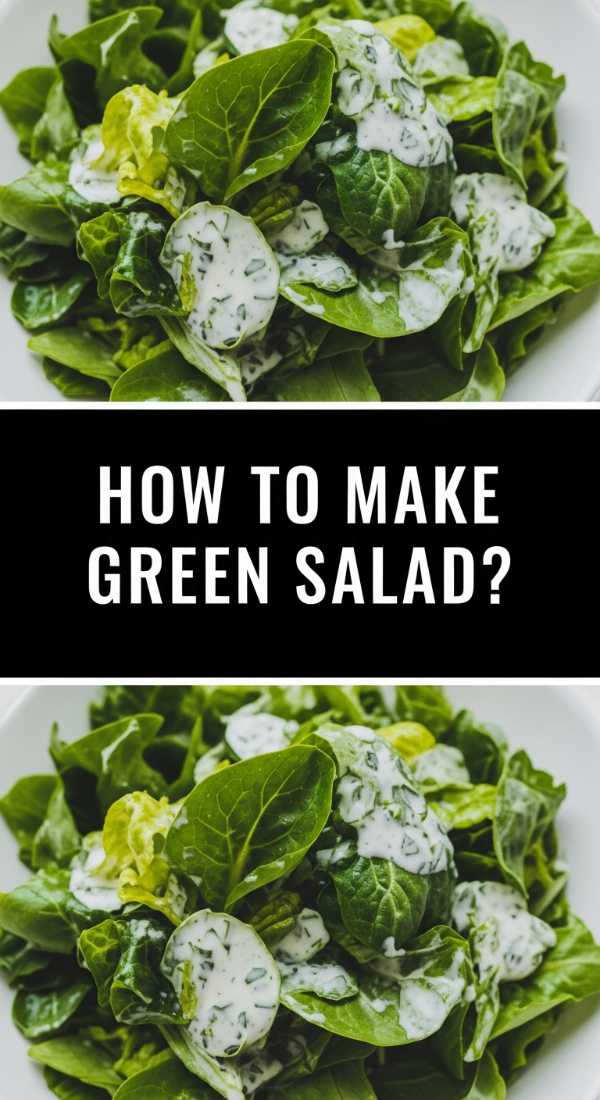
How to make green goddess salad
[IMAGE_10]
Why we love this
This salad went viral for a reason: it’s essentially a dip masquerading as a salad, and it is addictive. The magic lies in the finely diced cabbage, which provides a consistent, structural crunch that never gets soggy, even the next day. The dressing is a vibrant, herbaceous powerhouse packed with spinach, basil, and nuts, making it feel indulgent while being incredibly nutrient-dense. It’s bright, zesty, and savory all at once, and the act of eating it with tortilla chips instead of a fork makes it feel like the ultimate summer snack-dinner.
Ingredients
- 1 small head of green cabbage, finely diced
- 1 large English cucumber, finely diced
- 1 bunch green onions, sliced
- Dressing: 1 cup fresh basil, 1 cup fresh spinach, 2 cloves garlic, 1 small shallot, 1/4 cup walnuts or cashews, juice of 2 lemons, 1/4 cup olive oil, 2 tbsp nutritional yeast
How to make it
- The key to this salad is the ‘micro-dice.’ Cut your green cabbage into very thin slices, then turn those slices and cut them again into tiny squares, roughly 1/4 inch in size. Do the same with the cucumber. The smaller the dice, the better the dressing coats every piece.
- In a high-powered blender or food processor, combine the basil, spinach, garlic, shallot, walnuts, lemon juice, olive oil, and nutritional yeast. The nutritional yeast adds a ‘cheesy,’ savory depth without dairy.
- Blend the dressing on high until it is completely smooth and a vibrant, shocking green. If it’s too thick to blend, add a tablespoon of water or more olive oil to help it move.
- In a very large bowl, combine the diced cabbage, cucumber, and green onions. Pour the green dressing over the vegetables.
- Use a large spatula to fold the dressing into the vegetables. You want to spend a minute or two mixing to ensure the cabbage slightly softens and every nook and cranny is filled with the green goddess sauce.
- Taste and add more salt or lemon if needed. Serve this in a bowl accompanied by high-quality corn tortilla chips. Use the chips as your ‘spoon’ to scoop up the crunchy, zesty mixture.
Conclusion: Bringing it All Together
Creating a ‘viral’ food experience at home isn’t about professional photography or expensive gadgets; it’s about the intention we put into our ingredients and the joy we find in the process. From the patient steeping of dandelion petals to the rapid-fire sizzle of garlic shrimp, these recipes remind us that summer is a season to be tasted and shared. I hope these boards and bowls inspire you to gather your favorite people, put down the phones (after one quick photo, of course!), and dive into the delicious, messy, beautiful reality of a meal made with love.
Frequently Asked Questions
Everything you need to know about mastering your summer kitchen and hosting the perfect viral food board event.