

The Ultimate Simple Food Board That’s Taking Over Your Feed
There is something inherently magical about a shared meal that breaks the boundaries of a traditional plate. We’ve all seen the charcuterie boards, but the latest trend taking over our feeds is the ‘Full-Meal Board’—a gorgeous, sprawling display of textures and flavors that invites everyone to lean in, reach over, and savor a bit of everything. It’s about more than just food; it’s about the laughter that happens between bites and the warmth of a table that feels truly lived in.
I remember the first time I set one of these out for my friends. The room went quiet for a second as they took in the vibrant colors and the steam rising from the roasted elements, and then the conversation exploded. It turns out, when you take away the formality of individual portions, you make room for a lot more connection. Today, I’m sharing the absolute essentials for creating your own viral food board that tastes even better than it looks.
How to make crispy potatoes?
Why we love this
There is a specific, primal joy in the sound of a perfectly roasted potato cracking under your fork. These aren’t just side dishes; they are golden, rugged nuggets of joy with an exterior that shatters like glass to reveal a center as fluffy as a cloud. The aroma of rosemary and toasted garlic wafting from the oven creates an immediate sense of home and comfort, while the earthy, salty finish keeps you reaching back for ‘just one more’ until the board is empty.
Ingredients
- 2 lbs Yukon Gold potatoes, peeled and cubed
- 1/2 cup extra virgin olive oil
- 3 cloves garlic, smashed
- 2 sprigs fresh rosemary
- 1 tsp sea salt and cracked black pepper
- 1/2 tsp baking soda
How to make it
- Fill a large pot with water and add a generous pinch of salt and the baking soda. Bring to a rolling boil over high heat. The baking soda breaks down the potato’s starch, creating more surface area for maximum crunch later.
- Add the potato cubes and boil for about 8-10 minutes, or until the edges are soft but the centers still have some resistance. Drain them thoroughly in a colander.
- Shake the potatoes vigorously in the colander for 30 seconds. This ‘roughs up’ the edges, creating a starchy paste that will dehydrate and crisp up in the oven.
- Preheat your oven to 450°F (230°C). Pour the olive oil onto a large rimmed baking sheet and place it in the oven for 5 minutes to get the oil shimmering hot.
- Carefully spread the potatoes onto the hot tray in a single layer. Roast for 20 minutes, then flip them. Add the smashed garlic and rosemary at this stage so they don’t burn.
- Continue roasting for another 20-30 minutes, turning occasionally, until they are a deep mahogany gold and audibly crunchy when moved. Season with extra sea salt immediately.
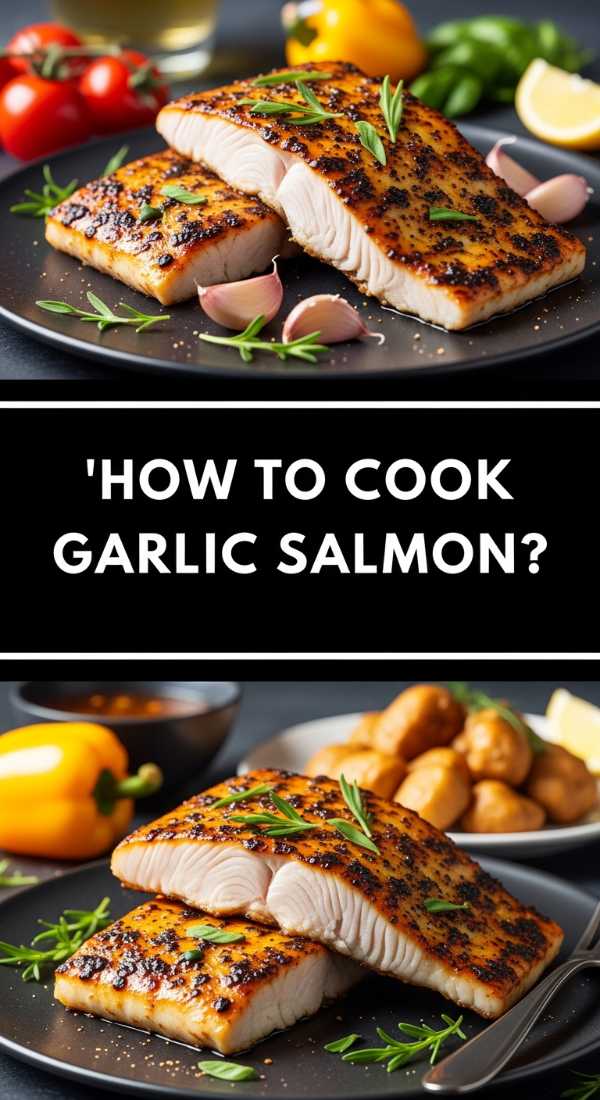
How to cook garlic salmon?
Why we love this
Salmon is the crown jewel of any food board, offering a vibrant pink hue that contrasts beautifully with greens and grains. When cooked with garlic and butter, the fish takes on a silky, melt-in-your-mouth quality that feels incredibly indulgent yet light. The scent of browning butter and caramelizing garlic creates an irresistible pull, while the citrusy brightness of lemon zest cuts through the richness, leaving your palate refreshed and ready for the next bite.
Ingredients
- 2 large salmon fillets (center-cut)
- 4 tbsp unsalted butter
- 3 cloves garlic, minced
- 1 tbsp fresh parsley, chopped
- 1 lemon, sliced into rounds
- Kosher salt and cracked pepper to taste
How to make it
- Remove the salmon from the refrigerator 20 minutes before cooking to bring it to room temperature; this ensures even cooking throughout the fillet.
- Pat the skin and flesh completely dry with paper towels. Season generously with salt and pepper on all sides.
- Place a large non-stick or cast-iron skillet over medium-high heat. Add 1 tablespoon of oil. Once the oil is shimmering and slightly smoking, place the salmon skin-side down in the pan.
- Press down lightly with a spatula for 30 seconds to ensure the skin makes full contact. Cook undisturbed for 5-6 minutes until the skin is crispy and the flesh has cooked about three-quarters of the way up.
- Flip the salmon and immediately add the butter, minced garlic, and lemon slices to the pan. Reduce heat to medium.
- As the butter foams, use a large spoon to continuously baste the salmon with the garlic-infused butter for 2-3 minutes. Remove from heat when the internal temperature reaches 125°F (52°C) for a perfect medium-rare.
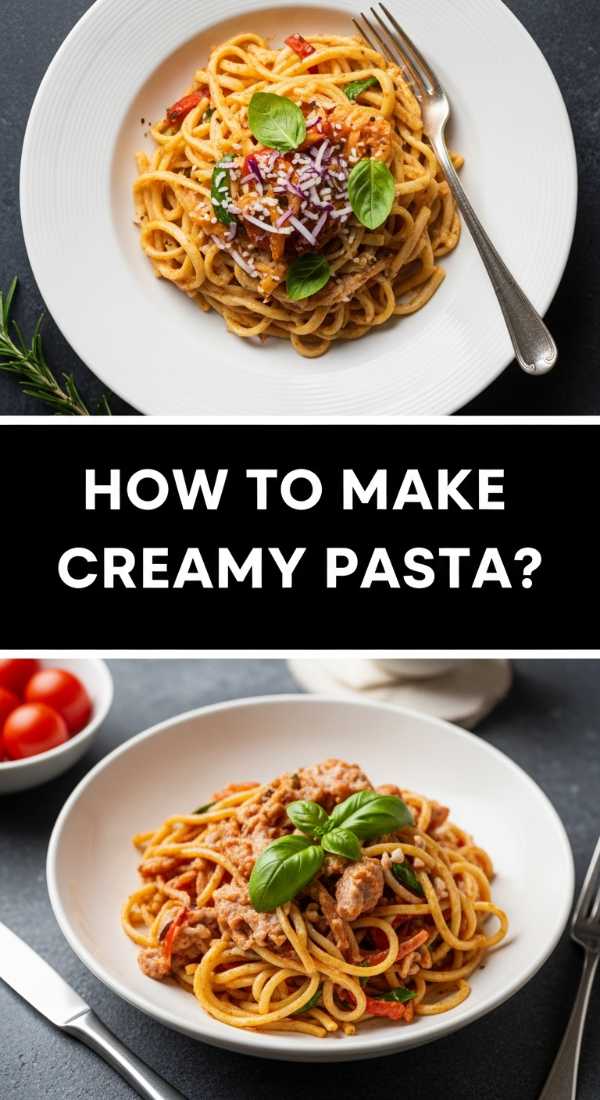
How to make creamy pasta?

Why we love this
A swirl of creamy pasta adds a luxurious, comforting weight to your food board that anchors the lighter elements. We love how the sauce clings to every ridge of the noodle, creating a velvety texture that feels like a warm hug. The subtle pungency of aged Parmesan combined with the sharp bite of black pepper creates a complex flavor profile that is both sophisticated and simple, making it the ultimate crowd-pleaser for guests of all ages.
Ingredients
- 1 lb Fettuccine or Rigatoni
- 1 cup heavy cream
- 1 cup freshly grated Parmesan cheese
- 2 tbsp unsalted butter
- 1/2 cup reserved pasta water
- Nutmeg, salt, and black pepper
How to make it
- Bring a large pot of heavily salted water (it should taste like the sea) to a boil. Cook your pasta until it is about 2 minutes away from ‘al dente’—it should still have a firm bite in the center.
- While the pasta cooks, place a large skillet over medium heat. Melt the butter and add the heavy cream, bringing it to a very gentle simmer. Do not let it boil vigorously or the cream may break.
- Whisk in a pinch of nutmeg and plenty of cracked black pepper. Let the cream reduce slightly for about 3 minutes until it coats the back of a spoon.
- Before draining the pasta, use a mug to scoop out at least one cup of the starchy pasta water. This is the ‘liquid gold’ that binds the sauce to the noodles.
- Transfer the pasta directly into the cream sauce. Add the Parmesan cheese and 1/4 cup of the pasta water.
- Toss vigorously with tongs over medium heat. The starch in the water and the cheese will emulsify with the cream to create a glossy, thick sauce. Add more pasta water if it looks too dry. Serve immediately while silky.
How to bake soft cookies?
Why we love this
Every board needs a sweet finish, and nothing beats a cookie that is impossibly soft and chewy. These cookies offer a multi-sensory experience: the smell of toasted sugar and vanilla filling the kitchen, the sight of pools of melted dark chocolate, and that specific ‘bend’ a soft cookie has before it breaks. It’s a nostalgic treat that balances the savory elements of your spread, providing a gooey, buttery conclusion to a perfect meal.
Ingredients
- 1 cup unsalted butter, softened
- 3/4 cup brown sugar, packed
- 3/4 cup granulated sugar
- 2 large eggs, room temperature
- 2 tsp vanilla extract
- 2 1/4 cups all-purpose flour
- 1 tsp baking soda
- 1/2 tsp salt
- 1.5 cups dark chocolate chunks
How to make it
- In a large bowl, cream together the softened butter, brown sugar, and granulated sugar. Use a hand mixer or stand mixer on medium-high speed for at least 3-5 minutes until the mixture is pale and fluffy.
- Add the eggs one at a time, beating well after each addition, then stir in the vanilla extract.
- In a separate bowl, whisk together the flour, baking soda, and salt. Gradually add the dry ingredients to the wet ingredients, mixing on low speed only until no streaks of flour remain. Do not overmix or the cookies will become tough.
- Fold in the chocolate chunks by hand using a spatula. For the best texture, cover the dough and chill in the refrigerator for at least 2 hours (or overnight). This prevents the cookies from spreading too thin.
- Preheat oven to 350°F (175°C). Scoop rounded tablespoons of dough onto a parchment-lined baking sheet, spacing them 2 inches apart.
- Bake for 9-11 minutes. The key to softness is taking them out when the edges are just barely golden but the centers still look slightly ‘underdone’ and shiny. They will firm up on the hot pan as they cool.
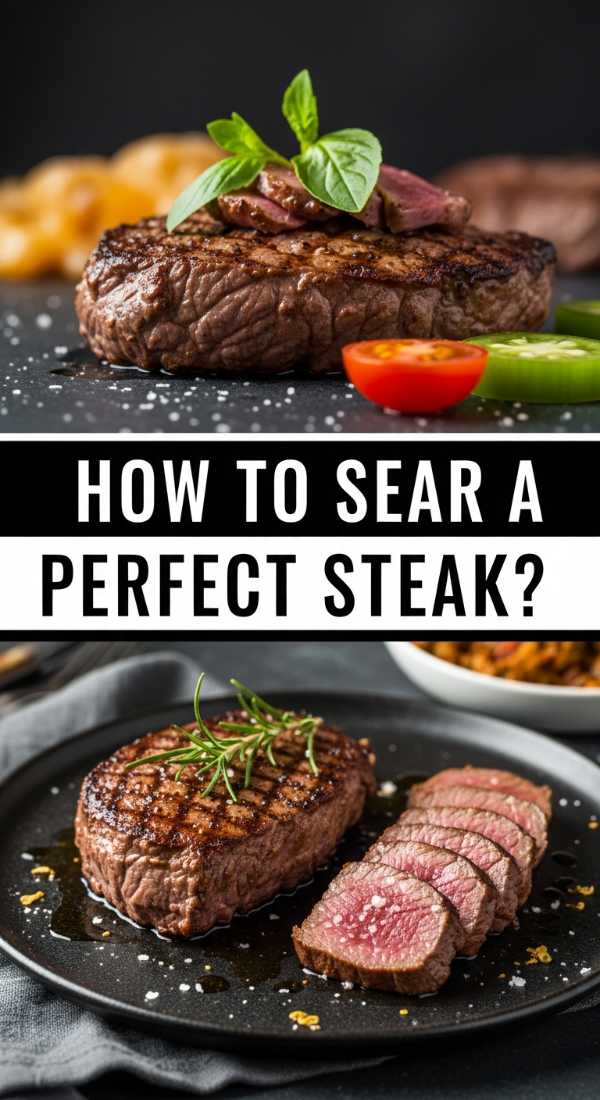
How to sear perfect steak?

Why we love this
A perfectly seared steak is the definition of rustic elegance on a food board. The Maillard reaction creates a dark, savory crust that contrasts beautifully with the tender, juicy, pink interior. Each slice offers a robust, umami-rich flavor profile enhanced by the aroma of toasted thyme and garlic. It adds a premium feel to the spread, providing a satisfying, high-protein anchor that pairs wonderfully with roasted vegetables and crispy potatoes.
Ingredients
- 1.5 lb Ribeye or New York Strip (1.5 inches thick)
- 2 tbsp neutral oil (grapeseed or canola)
- 3 tbsp unsalted butter
- 3 cloves garlic, crushed
- 4 sprigs fresh thyme
- Coarse sea salt and cracked peppercorns
How to make it
- Take the steak out of the fridge 45-60 minutes before cooking. A cold steak will not sear properly and will cook unevenly. Pat it bone-dry with paper towels—moisture is the enemy of a good crust.
- Season aggressively with salt and pepper on all sides, including the edges. Press the seasoning into the meat.
- Heat a heavy cast-iron skillet over high heat until it is starting to smoke slightly. Add the oil and swirl to coat the pan.
- Place the steak in the pan. Sear for 3-4 minutes without moving it to develop a deep brown crust. Flip the steak and sear the other side for another 3 minutes.
- Turn the heat down to medium. Add the butter, crushed garlic, and thyme. Once the butter melts and foams, tilt the pan and use a spoon to pour the flavored butter over the steak repeatedly for 2-3 minutes.
- Use a meat thermometer to check for a medium-rare finish (130°F or 54°C). Remove the steak to a cutting board and let it rest for at least 10 minutes before slicing against the grain to keep all the juices inside.
How to make fluffy pancakes?

Why we love this
If you’re creating a brunch-style board, pancakes are the fluffy clouds that hold everything together. We love the gentle sweetness and the way the edges get slightly crisp in the butter while the inside remains airy and light. The sight of maple syrup slowly cascading down a stack of these cakes is the ultimate ‘food porn’ moment for any feed, and their neutral flavor makes them the perfect vessel for everything from fresh berries to savory bacon.
Ingredients
- 1 1/2 cups all-purpose flour
- 3 1/2 tsp baking powder
- 1 tbsp white sugar
- 1/2 tsp salt
- 1 1/4 cups milk
- 1 egg
- 3 tbsp melted butter
- 1 tsp vanilla extract
How to make it
- In a large bowl, sift together the flour, baking powder, sugar, and salt. Sifting is crucial for removing lumps and aerating the flour for maximum fluffiness.
- In a separate jug, whisk the milk, egg, melted butter, and vanilla. Make a well in the center of the dry ingredients and pour in the wet mixture.
- Stir the batter with a whisk or fork only until combined. Small lumps are okay! Over-mixing develops gluten, which makes pancakes rubbery rather than fluffy. Let the batter rest for 10 minutes while the pan heats.
- Heat a non-stick griddle or skillet over medium-low heat. Lightly grease with a small amount of butter or oil.
- Pour 1/4 cup of batter for each pancake. Watch for bubbles to form on the surface and the edges to look set and dry (about 2-3 minutes).
- Flip carefully with a spatula and cook for another 1-2 minutes until golden brown on the bottom. Keep them warm in a low oven (200°F) until you are ready to assemble your board.
How to roast seasonal veggies?

Why we love this
Roasted vegetables bring the ‘pop’ of color and vital nutrients that make a food board look like a work of art. The high heat of the oven transforms bitter or bland raw veggies into caramelized, sweet treasures with charred, crispy tips. Whether it’s the snap of a carrot or the tender interior of a Brussels sprout, these morsels provide a necessary textural contrast to the richer proteins on the board, offering a burst of garden-fresh flavor in every bite.
Ingredients
- 1 lb mixed seasonal vegetables (carrots, broccoli, bell peppers, red onion)
- 3 tbsp olive oil
- 1 tsp dried oregano
- 1/2 tsp garlic powder
- Salt and pepper
- Optional: Balsamic glaze for drizzling
How to make it
- Preheat your oven to 425°F (220°C). High heat is essential for caramelization; low heat will just steam the vegetables and make them mushy.
- Cut all vegetables into uniform sizes. This ensures that they all finish cooking at the same time. For example, cut carrots into thinner slices and broccoli into medium florets.
- In a large bowl, toss the vegetables with olive oil, oregano, garlic powder, salt, and pepper until every piece is glistening.
- Spread the vegetables onto a large baking sheet. Rule of thumb: do not crowd the pan. If the veggies are touching too much, they will release steam and won’t get those crispy charred edges. Use two pans if necessary.
- Roast for 20-25 minutes. At the halfway mark, use a spatula to toss the vegetables so they brown evenly on all sides.
- The vegetables are done when they are fork-tender and have developed dark, caramelized spots. Drizzle with a little balsamic glaze right before serving for an extra punch of flavor.
How to bake crusty pizza?

Why we love this
Pizza on a board is the ultimate interactive food. There’s something so satisfying about a crust that crackles when you slice it, topped with bubbling cheese and zesty tomato sauce. The chewy texture of the dough, combined with the smoky aroma of a high-heat bake, evokes the feeling of an authentic Italian pizzeria. It’s a versatile base that allows you to get creative with toppings, ensuring there is a slice for every preference on the board.
Ingredients
- 1 lb pizza dough (store-bought or homemade)
- 1/2 cup pizza sauce
- 1.5 cups shredded mozzarella cheese
- Fresh basil leaves
- Cornmeal for dusting
- Olive oil for brushing
How to make it
- Preheat your oven to its highest possible setting (usually 500°F or 550°F). If you have a pizza stone or steel, place it in the oven while it preheats for at least 45 minutes to absorb the heat.
- Place the dough on a lightly floured surface and let it rest at room temperature for 30 minutes. This relaxes the gluten, making it easier to stretch without it snapping back.
- Gently stretch the dough into a 12-inch circle. Avoid using a rolling pin if you want a bubbly crust; use your hands to push the air to the edges.
- Dust a pizza peel or the back of a baking sheet with cornmeal. Place the stretched dough on top. Quickly spread a thin layer of sauce, followed by the cheese.
- Slide the pizza onto the hot stone or steel. Bake for 8-12 minutes. Watch for the crust to turn a deep golden brown and the cheese to be bubbling and slightly browned in spots.
- Remove from the oven and immediately brush the crust with a little olive oil and scatter fresh basil leaves on top. Let it sit for 2 minutes before slicing so the cheese sets.
How to fry chicken wings?

Why we love this
Chicken wings are the soul of the ‘viral board,’ offering a salty, crunchy, and savory experience that is hard to beat. The sound of the first bite into a perfectly fried wing is music to a food lover’s ears. We love the contrast between the craggy, seasoned skin and the succulent, juicy meat inside. Tossed in a glossy sauce or served dry-rubbed, they provide a messy, fun element that encourages everyone to get their hands dirty and truly enjoy the meal.
Ingredients
- 2 lbs chicken wings (flats and drums separated)
- 1 cup cornstarch
- 1 tsp baking powder
- 1 tbsp garlic powder
- 1 tsp salt and 1 tsp cayenne pepper
- Neutral oil for frying (peanut or vegetable)
How to make it
- Pat the chicken wings extremely dry with paper towels. Any moisture on the skin will prevent them from getting truly crispy.
- In a large bowl, whisk together the cornstarch, baking powder, garlic powder, salt, and cayenne. The baking powder is the secret ingredient that reacts with the heat to create tiny bubbles in the skin for extra crunch.
- Toss the wings in the flour mixture until evenly coated, then shake off any excess. Let them rest on a wire rack for 15 minutes to allow the coating to adhere.
- Heat 2 inches of oil in a heavy pot or deep fryer to 350°F (175°C). Use a thermometer to maintain this temperature; if the oil is too cold, the wings will be greasy.
- Fry the wings in batches for 8-10 minutes, turning occasionally. They should be a light golden brown. Remove and drain on a wire rack.
- For the ultimate ‘viral’ crunch, increase the oil heat to 375°F and fry the wings a second time for 2-3 minutes until they are a deep, shattered-glass gold. Serve immediately with your favorite dipping sauce.
How to blend smoothie bowls?
[IMAGE_10]
Why we love this
Smoothie bowls bring a refreshing, vibrant, and cold element to a board that is perfect for balancing out heavier, cooked items. We love the thick, soft-serve ice cream consistency that holds up its toppings, from crunchy granola to juicy slices of kiwi. The explosion of fruit flavors and the icy-smooth texture make it a healthy indulgence that looks like a painting. It’s the perfect way to add a ‘wow’ factor with bright purples, pinks, and greens.
Ingredients
- 2 cups frozen mixed berries or mango
- 1 frozen banana (sliced)
- 1/2 cup Greek yogurt or coconut milk
- 1 scoop protein powder (optional)
- Toppings: Granola, chia seeds, fresh fruit, honey drizzle
How to make it
- The secret to a thick bowl is using entirely frozen fruit. Do not use fresh fruit for the base or it will turn into a liquid drink rather than a bowl.
- Place the frozen berries and banana slices into a high-speed blender. Add the Greek yogurt or coconut milk. Start with only 1/4 cup of liquid—you can always add more, but you can’t take it away.
- Use the ‘pulse’ setting initially to break down the large frozen chunks. If your blender has a tamper, use it to continuously push the fruit down into the blades.
- If the blender gets stuck, add more liquid one tablespoon at a time. You are looking for a thick, creamy consistency that is difficult to pour.
- Once smooth, scoop the mixture into a shallow bowl. Use the back of a spoon to create a smooth surface or a decorative swirl.
- Immediately add your toppings in neat rows or patterns. The cold base will keep the toppings from sinking. Serve immediately before it starts to melt!
Conclusion
Building the ultimate simple food board is an exercise in creativity and a celebration of good ingredients. Whether you’re piling up crispy potatoes or nesting a smoothie bowl amongst fresh fruit, the goal is to create a shared experience that feels generous and approachable. There are no rules—only flavors that make you happy. So grab your largest wooden board, pick a few of these favorites, and get ready to host the most Instagrammable (and delicious) meal of the season!