
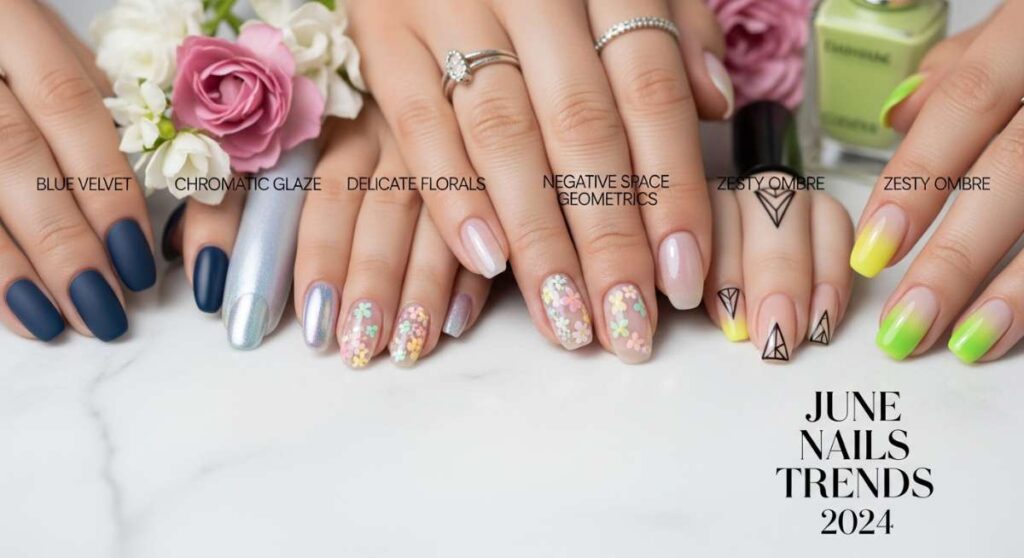
The Ultimate June 2024 Nail Inspo: Trends Every Blogger is Wearing
Hi loves! Can you feel it? That soft, golden warmth is finally settling into our mornings, and I couldn’t be more excited to welcome the magic of June with you. There is something so restorative about this time of year—the way the light hits the dew on the grass and the promise of endless summer sunsets just around the corner. For me, shifting into a new season always starts with a little self-care ritual, and this month, it’s all about the fingertips.
I’ve been scouring every corner of my feed, chatting with my favorite artists, and honestly, the nail trends for June 2024 are like a cloud-soft embrace for your soul. We’re moving away from the heavy darks and stepping into a world of tactile 3D art, sun-drenched neons, and textures that feel like a vacation in a bottle. I want your nails to tell a story this month—one of playfulness, beauty, and that effortless summer glow we all crave.
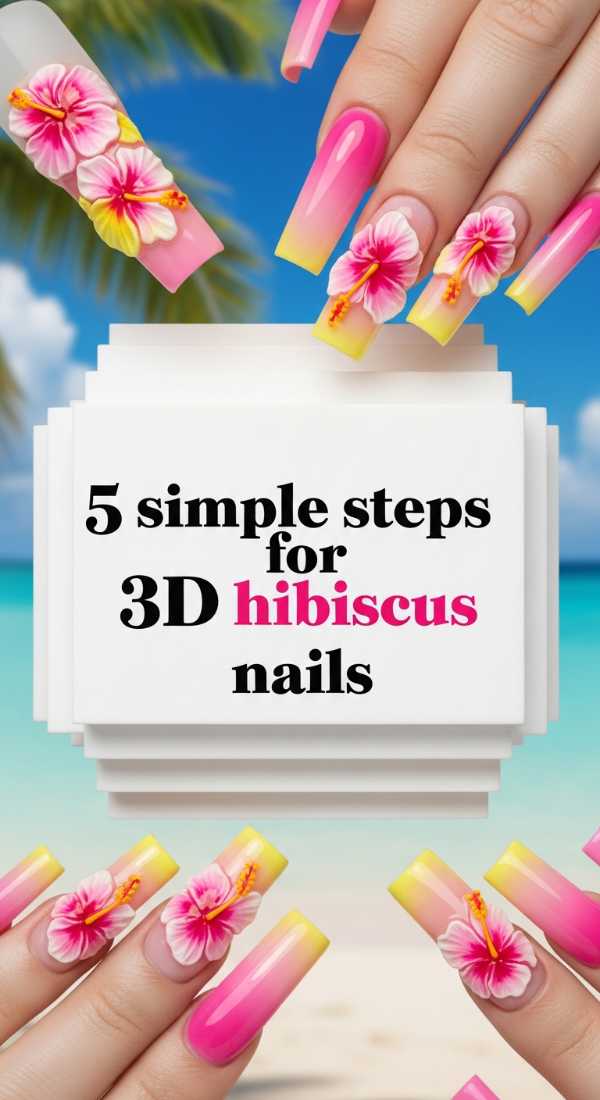
3D Hibiscus Nails: The Island Escape
Why to love this Design:
This design is like carrying a piece of a tropical paradise with you wherever you go. It’s romantic, textured, and adds a whimsical depth that flat polish just can’t reach. Every time you look down, you’ll be reminded of salty air and hibiscus blooms.
Essential Elements:
- Soft pink or coral base polish
- White 3D building gel or acrylic powder
- Small bead or rhinestone for the center
- Fine detail brush
How to Prepare:
- Apply two coats of your base color and cure.
- Place a small bead of white 3D gel in the center of the nail.
- Pull the gel outward into five petal shapes using a needle tool or fine brush.
- Add texture lines to each petal for a realistic floral look.
- Place a tiny gold bead in the center and cure one last time.
Budget Range
- OPI Passion Polish ($11.00)
- Saviland 3D Sculpting Gel ($9.00)
- Detail Brush Set ($7.00)
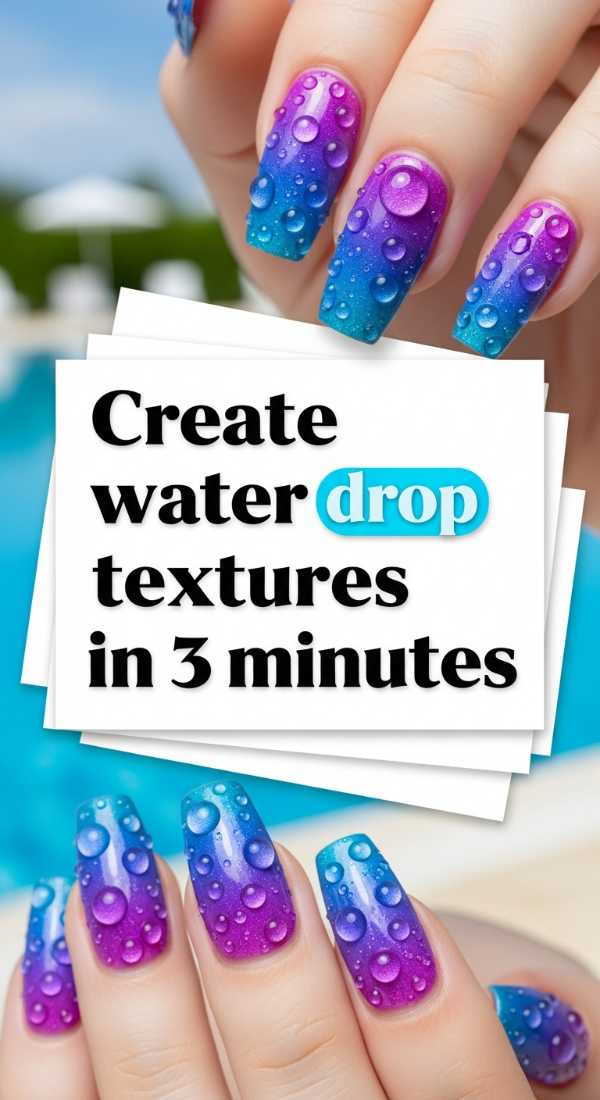
Create Water Drop Textures in 3 Minutes
Why to love this Design:
There is nothing more refreshing than the look of morning dew on a leaf or condensation on a cold glass of lemonade. This texture is incredibly satisfying to touch and adds an avant-garde edge to any simple manicure.
Essential Elements:
- No-wipe top coat
- High-viscosity clear builder gel
- UV/LED lamp
How to Prepare:
- Finish your base color and apply a matte top coat for contrast.
- Use a dotting tool to pick up a large bead of clear builder gel.
- Gently place ‘drops’ of varying sizes randomly across the nail surface.
- Cure immediately for 60 seconds to lock the height of the drops.
Budget Range
- Modelones Builder Gel ($8.99)
- Dotting Tool Kit ($5.00)
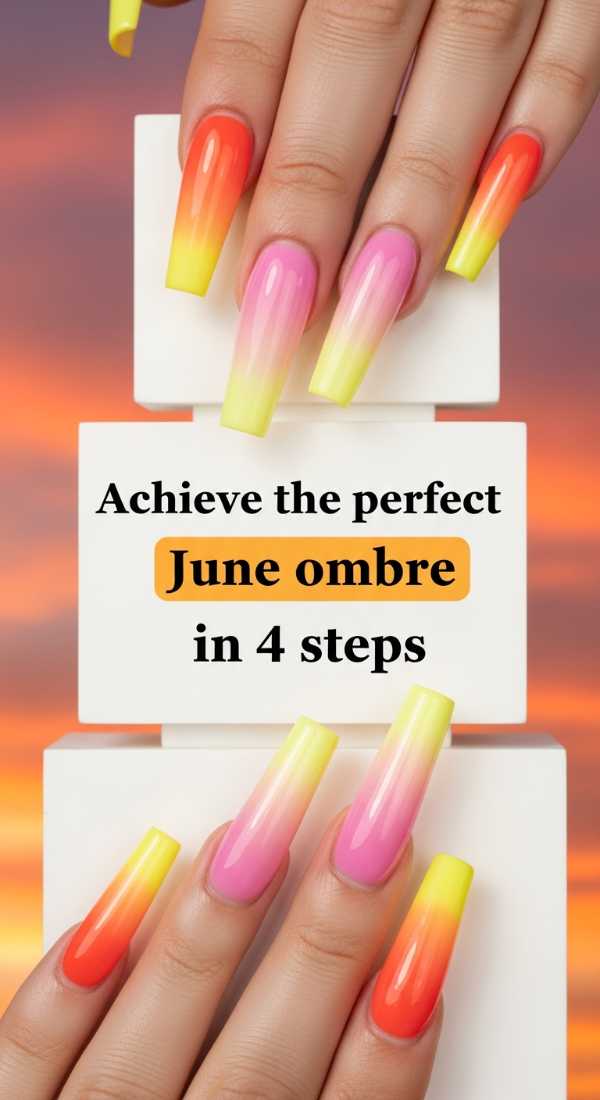
Achieve the Perfect June Ombre in 4 Steps
Why to love this Design:
The June ombre is all about capturing that transition from a midday sky to a peach sunset. It’s soft, seamless, and elongates the fingers beautifully, making it a favorite for every blogger’s aesthetic.
Essential Elements:
- Peach gel polish
- Soft lavender or sky blue gel polish
- Makeup sponge or ombre brush
How to Prepare:
- Apply the lighter color as your base and cure.
- Paint a strip of the peach and a strip of the blue onto a makeup sponge.
- Gently dab the sponge onto the nail where the two colors meet.
- Repeat until the blend is seamless and finish with a glossy top coat.
Budget Range
- Beetles Summer Gel Set ($15.99)
- Latex-free Makeup Sponges ($4.00)
Apply Gold Starfish Charms in 3 Easy Steps
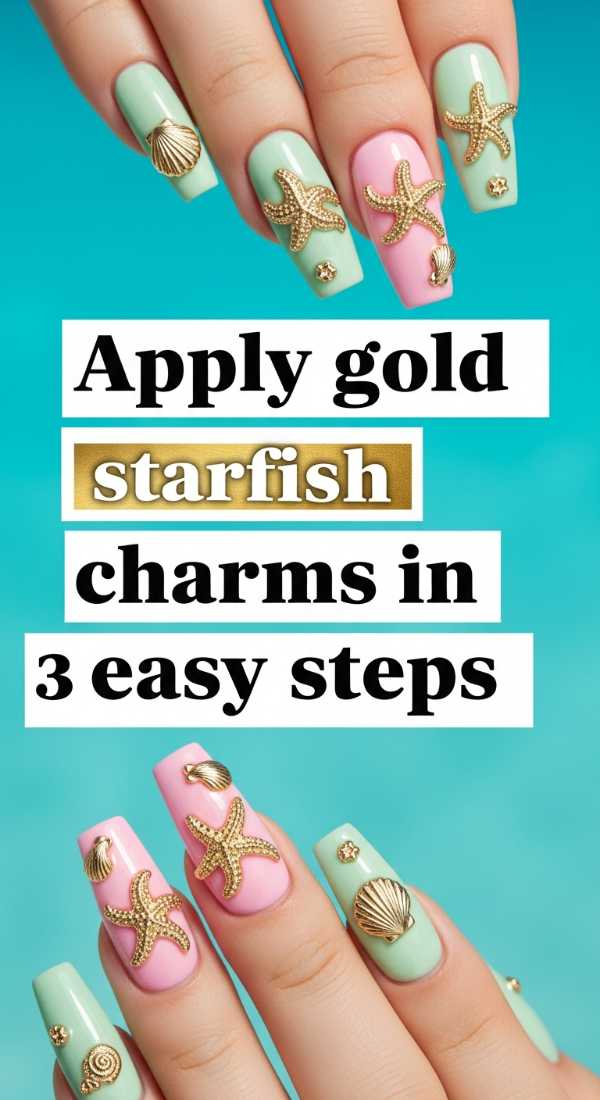
Why to love this Design:
For my loves who want a touch of luxury, gold starfish charms are the ultimate ‘quiet luxury’ beach accessory. They catch the light beautifully and elevate a simple sand-colored base to something runway-ready.
Essential Elements:
- Gold starfish metal charms
- Nail charm glue or thick base coat
- Tweezers
How to Prepare:
- Apply a small dollop of nail glue to your desired spot.
- Using tweezers, carefully press the gold starfish into the glue.
- Hold for 10 seconds and seal the edges with a thin layer of top coat.
Budget Range
- Ocean Theme Nail Charms ($6.50)
- Makartt Nail Glue ($7.99)
Design Neon Tropical Patterns in 6 Steps
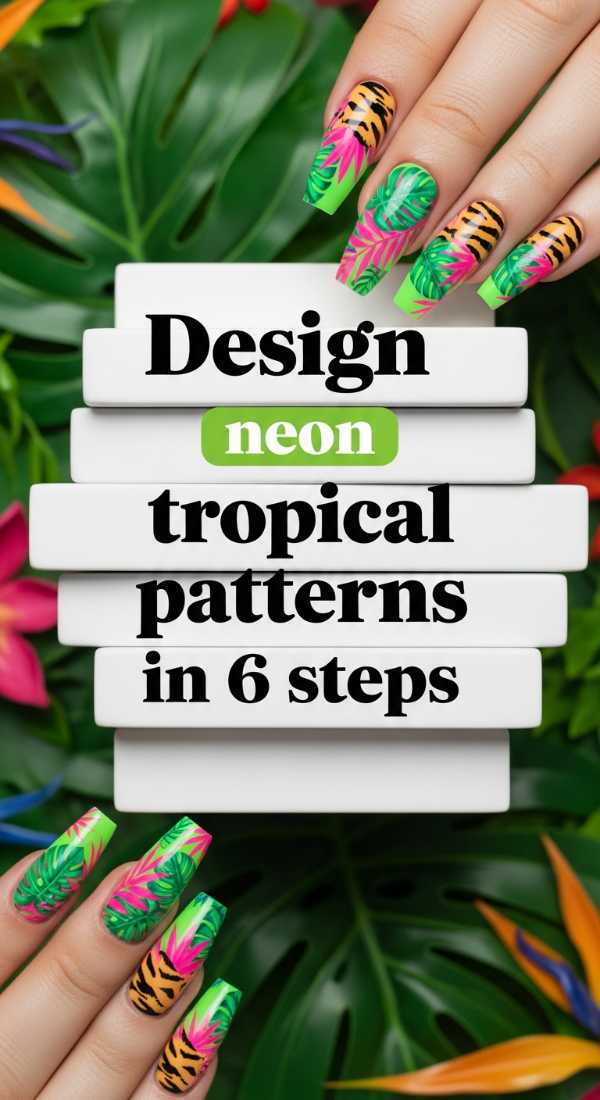
Why to love this Design:
Sometimes we just need a burst of energy! Neon tropical patterns are bold, bright, and scream summer festival vibes. It’s the perfect way to express your vibrant personality during the hottest month.
Essential Elements:
- Neon green, pink, and yellow polishes
- Black stripping ink for detail
- Ultra-fine liner brush
How to Prepare:
- Paint the nail a crisp white to make the neons pop.
- Dab irregular shapes of neon pink and yellow across the nail.
- Use neon green to paint small leaf silhouettes.
- Outline the leaves with thin black lines for a ‘pop art’ effect.
- Add tiny white dots for highlights.
- Seal with a high-shine top coat.
Budget Range
- Kiara Sky Neon Collection ($14.00/bottle)
- Nail Art Liner Brushes ($6.00)
Master 3D Acrylic Flower Sculpting in 7 Steps
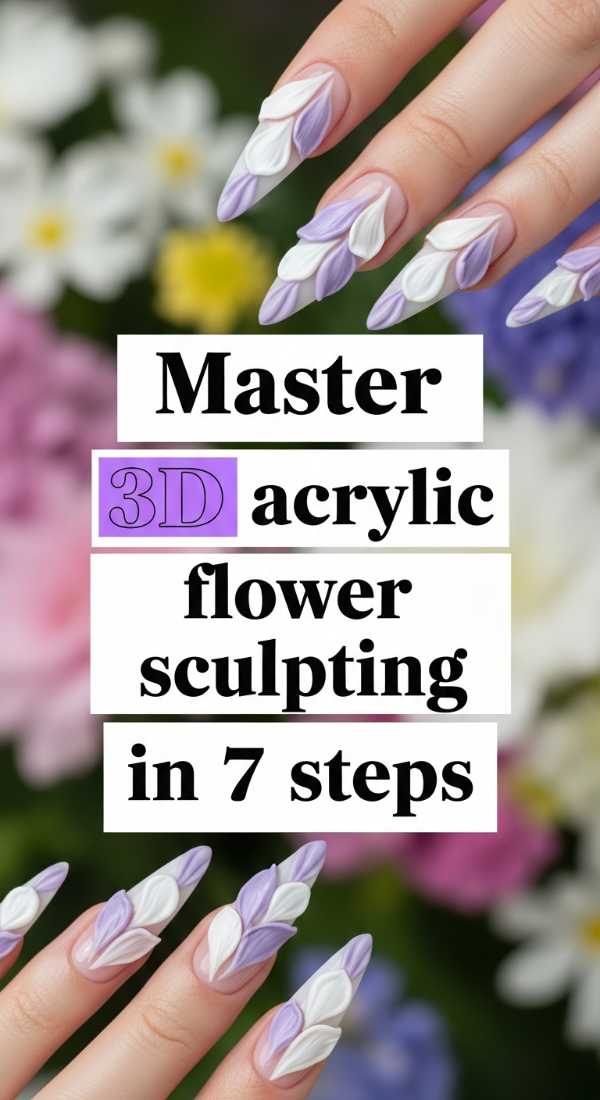
Why to love this Design:
This is pure artistry. Sculpting 3D flowers adds a vintage, high-fashion feel to your nails. It feels like wearing a piece of jewelry crafted just for you, and it’s a total conversation starter.
Essential Elements:
- Acrylic powder (white or pastel)
- Acrylic monomer
- Kolinsky brush (size 2 or 4)
How to Prepare:
- Dip your brush into the monomer and then into the powder to create a small bead.
- Place the bead on the nail and wait a few seconds for it to mattify.
- Press the center of the bead with the belly of your brush to flatten it.
- Shape the edges into a petal.
- Repeat for 4-5 petals in a circle.
- Add a smaller bead in the center for the flower heart.
- Finish with a tiny crystal in the middle.
Budget Range
- Mia Secret Acrylic System ($20.00)
- Kolinsky Sable Brush ($15.00)
Get the Trendy Duck Nail Shape in 5 Steps
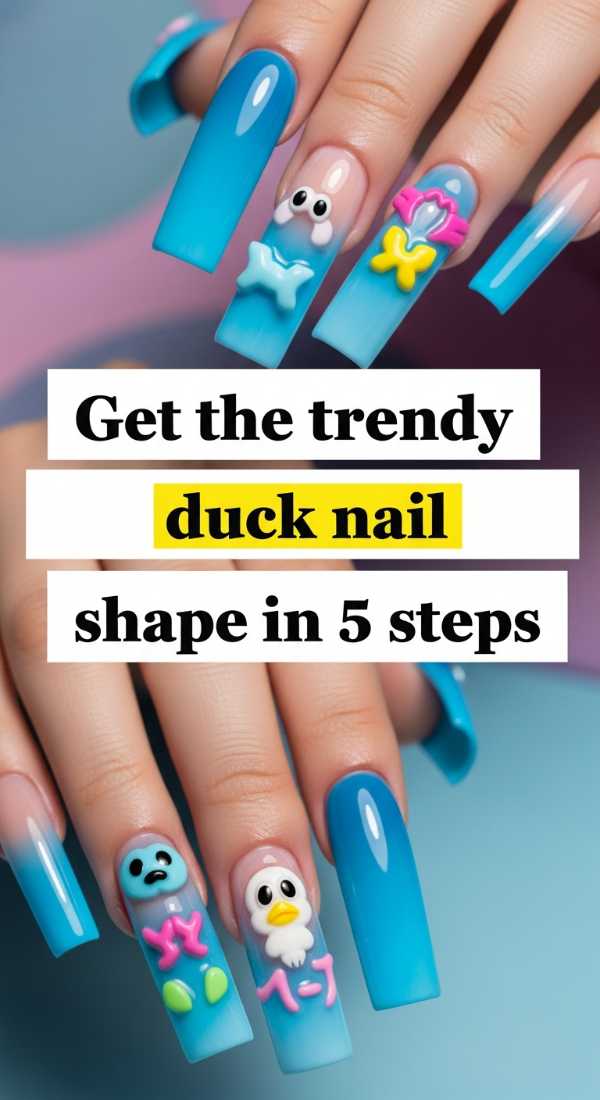
Why to love this Design:
The ‘Duck’ shape is making a massive comeback for Summer 2024! It’s wide, flared, and provides a huge canvas for art. It’s for the girlies who aren’t afraid to stand out and embrace Y2K nostalgia.
Essential Elements:
- Wide flared nail tips
- Strong nail file (100/180 grit)
- Acrylic or builder gel system
How to Prepare:
- Glue the flared tips to the very edge of your natural nail.
- Trim to your desired length (usually medium-long).
- File the sides so they flare out wider as they reach the tip.
- Apply your acrylic overlay to reinforce the wide shape.
- Buff smooth and prepare for your wildest color choices.
Budget Range
- Duck Nail Tip Kit ($10.00)
- Professional Nail File ($3.00)
Layer 3D Butterfly Charms in 4 Simple Steps
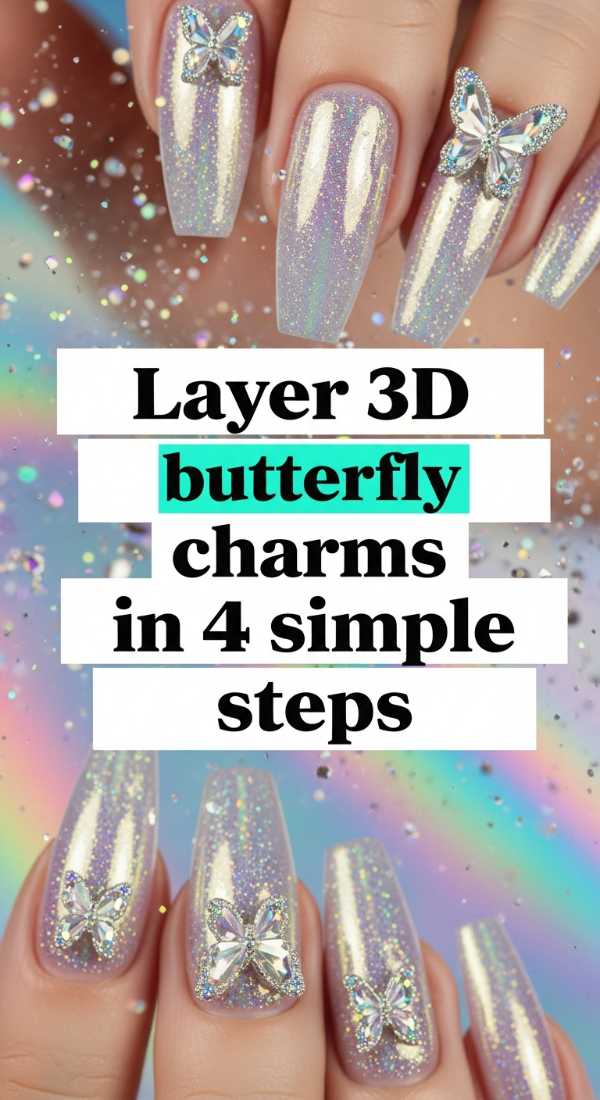
Why to love this Design:
Butterflies represent transformation, and what better time to transform than June? Layering these charms gives a fluttering, ethereal effect that looks like a fairy tale come to life on your hands.
Essential Elements:
- Resin or metal 3D butterfly charms
- Gem gel (extra strength)
- LED Flash cure lamp
How to Prepare:
- Apply a thick layer of gem gel where you want the butterfly.
- Angle the butterfly so it looks like it’s landing.
- Flash cure for 10 seconds while holding it in place.
- Full cure for 60 seconds to ensure it won’t snag on your summer knits.
Budget Range
- Butterfly 3D Decals ($5.99)
- Mini Handheld UV Light ($9.00)
Mix Tiger Print with Florals in 6 Steps
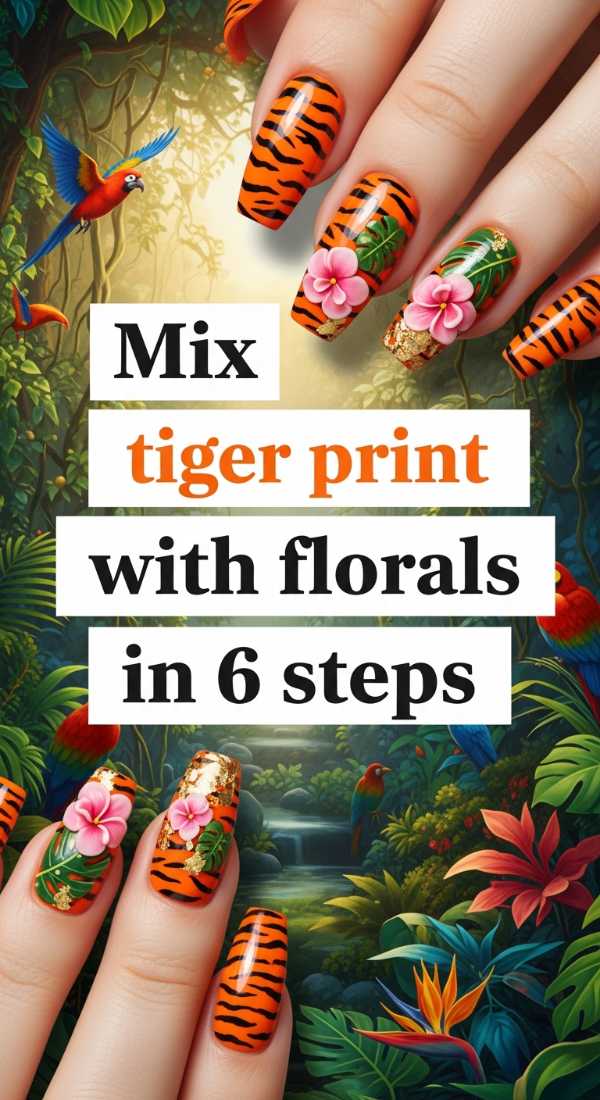
Why to love this Design:
This is the ultimate ‘Coastal Cowgirl’ meets ‘Tropical Muse’ look. It’s unexpected, edgy, and surprisingly sophisticated when done in soft earth tones mixed with bright floral pops.
Essential Elements:
- Caramel brown and black polish
- Pastel floral stickers or hand-paint tools
- Matte top coat
How to Prepare:
- Paint a tan or caramel base.
- Draw thin, wavy black lines for the tiger stripes.
- Leave a small ‘window’ or corner of the nail blank.
- In that blank space, paint a delicate daisy or hibiscus.
- Use a matte top coat over the stripes and a glossy one over the flower.
- Clean up the edges with a brush dipped in acetone.
Budget Range
- Essie ‘Saccento’ Brown ($10.00)
- Floral Nail Decals ($4.00)
Seal High-Gloss 3D Art in 2 Easy Steps
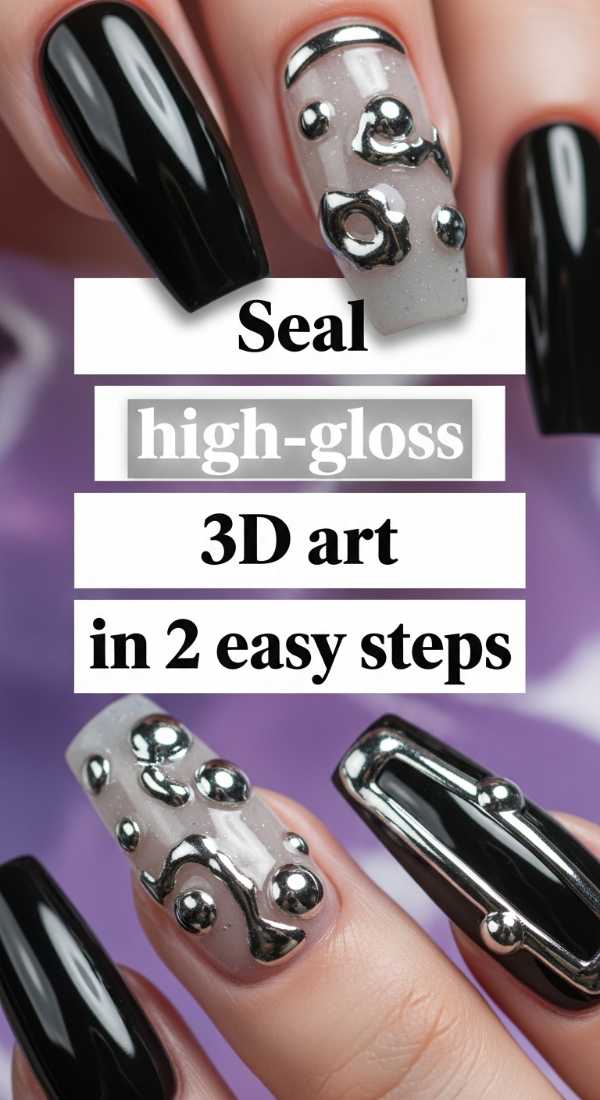
Why to love this Design:
The secret to that ‘blogger-perfect’ finish is the seal. It makes your 3D art look like glass and ensures your hard work lasts through pool days and beach trips.
Essential Elements:
- Tempered glass top coat
- Lint-free wipes
How to Prepare:
- Apply a generous layer of tempered top coat, making sure to tuck it into the crevices of your 3D charms.
- Cure for double the usual time (120 seconds) for a diamond-hard finish.
Budget Range
- Kupa Gelfinity Top Coat ($14.00)
- Lint-free wipes ($5.00)
A June to Remember
I hope these designs spark a little bit of joy in your heart, loves. June is such a fleeting, beautiful bridge into summer, and you deserve to feel pampered and polished through every moment of it. Whether you go for the bold duck shape or the delicate 3D hibiscus, remember that your nails are just an extension of the beautiful light you already carry. Tag me in your recreations—I can’t wait to see your stunning June sets! Stay glowing.
June Nails FAQ
Q: How long does 3D nail art usually last?
A: If sealed correctly with a high-quality builder gel or gem glue, your 3D art can last 2-3 weeks. Just be careful with heavy lifting!
Q: Are duck nails comfortable for daily wear?
A: They take a little getting used to because of the wider tip, but they are surprisingly functional once you find your rhythm. Great for typing actually!
Q: Can I do these trends on natural nails?
A: Most of them, yes! 3D charms and water drops work beautifully on natural nails with gel polish. For the duck shape, you’ll definitely need extensions.