

There is something inherently magical about gathering around a table where the food isn’t just served, but presented as a landscape of possibilities. We’ve all seen those viral ‘simple food boards’ taking over our feeds—the kind that look effortlessly chic yet impossibly delicious. For me, these boards represent more than just a trend; they are a love letter to slow afternoons and the joy of hosting without the stress of a formal five-course meal. It’s about the tactile experience of reaching for a warm slice of bread or a perfectly fudgy brownie while the conversation flows like wine.
Bringing this aesthetic into your own kitchen doesn’t require a culinary degree, just a bit of heart and some tried-and-true recipes that anchor the board. Whether you’re planning a cozy date night or a Sunday brunch with your best friends, the secret lies in the variety of textures and the warmth of homemade elements. In this guide, I’m sharing my favorite recipes that have earned their spot on my ultimate food board, ensuring your next gathering is as visually stunning as it is satisfying.
How to bake soft cookies?

Why we love this
There is nothing quite like the scent of butter and vanilla wafting through the house as a batch of cookies nears completion. These cookies are the ultimate comfort food, featuring a delicate, golden-brown edge that shatters slightly upon the first bite, leading into a center that is incredibly soft, chewy, and almost dough-like in its richness. The way the semi-sweet chocolate pools into molten pockets creates a sensory experience that is both nostalgic and deeply indulgent, making them the perfect sweet anchor for any dessert board.
Ingredients
- 225g unsalted butter, softened
- 200g brown sugar
- 100g granulated sugar
- 2 large eggs
- 1 tsp vanilla extract
- 350g all-purpose flour
- 1 tsp baking soda
- 1/2 tsp sea salt
- 300g chocolate chips
How to make it
- Begin by creaming your softened butter and both sugars in a large bowl. Use a hand mixer or stand mixer on medium-high speed for at least 3-4 minutes until the mixture looks pale and fluffy; this aeration is key for a soft texture.
- Add the eggs one at a time, beating well after each addition, followed by the vanilla extract. Scrape down the sides of the bowl to ensure everything is perfectly incorporated.
- In a separate bowl, whisk together the flour, baking soda, and salt. Gradually add the dry ingredients to the wet mixture on low speed. Stop mixing the moment the last streaks of flour disappear to avoid overworking the gluten, which can make cookies tough.
- Fold in the chocolate chips by hand using a spatula. For the best flavor, chill the dough in the refrigerator for at least 30 minutes. This prevents the cookies from spreading too thin and concentrates the sugars.
- Preheat your oven to 175°C (350°F). Scoop rounded tablespoons of dough onto a parchment-lined baking sheet, spacing them 2 inches apart.
- Bake for 9-11 minutes. The edges should be just barely set and light gold, while the centers look slightly underbaked and soft. Let them cool on the pan for 5 minutes to firm up before moving them to a wire rack.
How to make fluffy pancakes?

Why we love this
Imagine a stack of pancakes so light and airy they practically melt on your tongue, acting as the perfect sponge for maple syrup and melted butter. These pancakes are defined by their impressive height and a tender, cloud-like crumb that feels luxurious yet simple. The slight tang from the buttermilk balances the sweetness, while the golden, lacy exterior provides just enough structural contrast to keep every bite interesting. They are the quintessential centerpiece for a breakfast food board, inviting everyone to dig in and enjoy a slow morning.
Ingredients
- 250g all-purpose flour
- 2 tbsp sugar
- 2 tsp baking powder
- 1 tsp baking soda
- 1/2 tsp salt
- 450ml buttermilk
- 1 large egg
- 50g melted butter
- 1 tsp vanilla extract
How to make it
- In a large mixing bowl, whisk together the flour, sugar, baking powder, baking soda, and salt. Ensure there are no large clumps of leavening agents to guarantee an even rise.
- In a separate jug, whisk the buttermilk, egg, melted (and slightly cooled) butter, and vanilla. The buttermilk is essential here—its acidity reacts with the baking soda to create those signature air bubbles.
- Make a well in the center of the dry ingredients and pour in the wet mixture. Use a whisk to gently fold the two together until just combined. It is vital to leave small lumps in the batter; over-mixing will result in rubbery pancakes rather than fluffy ones.
- Heat a non-stick skillet or griddle over medium heat. Lightly grease with a small amount of butter or oil. You’ll know it’s ready when a drop of water sizzles and evaporates immediately.
- Pour about 1/4 cup of batter for each pancake. Cook until bubbles form on the surface and the edges look set and matte, which usually takes about 2-3 minutes.
- Flip carefully and cook the other side for another 1-2 minutes until golden brown. Keep the pancakes warm in a low oven (90°C/200°F) while you finish the rest of the batter.
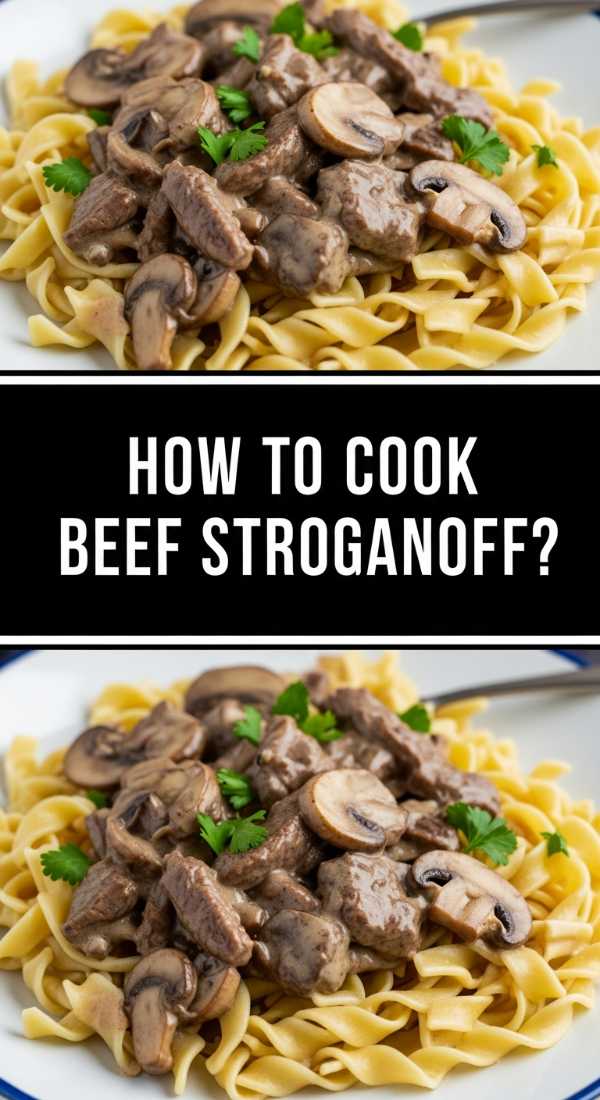
How to cook beef stroganoff?
Why we love this
Beef stroganoff is the epitome of rustic elegance, offering a deeply savory profile that warms you from the inside out. The combination of tender, seared strips of beef and earthy, sautéed mushrooms smothered in a velvety, tangy sour cream sauce is pure culinary alchemy. The aroma of garlic, onions, and deglazed white wine creates a sophisticated fragrance that draws everyone to the table, while the silky texture of the sauce provides a luxurious mouthfeel that pairs perfectly with wide egg noodles or crusty bread.
Ingredients
- 500g beef sirloin or ribeye, sliced into strips
- 300g cremini mushrooms, sliced
- 1 large onion, finely chopped
- 3 cloves garlic, minced
- 2 tbsp tomato paste
- 1 tbsp Dijon mustard
- 250ml beef broth
- 200ml sour cream
- 2 tbsp butter and 1 tbsp oil
- Fresh parsley for garnish
How to make it
- Season the beef strips generously with salt and pepper. Heat the oil in a large skillet over high heat. Sear the beef in batches to avoid crowding the pan, cooking for only 1-2 minutes until browned but still slightly pink inside. Remove and set aside.
- Lower the heat to medium and melt the butter. Add the mushrooms and cook undisturbed for a few minutes to develop a deep brown sear, then add the onions and cook until softened and translucent.
- Stir in the garlic and tomato paste, cooking for 1 minute until fragrant. Pour in the beef broth and Dijon mustard, scraping the bottom of the pan to release all the flavorful browned bits (the fond).
- Simmer the sauce for about 5-7 minutes until it reduces slightly. Reduce the heat to low—this is crucial to prevent the sour cream from curdling.
- Stir in the sour cream and return the beef (and any juices) to the pan. Toss gently to coat and heat through for 1-2 minutes.
- Serve immediately over buttered noodles, garnished with a generous sprinkle of freshly chopped parsley for a pop of brightness.
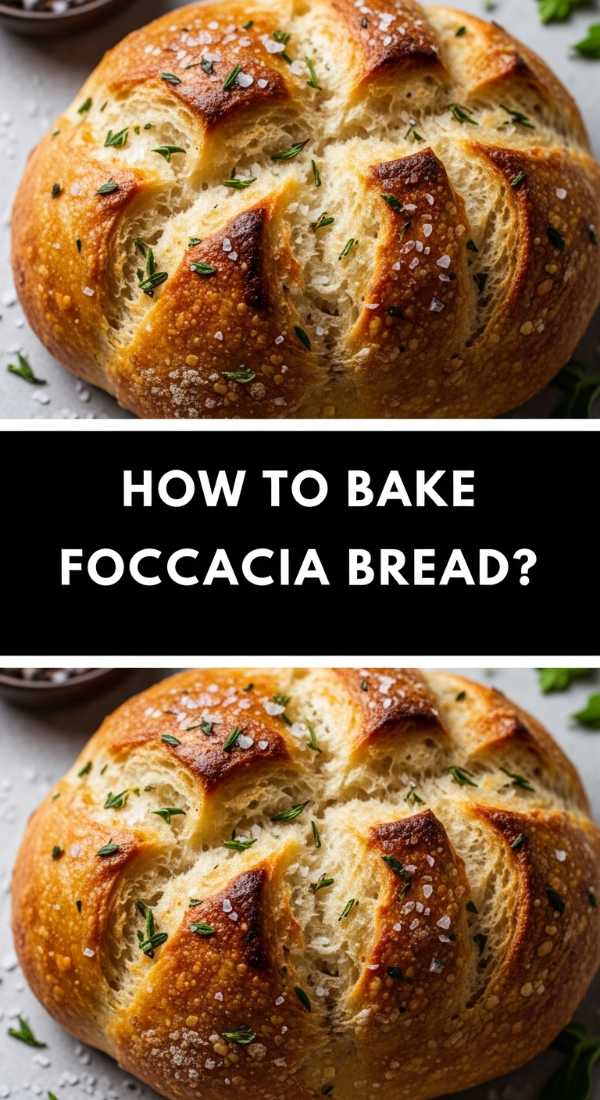
How to bake foccacia bread?
Why we love this
Focaccia is the most rewarding bread to bake because it celebrates the beauty of olive oil and coarse sea salt. The exterior is wonderfully crisp and fried-like from the oil in the pan, while the interior remains incredibly airy with large, irregular bubbles that are a joy to tear apart. Infused with the woody aroma of fresh rosemary and the bite of garlic, this bread is a sensory masterpiece. It’s the perfect foundation for a savory food board, acting as both a vessel for dips and a stand-alone star that feels like a trip to the Italian coast.
Ingredients
- 500g bread flour
- 400ml warm water
- 7g instant yeast
- 2 tsp honey or sugar
- 2 tsp sea salt
- 100ml extra virgin olive oil
- Fresh rosemary and flaky sea salt for topping
How to make it
- In a large bowl, combine the warm water, honey, and yeast. Let it sit for 5 minutes until foamy. Add the flour and salt, stirring with a wooden spoon until a sticky, shaggy dough forms.
- Cover the bowl and let the dough rise in a warm spot for about 1.5 to 2 hours, or until doubled in size and looking very bubbly.
- Generously grease a 9×13 inch baking pan with half of the olive oil. Transfer the dough to the pan, turning it once to coat in oil. Do not force the dough to the corners; let it rest for 20 minutes so it relaxes into the shape of the pan.
- Preheat your oven to 220°C (425°F). Once the dough has relaxed, pour the remaining oil over the top. Use your fingertips to dimple the dough deeply, pressing all the way down to the bottom of the pan.
- Sprinkle with fresh rosemary needles and a generous amount of flaky sea salt. The dimples should hold little pools of olive oil.
- Bake for 20-25 minutes until the top is a deep golden brown and the edges are crisp. Remove from the pan and let cool slightly on a wire rack to keep the bottom crunchy.
How to make fudgy brownies?

Why we love this
A truly great brownie should be a chocolate lover’s dream—dense, moist, and intensely rich with a paper-thin, crinkly top that crackles when you bite into it. These fudgy brownies eschew the cakey texture of boxed mixes for something far more decadent, almost resembling a thick ganache in the center. The deep, dark cocoa notes are highlighted by a touch of salt, creating a complex flavor profile that isn’t just sweet, but deeply satisfying. They bring a dark, moody aesthetic to a dessert board that is simply irresistible.
Ingredients
- 200g dark chocolate (70% cocoa), chopped
- 175g unsalted butter
- 250g granulated sugar
- 3 large eggs
- 1 tsp vanilla extract
- 80g all-purpose flour
- 40g unsweetened cocoa powder
- 1/2 tsp salt
How to make it
- Preheat your oven to 180°C (350°F) and line an 8-inch square baking pan with parchment paper, leaving an overhang on the sides for easy removal.
- Melt the butter and chopped dark chocolate together. You can do this in a microwave in 30-second bursts or over a double boiler. Stir until the mixture is completely smooth and glossy, then let it cool slightly.
- In a large bowl, whisk the sugar and eggs vigorously for about 3-5 minutes. You want the mixture to become pale and double in volume; this step is what creates that coveted crinkly top. Stir in the vanilla and the melted chocolate mixture.
- Sift the flour, cocoa powder, and salt directly into the wet ingredients. Using a rubber spatula, fold the dry ingredients in gently until just combined. Do not over-beat, as you want to keep the texture dense and fudgy.
- Pour the batter into the prepared pan and smooth the top. Bake for 22-25 minutes. The key is to look for slightly firm edges but a center that still has a very slight wobble.
- Let the brownies cool completely in the pan before slicing. For the cleanest cuts, refrigerate them for an hour; this allows the structure to set into a perfect fudgy consistency.
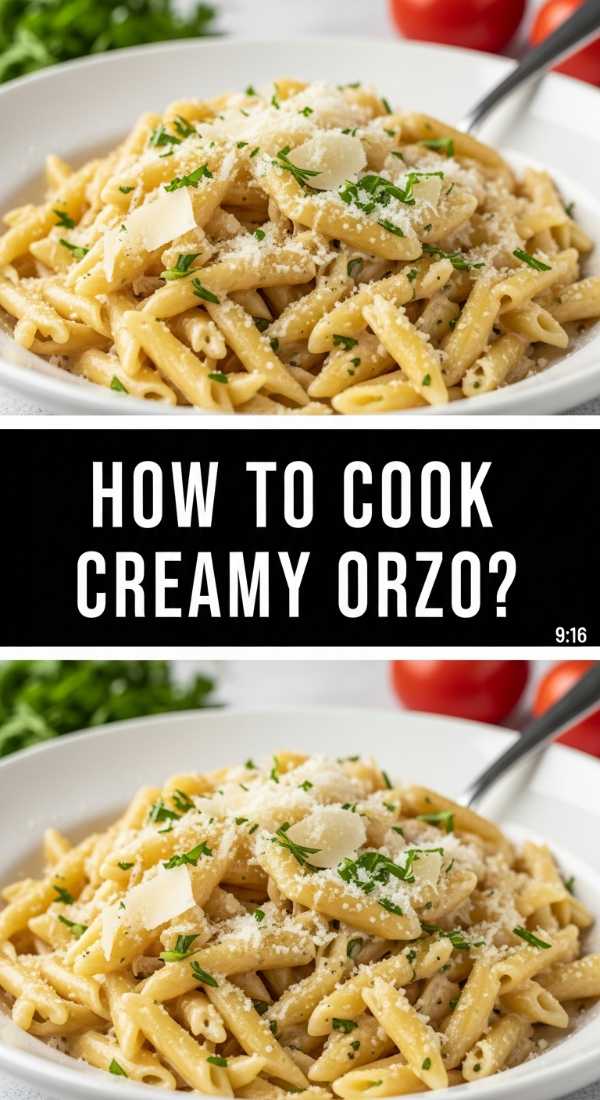
How to cook creamy orzo?
Why we love this
Creamy orzo is the ultimate bridge between pasta and risotto, offering a silky, comforting texture that feels sophisticated yet takes half the effort. Every grain of rice-shaped pasta is coated in a luscious, parmesan-infused sauce that is brightened by a hint of lemon and fresh herbs. It has a wonderful “slip” to it, making it incredibly satisfying to eat, and the aroma of toasted garlic and simmering cream is purely hypnotic. This dish is perfect for a Mediterranean-style food board, providing a warm, savory element that pairs beautifully with grilled proteins.
Ingredients
- 250g orzo pasta
- 1 tbsp olive oil and 1 tbsp butter
- 2 cloves garlic, minced
- 500ml chicken or vegetable broth
- 100ml heavy cream
- 50g grated Parmesan cheese
- Zest of half a lemon
- Fresh spinach or parsley
How to make it
- In a large skillet or saucepan, heat the olive oil and butter over medium heat. Add the dry orzo and toast it for 2-3 minutes, stirring constantly, until it smells nutty and some grains turn a light golden brown.
- Add the minced garlic and cook for another 30 seconds until fragrant, being careful not to let it burn.
- Pour in about half of the broth and bring to a gentle simmer. Cook the orzo much like a risotto, adding the remaining broth in splashes as the liquid is absorbed, stirring frequently to release the starches which create the creaminess.
- Once the orzo is al dente (usually about 8-10 minutes), pour in the heavy cream and stir well. Let it simmer for another minute until the sauce thickens and clings to the pasta.
- Remove from heat and stir in the Parmesan cheese and lemon zest. The cheese will melt into the sauce, creating a velvety finish.
- Fold in a handful of fresh spinach (which will wilt in the residual heat) or chopped parsley, and serve immediately while it is at its creamiest.
How to make sausage rolls?

Why we love this
There is a rustic, hearty charm to a homemade sausage roll that no store-bought version can match. The contrast between the shattering, buttery layers of puff pastry and the juicy, seasoned meat filling is a textural delight. Each bite releases a savory steam infused with herbs like sage and thyme, making them an instant crowd-pleaser. They are the perfect finger food for a viral board, looking gorgeous when stacked high and served alongside a tangy mustard or a sweet chutney for dipping.
Ingredients
- 500g high-quality pork sausage meat
- 1 small onion, very finely grated
- 1 tbsp fresh sage, chopped
- 1/2 tsp salt and 1/2 tsp black pepper
- 1 sheet ready-rolled puff pastry (cold)
- 1 egg, beaten (for egg wash)
- Sesame seeds or poppy seeds for topping
How to make it
- Preheat your oven to 200°C (400°F) and line a baking tray with parchment paper. In a bowl, mix the sausage meat, grated onion, sage, salt, and pepper until well combined. The grated onion is a secret tip for keeping the meat moist during baking.
- Unroll your cold puff pastry on a lightly floured surface. Cut the sheet in half lengthwise to create two long rectangles.
- Divide the meat mixture into two portions. Shape each portion into a long log and place it down the center of each pastry rectangle.
- Brush one edge of the pastry with the beaten egg. Fold the pastry over the meat and press the edges firmly with a fork to seal the seam.
- Brush the tops of the long rolls generously with egg wash; this ensures a deep golden color. Sprinkle with sesame or poppy seeds.
- Cut each long roll into 2-inch pieces and place them on the baking tray. Bake for 20-25 minutes until the pastry is puffed and golden, and the meat is cooked through (internal temp 75°C/165°F). Let them rest for 5 minutes before serving.
How to make pork dumplings?

Why we love this
Dumplings are little pockets of pure joy, offering a complex blend of ginger, garlic, and savory pork encased in a delicate, chewy wrapper. The magic happens in the cooking technique—pan-frying them creates a crisp, golden-brown bottom that shatters, while steaming the tops keeps them tender and translucent. When you bite into one, you’re greeted with a burst of flavorful juices that make them addictive. They add an interactive and international flair to your food board, especially when paired with a spicy soy dipping sauce.
Ingredients
- 300g ground pork
- 2 cups finely shredded cabbage (salted and squeezed dry)
- 2 green onions, minced
- 1 tbsp fresh ginger, grated
- 1 tbsp soy sauce
- 1 tsp toasted sesame oil
- 1 pack round dumpling wrappers
- Oil for frying and water for steaming
How to make it
- In a large bowl, combine the ground pork, pre-prepared cabbage, green onions, ginger, soy sauce, and sesame oil. Mix vigorously in one direction until the mixture becomes slightly tacky and pale; this creates a better internal texture.
- Place a dumpling wrapper in your palm. Put a rounded teaspoon of filling in the center. Lightly moisten the edges of the wrapper with water.
- Fold the wrapper in half and pleat the edges to seal, ensuring no air is trapped inside. Place finished dumplings on a parchment-lined tray.
- Heat 1 tablespoon of oil in a non-stick skillet over medium-high heat. Place the dumplings in the pan, flat side down, and fry for 2-3 minutes until the bottoms are deeply golden and crispy.
- Carefully pour about 1/4 cup of water into the pan (it will sizzle and steam) and immediately cover with a tight-fitting lid. Lower the heat to medium and steam for 5-6 minutes.
- Remove the lid and continue to cook for another minute until the remaining water evaporates and the bottoms re-crisp. Serve immediately with a dipping sauce of soy, vinegar, and chili oil.
How to cook butter curry?

Why we love this
Butter curry, or Murgh Makhani, is a celebration of spices and silkiness. The sauce is a vivid orange, rich with the creaminess of butter and heavy cream, balanced by the acidity of tomatoes and the warmth of garam masala. The aroma is intoxicating, filling the kitchen with notes of toasted cumin and fenugreek. This isn’t just a meal; it’s an experience of deep, layered flavors that wrap around you like a blanket. Adding a bowl of this to your board with some warm naan makes for the ultimate dipping experience.
Ingredients
- 500g chicken thighs, cut into bite-sized pieces
- 1 cup Greek yogurt
- 2 tbsp lemon juice
- 2 tbsp ginger-garlic paste
- 1 can (400g) tomato puree
- 100g butter
- 200ml heavy cream
- 2 tsp garam masala, 1 tsp turmeric, 1 tsp cumin
- Dried fenugreek leaves (Kasuri Methi)
How to make it
- Marinate the chicken in yogurt, lemon juice, 1 tbsp ginger-garlic paste, and half the spices for at least 30 minutes (preferably overnight). This tenderizes the meat through acidity.
- In a large pot, melt half the butter. Brown the chicken pieces in batches over medium-high heat until seared. They don’t need to be cooked through yet. Remove and set aside.
- In the same pot, melt the remaining butter. Add the rest of the ginger-garlic paste and cook for 1 minute. Pour in the tomato puree and the remaining spices. Simmer for 10-15 minutes on low heat until the sauce darkens and the oil starts to separate.
- Stir in the heavy cream and return the chicken to the pot. Cover and simmer gently for another 10 minutes until the chicken is tender and the sauce is thick.
- Crucial Step: Crush the dried fenugreek leaves between your palms and stir them in at the very end. This provides the authentic “restaurant style” fragrance.
- Taste and adjust salt, adding a pinch of sugar if the tomatoes are too acidic. Serve warm with a swirl of cream on top.
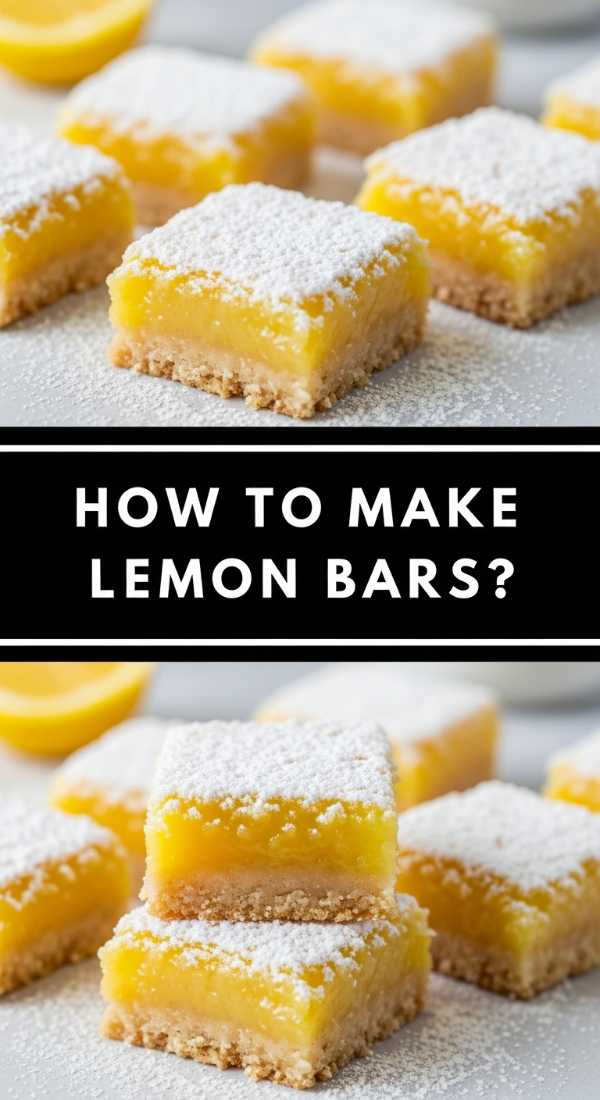
How to make lemon bars?
Why we love this
Lemon bars are like a burst of sunshine on a plate, offering a sharp, tangy contrast to a rich food board. The base is a buttery, shortbread-style crust that provides a sturdy, crumbly foundation for the star of the show: a thick layer of bright, zesty lemon curd. The texture is a delightful play between the crisp crust and the soft, slightly gooey filling that sets into a translucent yellow. Dusted with a snowy layer of powdered sugar, they are as beautiful as they are refreshing, cleansing the palate with every citrusy bite.
Ingredients
- For the crust: 200g all-purpose flour, 60g powdered sugar, 170g cold butter (cubed).
- For the filling: 4 large eggs, 300g granulated sugar, 2 tbsp lemon zest, 150ml fresh lemon juice, 40g all-purpose flour.
- Extra powdered sugar for dusting.
How to make it
- Preheat your oven to 175°C (350°F) and grease an 8-inch square baking pan. For the crust, pulse the flour, powdered sugar, and cold butter in a food processor until it looks like coarse crumbs. Alternatively, rub with your fingers.
- Press the crust mixture firmly into the bottom of the pan. Bake for 18-20 minutes until the edges are just starting to turn a pale golden brown.
- While the crust is baking, prepare the filling. Whisk the eggs and granulated sugar together until smooth. Stir in the lemon zest and fresh lemon juice (always use fresh for the best flavor).
- Sift the 40g of flour into the lemon mixture and whisk until no lumps remain. This small amount of flour helps the curd set into a sliceable consistency.
- Pour the lemon filling over the hot crust as soon as it comes out of the oven. This ensures the two layers bond together.
- Lower the oven temperature to 160°C (325°F) and bake for another 20-25 minutes until the center is set and doesn’t jiggle. Let them cool completely at room temperature, then chill in the fridge for at least 2 hours before dusting with powdered sugar and slicing.
Conclusion
Creating a viral-worthy food board is truly about embracing the joy of variety and the warmth of home cooking. By mixing these sweet and savory elements, you create a tapestry of flavors that invites people to slow down and savor the moment. Remember, there are no strict rules—only the guide of your own cravings and the smiles of those you share it with. Happy hosting!