

There is something truly magical about the way a perfectly curated board brings people together. Whether it is a tray of artisanal cheeses or, as we are exploring today, the ‘landscape board’ of your very own home, the art of curation is what transforms a simple space into a viral sensation. I remember the first time I sat in a garden that felt like a living, breathing work of art; the way the light filtered through the leaves made the whole world feel like it had a soft-focus filter. It was more than just plants; it was a vibe, a feeling of home that I just had to share with everyone.
Today, we are taking that viral ‘board’ aesthetic and applying it to every corner of your lifestyle. We are layering textures, colors, and ‘flavors’ in your outdoor spaces to create a home that looks like it stepped right out of a high-end magazine. From the curb to the poolside, every inch of your property is a canvas waiting for that perfect, simple touch that makes people stop and stare. Let’s dive into how you can build your own lifestyle spread that is as delicious for the eyes as a charcuterie board is for the palate.
How to Build a Dreamy Garden for Ultimate Curb Appeal

Why we love this
A well-curated front garden is the handshake of your home, offering a warm and fragrant welcome before you even reach the door. We love the way the rich, dark mulch provides a grounding contrast to the explosion of lime-green hostas and delicate, petal-soft peonies that dance in the breeze. There is a specific sensory joy in the aroma of fresh cedar chips and damp earth after a light morning dew, creating an atmosphere that feels both grounded and ethereal. It is the visual equivalent of a perfectly seasoned dish, where every element works in harmony to create a lasting, stunning first impression.
Essential Elements:
- Layered perennial blooms (Peonies, Hydrangeas, Lavender)
- Hardwood mulch for texture and moisture retention
- Defined stone or brick edging
- Evergreen shrubs for year-round structure
- Solar-powered warm glow path lights
How to make it
- Begin by clearing the area of all weeds and debris, ensuring you have a clean slate; work the soil to a depth of 12 inches to allow for optimal root aeration.
- Apply a 2-inch layer of organic compost to provide a nutrient-dense base, mixing it thoroughly with the existing topsoil until the texture is crumbly and dark.
- Map out your planting zones by placing the tallest evergreens at the back to create a ‘spine’ for your garden, ensuring they are spaced at least 3 feet apart to allow for mature growth.
- Dig holes for your flowering perennials that are twice as wide as the root ball; tease the roots gently before placing them in the ground to encourage outward spreading.
- Install your edging material, ensuring it sits flush against the soil line to prevent grass from encroaching on your floral ‘board.’
- Spread a thick 3-inch layer of mulch across the entire surface, being careful not to pile it against the stems of the plants to avoid rot.
- Water deeply using a soaking hose for at least 30 minutes, ensuring the water reaches the root zone rather than just wetting the surface leaves.
How to Create a Cozy Backyard for Relaxing Summer Nights

Why we love this
This setup is all about the transition from the golden hour to the deep, star-studded velvet of a summer night. We are obsessed with the way soft textiles—chunky knit throws and weather-resistant linen pillows—soften the rugged edges of a stone patio or wooden deck. The air carries the faint, nostalgic scent of woodsmoke from a small fire pit, while the amber glow of Edison bulbs overhead mimics the warmth of a sunset that never ends. It creates a sanctuary where the world slows down, inviting long conversations and the simple pleasure of watching the firelight flicker against the trees.
Essential Elements:
- Weatherproof outdoor rug in a neutral tone
- Portable smokeless fire pit
- Overhead string lights (warm white)
- Plush outdoor seating with oversized cushions
- Galvanized buckets for cold drinks and ice
How to make it
- Define the ‘anchor’ of the space by laying down a large outdoor rug; this acts as the visual frame for your backyard ‘board’ and provides a soft surface for bare feet.
- Position your seating in a semi-circle or ‘U’ shape to facilitate easy conversation, keeping the chairs approximately 18 to 24 inches apart for a cozy yet comfortable feel.
- Set up your fire pit in the center of the seating area, ensuring it is at least 10 feet away from any structures or low-hanging branches for safety.
- String your lights overhead using ‘S’ hooks or zip ties attached to sturdy posts or trees; aim for a ‘zigzag’ pattern to ensure even light distribution across the entire zone.
- Layer in your textiles, adding at least two pillows per chair and a throw blanket for every other seat to create that high-end, ‘viral’ lifestyle look.
- Place side tables within arm’s reach of every seat, ensuring there is a stable surface for drinks or books.
- Light the fire pit 20 minutes before guests arrive to let the heat stabilize and the flames settle into a welcoming, consistent glow.
How to Style a Whimsical Camping Spot for Enchanted Forest Vibes
Why we love this
Transforming a simple patch of woods into a whimsical retreat is the ultimate way to reconnect with nature without sacrificing style. We love the juxtaposition of rustic canvas tents against the wild, untamed texture of ferns and mossy bark. The atmosphere is thick with the scent of pine needles and damp earth, punctuated by the soft chime of a wind bell or the gentle rustle of leaves. It feels like stepping into a fairytale, where the light is always dappled and every corner holds a secret, inviting you to leave the digital world behind for a moment of pure, enchanted stillness.
Essential Elements:
- A-frame canvas tent or bell tent
- Battery-operated lanterns with flickering flame effect
- Macramé wall hangings or dreamcatchers
- Floor cushions and faux fur rugs
- Woven baskets for storage and aesthetic
How to make it
- Select a level site with high ground to avoid moisture buildup; clear any sharp rocks or branches that could puncture the tent floor.
- Pitch your canvas tent following the manufacturer’s tensioning guide; ensure the guy lines are taut and the stakes are driven in at a 45-degree angle for maximum stability.
- Line the interior floor with a moisture barrier, then layer your faux fur rugs and floor cushions starting from the back and working toward the entrance.
- Hang macramé decor from the central tent pole or nearby tree branches to add vertical texture and a bohemian flair.
- Place lanterns both inside and outside the tent entrance, using warm-toned LED bulbs to create a safe, inviting glow that mimics candlelight.
- Set up a ‘wash station’ outside using a vintage ceramic pitcher and basin filled with fresh water and herbs like rosemary for a sensory, practical touch.
- Add a small woven basket near the door for shoes to keep the interior pristine and organized.
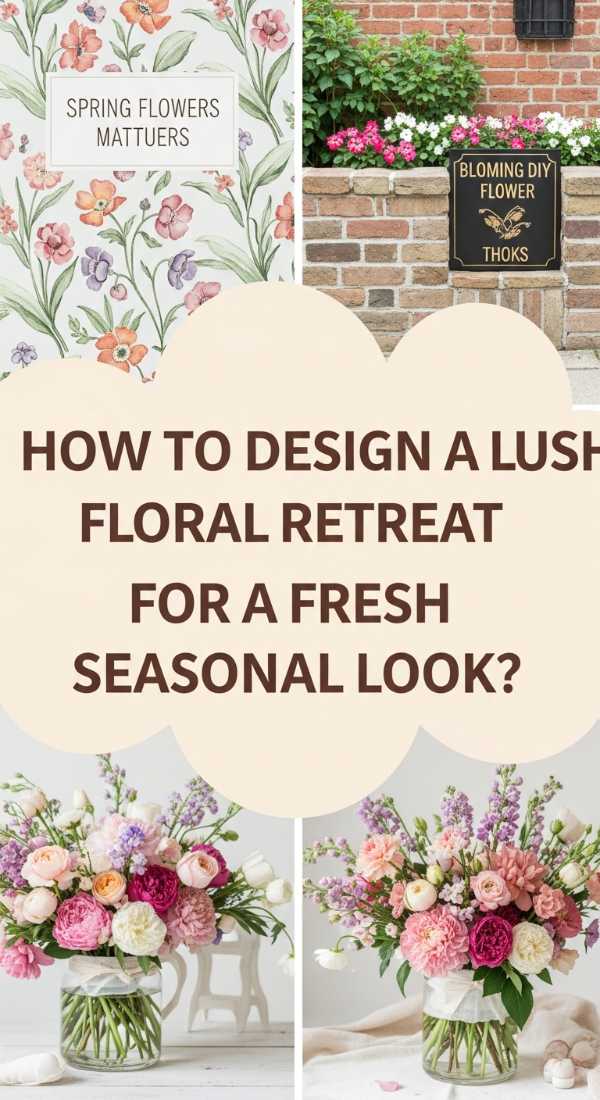
How to Design a Lush Floral Retreat for a Fresh Seasonal Look

Why we love this
There is nothing quite like the vibrant energy of a garden designed specifically for seasonal abundance. We love the way the heavy, saturated colors of zinnias and dahlias pop against the deep emerald of a well-manicured lawn. The air is thick with the hum of bees and the sweet, citrusy fragrance of marigolds, creating a sensory experience that feels like a celebration of life itself. It is a visual feast of textures—from the velvety soft leaves of lamb’s ear to the architectural spikes of delphinium—that makes every glance feel like a discovery.
Essential Elements:
- High-density flower beds with varied heights
- Birdbaths or small water features
- Climbing roses or clematis on a trellis
- Organic mulch to keep colors bright
- Garden gnomes or subtle statuary
How to make it
- Plan your ‘retreat’ by sketching a layout that places taller, structure-giving plants in the center or back, and lower, trailing plants along the borders.
- Install a trellis or arbor first; secure it into the ground with concrete or deep stakes to support the weight of heavy climbing vines.
- Plant your climbers at the base of the trellis, gently weaving the stems through the lattice and securing them with soft garden twine to guide their upward growth.
- Dig planting holes for your seasonal flowers, adding a handful of bone meal to each hole to encourage strong root development and vibrant blooms.
- Place a birdbath in a quiet corner, ensuring it is level; fill it with fresh water and add a few flat stones so insects can land and drink safely.
- Apply a liquid seaweed fertilizer once every two weeks to maintain the ‘lush’ look and keep the foliage deep green and healthy.
- Deadhead (remove) spent blooms daily; this signals the plant to produce more flowers rather than going to seed, extending your seasonal ‘board’ display.
How to Construct a Budget Friendly Fence for Stylish Privacy

Why we love this
Privacy doesn’t have to be clinical or boring; it can be a beautiful design element that frames your entire outdoor world. We love the look of raw, horizontal wood slats that catch the late afternoon sun, creating a play of light and shadow that feels modern and architectural. The scent of freshly cut cedar or pressure-treated pine is invigorating, providing a clean backdrop for green vines to climb. It turns a standard backyard into a private courtyard, making the space feel intimate, secure, and infinitely more expensive than it actually was to build.
Essential Elements:
- Horizontal cedar or pine slats
- Sturdy 4×4 pressure-treated posts
- Outdoor-rated wood stain (transparent or semi-transparent)
- Black hardware/screws for a modern contrast
- Concrete mix for post setting
How to make it
- Mark your fence line with string and stakes, ensuring you check property lines and local building codes before digging.
- Dig post holes 24 to 30 inches deep using a post-hole auger; ensure the bottom of the hole is wider than the top to prevent frost heave.
- Set the 4×4 posts into the holes, using a level to ensure they are perfectly vertical; pour quick-setting concrete around the post and let it cure for 24 hours.
- Measure the distance between posts and cut your horizontal slats to fit; using a spacer (like a 1-inch block) ensures consistent gaps between each slat for a professional look.
- Secure the slats to the posts using 2.5-inch black outdoor screws, pre-drilling the holes to prevent the wood from splitting at the ends.
- Apply a high-quality UV-resistant wood stain using a wide brush, working in the direction of the grain to highlight the natural beauty of the wood.
- Seal the tops of the posts with decorative caps to prevent water from soaking into the end grain and causing premature rot.
How to Master Garden Organization for the Perfect Botanical Space

Why we love this
There is a profound sense of peace that comes from a garden where everything has its place. We love the ‘potting shed’ aesthetic—rows of terracotta pots stacked by size, hand tools hanging on a pegboard, and labeled seeds tucked into vintage wooden boxes. The smell of dry terracotta and clean metal tools is crisp and satisfying, evoking the feeling of a professional greenhouse. It turns gardening from a chore into a curated hobby, where the beauty of the organization is just as compelling as the plants themselves, making the entire workspace feel like a viral-worthy vignette.
Essential Elements:
- Wall-mounted pegboard for tools
- Sturdy wooden potting bench
- Uniform terracotta pots in various sizes
- Chalkboard labels for herbs and seeds
- Galvanized watering cans for display and use
How to make it
- Install a potting bench in a shaded area of the garden; ensure the height is comfortable for standing work (usually around 36 inches).
- Mount a weather-resistant pegboard directly above the bench, securing it into wall studs or heavy-duty anchors.
- Organize tools by frequency of use, hanging trowels and pruners at eye level; keep larger items like shovels on hooks at the side.
- Clean all terracotta pots with a vinegar-water solution to remove mineral deposits, then stack them neatly on the lower shelf of the potting bench.
- Fill small glass jars or wooden crates with your seed packets, organizing them by planting month to keep your garden schedule on track.
- Create a ‘soil station’ by placing large bags of potting mix into heavy-duty plastic bins with lids to keep out moisture and pests.
- Label each section of your organization board using waterproof markers or chalkboard paint so you can easily update the ‘spread’ as the seasons change.
How to Curate a Vibrant Pastel Aesthetic for an Airy Home Feel

Why we love this
Stepping into a pastel-themed space feels like a breath of fresh air; it’s light, breezy, and effortlessly chic. We love the way soft mint greens, blush pinks, and pale lavenders reflect the light, making even small spaces feel expansive and bright. The texture of linen curtains fluttering in the breeze and the smooth, matte finish of ceramic vases in candy colors create a sensory experience that is both soothing and playful. It’s like living inside a macaron shop—sweet, sophisticated, and perfectly styled for that airy, viral home aesthetic we all crave.
Essential Elements:
- Sheer linen curtains in off-white or blush
- Matte ceramic vases in pastel tones
- Light-colored wood furniture (ash or birch)
- Fresh flowers (Ranunculus, Sweet Peas, Hydrangeas)
- Pastel-toned throw pillows and rugs
How to make it
- Switch out heavy window treatments for sheer linen panels; hang them 2-4 inches above the window frame to draw the eye upward and maximize natural light.
- Paint a single accent wall or furniture piece in a soft, muted pastel shade like ‘dusty sage’ or ‘pale peach’ using a flat or eggshell finish to keep the light soft.
- Group your ceramic vases in odd numbers (3 or 5) on a coffee table or mantel, mixing heights to create a dynamic visual flow.
- Fill the vases with monochromatic floral arrangements; for example, use only pink ranunculus to create a focused ‘pop’ of color against a light background.
- Replace dark hardware (like knobs or handles) with brushed gold or white ceramic to maintain the ‘airy’ feel throughout the room.
- Layer light-colored textiles on sofas and beds, mixing textures like cotton bouclé and smooth silk to add depth without adding ‘weight’ to the room.
- Keep surfaces uncluttered; the pastel aesthetic relies on ‘negative space’ to let the colors truly shine and breathe.
How to Revamp Your Front Entryway for a Welcoming Welcome

Why we love this
Your front entryway is the prologue to your home’s story, and we love making it as inviting as possible. There is something so satisfying about a freshly painted front door—perhaps in a bold navy or a classic sage—paired with the rugged texture of a high-quality coir doormat. The scent of potted boxwood or seasonal mums adds a layer of freshness, while a well-placed outdoor lantern provides a warm, golden glow as the sun sets. It’s a small space that packs a huge punch, making every arrival feel like a special occasion for you and your guests.
Essential Elements:
- Statement front door color
- Oversized decorative planters
- Coordinated doormat and rug layering
- Modern house numbers in high-contrast finish
- Seasonal wreath or door hanging
How to make it
- Clean the front door thoroughly and apply two coats of high-quality exterior paint; use a 2.5-inch sash brush for the panels and a small roller for the flat surfaces for a factory-smooth finish.
- Frame the door with two oversized planters; choose a height that is at least one-third the height of the door to create a sense of scale and importance.
- Plant a ‘thriller, filler, spiller’ combination in each pot: a tall central plant (like a cedar), flowering filler (like petunias), and trailing vines (like ivy).
- Layer your doormats: place a larger, patterned outdoor rug underneath a standard-sized coir mat to add texture and visual interest to the ‘board.’
- Update your house numbers, ensuring they are level and visible from the street; use a drill with a masonry bit if attaching to brick or stone.
- Install a new porch light fixture or clean the existing one, ensuring you use a ‘warm white’ bulb (2700K) to create a cozy, welcoming atmosphere.
- Add a seasonal wreath made of natural materials like dried wheat or fresh eucalyptus to soften the hard lines of the door and glass.
How to Upgrade Your Poolside Paradise for Total Relaxation
Why we love this
The ultimate poolside paradise is all about the feeling of being on a permanent vacation. We are head-over-heels for the look of crisp white umbrellas against the sparkling turquoise of the water, creating a high-contrast aesthetic that feels clean and luxurious. The air smells like coconut sunscreen and salt air, while the sound of a small waterfall or bubbling fountain provides a soothing background track to your afternoon nap. It’s a place where every element—from the striped towels to the weather-resistant loungers—is designed for maximum comfort and style.
Essential Elements:
- Modern lounge chairs with thick cushions
- Cantilever umbrellas for adjustable shade
- Outdoor speakers for ambient music
- Rolling bar cart for poolside refreshments
- Storage bin for colorful pool floats
How to make it
- Arrange lounge chairs in pairs, ensuring each pair has its own small side table and share of shade from an umbrella.
- Level the umbrella bases using sand or weight plates to ensure they can withstand a sudden summer breeze without tipping.
- Stock a rolling bar cart with shatterproof acrylic glassware, chilled carafe of infused water (try cucumber and mint), and fresh towels rolled into tight ‘spa’ cylinders.
- Set up a Bluetooth outdoor speaker system, positioning the speakers at ear-level but hidden behind planters to provide ‘surround sound’ without being intrusive.
- Choose a color palette for your pool floats (like all whites or all tropical brights) and store them in a large wicker or mesh bin to keep the deck clutter-free.
- Add a few large tropical plants in heavy pots, like Bird of Paradise or Majesty Palms, to provide a sense of privacy and a lush ‘island’ vibe.
- Clean the pool tiles and deck weekly with a mild detergent to keep the surfaces bright and the water looking crystal clear.
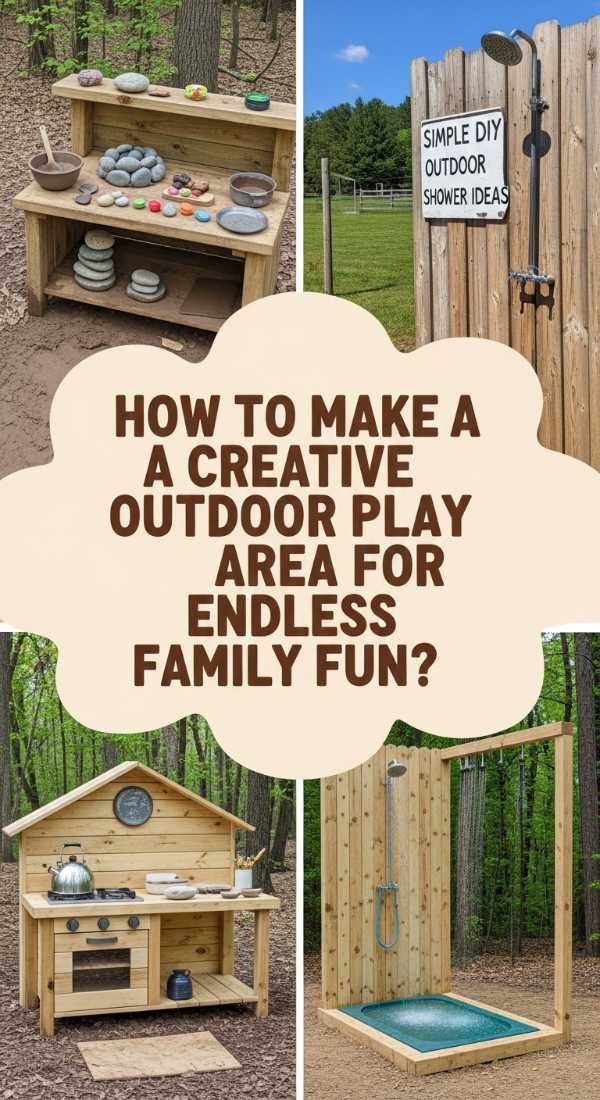
How to Make a Creative Outdoor Play Area for Endless Family Fun
[IMAGE_10]
Why we love this
An outdoor play area should be a place where imagination runs wild, and we love designing spaces that look as good as they function. We are charmed by the idea of a ‘mud kitchen’ with little wooden spoons and stainless steel bowls, or a chalkboard fence where masterpieces can be created and washed away by the rain. The atmosphere is filled with laughter and the earthy scent of cedar chips, which provide a soft, safe landing for little feet. It’s a curated ‘kid board’ that encourages messy, creative play while still looking like a beautiful, integrated part of your landscape.
Essential Elements:
- Natural wood play structures (cedar or redwood)
- Rubber mulch or cedar chips for safety surfacing
- Outdoor chalkboard or art easel
- Sensory bin with sand or smooth river stones
- Shade sail or colorful canopy
How to make it
- Define the play zone with a border of landscape timbers; dig a shallow trench for the timbers to sit in so they are stable and level.
- Fill the interior with 6 inches of certified playground-grade cedar chips to provide an impact-absorbing surface that is also naturally rot-resistant.
- Assemble any wooden play structures (like a swing set or playhouse), ensuring all bolts are tightened and the wood is sanded smooth to prevent splinters.
- Create a ‘mud kitchen’ by repurposing an old potting bench; add a plastic tub for a ‘sink’ and hang old pots and pans on hooks.
- Mount a large piece of cement board or exterior-grade plywood painted with chalkboard paint to a sturdy fence or wall at the children’s height.
- Install a shade sail overhead by anchoring it to 4×4 posts or the side of the house; ensure it is tilted slightly so rainwater can run off easily.
- Organize toys in large, drainable mesh bags or plastic bins with holes in the bottom to prevent water from collecting inside.
Conclusion
Creating your own viral lifestyle board is all about the layers. Whether you are arranging flowers in a garden or styling a cozy backyard nook, the key is to focus on sensory details and high-quality elements that tell a story. By following these guides, you’ve turned your home into a living, breathing ‘board’ that is ready for its close-up. Remember, the best boards are the ones that are lived in and loved, so don’t be afraid to add your own personal flair to every corner!