

There is something undeniably magical about a gathering where the centerpiece isn’t just a plate, but a sprawling, vibrant food board that invites everyone to lean in, share stories, and dig into something delicious. We live in a world that moves so fast, but the simple act of assembling a ‘Viral Simple Food Board’ allows us to slow down and appreciate the textures and aromas of home-cooked comfort. Whether it’s a Sunday dinner with family or a casual get-together with friends, this board is all about abundance, warmth, and the rustic charm of perfectly prepared chicken.
I remember the first time I set out a massive wooden board covered in different styles of chicken thighs and legs; the room literally went silent for a second before the ‘oohs’ and ‘aahs’ started. It’s a visual feast that smells like garlic, rosemary, and caramelized goodness. This guide is my love letter to the humble chicken thigh and leg—the unsung heroes of the kitchen—and how you can master every technique to create a board that will have everyone reaching for their phones to snap a photo before they dive in.
How to bake juicy chicken thighs
Why we love this
When you pull these juicy thighs out of the oven, the first thing that hits you is the heavenly scent of rendered fat mingling with fresh herbs. The meat is so incredibly succulent that it practically melts away from the bone, releasing a savory juice that demands to be soaked up with a piece of crusty bread. There is a specific joy in seeing that perfectly taut skin, glistening under the kitchen lights, promising a texture that is both soft and substantial. It is the ultimate comfort food, providing a deep, soul-warming satisfaction that only a perfectly baked piece of dark meat can deliver.
Ingredients
- 4-6 bone-in, skin-on chicken thighs
- 2 tablespoons olive oil
- 1 teaspoon sea salt
- 1/2 teaspoon cracked black pepper
- 1 teaspoon garlic powder
- 1 teaspoon dried oregano
- Fresh parsley for garnish
How to make it
- Preheat your oven to 400°F (200°C). This high heat is crucial for rendering the fat while keeping the inside moist.
- Pat the chicken thighs completely dry with paper towels. Removing surface moisture is the secret to ensuring the skin doesn’t steam but instead stays beautiful and firm.
- In a small bowl, whisk together the olive oil, salt, pepper, garlic powder, and oregano until it forms a loose paste.
- Rub the mixture thoroughly over each thigh, making sure to get under the skin and on the bottom of the meat for maximum flavor distribution.
- Place the thighs on a wire rack set over a rimmed baking sheet. This allows hot air to circulate around the entire piece of meat.
- Bake for 35-40 minutes. Use a meat thermometer to check for an internal temperature of 165°F (74°C), but for extra tenderness, I recommend going to 175°F.
- Let the chicken rest for 5-10 minutes before placing it on your board. This allows the juices to redistribute so they don’t run out when someone takes a bite.
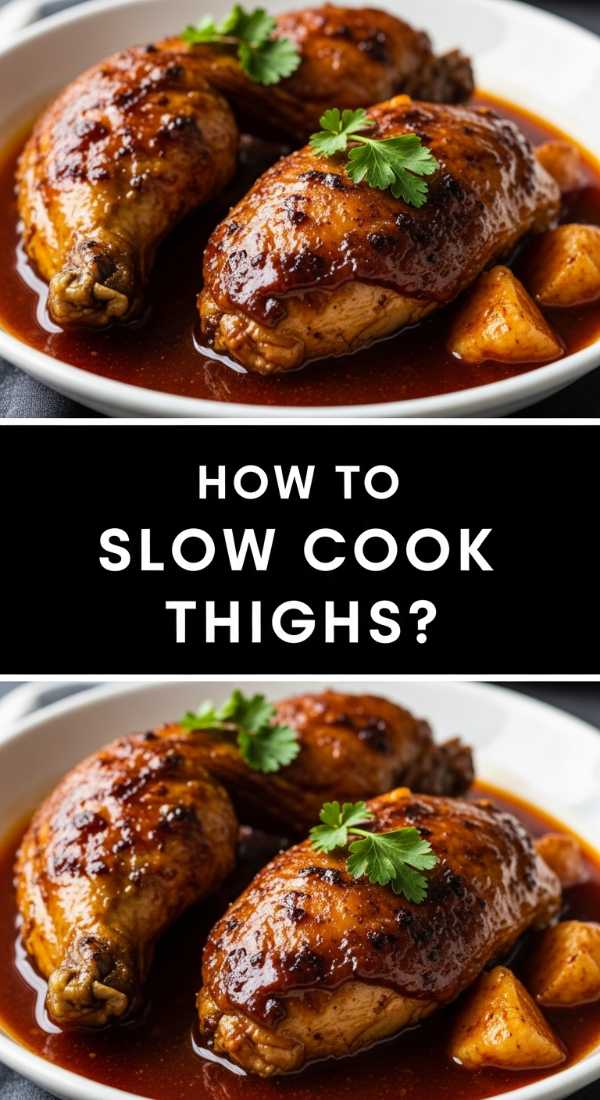
How to cook crockpot chicken thighs

Why we love this
The crockpot is like a magic wand for chicken thighs, transforming them into something so tender you could eat them with a spoon. As they slow-cook over several hours, the connective tissues break down into a rich, silky sauce that coats every fiber of the meat with intense flavor. The aroma that fills your home as these simmer is absolutely intoxicating—a mix of slow-roasted onions, chicken stock, and earthy spices that whispers ‘home’ from the moment you walk through the door. It’s the kind of effortless cooking that results in a sophisticated, fork-tender dish perfect for the center of your food board.
Ingredients
- 6-8 skinless chicken thighs (bone-in or boneless)
- 1 cup chicken bone broth
- 1 onion, sliced
- 3 cloves garlic, minced
- 1 teaspoon paprika
- 1 teaspoon salt
- 1/2 teaspoon thyme
How to make it
- Layer the sliced onions at the bottom of the slow cooker to act as a natural rack for the chicken, preventing it from sticking and adding sweetness.
- Season the chicken thighs generously on all sides with salt, paprika, and thyme, pressing the spices into the meat.
- Place the chicken on top of the onions in a single layer if possible, or slightly overlapping.
- Pour the chicken broth and minced garlic over the top, being careful not to wash off all the spices you just applied.
- Cover and cook on LOW for 6-7 hours or on HIGH for 3-4 hours. I highly recommend the LOW setting for a more delicate, ‘fall-apart’ texture.
- The chicken is done when it reaches at least 165°F and pulls apart easily with two forks.
- Carefully lift the thighs out using a slotted spoon to keep them intact for presentation on your viral food board.
How to make crispy chicken legs

Why we love this
There is nothing quite as satisfying as the audible ‘crunch’ of a perfectly crispy chicken leg. This technique focuses on achieving a paper-thin, golden-brown skin that shatters like glass upon the first bite, revealing the piping hot, steaming meat beneath. The contrast between the salty, seasoned exterior and the tender, natural sweetness of the leg meat creates a sensory experience that is both nostalgic and exciting. It’s a finger-food favorite that brings a playful energy to your food board, inviting guests to simply grab a drumstick and enjoy the textural masterpiece you’ve created.
Ingredients
- 8 chicken drumsticks
- 3 tablespoons melted butter or ghee
- 1 tablespoon cornstarch (the secret for extra crunch)
- 1 teaspoon onion powder
- 1 teaspoon smoked paprika
- Salt and pepper to taste
How to make it
- Preheat your oven to 425°F (220°C). A hotter oven is essential for that rapid crisping effect on the skin.
- In a large bowl, toss the chicken legs with melted butter until they are completely and evenly coated.
- In a separate small dish, mix the cornstarch, onion powder, paprika, salt, and pepper.
- Dredge each buttery leg into the spice mix, tapping off any excess. The cornstarch works with the fat to create a light, crispy crust.
- Arrange the legs on a parchment-lined baking sheet, ensuring they do not touch each other so the steam can escape.
- Roast for 20 minutes, then flip each leg carefully using tongs to ensure even browning on all sides.
- Cook for another 15-20 minutes until the skin is deep golden and very firm to the touch. Let them sit for 3 minutes before serving to let the crust set.
How to cook boneless chicken thighs

Why we love this
Boneless chicken thighs are the versatile stars of the culinary world, offering a rich flavor profile without the fuss of a bone. When cooked correctly, they develop a gorgeous pan-sear—a caramelized, mahogany crust that locks in an explosion of savory juices. The texture is consistently meaty and satisfying, making them perfect for slicing into elegant strips to fan out across your food board. They carry sauces and seasonings beautifully, acting as a canvas for whatever flavors you choose to highlight, from zesty lemon-herb to a sweet balsamic reduction.
Ingredients
- 1.5 lbs boneless, skinless chicken thighs
- 2 tablespoons avocado oil (high smoke point)
- 1 teaspoon dried basil
- 1/2 teaspoon lemon pepper
- 1/2 teaspoon kosher salt
- 1 tablespoon butter
How to make it
- Trim any excess fat from the thighs and pat them dry. This ensures even cooking and a better sear.
- Season both sides of the meat with basil, lemon pepper, and salt, pressing the seasonings in firmly.
- Heat a heavy cast-iron skillet over medium-high heat. Add the avocado oil and wait until it shimmers and just begins to smoke.
- Place the thighs in the pan, smooth side down. Do not crowd the pan; cook in batches if necessary.
- Sear undisturbed for 5-6 minutes. You are looking for a deep, golden-brown crust to form before you attempt to flip them.
- Flip the thighs and add a tablespoon of butter to the pan. Baste the chicken with the melting butter for the final 4-5 minutes of cooking.
- Remove from heat once the internal temperature hits 165°F. Let them rest for 5 minutes before slicing against the grain for a professional board look.
How to roast chicken legs
Why we love this
Roasting chicken legs is a classic technique that brings out a rustic, deep-seated flavor that is hard to beat. As the legs roast, the natural sugars in the meat and skin caramelize, creating a complex sweetness that pairs beautifully with the savory juices. The result is a piece of meat that is incredibly moist, with a skin that is seasoned to perfection and a bone that has imparted an extra layer of richness to the surrounding flesh. It feels like a celebration of simple ingredients, resulting in a dish that is as visually stunning as it is delicious to eat.
Ingredients
- 6 chicken legs (drumstick and thigh attached, or just drumsticks)
- 2 tablespoons olive oil
- 4 sprigs fresh rosemary
- 3 cloves smashed garlic
- 1 teaspoon coarse salt
- 1/2 teaspoon red pepper flakes
How to make it
- Set your oven to 400°F (200°C). Prepare a roasting pan by lightly greasing it or lining it with foil.
- Rub the chicken legs with olive oil, ensuring every nook and cranny is covered to prevent drying.
- Season generously with coarse salt and red pepper flakes for a tiny hint of heat that cuts through the richness.
- Tuck the smashed garlic cloves and rosemary sprigs around the chicken in the pan. The oils from the herbs will infuse the chicken as it roasts.
- Roast for 40-45 minutes. Halfway through, use a spoon to baste the legs with the juices accumulating in the bottom of the pan.
- Check the thickest part of the leg with a thermometer; it should reach 165°F. The skin should be tight and browned.
- Let the legs rest in the roasting pan for 5 minutes so they can soak back up some of that garlic-rosemary infused oil before moving to the board.
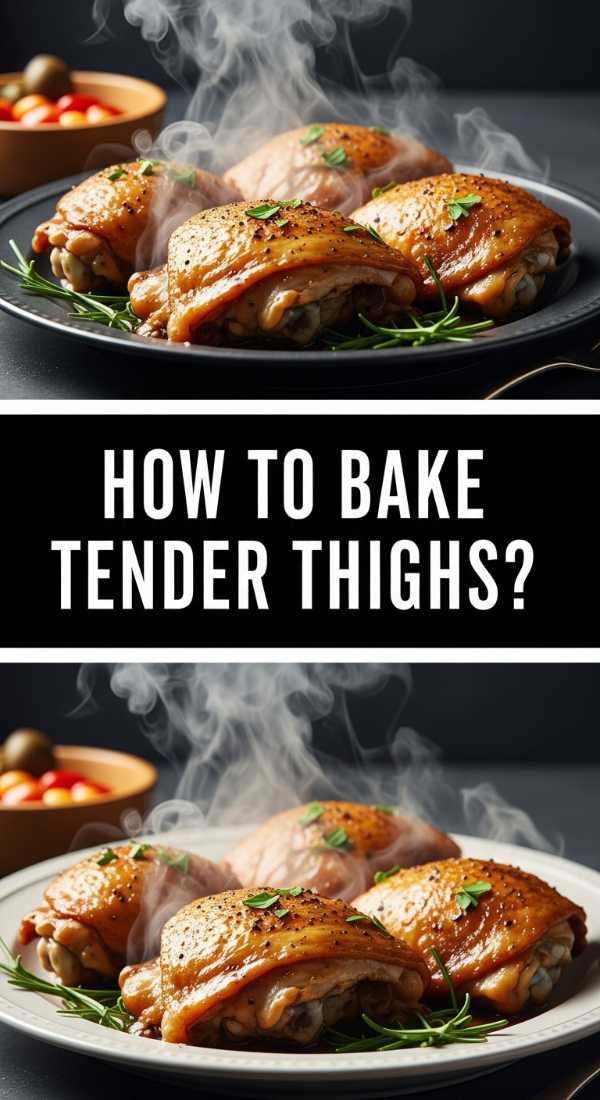
How to bake tender thighs
Why we love this
There is a specific kind of tenderness that comes from a slow-baked chicken thigh—the kind where the meat feels like it’s been braised but retains the structure of a roast. The fibers of the meat become incredibly soft, almost velvety, and they hold onto moisture with incredible tenacity. Every bite is an explosion of savory goodness, often enhanced by a light marinade that has had time to penetrate deep into the meat. It’s the kind of dish that feels sophisticated and thoughtful, providing a gentle, comforting texture that contrasts beautifully with the crunchier elements on your food board.
Ingredients
- 4-6 bone-in chicken thighs
- 1/4 cup plain Greek yogurt (the acid tenderizes the meat)
- 1 teaspoon cumin
- 1/2 teaspoon turmeric
- 1 teaspoon salt
- Zest of one lemon
How to make it
- In a large bowl, whisk together the yogurt, cumin, turmeric, salt, and lemon zest. This acidic mixture is the key to breaking down the proteins for maximum tenderness.
- Add the chicken thighs to the bowl and coat them thoroughly. Let them marinate in the fridge for at least 30 minutes, or up to 4 hours.
- Preheat your oven to 375°F (190°C). The slightly lower temperature compared to roasting helps keep the meat tender.
- Place the thighs in a baking dish just large enough to hold them. Do not shake off the excess marinade; it will form a tenderizing ‘crust’.
- Bake for 45-50 minutes. The yogurt will brown slightly and create a moist environment for the chicken.
- Test for doneness at 165°F. The meat should feel very ‘yielding’ when poked with a fork.
- Let the chicken sit for 10 minutes. This is crucial for yogurt-marinated meats to ensure the texture stays silky.
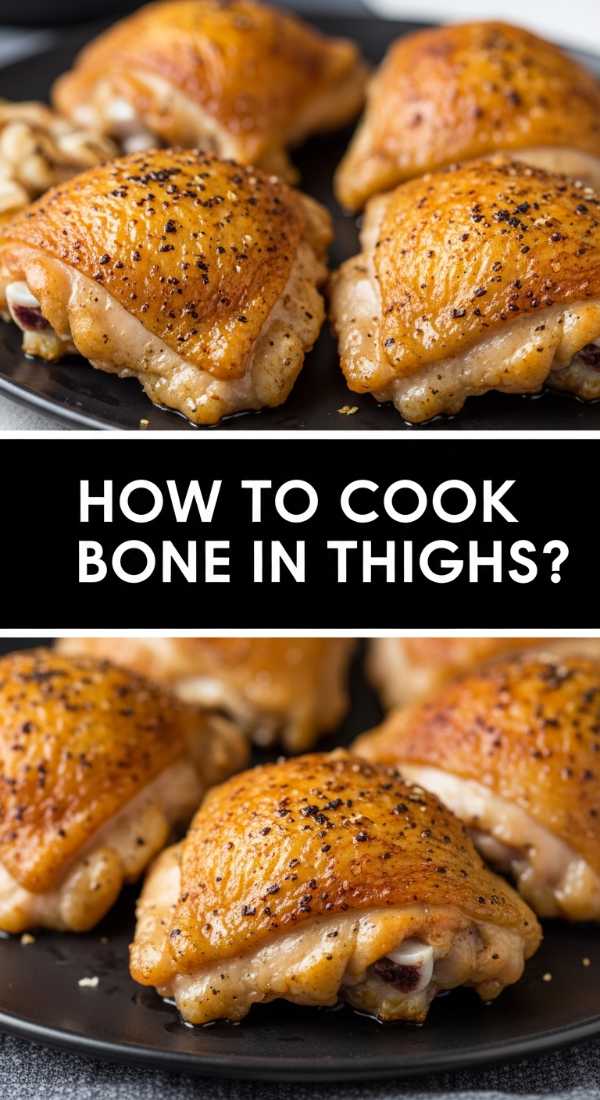
How to cook bone in thighs

Why we love this
Cooking chicken with the bone in is the secret weapon of home chefs everywhere because the bone acts as a thermal conductor, cooking the meat from the inside out while adding a profound depth of flavor. There is a primal, rustic quality to bone-in thighs that makes them the perfect anchor for a food board. The meat near the bone stays incredibly juicy and flavorful, offering a rich, savory experience that boneless cuts simply cannot match. It’s an authentic, ‘real food’ feel that encourages guests to get comfortable and enjoy the meal with their hands if they want to.
Ingredients
- 6 bone-in, skin-on chicken thighs
- 2 tablespoons vegetable oil
- 1 tablespoon poultry seasoning
- 1 teaspoon onion powder
- 1 teaspoon salt
- Fresh thyme for garnish
How to make it
- Preheat the oven to 400°F (200°C). Using a bone-in cut requires a consistent, medium-high heat to ensure the center cooks through.
- Pat the skin very dry. Season both sides with poultry seasoning, onion powder, and salt.
- Heat oil in an oven-proof skillet over medium heat. Place the chicken skin-side down and sear for about 5 minutes until the skin is golden and starting to crisp.
- Flip the thighs so they are skin-side up. This protects the skin from getting soggy while the rest of the meat cooks.
- Transfer the entire skillet into the preheated oven.
- Bake for 20-25 minutes. The combination of the initial sear and the oven finishing creates a perfect texture.
- Use a thermometer to ensure the meat reaches 165°F at the bone. Let them rest in the pan for 5 minutes before serving.
How to make savory thighs
Why we love this
Savory chicken thighs are all about the ‘umami’—that deep, fifth taste that makes your mouth water and keeps you coming back for more. By using ingredients like balsamic vinegar, soy, or Worcestershire, you create a complex glaze that turns a simple thigh into a gourmet experience. The aroma is a heady mix of sweet, salty, and tangy, which fills the air with a promise of a bold flavor profile. The finished thighs have a dark, glossy sheen that looks absolutely stunning on a board, especially when surrounded by bright green herbs or colorful roasted vegetables.
Ingredients
- 4-6 boneless chicken thighs
- 2 tablespoons balsamic glaze
- 1 tablespoon soy sauce
- 1 tablespoon honey
- 2 cloves minced garlic
- 1/2 teaspoon ginger powder
How to make it
- In a small saucepan, whisk together the balsamic glaze, soy sauce, honey, garlic, and ginger. Simmer over low heat for 3-5 minutes until thickened slightly.
- Season the chicken thighs lightly with salt (remember, soy sauce is salty!).
- Heat a pan over medium heat with a touch of oil. Sear the thighs for 5 minutes on one side.
- Flip the thighs and immediately brush a generous layer of the savory glaze over the cooked side.
- Cover the pan with a lid for 4 minutes to let the steam finish cooking the inside while the glaze sets.
- Remove the lid, flip one last time to caramelize the glaze for 30 seconds, then flip back and brush with one more layer of sauce.
- Internal temperature should hit 165°F. The thighs should be sticky, dark, and incredibly fragrant.
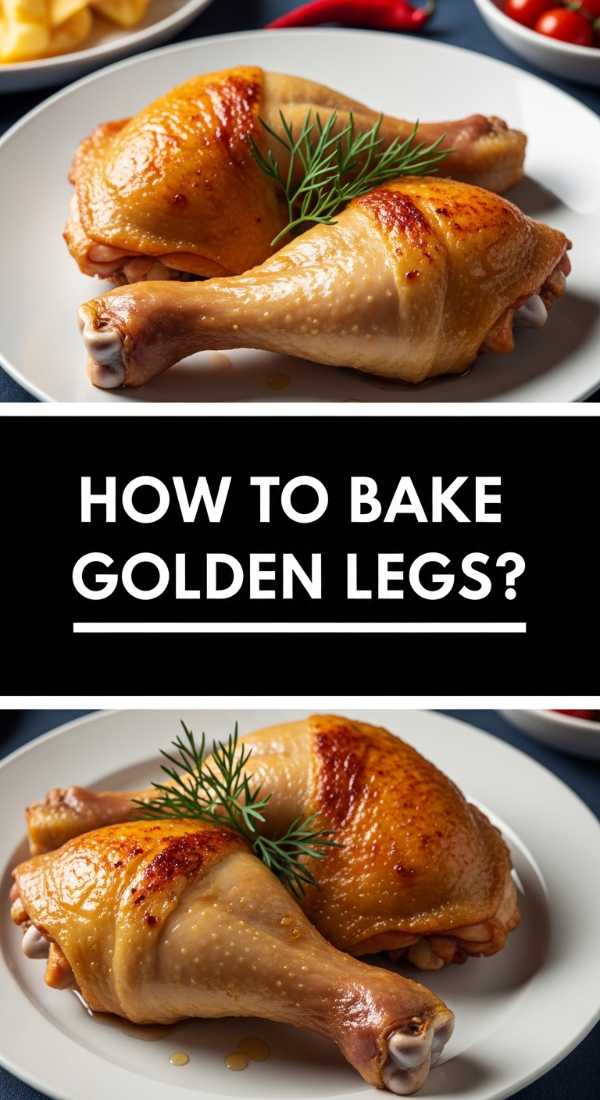
How to bake golden legs

Why we love this
Golden chicken legs are the visual superstars of any viral food board. This method is all about achieving that specific, sun-kissed hue that looks like it came straight out of a professional food photography shoot. The skin is delicate yet firm, with a beautiful translucence that shows off the spices underneath. It’s a gentle bake that preserves the integrity of the meat while ensuring the exterior is aesthetically perfect. The mild, buttery flavor and the soft, yielding texture make these an easy favorite for children and adults alike, providing a reliable and beautiful centerpiece.
Ingredients
- 8 chicken drumsticks
- 1/4 cup melted butter
- 1 teaspoon paprika (for color)
- 1/2 teaspoon turmeric (the secret for the golden hue)
- 1 teaspoon garlic salt
- 1/2 teaspoon white pepper
How to make it
- Preheat your oven to 375°F (190°C). A slightly lower temp prevents the spices from burning before the ‘gold’ develops.
- Whisk the melted butter with paprika and turmeric. The turmeric is what provides that vibrant, photo-ready golden glow.
- Dredge each drumstick in the golden butter mixture until fully coated.
- Arrange the legs on a baking sheet lined with a silicone mat or parchment paper.
- Season the tops with a final sprinkle of garlic salt and white pepper.
- Bake for 35-40 minutes. Every 15 minutes, use a brush to re-apply any butter that has pooled on the tray back onto the legs.
- The legs are done when they are bright golden-brown and the juices run clear. Let them rest for 5 minutes to allow the color to deepen slightly.
How to cook tasty thighs
[IMAGE_10]
Why we love this
What makes a ‘tasty’ thigh? It’s the perfect balance of seasoning and technique that makes the natural flavor of the chicken ‘pop’. This approach uses a dry brine method to ensure that every single cell of the meat is seasoned, not just the surface. The result is a clean, robust chicken flavor that feels incredibly fresh and vibrant. The texture is springy and moist, with a lightly browned exterior that offers just enough resistance to make every bite interesting. It’s the kind of chicken that doesn’t need a heavy sauce because its inherent tastiness is the star of the show.
Ingredients
- 6 boneless or bone-in chicken thighs
- 1 tablespoon kosher salt
- 1 teaspoon sugar (helps with browning)
- 1 teaspoon onion powder
- 1/2 teaspoon dried thyme
- 1 tablespoon olive oil
How to make it
- At least 1 hour before cooking (or up to overnight), mix the salt, sugar, onion powder, and thyme.
- Rub this dry brine all over the chicken thighs. Place them on a plate in the fridge, uncovered. This dries out the skin and seasons the meat deeply.
- When ready to cook, preheat the oven to 400°F (200°C).
- Lightly brush the olive oil over the chicken (don’t wash off the brine!).
- Place the thighs in a shallow baking pan. The sugar in the brine will assist in rapid caramelization once the heat hits.
- Bake for 30-35 minutes for boneless, or 40-45 for bone-in.
- Once the thermometer hits 165°F and the tops are beautifully browned, remove from the oven and let them rest for at least 7 minutes to lock in that ‘tasty’ juice.
Conclusion
Building a viral food board is about more than just the food; it’s about the feeling of community and the joy of a shared meal. By mastering these various chicken techniques, you’ve created a tapestry of flavors and textures that cater to every palate. From the crunch of the crispy legs to the melt-in-your-mouth tenderness of the slow-cooked thighs, your board is now a masterpiece of home-cooked goodness. So, lay out your board, add some fresh garnishes, and watch as your guests (and your social media followers) fall in love with the simple beauty of a perfectly executed chicken feast.