
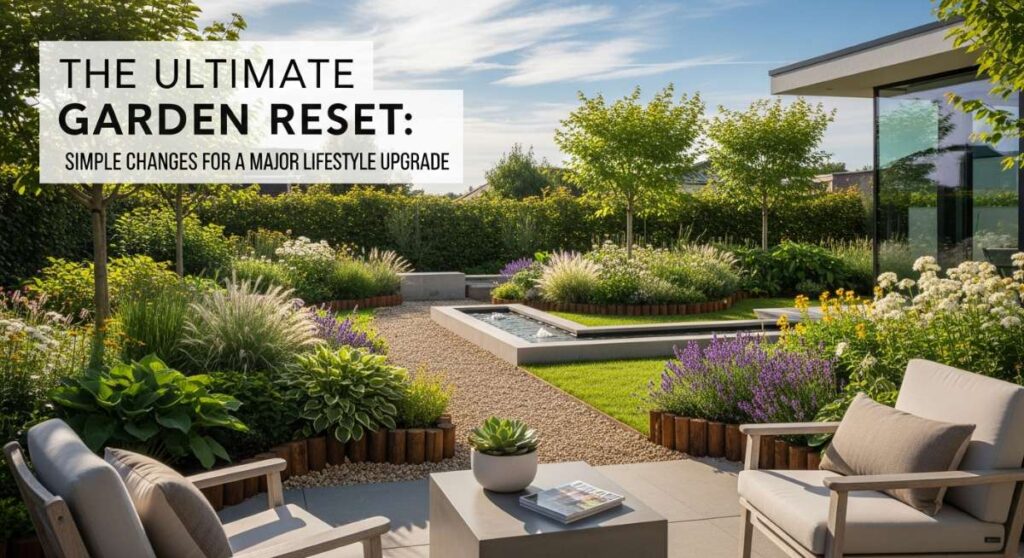
The Ultimate Garden Reset: Simple Changes for a Major Lifestyle Upgrade
There is a specific kind of magic that happens when the air begins to shift and the light lingers just a little longer in the evening. It’s a call to action from nature itself, whispering that it’s time to shed the heavy layers of winter and breathe new life into the spaces we call home. For me, the garden has always been more than just a plot of land; it is an extension of my soul, a place where I can reset, recharge, and rediscover the simple joys of a life well-lived.
We often think that a lifestyle upgrade requires a massive renovation or a cross-country move, but the truth is far more beautiful. The most profound transformations usually begin with the smallest shifts—a pop of color on the porch, a soft glow by the front door, or the therapeutic rhythm of digging your hands into fresh, cool earth. This guide is your roadmap to creating a sanctuary that reflects your inner peace, one dreamy project at a time.
How to Build a Glow Planter for Your Dreamy Front Entry

Why we love this
There is something truly magical about the way a soft, golden glow spills across your front porch as the sun begins to dip below the horizon. It transforms a simple entryway into a sanctuary, welcoming you home with a warmth that feels like a literal hug. We adore how these planters bridge the gap between functional lighting and organic beauty, casting delicate shadows of greenery against your siding and creating an ethereal atmosphere that passersby can’t help but admire. The texture of the damp soil combined with the cool radiance of the LED elements creates a sensory experience that feels both high-end and deeply grounding.
Essential Elements:
- Large weather-resistant resin or ceramic planter
- Waterproof LED puck lights with remote
- Frosted glass pebbles or translucent drainage stones
- Trailing ivy or silver falls dichondra
- Tall structural plant (like a Sansevieria or Grass)
- Potting mix and a clear plastic inner liner
How to make it
- Begin by cleaning your planter thoroughly to ensure no debris interferes with the light quality. Place a clear plastic liner inside if your planter isn’t naturally translucent or if you want to protect the LED units.
- Position three to four waterproof LED puck lights at the very bottom of the planter, spaced evenly in a triangular or square pattern. Test them with the remote to ensure the signal can pass through the planter walls.
- Carefully pour a 3-inch layer of frosted glass pebbles over the lights. These stones act as a diffuser, scattering the light upward so it glows softly rather than looking like a spotlight.
- Place your tall structural plant in the center, keeping it in its nursery pot to prevent soil from leaking down into your light layer. Fill the surrounding gaps with more glass pebbles or a light potting mix contained in a separate mesh bag.
- Plant your trailing ivy around the edges of the top rim. As these grow, they will catch the upward light, creating a shimmering, dancing effect at night.
- Turn the lights on at dusk and adjust the brightness via remote to match the ambiance of your street.
How to Choose Spring Wallpaper for a Fresher Bedroom Vibe

Why we love this
Stepping into a bedroom wrapped in a fresh spring print feels like waking up inside a watercolor painting. We love how a simple change in wall texture can completely shift the energy of a room from a sleepy cocoon to a vibrant, airy retreat. The sight of delicate botanical stems or soft pastel hues against a crisp morning sun provides an immediate mood boost. It’s about more than just decor; it’s about creating a backdrop for your rest that feels as light and hopeful as a dewy April morning, smelling faintly of clean linens and new beginnings.
Essential Elements:
- Peel-and-stick or traditional non-pasted wallpaper
- Smoothing tool (squeegee)
- Sharp utility knife with extra blades
- Tape measure and level
- Sponge and mild soap for wall prep
- Painter’s tape
How to make it
- Clean your walls meticulously with a damp sponge to remove any dust or oils. This ensures the adhesive bonds perfectly and stays flat for years to come.
- Measure the height of your wall and add 2 inches of ‘bleed’ to the top and bottom. Cut your first strip of wallpaper based on this measurement, ensuring the pattern is oriented correctly.
- Use a level to draw a faint vertical pencil line (a plumb line) on the wall where the first strip will go. This is the most critical step, as walls are rarely perfectly straight.
- Starting at the ceiling, peel back 6 inches of the backing and align the edge of the paper with your plumb line. Press firmly and use your smoothing tool to push air bubbles out from the center to the edges.
- Continue peeling and smoothing downward, moving in 12-inch increments. For the next strip, make sure to match the pattern repeat perfectly at eye level before pressing the adhesive down.
- Once the wall is covered, use a very sharp utility knife and a metal straight edge to trim the excess paper at the ceiling and baseboard. A dull blade will tear the paper, so snap off a new edge frequently.
How to Style a Cute Campsite for the Ultimate Nature Retreat

Why we love this
Nature is beautiful on its own, but styling a campsite with intention adds a layer of luxurious comfort that makes the wilderness feel like a high-end boutique hotel. We love the juxtaposition of rugged tall pines against soft, fringed throw pillows and the flicker of a vintage-style lantern. It’s the smell of pine needles mixed with freshly brewed pour-over coffee, and the tactile joy of stepping out of a tent onto a woven outdoor rug instead of cold dirt. It encourages you to linger longer in the fresh air, turning a simple trip into a restorative lifestyle experience.
Essential Elements:
- Canvas bell tent or stylish A-frame tent
- Outdoor woven polypropylene rugs
- Inflatable mattress with high-thread-count linens
- Battery-operated string lights or Edison bulbs
- Folding wooden side tables
- Portable fire pit and floor cushions
How to make it
- Choose a level spot under a canopy of trees and clear away any large rocks or sticks. Lay down a heavy-duty tarp that is slightly smaller than your tent footprint to prevent water from pooling.
- Set up your tent, ensuring the entrance faces the best view—whether that’s a lake, a valley, or a sunset. Tension the guy lines tightly to create a crisp, professional look.
- Layer your outdoor rugs both inside the tent and just outside the ‘front door.’ This creates a defined living space and keeps the interior clean.
- Instead of sleeping bags, use a real duvet and plush pillows. The weight and texture of home bedding are essential for that ‘viral’ glamping aesthetic.
- Drape string lights along the tent’s structural poles and out to a nearby tree. This provides soft, ambient lighting that is much more inviting than a harsh headlamp.
- Set up a ‘coffee station’ on a wooden folding table outside, complete with a beautiful kettle and ceramic mugs, to make your first morning moments feel intentional.
How to Design Low Retaining Walls for a Professional Garden Look
Why we love this
There is a profound sense of order and sophistication that comes with a well-designed low retaining wall. It defines the ‘bones’ of your garden, creating clean lines that make even the wildest flower beds look intentional and curated. We love the architectural contrast between the hard, cool surface of stone or timber and the soft, billowing textures of the plants spilling over the edge. It elevates the entire property, giving your landscape a structured, multi-dimensional feel that mimics the gardens of historic estates while remaining perfectly scaled for a modern backyard.
Essential Elements:
- Wall blocks, natural stone, or pressure-treated timber
- Leveling sand and crushed gravel (base)
- Landscape fabric (weed barrier)
- Level (4-foot preferred)
- Rubber mallet and shovel
- Perforated drainage pipe
How to make it
- Mark your wall path using a garden hose or spray paint. Dig a trench that is roughly 6 inches deep and twice as wide as your wall material.
- Fill the trench with 3 inches of crushed gravel, then top with an inch of leveling sand. Use a hand tamper to pack this down until it is rock-solid and perfectly level.
- Lay your first course of blocks or stones. This is the ‘foundation’ layer. Use your level on every single block, tapping them into place with a rubber mallet. If the first layer isn’t perfect, the whole wall will be crooked.
- Install a perforated drainage pipe behind this first layer, sloped toward an outlet, to prevent water pressure from pushing the wall over during heavy rains.
- Stack subsequent layers, staggering the joints (like a brick pattern) for maximum strength. If using blocks, use a high-strength landscape adhesive between layers.
- Backfill the space behind the wall with gravel for the first few inches to aid drainage, then top with high-quality topsoil for your plants.
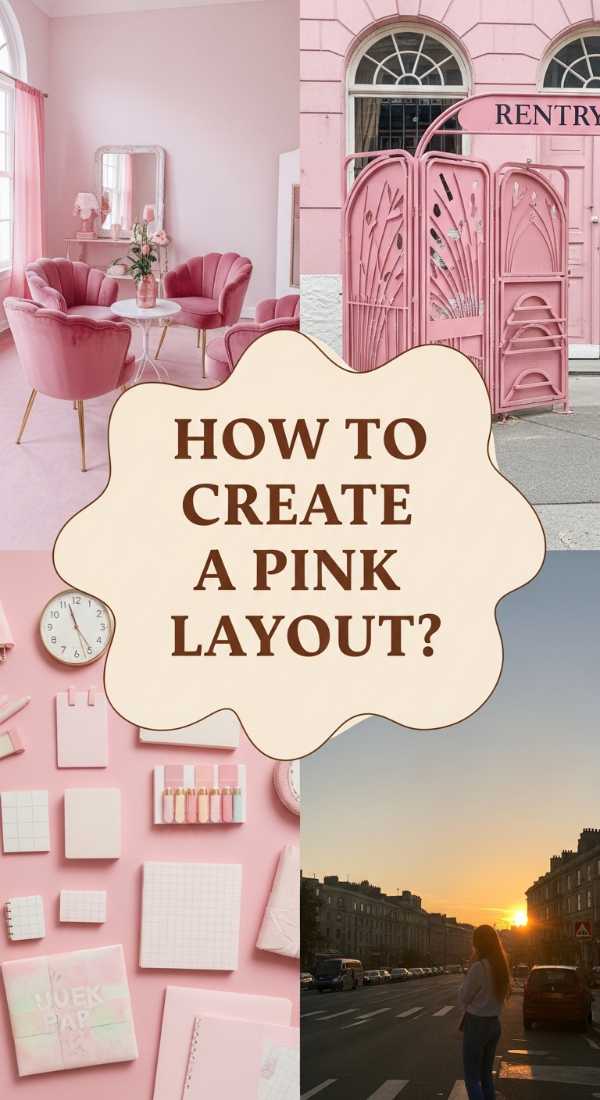
How to Create a Pink Layout for a Sweet Morning Aesthetic

Why we love this
Romanticizing your life starts with the first thing you see in the morning. A soft pink morning layout—complete with blush-toned linens, rose-tinted glassware, and delicate peonies—creates a bubble of serenity before the chaos of the day begins. We love how this aesthetic softens the harsh light of early morning, casting a glow that feels optimistic and gentle. It’s the scent of raspberry jam on warm brioche and the feel of a silk robe against your skin; a sensory ritual that tells your brain that beauty and self-care are the day’s top priorities.
Essential Elements:
- Blush pink linen napkins or tablecloth
- Rose quartz or pink tinted glassware
- White ceramic breakfast set
- Fresh pink flowers (peonies, tulips, or ranunculus)
- Gold or brass cutlery
- A wooden or marble serving tray
How to make it
- Start with a clean, neutral base, like a white marble countertop or a light wood table. Drape your pink linen loosely to create soft, organic folds rather than a stiff, formal look.
- Layer your plates. Use a larger white dinner plate as a base and top it with a smaller pink salad plate or a bowl. This adds depth and visual interest to the ‘layout.’
- Position your glassware so it catches the morning light. A glass of grapefruit juice or a latte in a pink-rimmed cup adds a pop of vibrant, translucent color.
- Cut your flowers short and place them in a low bud vase. You want them to be a part of the table, not a barrier that blocks your view of the breakfast.
- Arrange your food items with ‘ordered chaos.’ Scatter a few loose berries or a sprig of mint on the tray to make it look effortless and ‘lived-in.’
- Add a final touch of sparkle with gold cutlery, which warms up the pink tones and adds a hint of luxury to the overall presentation.
How to Arrange Wildflower Centerpieces for Your Round Dining Table
Why we love this
Round tables are inherently social, and a wildflower centerpiece is the perfect conversational companion. We love the untamed, ‘just-picked-from-the-meadow’ vibe that breaks up the symmetry of a dining room. These arrangements bring the outdoors in, filling the air with the earthy, sweet fragrance of Queen Anne’s Lace and Lavender. The way the stems arch and dance in different directions creates a sense of movement and life that formal arrangements often lack, making your dinner parties feel relaxed, soulful, and deeply connected to the seasons.
Essential Elements:
- A low, wide-mouthed ceramic bowl or vase
- Chicken wire or a floral frog
- Clear floral tape
- Assorted wildflowers (Cosmos, Zinnias, Chamomile, Scabiosa)
- Greenery (Eucalyptus or Ferns)
- Sharp floral shears
How to make it
- Prepare your vessel by creating a grid across the top with clear floral tape, or crumple a small piece of chicken wire inside. This provides the structure needed to keep stems at specific angles.
- Fill the vase with cool water and a packet of floral preservative. Strip all leaves from the parts of the stems that will sit below the waterline to prevent bacterial growth.
- Start with your greenery. Place stems horizontally so they spill over the edges of the bowl, hiding the rim and establishing the overall ‘reach’ of the centerpiece.
- Add your ‘focal’ flowers—the biggest or brightest blooms. Place them at varying heights and angles, ensuring there is a clear ‘hero’ flower that sits slightly off-center.
- Fill in the gaps with ‘airy’ fillers like Chamomile or Baby’s Breath. These should sit higher than the focal flowers to give that signature wildflower ‘floating’ effect.
- Rotate the table as you work to ensure the arrangement looks beautiful from every seat. A round table requires a 360-degree design with no ‘back’ side.
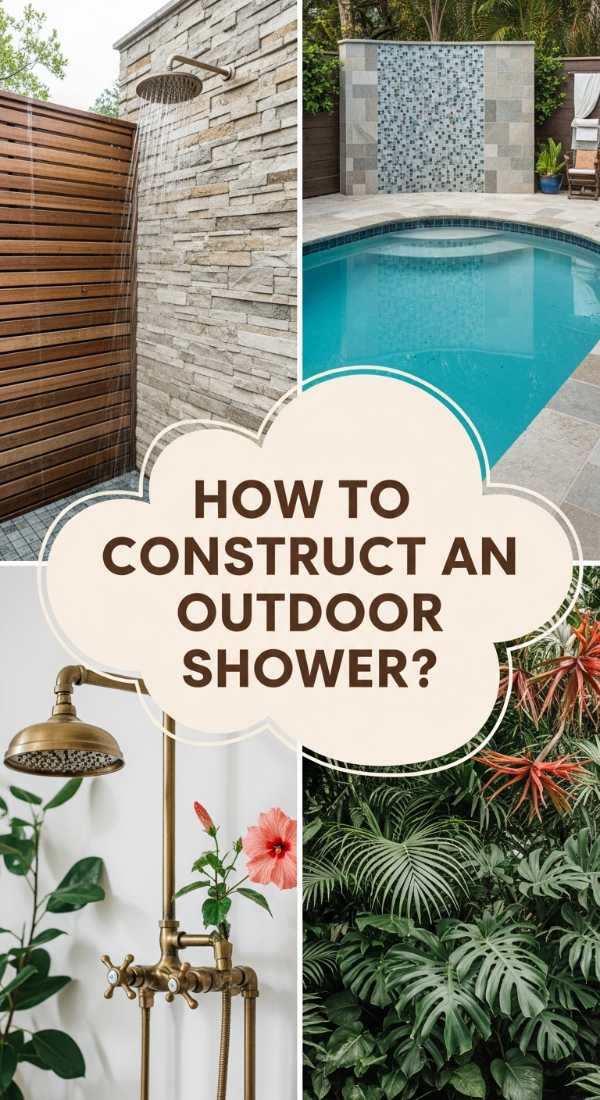
How to Construct an Outdoor Shower for Refreshing Summer Days

Why we love this
There is no luxury quite like rinsing off under the open sky, feeling the cool water hit your skin while a warm summer breeze rustles the leaves nearby. We love how an outdoor shower turns a mundane task into a spa-like ritual. It smells of cedarwood and eucalyptus, and the feeling of sun-warmed stones underfoot adds a grounding, tactile element to your post-beach or post-garden routine. It’s an architectural statement that screams ‘summer house’ and provides a refreshing escape from the indoor heat, making your backyard feel like a private tropical resort.
Essential Elements:
- Cedar or bamboo privacy panels
- Outdoor-rated shower head and hardware
- Standard garden hose adapter or PEX piping
- Paver stones or a wooden deck floor
- French drain or gravel pit
- Wall-mounted hooks for towels
How to make it
- Choose a location with good sun exposure (to help dry the area and prevent mold) and proximity to an outdoor faucet. Dig a 12-inch deep pit for drainage and fill it with coarse gravel.
- Install your flooring over the gravel. Cedar slats are beautiful and soft on the feet, while smooth river stones provide a natural, rugged look.
- Erect your privacy screen. If using cedar panels, ensure they are anchored deeply into the ground with concrete footings to withstand wind. Leave a small gap at the bottom for airflow.
- Mount the shower hardware to a sturdy post or the side of the house. For a simple setup, use a high-quality outdoor shower kit that connects directly to your garden hose.
- If you want hot water, install a simple outdoor tankless water heater or a dual-hose mixer valve. Ensure all pipes are insulated or easily drainable for winter.
- Add the finishing touches: a weatherproof bench, a cedar shelf for organic soap, and a few potted ferns to enhance the tropical, secluded vibe.
How to Decorate a Front Porch for a Welcoming Summer Entrance

Why we love this
Your front porch is the ‘handshake’ of your home; it sets the tone for everything that lies within. We love a summer porch that feels like an outdoor living room—a place where the boundaries between inside and out blur into a haze of rocking chairs and iced tea. The scent of blooming jasmine and the visual pop of striped outdoor pillows create an immediate sense of belonging. It’s about creating a space that invites neighbors to stop and chat, fostering a sense of community while providing you with a beautiful vantage point to watch the world go by.
Essential Elements:
- Cozy seating (Wicker chairs or a porch swing)
- Layered doormats (a large patterned rug under a coir mat)
- Symmetrical oversized planters
- Seasonal wreath (think boxwood or dried citrus)
- Outdoor lanterns of varying heights
- Side table for drinks
How to make it
- Start by power-washing the porch floor and ceiling. A clean slate is the foundation of a ‘viral’ aesthetic.
- Layer your rugs. Place a 3×5 outdoor rug with a bold stripe or geometric pattern down first, then center a classic coir ‘Welcome’ mat on top. This adds instant designer-level depth.
- Place two identical, large planters on either side of the door. Use the ‘Thriller, Filler, Spiller’ method: a tall grass in the middle, colorful petunias around it, and ivy hanging over the edge.
- Arrange your seating to face outward or toward each other to encourage conversation. Soften the furniture with UV-resistant throw pillows in a cohesive color palette.
- Hang a wreath that mirrors the colors in your planters. Use a magnetic or over-the-door hook to avoid damaging the finish of your door.
- Group three lanterns in a corner or near the steps. Use flameless candles with timers so the porch automatically glows to life every evening at sunset.
How to Organize Your Space with Chic Rentry Dividers
Why we love this
Open-concept living is great until you realize you have no place to hide the keys, mail, and daily clutter. We love how ‘Rentry’ (Entryway) dividers create functional zones without closing off the light or flow of a home. There is a deep satisfaction in having a designated, beautiful spot for every transition—from coming home to heading out. The texture of woven baskets, the smooth finish of a console table, and the organized lines of a slat wall divider bring a sense of architectural calm to the most high-traffic area of your house.
Essential Elements:
- Vertical wood slat divider or open shelving unit
- Uniform woven baskets
- Wall-mounted coat hooks or a ‘floating’ console
- Decorative tray for keys and tech
- Mirror (to bounce light and for last-minute checks)
- A small bench with hidden storage
How to make it
- Identify the ‘drop zone’—the natural spot where everyone dumps their bags. This is where your divider needs to live to define the space.
- If using a slat wall, anchor the top and bottom plates into the ceiling and floor joists for safety. Space the slats 2 inches apart to maintain visibility while creating a visual barrier.
- Incorporate a ‘floating’ shelf at waist height. This keeps the floor clear, making the entry feel larger and more modern.
- Assign a basket to every family member. Use high-quality labels so everyone knows exactly where their shoes and scarves go.
- Place a large mirror on the wall behind the divider or console. This ‘doubles’ the space and ensures the entry doesn’t feel like a cramped hallway.
- Style the top of the console with a single lamp and a small plant. This adds warmth and a touch of life to a space that is primarily functional.
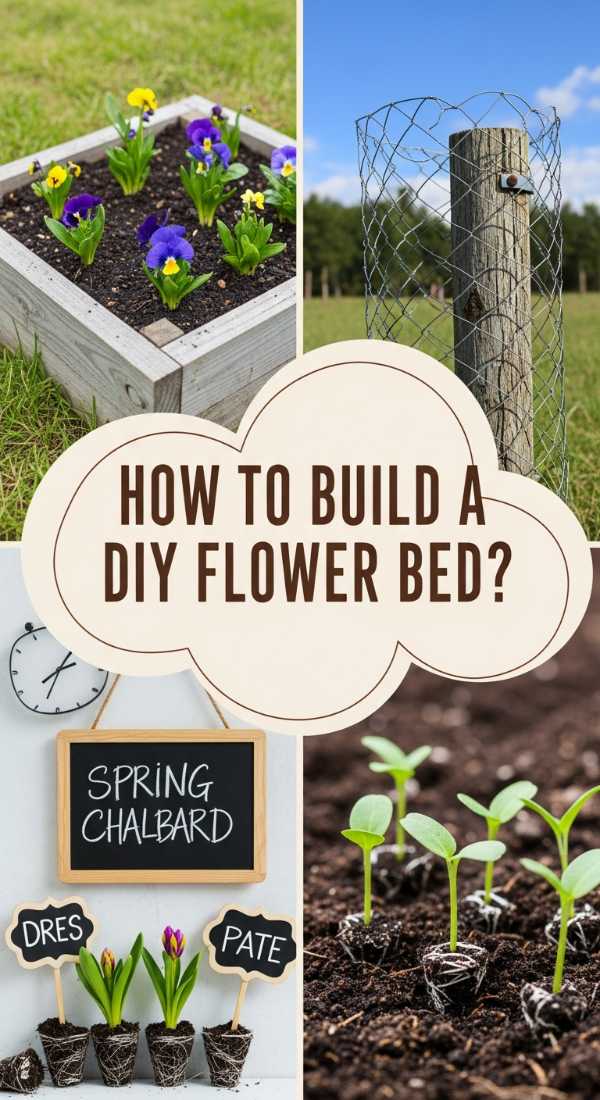
How to Build a Flower Bed for a Burst of Seasonal Color
[IMAGE_10]
Why we love this
There is no greater reward for a gardener than the first morning your brand-new flower bed reaches full bloom. It’s an explosion of sensory delight—the hum of bees, the fragrance of damp petals, and a kaleidoscope of colors that changes with every passing week. We love the process of planning a palette, from the deep purples of Salvia to the bright yellows of Coreopsis. It’s a living piece of art that grows and evolves, providing a constant source of fresh-cut flowers for your home and a vibrant sanctuary for local pollinators.
Essential Elements:
- Garden edging (metal, stone, or plastic)
- Premium garden soil and compost mix
- Selection of perennials and annuals
- Mulch (shredded bark or pine straw)
- Transplanting trowel and garden gloves
- Slow-release flower food
How to make it
- Outline your bed’s shape with a garden hose. Curved lines feel more organic and ‘pro,’ while straight lines feel modern and formal.
- Remove the grass within the outline using a flat-edged spade. Dig down 4 inches to ensure all roots are removed. Shake the soil off the sod and compost the green waste.
- Mix 3 inches of compost into the existing soil to improve drainage and nutrients. Rake it smooth so the bed is slightly mounded in the center.
- Before planting, ‘stage’ your flowers while they are still in their pots. Place taller plants in the back and shorter, spreading plants in the front. Group colors in clusters of three for a more natural look.
- Dig holes twice the size of the root balls. Add a sprinkle of flower food, place the plant, and firm the soil around it to remove air pockets.
- Apply a 2-inch layer of mulch across the entire bed, being careful not to touch the stems of the plants. This keeps moisture in, weeds out, and gives the bed a finished, professional look.
Conclusion: Embracing the Garden Lifestyle
As you stand back and look at your transformed space—whether it’s the soft glow of a new planter or the structured beauty of a retaining wall—remember that these projects are more than just home improvement. They are acts of self-care. By curating a home and garden that reflects the beauty you want to see in the world, you create a sanctuary that supports your best, most vibrant self. Happy nesting, and may your garden always be a place of peace.