
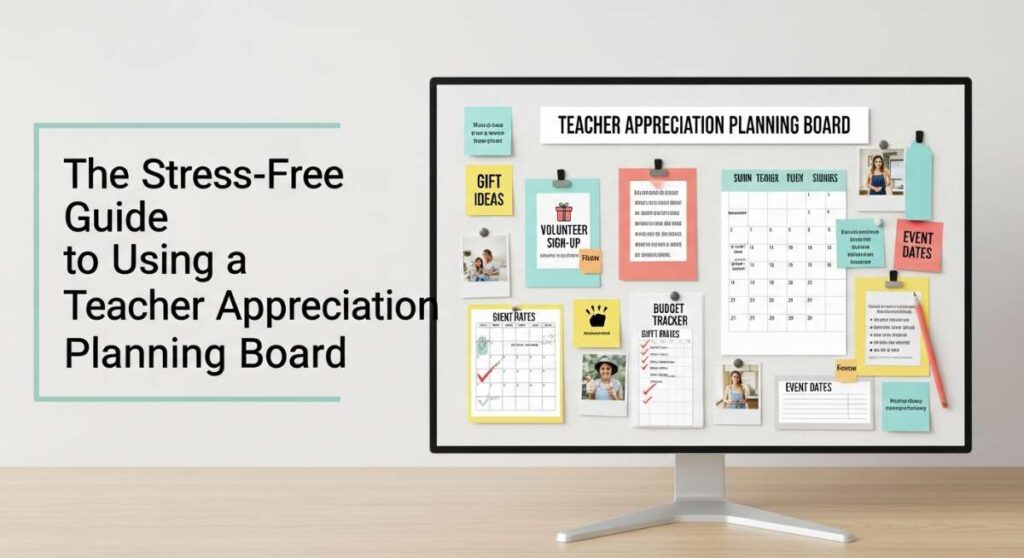
The Stress-Free Guide to Using a Teacher Appreciation Planning Board
Hello, my lovely souls. I’m so happy you’ve found your way into my cozy corner of the internet today. You know that feeling when the season shifts, and your heart starts to swell with gratitude for the incredible humans who pour their magic into our children every single day? Teachers are the quiet architects of our little ones’ futures, but let’s be honest—finding the perfect way to say ‘thank you’ can sometimes feel a bit overwhelming amidst the bustle of our own lives.
That is exactly why I created the Ultimate Teacher Appreciation Planning Board. Think of it as a warm, cloud-soft embrace for your schedule—a place where intention meets simplicity. We aren’t aiming for perfection here, darlings; we are aiming for presence. It’s about those tender, thoughtful gestures that tell a teacher, ‘I see you, I value you, and you matter.’
Today, I’m walking you through every little detail on my board. From the sweet crunch of a snack tray to the handwritten whispers of a thank you card, we’re going to make this the most soul-soothing Teacher Appreciation Week yet. Grab a cup of tea, wrap yourself in your favorite throw, and let’s plan some joy together.
5 Easy Steps to Build a Teacher Candy Bar

Why to love this recipe:
This is pure, sugary nostalgia. A candy bar isn’t just about the treats; it’s about creating a moment of whimsical choice for a teacher who spends their whole day making choices for others. It’s colorful, joyous, and so easy to scale up or down.
Essential Ingredients:
- Assorted glass jars or clear bins
- Small silver scoops or wooden tongs
- Striped paper bags
- A variety of candies (gummies, chocolates, sours)
- Custom labels
How to Prepare:
- Gather your vessels and ensure they are sparkling clean.
- Fill each jar with a different texture of candy—think soft marshmallows next to crunchy chocolates.
- Place your scoops inside or beside the jars.
- Stack your cute paper bags at the start of the ‘line.’
- Add handwritten labels describing each sweet treat.
Budget Range
- Glass Apothecary Jars (Set of 3): $24.99
- Bulk Gummy Bears (5lb bag): $15.00
- Striped Favor Bags (50 pack): $8.50
7 Simple Ways to Craft Teacher Appreciation Cards

Why to love this recipe:
There is something deeply sacred about a handwritten note. These cards are designed to be tactile experiences—soft paper, the glide of a pen, and the scent of intentionality. It’s the ultimate ‘slow’ gift that lingers in the heart long after the week is over.
Essential Ingredients:
- Heavyweight cardstock (cream or soft pastels)
- Watercolor paints
- Pressed dried flowers
- Washi tape
- Fine-liner pens
- Twine
- Envelope seals
How to Prepare:
- Fold your cardstock to your desired size.
- Apply a light wash of watercolor for a dreamy background.
- Once dry, secure a single pressed flower with a strip of washi tape.
- Write a short, soulful message inside.
- Tie a piece of twine around the fold for texture.
- Slip into an envelope and seal with a gold sticker.
- Add the teacher’s name in your best calligraphy.
Budget Range
- Premium Cardstock Pack: $12.00
- Pressed Dried Flower Set: $9.99
- Metallic Fine-Liner Pens: $11.50
3 Quick Tips to Design a Thank You Poster
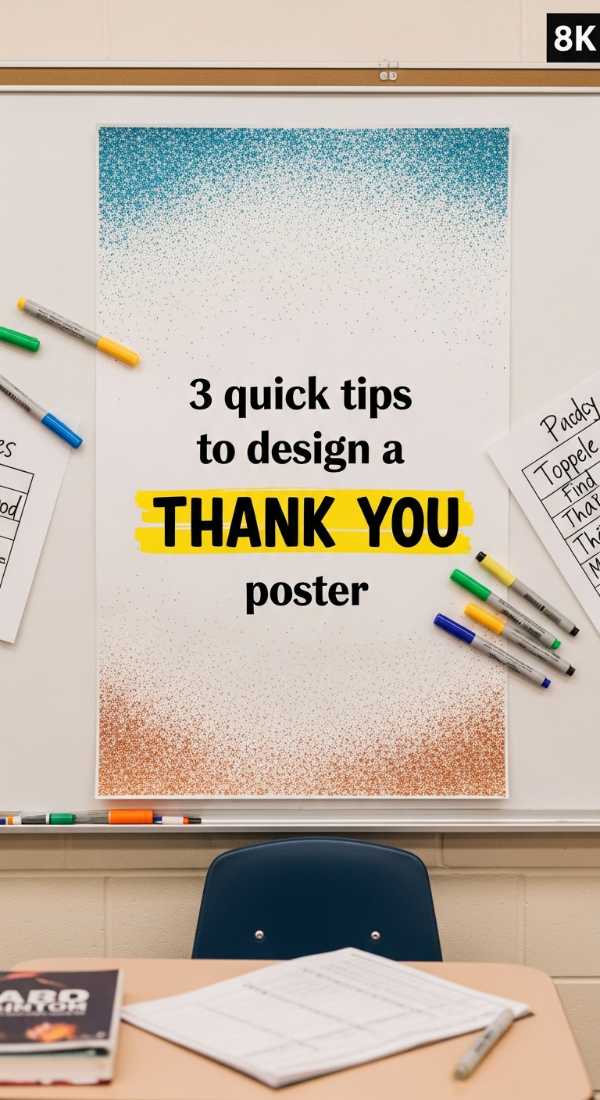
Why to love this recipe:
A poster is a grand, visual ‘hug’ from the entire class. It’s a wonderful way to involve the kids and create a piece of art that the teacher can hang proudly in the classroom to brighten those rainy Tuesday afternoons.
Essential Ingredients:
- Large white poster board
- Colorful permanent markers
- Class photo or individual student polaroids
- Adhesive photo corners
How to Prepare:
- Center the words ‘THANK YOU’ in a large, whimsical font.
- Use photo corners to frame the student photos around the edges.
- Have each child sign their name or leave a tiny fingerprint heart in the blank spaces.
Budget Range
- Large Poster Board (5 pack): $10.00
- Dual-Tip Marker Set: $14.00
- Adhesive Photo Corners: $5.00
4 Easy Steps to Assemble a Snack Gift Tray
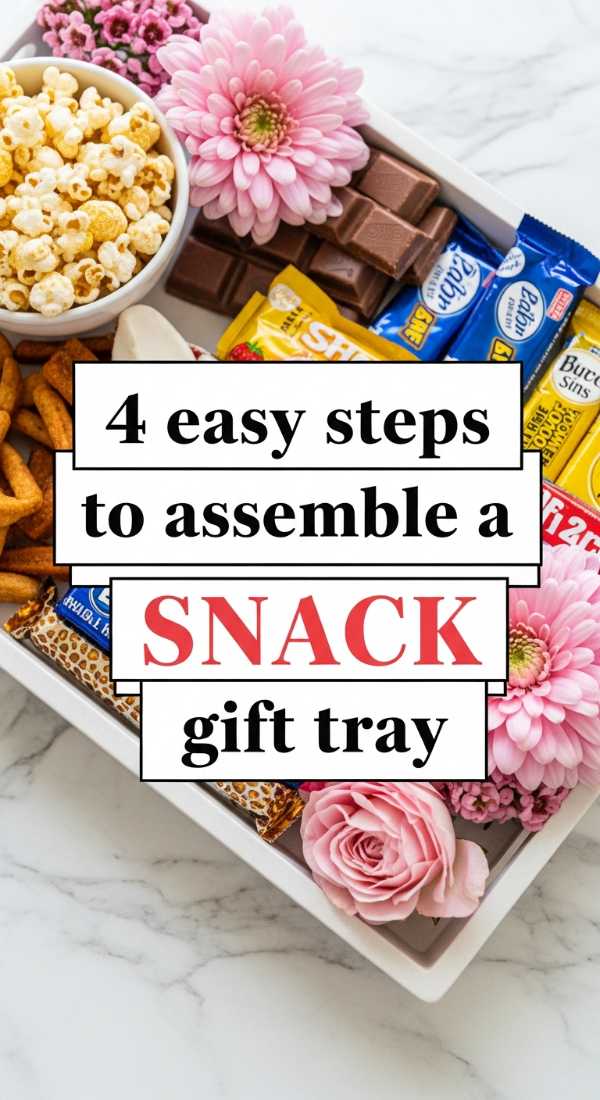
Why to love this recipe:
Teachers often miss lunch or need a mid-afternoon pick-me-up. This snack tray is a curated selection of energy and comfort, arranged to look like a high-end grazing board. It’s practical, beautiful, and oh-so-thoughtful.
Essential Ingredients:
- Small wooden tray or sturdy basket
- Individual nut packs
- Gourmet granola bars
- Dried fruit or fruit leathers
- Sparkling water cans
How to Prepare:
- Layer the bottom of the tray with a linen napkin for a soft touch.
- Group similar items together for a clean, organized look.
- Tuck the heavier drinks into the corners for stability.
- Add a small sprig of fresh rosemary or lavender for a calming scent.
Budget Range
- Small Bamboo Serving Tray: $18.00
- Gourmet Snack Variety Pack: $22.00
- San Pellegrino 6-pack: $7.50
6 Fun Themes for Teacher Appreciation Week
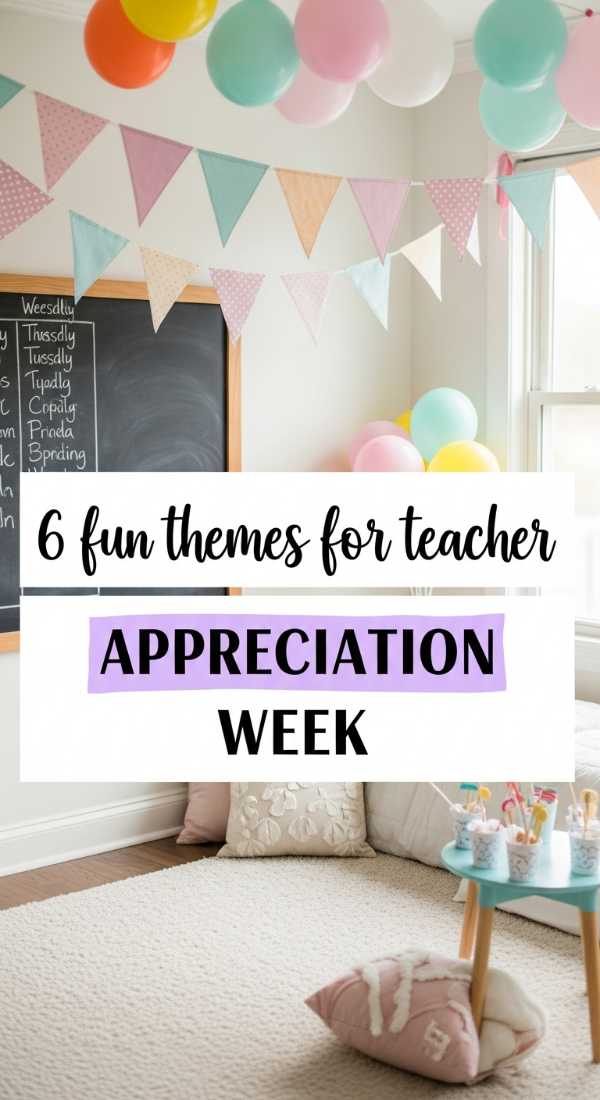
Why to love this recipe:
Having a theme makes planning feel like a story unfolding. It ties all your efforts together and gives the teachers something to look forward to each day. It’s the ‘vibe’ that makes the week feel truly special.
Essential Ingredients:
- Theme list (Garden, Cinema, Coffee Shop, etc.)
- Matching color palette
- Theme-specific props
How to Prepare:
- Choose one theme (e.g., ‘Planting Seeds of Knowledge’).
- Coordinate your colors—for the garden theme, use greens and florals.
- Match your snacks (sunflower seeds) and cards (floral prints) to the theme.
- Create a ‘Menu of the Week’ to let the staff know what’s coming.
- Decorate a central table with a few theme-related items.
- Encourage other parents to follow the daily prompt.
Budget Range
- Printable Theme Bundle: $5.00
- Coordinating Tablecloth: $12.00
- Themed Party Props: $15.00
5 Creative Ideas to Decorate the Staff Room

Why to love this recipe:
The staff room is their sanctuary. Transforming it, even slightly, creates a bubble of peace and celebration away from the classroom chaos. It shows them that their space is respected and loved.
Essential Ingredients:
- Fairy lights
- Fresh eucalyptus bunches
- Scented soy candles
- Soft throw pillows
- Table runners
How to Prepare:
- Drape fairy lights across the main table or windows for a soft glow.
- Place eucalyptus in simple glass vases for a spa-like scent.
- Swap out harsh lighting for a few warm-toned lamps if possible.
- Lay a soft runner across the lunch table.
- Place a small basket of ‘compliment cards’ for teachers to swap.
Budget Range
- Battery Operated Fairy Lights: $8.99
- Fresh Eucalyptus Bunch: $12.00
- Linen Table Runner: $16.00
8 Steps to Make a Custom Appreciation Banner
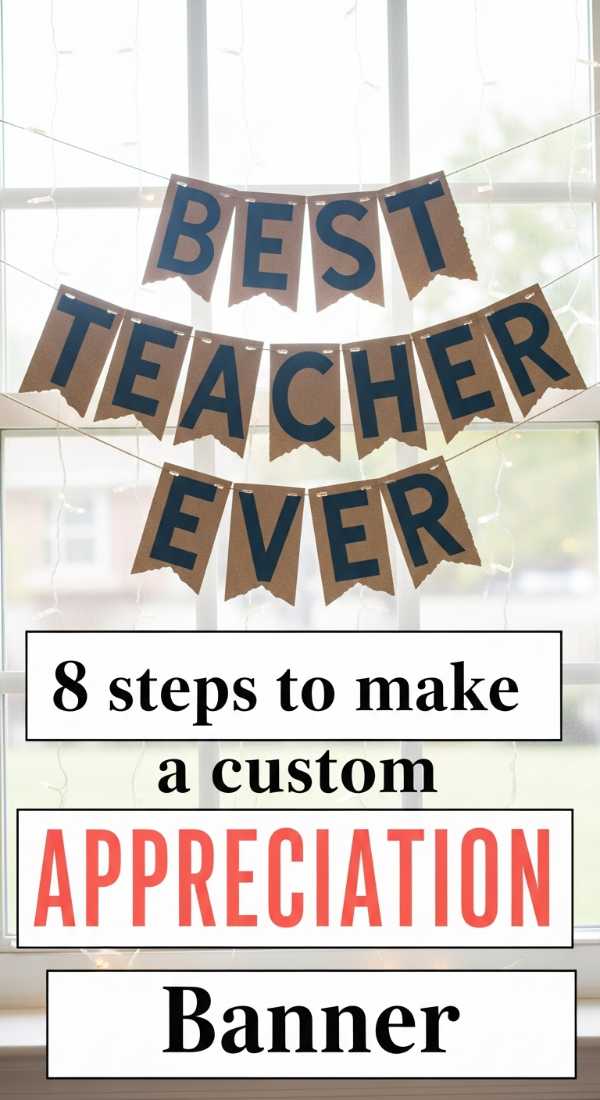
Why to love this recipe:
Banners act as a joyful announcement! They define the space and make the entrance to the school or classroom feel like a party. This custom version is much more personal than anything store-bought.
Essential Ingredients:
- Pre-cut cardstock pennants
- Letter stencils or stickers
- Hole punch
- Satin ribbon
- Glitter glue
How to Prepare:
- Lay out your pennants to spell ‘WE LOVE OUR TEACHERS’.
- Stencil or stick one letter onto each pennant.
- Add a touch of glitter glue to the edges for a little sparkle.
- Let the glue dry completely (patience, loves!).
- Punch two holes in the top corners of each piece.
- Thread the satin ribbon through the holes.
- Ensure the spacing is even between letters.
- Hang with non-damaging adhesive hooks.
Budget Range
- Cardstock Pennant Set: $7.00
- Gold Letter Stickers: $4.50
- Satin Ribbon Spool: $3.00
10 Cute Quotes to Write in Teacher Cards
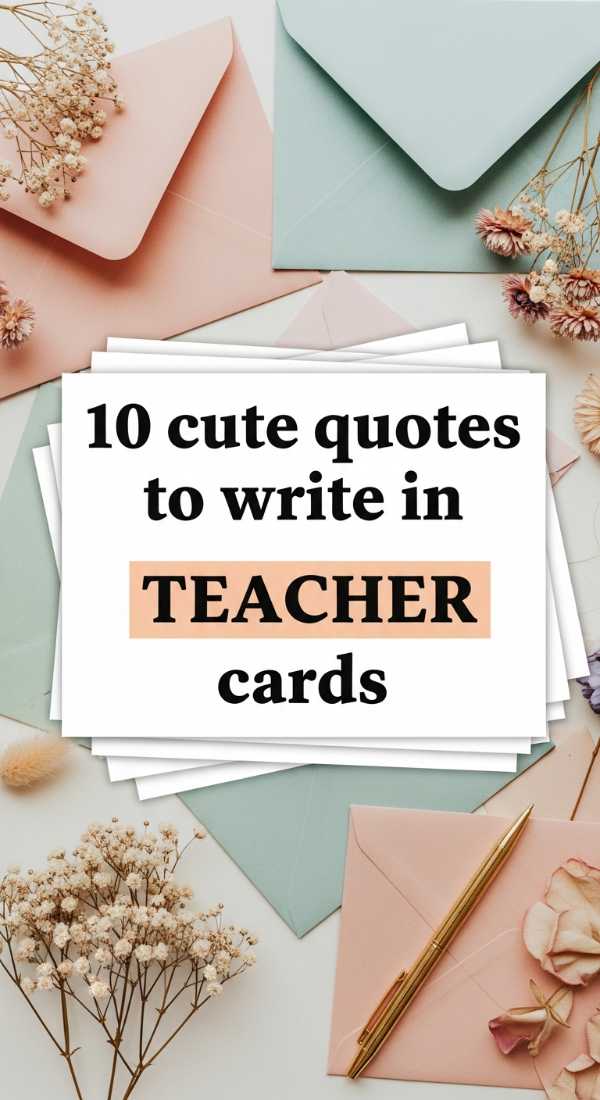
Why to love this recipe:
Sometimes our hearts are full but our minds are blank. Having a curated list of ‘heart-words’ takes the pressure off. These quotes are chosen to be evocative and deeply appreciative.
Essential Ingredients:
- Quality pens
- Card inserts or stationery
- The list of 10 quotes
How to Prepare:
- ‘It takes a big heart to help shape little minds.’
- ‘The influence of a great teacher can never be erased.’
- ‘Thank you for helping me grow.’
- ‘You are a star in our story.’
- ‘Teaching is a work of heart.’
- ‘To the world you may be just a teacher, but to your students you are a hero.’
- ‘The best teachers teach from the heart, not from the book.’
- ‘Because of you, I shine a little brighter.’
- ‘Your patience is a gift we don’t take for granted.’
- ‘Wishing you a day as wonderful as you make our children feel.’
Budget Range
- Calligraphy Starter Pen: $6.00
- Set of Blank Stationery: $15.00
3 Easy Ways to Style Teacher Thank You Gifts

Why to love this recipe:
Presentation is the ‘icing’ on the cake of gratitude. Styling a gift shows that you took the time to make it look beautiful, which makes the recipient feel extra special before they even open it.
Essential Ingredients:
- Brown kraft paper
- Velvet ribbon
- Dried botanical sprigs
- Custom gift tags
How to Prepare:
- Wrap your gift in plain kraft paper for a rustic, clean aesthetic.
- Tie a thick velvet ribbon in a bow—choose a calming color like sage or dusty rose.
- Tuck a small sprig of dried lavender or a cinnamon stick into the knot.
Budget Range
- Kraft Paper Roll: $9.00
- Velvet Ribbon Spool: $12.00
- Assorted Dried Botanicals: $10.00
5 Minute Guide to Planning a Teacher Brunch
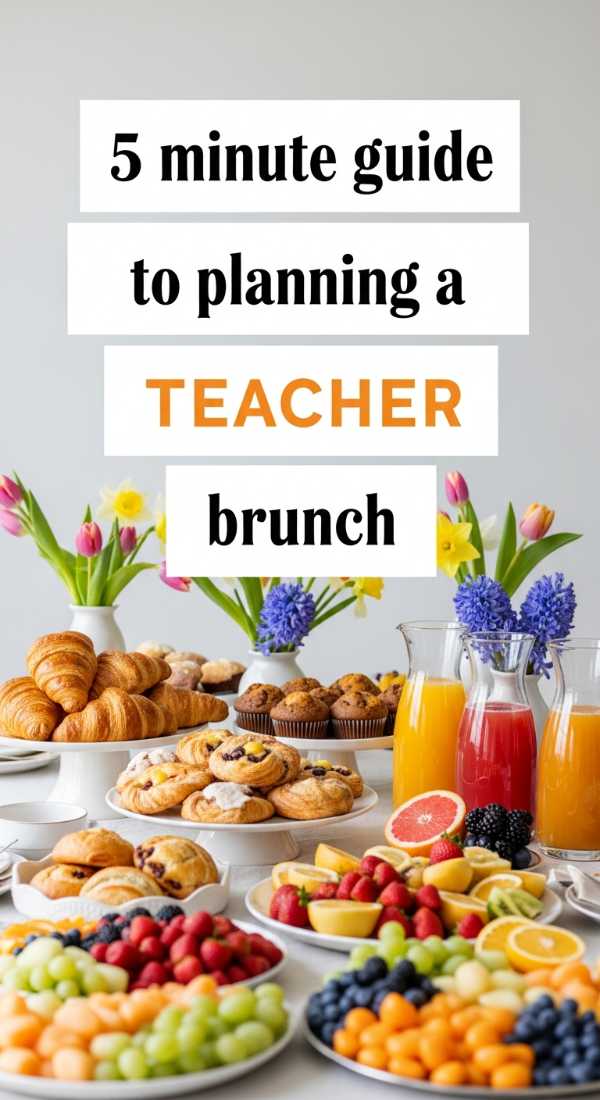
Why to love this recipe:
A morning meal is a beautiful way to start the day. This guide is all about maximum impact with minimum morning-of stress. It’s about fresh flavors and a bright, inviting spread.
Essential Ingredients:
- Store-bought mini pastries
- Pre-cut fruit salad
- Cold brew coffee bottles
- Orange juice and carafes
- Paper plates with gold trim
How to Prepare:
- Arrange pastries on a tiered stand for height and elegance.
- Transfer fruit to a pretty glass bowl.
- Set out carafes of juice and bottles of coffee on ice.
- Stack your high-quality paper plates and napkins.
- Place a small ‘Enjoy Your Morning’ sign in the center.
Budget Range
- Tiered Serving Stand: $20.00
- Gourmet Pastry Platter: $30.00
- Fancy Paper Plates (20 count): $10.00
Final Thoughts on Creating a Season of Gratitude
As we wrap up this guide, I want you to take a deep breath and remember: the most important ingredient in any of these ideas is your heart. Whether you build an elaborate candy bar or simply write a three-sentence note on a scrap of paper, the frequency of your gratitude is what will be felt. Our teachers give so much of their spirits to our children; reflecting a little of that light back to them is one of the most beautiful things we can do. Go forth and spread that magic, my loves. You’ve got this!