
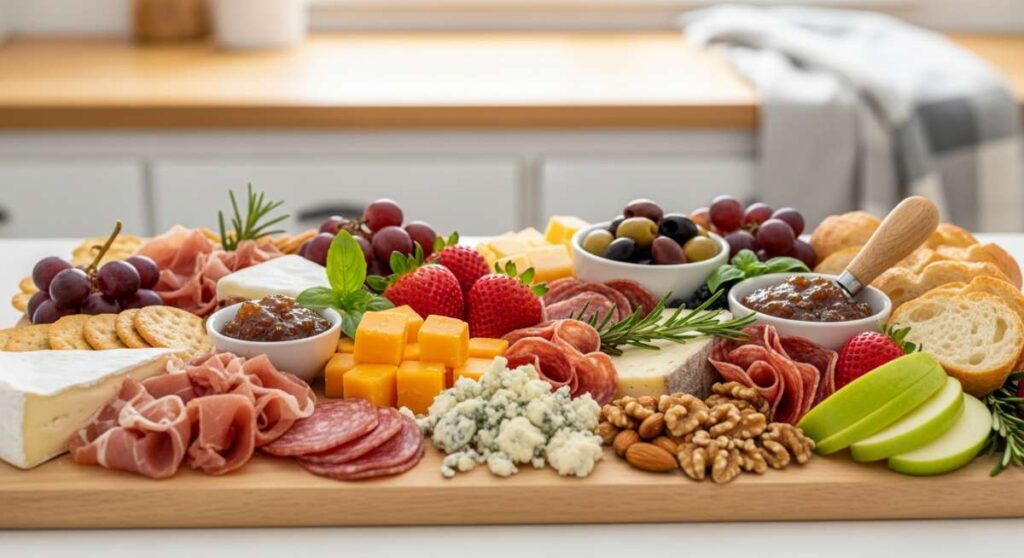
The Simple Food Board Trend That’s Taking Over Your Feed
There is something inherently magical about the way the light shifts as we transition into spring. It’s that soft, golden glow that spills across the kitchen counter, signaling a time for renewal and, more importantly, a time for gathering. Lately, my social media feeds have been overflowing with the ‘Simple Food Board’—a gorgeous, deconstructed way of serving meals that feels less like a chore and more like a curated art piece. It’s about taking the best of the season and laying it out for everyone to enjoy at their own pace.
I remember the first time I set one of these up for a Sunday brunch with my closest friends. The stress of plating individual dishes completely vanished, replaced by the rhythmic sound of laughter and the clinking of forks against ceramic. This trend isn’t just about the aesthetic; it’s about the feeling of abundance and the ease of a life lived slowly. Today, I’m sharing my favorite spring-inspired components to build your own viral-worthy food board that tastes even better than it looks.
A guide on how to bake strawberry cake
Why we love this
There is nothing quite like the aroma of fresh strawberries macerating in sugar, filling your kitchen with a scent that is both nostalgic and deeply comforting. This cake boasts a tender, buttery crumb that is punctuated by jammy pockets of concentrated fruit, creating a texture that is simultaneously light and indulgent. Every bite feels like a celebration of the first harvest, offering a delicate sweetness that isn’t overwhelming but lingers beautifully on the palate. It’s the kind of cake that looks stunning as the centerpiece of a board, dusted simply with powdered sugar or topped with a dollop of whipped cream.
Ingredients
- 2 cups all-purpose flour
- 1 1/2 teaspoons baking powder
- 1/2 teaspoon baking soda
- 1/2 teaspoon salt
- 1/2 cup unsalted butter, softened
- 1 cup granulated sugar
- 1 large egg plus 1 egg white
- 1 teaspoon vanilla extract
- 1/2 cup sour cream
- 1 1/2 cups fresh strawberries, hulled and sliced
How to make it
- Preheat your oven to 350°F (175°C) and generously grease a 9-inch round cake pan, lining the bottom with parchment paper to ensure an easy release.
- In a medium bowl, whisk together the flour, baking powder, baking soda, and salt until well combined; this ensures your leavening agents are evenly distributed for a perfect rise.
- In a large mixing bowl, cream the softened butter and granulated sugar together using a hand mixer or stand mixer on medium-high speed for about 3-4 minutes until the mixture is pale, light, and fluffy.
- Add the egg, egg white, and vanilla extract, beating well after each addition and scraping down the sides of the bowl to ensure a cohesive emulsion.
- Reduce the mixer speed to low and add the dry ingredients in three parts, alternating with the sour cream, beginning and ending with the flour mixture. Mix only until just combined to avoid overworking the gluten, which can make the cake tough.
- Gently fold in half of the sliced strawberries using a rubber spatula. Pour the batter into the prepared pan and smooth the top with an offset spatula.
- Arrange the remaining strawberry slices in a decorative pattern on top of the batter, pressing them in very slightly.
- Bake for 35-40 minutes, or until a wooden skewer inserted into the center comes out clean with just a few moist crumbs attached. The top should be golden brown and the edges should slightly pull away from the pan.
- Allow the cake to cool in the pan for 10 minutes before transferring it to a wire rack to cool completely before serving.
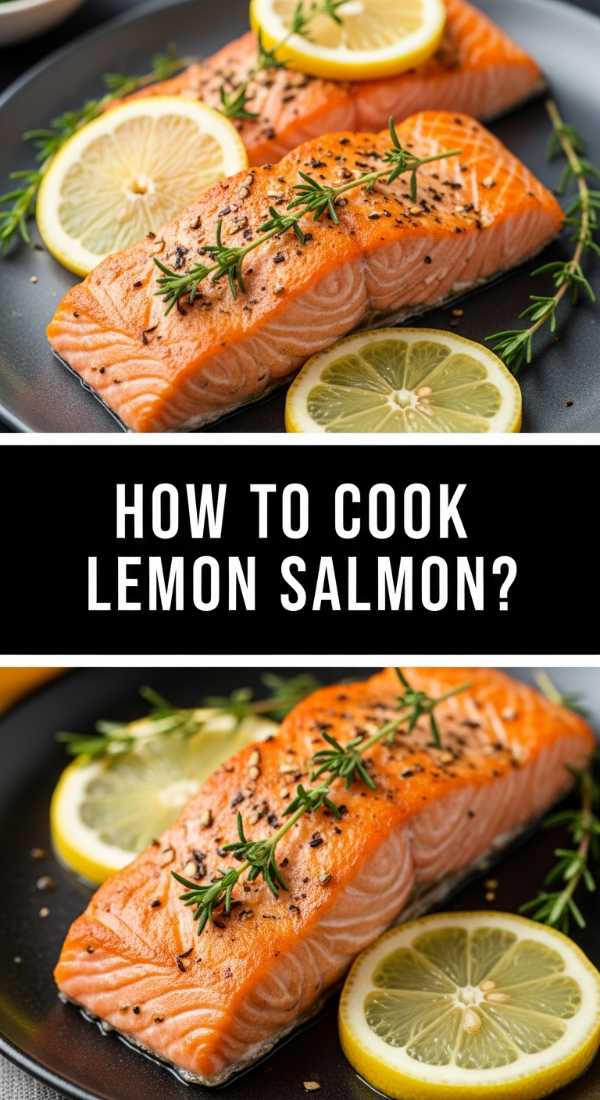
A guide on how to cook lemon salmon

Why we love this
Salmon is the ultimate protein for a spring board because its rich, fatty texture pairs so exquisitely with the sharp, bright acidity of fresh citrus. When cooked correctly, the skin becomes incredibly crisp and crackly, providing a sensory contrast to the succulent, translucent flakes of fish underneath. The aroma of sizzling lemon slices and fresh herbs hitting the hot pan creates an immediate appetite, making it a showstopper for any lunch or dinner gathering. It’s a dish that feels sophisticated yet remains remarkably simple to execute, embodying the effortless elegance of modern lifestyle cooking.
Ingredients
- 2 large salmon fillets (6-8 oz each)
- 2 tablespoons olive oil
- 1 organic lemon, thinly sliced
- 2 cloves garlic, smashed
- Fresh dill and parsley for garnish
- Flaky sea salt and cracked black pepper
- 1 tablespoon unsalted butter
How to make it
- Remove the salmon from the refrigerator about 15 minutes before cooking to bring it closer to room temperature, which ensures even cooking throughout the fillet.
- Pat the skin side of the salmon extremely dry with paper towels; moisture is the enemy of crispiness, so take your time with this step.
- Season both sides generously with kosher salt and freshly cracked black pepper.
- Heat a heavy-bottomed stainless steel or cast-iron skillet over medium-high heat. Add the olive oil and wait until it is shimmering and just starting to wisps of smoke appear.
- Carefully place the salmon fillets in the pan, skin-side down, pressing down firmly with a spatula for about 10 seconds to ensure total contact with the hot surface.
- Lower the heat to medium and cook undisturbed for 5-6 minutes. You will see the color of the fish change from translucent to opaque starting from the bottom up.
- Once the skin is crispy and releases easily from the pan, flip the fillets. Add the butter, lemon slices, and smashed garlic to the pan.
- Tilt the pan slightly and use a spoon to baste the salmon with the foaming, lemon-infused butter for another 2-3 minutes until the internal temperature reaches 125-130°F (52-54°C) for medium-rare.
- Remove from heat and let the fish rest for 2 minutes before garnishing with fresh herbs and serving alongside the charred lemon slices.
A guide on how to roast spring vegetables

Why we love this
Roasting spring vegetables is all about capturing the fleeting sweetness of the season’s first produce through the magic of caramelization. Think of tender baby carrots with their tops still attached, snappy radishes that lose their bite and become succulent, and vibrant asparagus that turns nutty and crisp in the oven. The visual appeal of these jewel-toned vegetables scattered across a board is undeniable, offering a variety of textures from soft and buttery to pleasantly firm. Each bite provides a burst of earthy flavor, heightened by a touch of char that balances the natural sugars found in young vegetables.
Ingredients
- 1 bunch baby carrots, scrubbed and halved
- 1 bunch radishes, halved
- 1 pound thin asparagus, woody ends trimmed
- 2 tablespoons extra virgin olive oil
- 1 tablespoon honey or maple syrup
- 1 teaspoon dried thyme
- Salt and pepper to taste
- Zest of half a lemon
How to make it
- Preheat your oven to 425°F (220°C). High heat is essential for achieving those golden-brown caramelized edges without overcooking the delicate interiors of spring produce.
- Line a large rimmed baking sheet with parchment paper for easy cleanup and to prevent the honey from sticking to the pan.
- In a large bowl, toss the carrots and radishes with the olive oil, honey, dried thyme, salt, and pepper until every piece is thoroughly and evenly coated.
- Spread the carrots and radishes out on the baking sheet in a single layer, ensuring they aren’t crowded; if they are too close together, they will steam rather than roast.
- Roast the carrots and radishes for 12-15 minutes. Because asparagus is thinner and cooks faster, we add it later in the process.
- Remove the pan from the oven, add the asparagus spears, and toss quickly to coat them in the residual oil and juices on the pan.
- Return the tray to the oven and roast for an additional 8-10 minutes, or until the asparagus is tender-crisp and the other vegetables are beautifully browned and tender.
- Immediately after removing from the oven, sprinkle the fresh lemon zest over the hot vegetables to release the citrus oils.
- Serve warm or at room temperature for the best flavor profile on your food board.
A guide on how to design spring cakes
Why we love this
Designing a spring cake is an exercise in ethereal beauty and soft, pastel aesthetics that perfectly mirror the blossoming world outside. It’s where culinary skill meets artistic expression, using delicate textures like Swiss meringue buttercream and light-as-air sponge to create a canvas for seasonal storytelling. We love this process because it allows for a playful use of color—think pale lavenders, soft mints, and dusty pinks—that instantly brightens any table setting. The final result isn’t just a dessert; it’s a centerpiece that evokes the freshness of a spring morning and the whimsical charm of a garden party.
Ingredients
- Pre-baked sponge cake layers (chilled)
- Batch of Swiss meringue buttercream
- Gel food coloring (pastel tones)
- Piping bags and various tips (petal, leaf, and round tips)
- Offset spatula
- Rotating cake turntable
How to make it
- Ensure your cake layers are completely chilled or even slightly frozen; this makes them much easier to handle and prevents crumbs from getting into your final frosting layer.
- Place your first layer on a cake board and apply a thin, even layer of buttercream using your offset spatula, spreading it right to the edges. Repeat with subsequent layers.
- Apply a ‘crumb coat’—a very thin layer of frosting over the entire exterior of the cake to trap loose crumbs. Chill the cake for 30 minutes until this layer is firm to the touch.
- Divide your remaining buttercream into small bowls and tint them with gel colors using a toothpick to add color incrementally until you reach your desired pastel shade.
- Apply the final thick layer of frosting using a bench scraper or large offset spatula. For a ‘spring’ look, try a semi-naked finish or a smooth, watercolor effect by dabbing different colors of frosting and smoothing them together.
- Fit your piping bags with tips. Use a petal tip to create delicate ruffles around the base or a leaf tip to add small pops of green.
- If creating a textured look, use the back of a spoon to create soft swooshes or vertical lines in the frosting, mimicking the organic shapes found in nature.
- Keep the design light and airy; avoid over-decorating, as the beauty of spring design often lies in its understated elegance.
- Store the cake in a cool place until ready to be featured on your board, allowing the frosting to set perfectly.
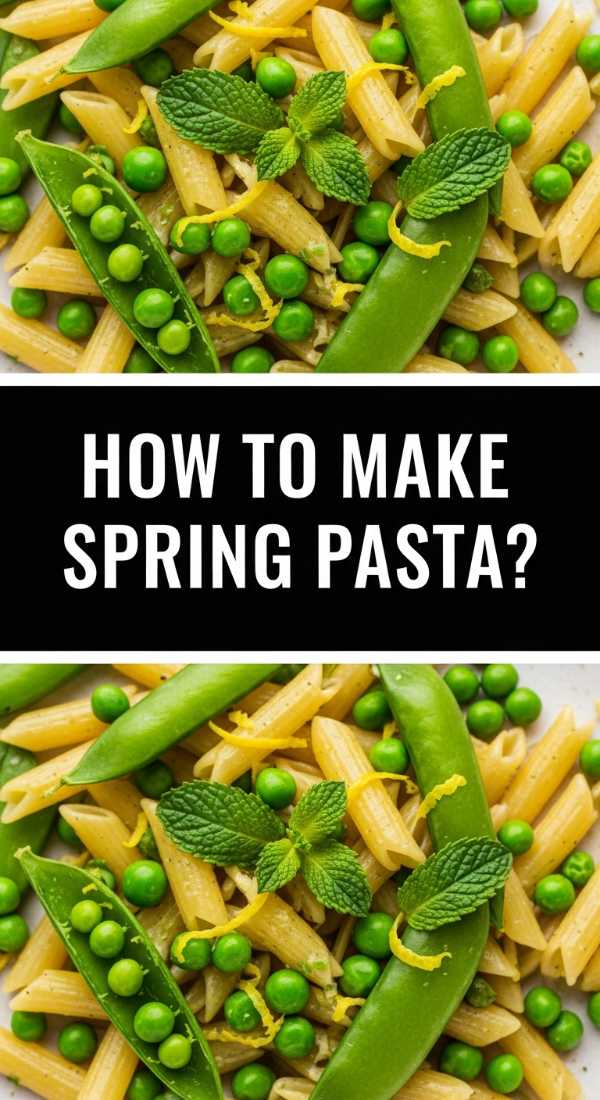
A guide on how to make spring pasta

Why we love this
Spring pasta is the epitome of comfort food reimagined for warmer weather, trading heavy, slow-simmered sauces for light, herb-forward infusions. The sensation of silky, al dente noodles coated in a glossy emulsion of pasta water, lemon, and high-quality olive oil is pure bliss. We love how the bright green hues of peas and herbs pop against the golden pasta, creating a visual freshness that matches the flavor profile. It’s a dish that feels restorative and vibrant, filling the air with the scent of garlic and fresh mint, and it serves as a wonderful, hearty anchor for a diverse food board.
Ingredients
- 12 oz long pasta (like linguine or spaghetti)
- 1 cup fresh or frozen peas
- 3 tablespoons extra virgin olive oil
- 2 cloves garlic, thinly sliced
- 1/2 cup grated Parmigiano-Reggiano
- Fresh mint and basil leaves
- Red pepper flakes (optional)
- Reserved pasta cooking water (at least 1 cup)
How to make it
- Bring a large pot of heavily salted water to a rolling boil. Use more salt than you think; it should taste like the sea to properly season the pasta from the inside out.
- Add the pasta to the water and cook for 2 minutes less than the package directions for ‘al dente’. The pasta will finish cooking in the sauce later.
- In a large wide skillet, heat the olive oil over medium-low heat. Add the sliced garlic and a pinch of red pepper flakes, cooking slowly until the garlic is golden and fragrant but not burnt.
- About 2 minutes before the pasta is done, add the peas to the boiling pasta water to blanch them quickly.
- Before draining, reserve at least one large cup of the starchy pasta water—this is the secret to a silky, restaurant-quality sauce.
- Drain the pasta and peas and add them directly to the skillet with the garlic oil. Increase the heat to medium.
- Add half of the reserved pasta water and the grated cheese. Toss vigorously with tongs or a pasta fork. The starch and cheese will emulsify into a light, creamy sauce.
- Continue tossing for 1-2 minutes, adding more pasta water as needed until the sauce coats every strand and the pasta is perfectly tender.
- Remove from heat and fold in a generous amount of torn fresh mint and basil. The residual heat will wilt the herbs just enough to release their oils without losing their bright color.
A guide on how to bake lemon cakes
Why we love this
There is a specific kind of joy found in the zesty, mouth-watering pucker of a well-made lemon cake. These cakes are prized for their moist, tight crumb and the way they seem to capture the essence of sunshine in a single dessert. The aroma is intoxicating—a mix of sweet sugar and the sharp, clean scent of essential oils from the lemon zest. Whether served as individual mini-loaves or one large bundt, the bright yellow hue adds an instant pop of color to your spring board. It’s the perfect palate cleanser after a savory meal, leaving you feeling refreshed rather than weighed down.
Ingredients
- 1 1/2 cups all-purpose flour
- 1 teaspoon baking powder
- 1/2 teaspoon salt
- 1 cup granulated sugar
- Zest of 2 large organic lemons
- 1/2 cup unsalted butter, softened
- 2 large eggs
- 1/2 cup whole milk
- 3 tablespoons fresh lemon juice
- Glaze: 1 cup powdered sugar + 2 tablespoons lemon juice
How to make it
- Preheat your oven to 350°F (175°C) and grease your cake pans or a muffin tin thoroughly with butter and a light dusting of flour.
- In a small bowl, combine the granulated sugar and lemon zest. Use your fingertips to rub the zest into the sugar until it becomes fragrant and moist; this releases the maximum amount of lemon oil.
- In a medium bowl, whisk together the flour, baking powder, and salt to aerate the dry ingredients.
- Cream the lemon-sugar mixture and the softened butter together in a large bowl for 3-5 minutes until the mixture is exceptionally light and fluffy.
- Add the eggs one at a time, beating well after each addition to ensure the batter doesn’t curdle.
- Stir the 3 tablespoons of lemon juice into the milk (it may curdle slightly, which is fine—it acts like buttermilk).
- Alternate adding the dry ingredients and the lemon-milk to the butter mixture, starting and ending with the dry ingredients. Mix until just combined.
- Divide the batter into your pans and bake. For mini cakes, check at 18-20 minutes; for a standard loaf, 45-50 minutes. A toothpick should come out clean.
- While the cakes are slightly warm, whisk the powdered sugar and lemon juice for the glaze and drizzle it over the cakes, allowing it to soak in and form a sweet, tart crust.
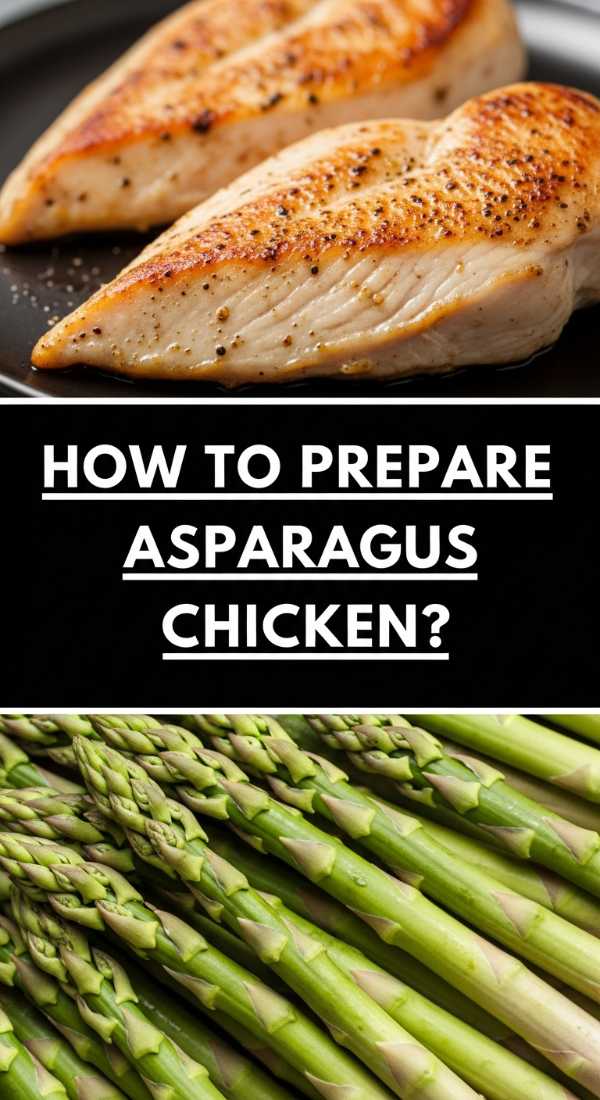
A guide on how to prepare asparagus chicken

Why we love this
Asparagus chicken is a masterclass in balance, combining the savory, umami depths of golden-brown poultry with the clean, grassy notes of spring’s favorite vegetable. We love the way the pan juices from the chicken create a natural ‘jus’ that coats the asparagus, making every component feel unified. The texture of the chicken should be succulent and tender, while the asparagus retains a slight snap, offering a satisfying mouthfeel that keeps you coming back for more. It’s a healthy, high-protein addition to a food board that feels incredibly sophisticated but takes less than thirty minutes to prepare from start to finish.
Ingredients
- 1 lb chicken breast or thighs, cut into bite-sized pieces
- 1 bunch asparagus, woody ends removed and cut into 2-inch pieces
- 2 tablespoons olive oil
- 1 tablespoon unsalted butter
- 3 cloves garlic, minced
- 1/2 teaspoon dried oregano
- Squeeze of fresh lemon
- Salt and pepper
How to make it
- Season the chicken pieces generously with salt, pepper, and dried oregano. Ensure the chicken is patted dry before seasoning to encourage better browning.
- Heat the olive oil in a large skillet over medium-high heat. Once hot, add the chicken in a single layer, making sure not to crowd the pan.
- Let the chicken sear undisturbed for 3-4 minutes until a deep golden crust forms on the bottom, then flip and cook for another 3 minutes.
- Push the chicken to the outer edges of the pan and add the butter to the center. Once melted, toss in the minced garlic and cook for 30 seconds until fragrant.
- Add the asparagus pieces to the center of the pan. Toss them in the garlic butter and then incorporate the chicken back into the mix.
- Sauté everything together for about 5-6 minutes. The chicken should be cooked through (internal temp 165°F) and the asparagus should be bright green and tender-crisp.
- Deglaze the pan with a big squeeze of fresh lemon juice, scraping up any browned bits (fond) from the bottom of the pan to incorporate that flavor into the sauce.
- Remove from heat immediately to prevent the asparagus from turning mushy or losing its vibrant color.
- Transfer to a bowl or directly onto your board, garnishing with an extra sprinkle of herbs if desired.
A guide on how to make spring salad

Why we love this
A true spring salad is so much more than just a side dish; it is a crunchy, cooling, and refreshing explosion of flavors that acts as the perfect counterpoint to richer items on a board. We love the mix of delicate greens like arugula or butter lettuce with the sharp, peppery bite of radishes and the creamy richness of goat cheese or avocado. The visual variety of textures—from the thin ribbons of shaved cucumber to the pop of snap peas—makes it a feast for the eyes. Dressed in a light, zesty vinaigrette, it cleanses the palate and brings a sense of garden-fresh vitality to every mouthful.
Ingredients
- 4 cups mixed spring greens (mache, pea shoots, or baby kale)
- 1 cucumber, thinly sliced into ribbons
- 1/2 cup sugar snap peas, sliced lengthwise
- 1/4 cup radishes, paper-thin slices
- 2 tablespoons toasted pumpkin seeds or pine nuts
- Vinaigrette: 3 tbsp olive oil, 1 tbsp white balsamic vinegar, 1 tsp Dijon mustard, 1 tsp honey
- Optional: Edible pansies or nasturtiums
How to make it
- Begin by preparing your vegetables. Use a mandoline for the radishes and a vegetable peeler for the cucumber ribbons to get that professional, delicate look.
- Place the spring greens in a very large bowl. It’s important to have plenty of room to toss the salad without bruising the leaves.
- In a small jar, combine all the vinaigrette ingredients. Shake vigorously until the oil and vinegar have emulsified into a thick, pale dressing.
- Wait to dress the salad until the very moment you are ready to serve. If you dress it too early, the delicate spring greens will wilt and lose their volume.
- Drizzle about half of the dressing over the greens and toss gently using your hands or large salad servers, ensuring a light coating on every leaf.
- Arrange the dressed greens on your serving board or a flat platter, then artfully tuck the cucumber ribbons, snap peas, and radish slices into the greens.
- Top with the toasted seeds for a necessary crunch and add the edible flowers last for a stunning, viral-worthy aesthetic.
- Finish with a final, very light drizzle of dressing and a pinch of flaky sea salt to make the flavors of the raw vegetables really pop.
A guide on how to style floral cakes

Why we love this
Styling a cake with floral elements is the quickest way to elevate a simple bake into an ethereal work of art that captures the romanticism of spring. There is something deeply charming about the juxtaposition of soft, edible petals against smooth frosting, creating a look that feels both organic and high-fashion. We love this technique because it requires no complex piping skills—nature does the heavy lifting for you. It turns a dessert into a conversation piece, inviting guests to admire the intricate details of the blooms before they dive into the delicious layers beneath.
Ingredients
- A frosted cake (smooth finish works best)
- Organic, food-safe edible flowers (pansies, violas, marigolds, or dried cornflowers)
- Fresh herbs (mint or rosemary for ‘foliage’)
- Tweezers (for precise placement)
- Small amount of extra buttercream (to act as glue)
How to make it
- First and foremost, ensure your flowers are 100% edible and pesticide-free. Never use flowers from a standard florist unless they are specifically labeled for consumption.
- Wash the flowers very gently in cold water and pat them completely dry on paper towels. Any moisture left on the petals will cause the frosting to dissolve or the flowers to wilt.
- Plan your design before touching the cake. Do you want a ‘meadow’ look with flowers clustered at the base, or a ‘cascading’ look falling from the top?
- Starting with your largest ‘anchor’ blooms, use tweezers to gently press the base of the flower into the frosting. If the frosting has crusted, use a tiny dot of fresh buttercream as adhesive.
- Fill in the gaps with smaller blossoms and ‘filler’ elements like tiny herb leaves or individual petals to create a sense of depth and natural movement.
- Vary the colors and sizes to keep the eye moving across the cake, but try to stick to a cohesive color palette for a more professional, ‘styled’ appearance.
- If using fresh flowers, style the cake as close to serving time as possible, as delicate petals can start to curl or wilt within a few hours.
- Keep the cake in a cool, draft-free area until it’s time to reveal it on your food board.
A guide on how to cook spring soup
[IMAGE_10]
Why we love this
Spring soup is the ultimate bridge between the cold of winter and the heat of summer, offering a bowl of warmth that feels light and restorative. Typically made with a base of leeks, peas, or watercress, these soups are known for their striking, vibrant green color and silky-smooth texture. We love how a simple swirl of crème fraîche or a drizzle of herb oil can make a humble bowl of vegetables look like fine dining. The flavor is clean and bright, celebrating the essence of the vegetables without masking them in heavy creams or stocks, making it a perfect starter for a spring-themed board.
Ingredients
- 2 large leeks, white and light green parts only, sliced
- 1 lb frozen or fresh peas
- 1 large potato, peeled and diced (for creaminess)
- 4 cups high-quality vegetable or chicken broth
- 1/2 cup fresh mint leaves
- 2 tablespoons olive oil
- Crème fraîche and pea shoots for garnish
How to make it
- Heat the olive oil in a large pot over medium heat. Add the sliced leeks and a pinch of salt, sautéing slowly for about 8-10 minutes until they are soft and translucent but not browned.
- Add the diced potato and the broth. Bring to a boil, then reduce the heat to a simmer. Cover and cook for about 15 minutes or until the potatoes are completely tender when pierced with a fork.
- Turn the heat back up and add the peas to the pot. Cook for only 3-5 minutes. We want the peas just cooked through to maintain that bright, vivid green color; overcooking will turn them a dull olive drab.
- Remove the pot from the heat and stir in the fresh mint leaves. The heat of the soup will wilt them instantly.
- Use an immersion blender to puree the soup directly in the pot until it is completely smooth and velvety. If you want an even more refined texture, pour it through a fine-mesh sieve.
- Taste and adjust the seasoning with salt, pepper, and perhaps a tiny squeeze of lemon juice to brighten the finish.
- Serve the soup in small ramekins or shot glasses if placing on a food board to keep it contained and easy to handle.
- Garnish with a small swirl of crème fraîche and a few delicate pea shoots just before serving.
The Art of the Seasonal Board
Building a viral-worthy food board is about more than just the individual recipes; it’s about the harmony between them. By combining the savory crunch of roasted vegetables with the zesty brightness of lemon cake and the heartiness of spring pasta, you create a complete sensory experience for your guests. These boards invite people to linger, to try a bit of everything, and to celebrate the vibrant flavors of the season in a way that feels modern and effortless. So, grab your favorite platter, head to the farmer’s market, and start creating your own spring masterpiece.