
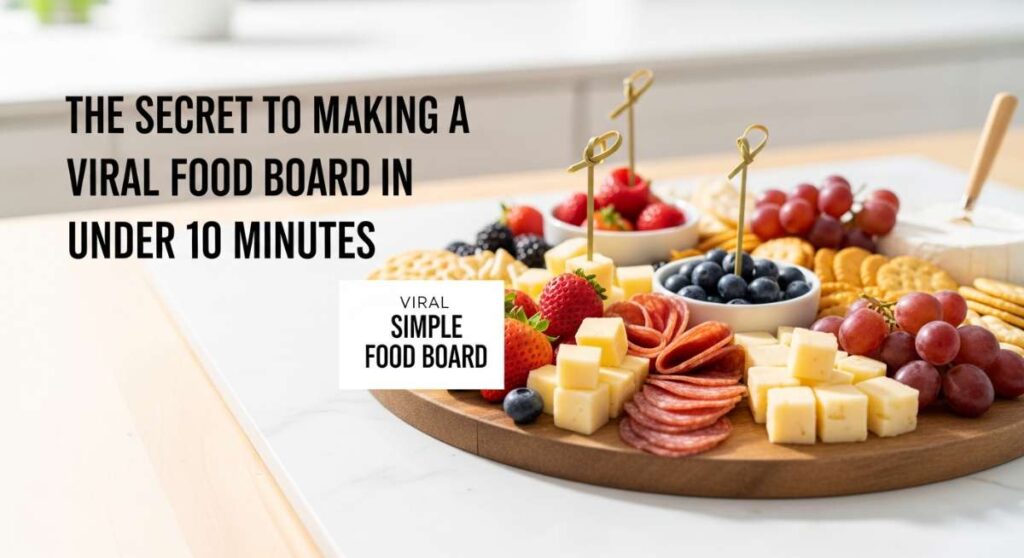
We’ve all been there—standing in the kitchen with ten minutes until guests arrive, staring at a collection of ingredients and wondering how to make them look like the masterpieces we see on our feeds. There is something truly magical about a perfectly curated food board; it’s not just about the food, it’s about the invitation to gather, the shared laughter over a platter of treats, and the effortless beauty of a well-laid spread. I used to think these boards took hours of meticulous planning, but I’ve discovered the secret to creating that ‘viral’ aesthetic without the stress.
The trick is all in the variety and the ‘wow’ factor of a few key homemade elements. Instead of just crackers and cheese, we’re leveling up with mini-portions of soulful, flavorful dishes that look like they were catered by a professional. In this post, I’m sharing my favorite quick-prep recipes that anchor a viral food board, ensuring your next gathering feels like a warm, curated experience that your friends won’t stop talking about.
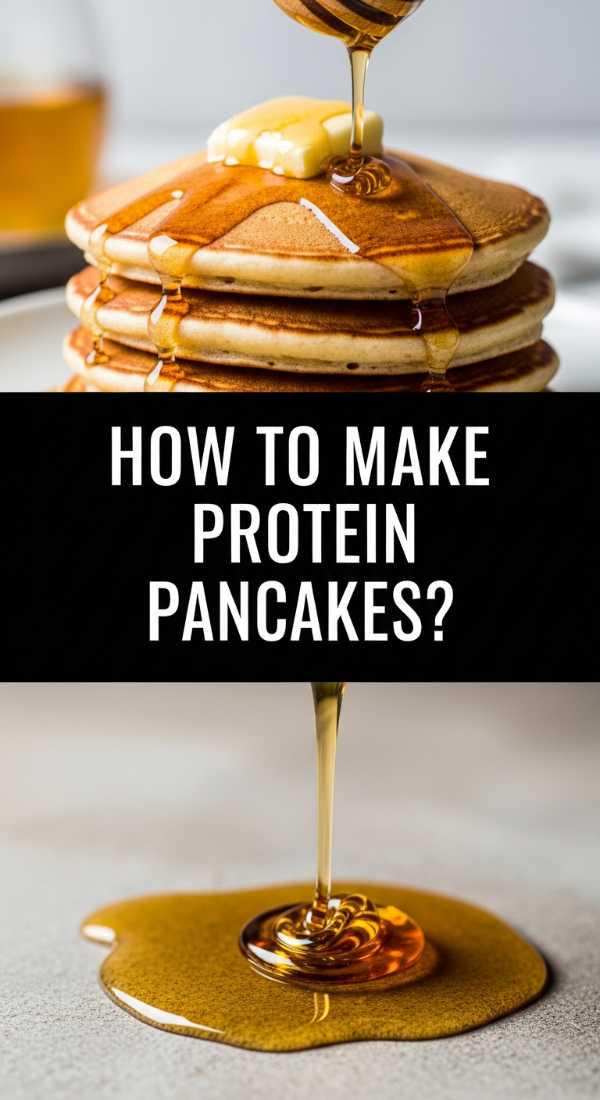
How to make protein pancakes?
Why we love this
There is nothing quite like the sweet, comforting aroma of warm vanilla and maple wafting through the kitchen on a slow morning. These protein pancakes are a revelation—thick, fluffy, and cloud-like in texture, providing a satisfying bite that feels indulgent yet fuels your body for the day ahead. As you cut into them, you’ll find a tender crumb that perfectly absorbs golden syrup, creating a harmonious blend of sweetness and wholesome goodness that makes breakfast feel like a luxury spa experience.
Ingredients
- 1 cup oat flour
- 1 scoop vanilla protein powder
- 1 teaspoon baking powder
- 1/2 cup Greek yogurt
- 2 large eggs
- 1/4 cup almond milk
- 1 teaspoon vanilla extract
How to make it
- In a large mixing bowl, whisk together the oat flour, protein powder, and baking powder until there are no clumps, ensuring an even distribution of the rising agents.
- In a separate bowl, combine the eggs, Greek yogurt, almond milk, and vanilla extract; whisk vigorously until the mixture is smooth and the yogurt is fully incorporated.
- Create a well in the center of the dry ingredients and pour in the wet mixture, stirring gently with a spatula just until combined—be careful not to overmix, as this preserves the air bubbles for fluffiness.
- Heat a non-stick griddle or large skillet over medium-low heat. Lightly coat with coconut oil or butter.
- Use a 1/4 cup measure to scoop the batter onto the skillet. Wait for the ‘visual cue’: small bubbles will form on the surface and the edges will look set and matte (usually 2-3 minutes).
- Flip carefully with a wide spatula and cook for another 1-2 minutes until both sides are a beautiful golden brown and the center feels springy to the touch.
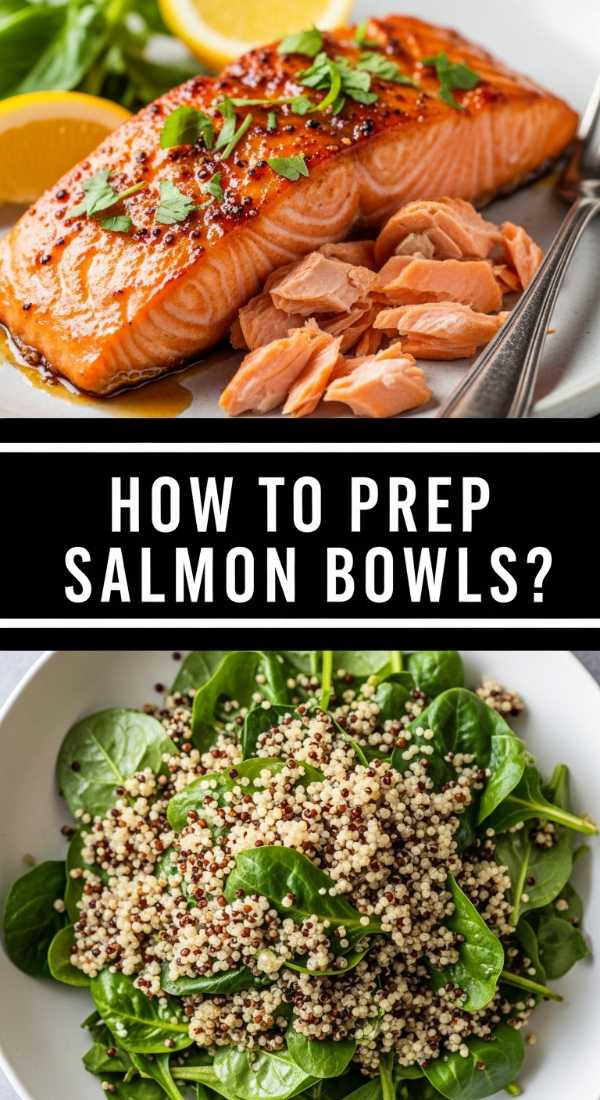
How to prep salmon bowls?
Why we love this
Salmon bowls are the ultimate vibrant centerpiece for any food board, offering a kaleidoscope of colors and a symphony of textures. The salmon itself is succulent and flaky, coated in a glaze that caramelizes into a sticky, savory-sweet crust that contrasts beautifully with the crisp, cool snap of fresh cucumbers and radishes. Every forkful is a refreshing journey of umami flavors, bright citrus notes, and the satisfying heartiness of fluffy grains, making it a meal that feels both incredibly healthy and deeply decadent.
Ingredients
- 2 salmon fillets, skin removed and cubed
- 2 cups cooked jasmine rice or quinoa
- 2 tablespoons soy sauce
- 1 tablespoon honey
- 1 teaspoon grated ginger
- 1 avocado, sliced
- Pickled ginger and sesame seeds for garnish
How to make it
- Begin by preparing your marinade: whisk together the soy sauce, honey, and freshly grated ginger in a small bowl until the honey is completely dissolved.
- Pat your salmon cubes dry with a paper towel—this is crucial for getting a good sear rather than steaming the fish.
- Toss the salmon cubes in half of the marinade, letting them sit for about 5 minutes while you heat a cast-iron skillet over medium-high heat with a splash of neutral oil.
- Place the salmon in the hot skillet in a single layer. Let them sear undisturbed for 2-3 minutes to develop a deep brown crust before gently turning them.
- Cook for an additional 2 minutes until the internal temperature reaches 125°F for a medium finish, then drizzle the remaining marinade over the fish to glaze them in the pan’s residual heat.
- Assemble the bowls by layering the warm grains, the glazed salmon, and fresh vegetables, finishing with a sprinkle of toasted sesame seeds for an earthy crunch.
How to air fry chicken?

Why we love this
The magic of the air fryer lies in its ability to create a shatteringly crisp exterior while locking in every drop of moisture inside the chicken. When you bite into a piece of this air-fried chicken, you’re met with a satisfying crunch and a burst of savory herbs that dance across your palate. It’s the kind of comfort food that feels lighter than traditional frying but loses none of the soul-satisfying richness, making it an absolute staple for a viral board that demands both crunch and convenience.
Ingredients
- 1 lb chicken breast or thighs, cut into bite-sized pieces
- 1/2 cup panko breadcrumbs
- 1/4 cup grated parmesan cheese
- 1 teaspoon garlic powder
- 1 teaspoon smoked paprika
- 1 egg, beaten
- Olive oil spray
How to make it
- Preheat your air fryer to 400°F (200°C) for at least 5 minutes; a hot starting environment is the secret to immediate browning and moisture retention.
- Set up a dredging station: one shallow bowl with the beaten egg and another with a mixture of panko, parmesan, garlic powder, and paprika.
- Dip each piece of chicken into the egg wash, allowing the excess to drip off, then press firmly into the panko mixture until every nook and cranny is coated.
- Arrange the chicken in the air fryer basket in a single layer, ensuring they aren’t touching to allow the hot air to circulate freely around each piece.
- Lightly spray the tops of the chicken with olive oil; this helps hydrate the dry breadcrumbs and turns them into a golden, crispy crust.
- Air fry for 10-12 minutes, pausing halfway through to shake the basket or flip the pieces. The chicken is done when the exterior is deep golden and the internal temperature hits 165°F.
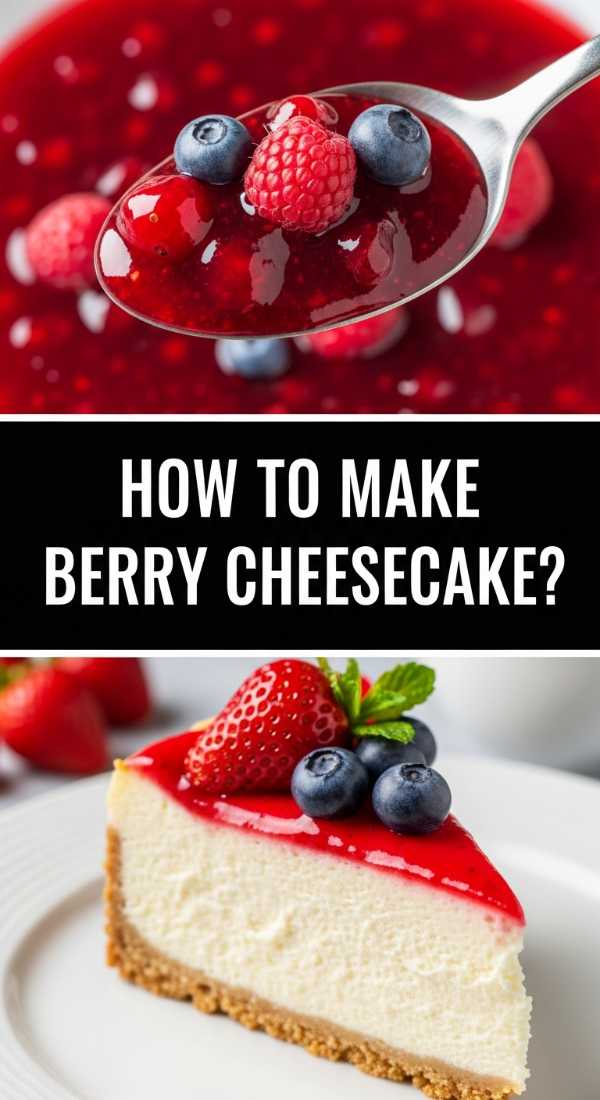
How to make berry cheesecake?
Why we love this
Imagine a dessert that is as velvety and smooth as silk, punctuated by the bright, tart explosion of summer berries. This cheesecake is a masterpiece of balance—the rich, tangy creaminess of the cheese filling rests atop a buttery, salty-sweet graham cracker crust that provides a satisfying crumble. As the berry compote swirls through the white filling, it creates a marbled visual that is almost too beautiful to eat, offering a cooling, luscious mouthfeel that lingers long after the last bite.
Ingredients
- 16 oz cream cheese, softened to room temperature
- 1/2 cup granulated sugar
- 2 large eggs
- 1 teaspoon vanilla extract
- 1 cup crushed graham crackers
- 3 tablespoons melted butter
- 1 cup mixed berries (blueberries, raspberries, strawberries)
How to make it
- Start by creating the base: mix the crushed graham crackers with melted butter until the mixture resembles wet sand, then press it firmly into the bottom of a lined baking pan or individual ramekins.
- In a large bowl, beat the softened cream cheese and sugar together using an electric mixer on medium speed until the texture is completely smooth and no lumps remain.
- Add the eggs one at a time, beating on low speed just until combined—over-beating at this stage introduces too much air, which can cause the cheesecake to crack during baking.
- Stir in the vanilla extract by hand, then pour the mixture over the crust.
- Gently press some of the berries into the batter and swirl a bit of berry juice or jam on top using a toothpick for a professional ‘viral’ marbled effect.
- Bake at 325°F (160°C) for about 35-40 minutes, or until the edges are set but the center still has a slight, gelatinous jiggle. Allow to cool completely at room temperature before chilling in the fridge for at least 4 hours.
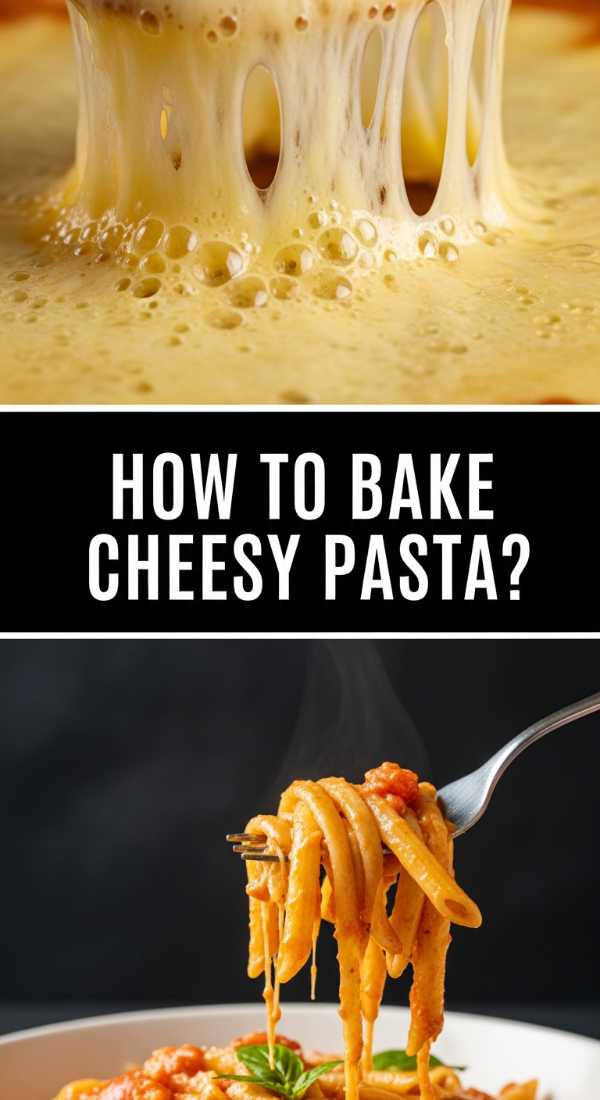
How to bake cheesy pasta?
Why we love this
Cheesy pasta is the ultimate culinary hug, a golden, bubbling dish of pure joy that anchors any food board with its irresistible warmth. The scent of toasted cheese and garlic creates an atmosphere of homey comfort that draws everyone in immediately. Each forkful pulls long, gooey strings of mozzarella, while the pasta itself is tender and coated in a rich, herby tomato sauce that balances the decadence of the cheese with a bright acidity, making it impossible to stop at just one serving.
Ingredients
- 1 box (16 oz) short pasta (penne or rigatoni)
- 2 cups marinara sauce
- 1.5 cups shredded mozzarella cheese
- 1/2 cup grated parmesan
- 1/2 teaspoon dried oregano
- Fresh basil for garnish
- 1/4 cup pasta water (reserved)
How to make it
- Boil a large pot of salted water and cook the pasta for 2 minutes less than the package directions suggest for ‘al dente’; it will finish cooking in the oven.
- Before draining the pasta, reserve about a quarter cup of the starchy pasta water—this is the secret to a silky, cohesive sauce.
- In a large baking dish, toss the cooked pasta with the marinara sauce, the reserved pasta water, and half of the mozzarella and parmesan.
- Spread the mixture evenly and top with the remaining cheese and a sprinkle of dried oregano.
- Bake in a preheated oven at 375°F (190°C) for 15-20 minutes until the sauce is bubbling around the edges.
- For the viral golden-brown finish, turn the broiler on for the last 2 minutes, watching closely until the cheese develops those beautiful charred spots, then garnish with fresh basil.
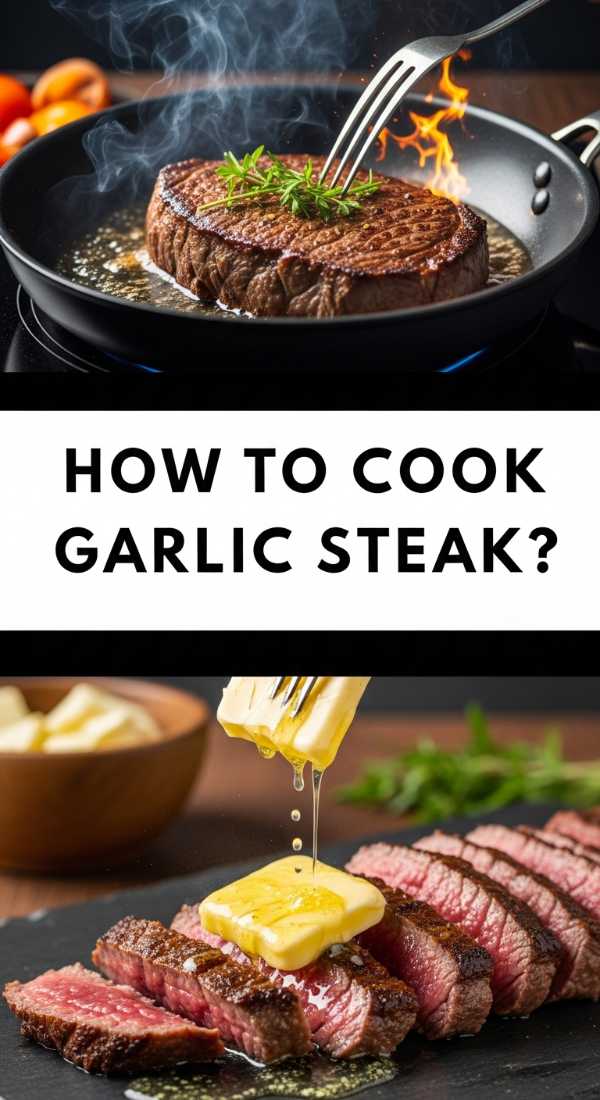
How to cook garlic steak?
Why we love this
There is an primal, mouthwatering appeal to a steak searing in a hot pan, especially when basted with foaming garlic butter. The exterior becomes a dark, savory crust known as the Maillard reaction, while the interior remains a tender, blushing pink that melts in your mouth. The aroma of roasted garlic and fresh rosemary infused into the beef creates a sophisticated flavor profile that elevates the entire board, offering a hearty, protein-packed bite that feels like a five-star steakhouse treat.
Ingredients
- 1 lb ribeye or sirloin steak, at room temperature
- 3 cloves garlic, smashed
- 2 tablespoons unsalted butter
- 2 sprigs fresh rosemary or thyme
- Kosher salt and coarse black pepper
- 1 tablespoon high-heat oil (like avocado oil)
How to make it
- Remove the steak from the fridge 30 minutes before cooking to ensure it cooks evenly; pat it extremely dry with paper towels on all sides.
- Season aggressively with salt and pepper. The seasoning needs to be heavy to form a flavorful crust.
- Heat a heavy cast-iron skillet over high heat until it is wisps of smoke start to appear. Add the oil and swirl to coat.
- Place the steak in the pan. Press down slightly to ensure contact and sear for 3 minutes without moving it to develop a deep crust.
- Flip the steak, then immediately lower the heat to medium and add the butter, smashed garlic, and herbs to the pan.
- As the butter melts and foams, tilt the pan and use a large spoon to continuously pour the flavored butter over the steak for the final 2-3 minutes of cooking.
- Remove the steak when it reaches an internal temperature of 130°F (for medium-rare). Rest it on a cutting board for at least 10 minutes before slicing against the grain to keep the juices inside.
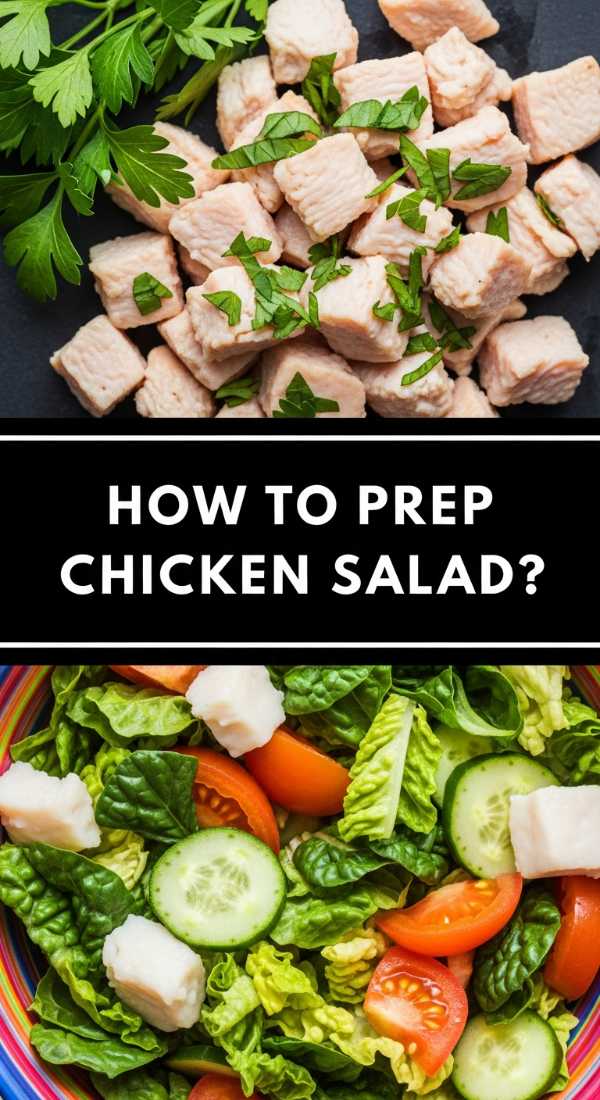
How to prep chicken salad?
Why we love this
This isn’t your average deli chicken salad; this is a bright, textured, and herbaceous delight that brings a refreshing crunch to your board. The creamy dressing is lightened with a touch of lemon, perfectly coating tender shreds of chicken, crisp celery, and sweet, juicy grapes. It’s a versatile component that feels sophisticated and fresh, providing a cool contrast to the warmer elements on the platter and offering a wonderful balance of sweet and savory notes in every bite.
Ingredients
- 2 cups cooked chicken breast, shredded
- 1/2 cup mayonnaise or Greek yogurt
- 1 tablespoon Dijon mustard
- 1/2 cup halved red grapes
- 1/4 cup finely diced celery
- 2 tablespoons chopped fresh dill
- Squeeze of lemon juice
How to make it
- If you’re starting with raw chicken, poach it gently in simmering water with aromatics until just cooked through to keep it moist and easy to shred.
- Use two forks to shred the warm chicken into bite-sized pieces; the warm meat absorbs the dressing better than cold meat.
- In a large bowl, whisk together the mayonnaise (or yogurt), mustard, lemon juice, and a pinch of salt and pepper until smooth and emulsified.
- Fold the shredded chicken into the dressing, ensuring every piece is well-coated.
- Gently stir in the celery and grapes—don’t over-mix once the fruit is added to prevent them from bruising or bleeding color into the salad.
- Add the fresh dill at the very end to preserve its bright green color and punchy aroma, then chill for at least 30 minutes to let the flavors meld together.
How to make egg muffins?

Why we love this
Egg muffins are the ultimate ‘pop-able’ snack for a viral food board—they are savory, protein-dense, and beautifully golden. Each little muffin is like a mini-frittata, featuring a light and airy texture packed with colorful vegetables and melted cheese. They are as pleasing to the eye as they are to the palate, offering a savory, sun-drenched flavor that works for brunch, lunch, or a sophisticated appetizer spread, especially when they are still slightly warm from the oven.
Ingredients
- 6 large eggs
- 1/4 cup milk
- 1/2 cup chopped spinach
- 1/4 cup diced bell peppers
- 1/4 cup crumbled feta or cheddar cheese
- Salt and pepper to taste
- Non-stick cooking spray
How to make it
- Preheat your oven to 350°F (175°C) and liberally grease a muffin tin with non-stick spray; these muffins love to stick, so be thorough.
- In a large glass measuring cup (for easy pouring), whisk the eggs and milk together until the yolks and whites are completely combined and slightly frothy.
- Season the egg mixture with salt and pepper, keeping in mind that feta cheese adds extra saltiness.
- Distribute your chopped spinach, peppers, and cheese evenly into the bottom of each muffin cup.
- Pour the egg mixture over the fillings until each cup is about three-quarters full, allowing space for the muffins to rise without overflowing.
- Bake for 18-22 minutes. You’ll know they are ready when the tops are puffed and golden, and a toothpick inserted into the center comes out clean. Let them sit for 5 minutes before using a plastic knife to gently pop them out.
How to make shrimp tacos?

Why we love this
Shrimp tacos bring a burst of coastal energy and zesty flavor that makes any food board feel like a celebration. The shrimp are quick-seared until they are plump and snap with freshness, seasoned with a blend of smoky spices that pair perfectly with a cool, tangy lime crema. Wrapped in a lightly charred tortilla, these tacos offer a complex layering of textures—from the soft tortilla to the crunchy cabbage slaw—making them a vibrant, high-impact dish that disappears in seconds.
Ingredients
- 1 lb large shrimp, peeled and deveined
- 1 tablespoon taco seasoning (chili powder, cumin, garlic powder)
- Small corn or flour tortillas
- 2 cups shredded cabbage (slaw mix)
- 1/2 cup sour cream
- 1 lime, juiced and zested
- Fresh cilantro
How to make it
- Pat the shrimp completely dry and toss them in a bowl with the taco seasoning and a drizzle of oil until evenly coated.
- In a small bowl, whisk the sour cream, lime juice, and lime zest to create a bright crema; set this aside to let the flavors develop.
- Heat a large skillet over high heat. Once hot, add the shrimp in a single layer. Sear for just 90 seconds per side—shrimp cook incredibly fast and will turn rubbery if overdone; look for them to turn opaque and form a ‘C’ shape.
- While the shrimp rest for a minute, char your tortillas directly over a gas flame or in a dry pan for 30 seconds per side until they have some smoky brown spots.
- Assemble by placing a handful of cabbage on each tortilla, followed by 3-4 shrimp.
- Drizzle generously with the lime crema and garnish with fresh cilantro and an extra squeeze of lime for that viral-ready, vibrant look.
How to make chocolate truffles?

Why we love this
Ending a food board with homemade chocolate truffles is the ultimate sophisticated touch. These bite-sized gems are incredibly rich and decadent, with a ganache center that melts slowly on the tongue, releasing deep notes of cocoa and cream. They feel like a true luxury, especially when coated in different textures like dark cocoa powder or crushed nuts. The contrast between the firm outer shell and the silky, buttery interior is a sensory delight that makes every guest feel pampered.
Ingredients
- 8 oz high-quality dark chocolate (60% cocoa or higher), finely chopped
- 1/2 cup heavy whipping cream
- 1/2 teaspoon vanilla extract
- Pinch of sea salt
- Coatings: Cocoa powder, crushed hazelnuts, or melted chocolate
How to make it
- Place the finely chopped chocolate in a heat-proof glass bowl. The smaller the chop, the more evenly the chocolate will melt.
- Heat the heavy cream in a small saucepan over medium heat just until it begins to simmer (do not let it reach a rolling boil).
- Pour the hot cream directly over the chopped chocolate and let it sit undisturbed for 5 minutes; this allows the heat to penetrate the chocolate pieces.
- Gently whisk from the center outward until the mixture is glossy, smooth, and completely combined. Stir in the vanilla and a pinch of sea salt.
- Cover the bowl and refrigerate for at least 2 hours until the ganache is firm enough to handle.
- Use a small scoop or teaspoon to portion out the ganache, roll quickly between your palms to form a ball, and immediately roll in your chosen coating. Work quickly so the heat from your hands doesn’t melt the truffle!
Creating Your Masterpiece
Building a viral food board is less about perfection and more about the love you put into the individual components. By mixing these high-quality, homemade bites with seasonal fruits, nuts, and dips, you create a tapestry of flavors that invites people to slow down and enjoy the moment. Remember, the ‘secret’ isn’t just the 10 minutes of prep; it’s the joy of sharing something beautiful and delicious with the people who matter most. Happy hosting!