
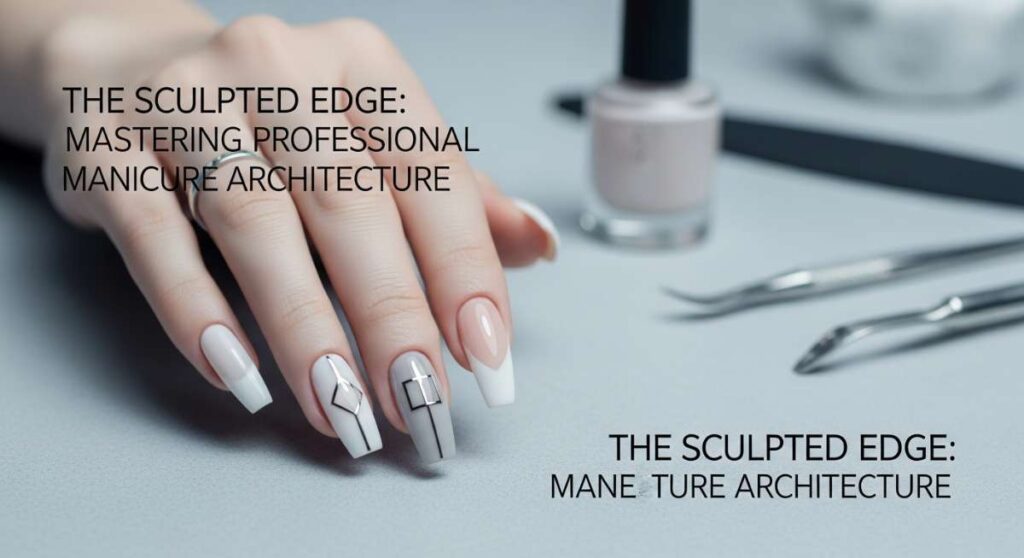
The Sculpted Edge: Mastering Professional Manicure Architecture
Hello, my loves. Welcome back to our little sanctuary of beauty and self-love. You know those moments when you look down at your hands, wrapped around a warm ceramic mug of tea, and you just feel… complete? That is the magic of a perfect manicure. It is not just about the color; it is about the architecture of the nail, the way the light catches the curve of the edge, and the soft, cloud-like confidence it gives you as you move through your day.
Today, I want to invite you into my world of aesthetic nail art. We are going to explore the delicate balance between professional precision and that effortless, airy vibe we all crave. Whether you are nesting at home with your favorite polish or stepping into the salon for a transformation, let’s master the art of the sculpted edge together. Pour yourself something warm, find a cozy spot, and let’s dive into these beautiful tutorials I’ve prepared just for you.
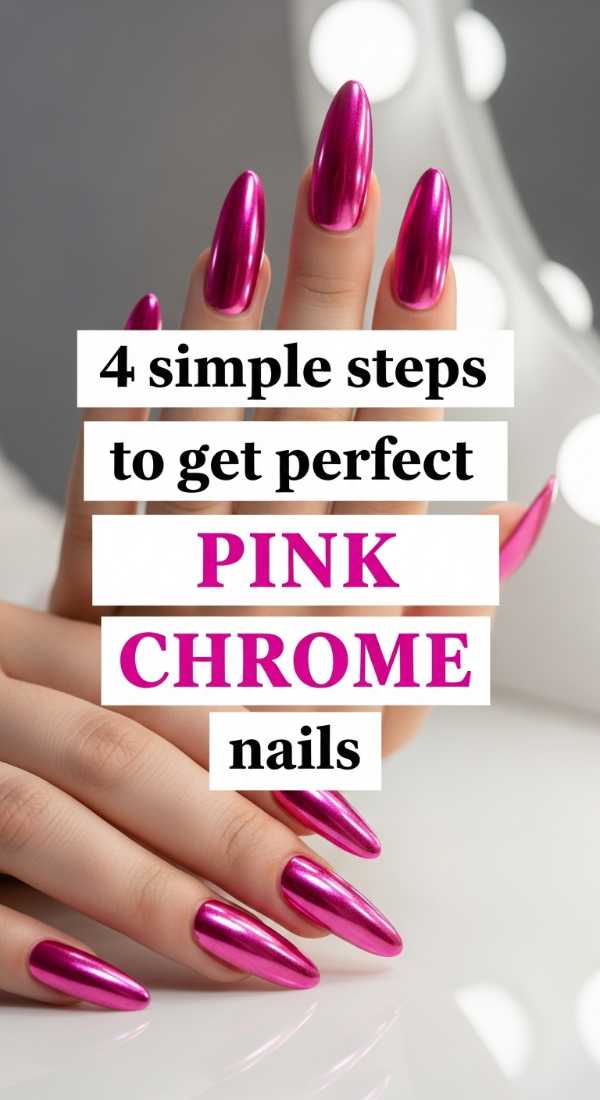
The Rose Gold Glow: Perfect Pink Chrome [ID:0]
Why to love these Nails:
These nails are like a sunset caught in a bottle. They offer a futuristic metallic finish while remaining incredibly soft and feminine. It’s the perfect choice for when you want to feel both modern and romantic.
Essential Items:
- Soft pink gel polish
- No-wipe top coat
- Pink chrome powder
- Sponge applicator
How to Prepare:
- Apply and cure two thin coats of your favorite soft pink gel.
- Apply a no-wipe top coat and cure for only 30 seconds (it needs to be slightly tacky).
- Using the sponge, gently buff the chrome powder onto the nail until it shines like a mirror.
- Seal with a final layer of top coat and cure fully for a long-lasting glow.
Budget Range
- Pink Chrome Powder: $8.00 – $12.00
- Gel Polish Base: $10.00 – $15.00
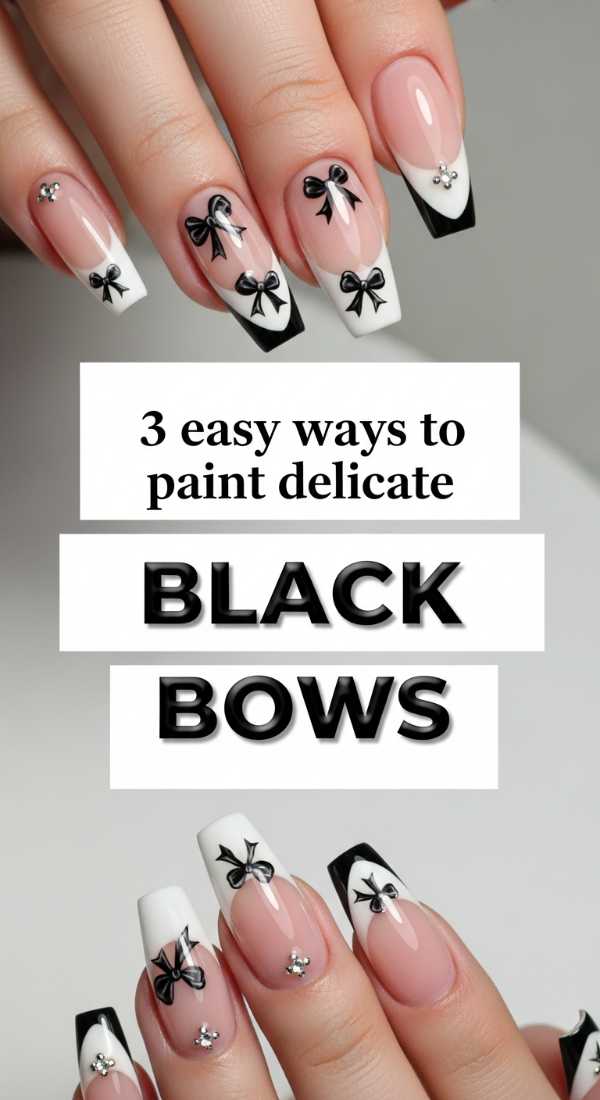
Coquette Chic: Delicate Black Bows [ID:1]
Why to love these Nails:
There is something so undeniably darling about a tiny bow. It’s the ultimate coquette aesthetic—playful, elegant, and just a little bit vintage. It turns your fingertips into tiny gifts.
Essential Items:
- Ultra-fine liner brush
- Highly pigmented black gel paint
- Dotting tool
How to Prepare:
- Use the dotting tool to place a tiny black dot where the center of your bow will be.
- With your liner brush, draw two delicate triangles extending from the dot for the loops.
- Add two thin, flowing lines beneath the triangles to create the ribbon tails.
Budget Range
- Precision Liner Brush: $6.00 – $9.00
- Black Nail Art Paint: $5.00 – $10.00
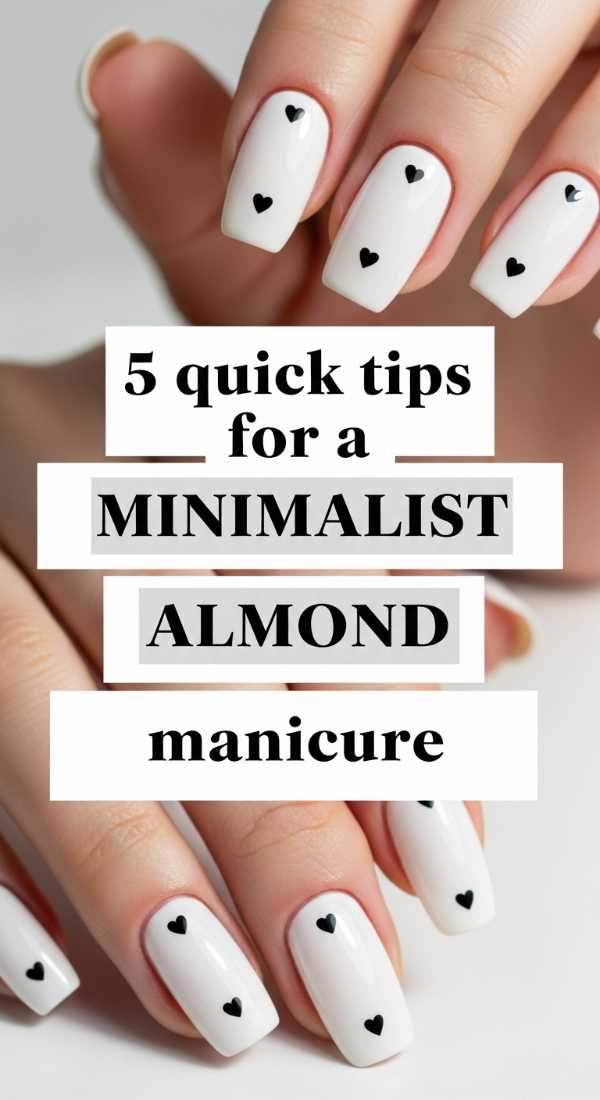
Quiet Luxury: The Minimalist Almond [ID:2]
Why to love these Nails:
Almond nails are the gold standard for elongating the fingers. This minimalist approach focuses on health and shape, embodying that ‘clean girl’ aesthetic that feels so refreshing and light.
Essential Items:
- Professional glass nail file
- Sheer nude or ‘milky’ polish
- Nourishing cuticle oil
How to Prepare:
- File nails into a soft taper, rounding the tip to mimic the shape of an almond.
- Gently push back cuticles to maximize the nail bed space.
- Apply one coat of sheer nude polish for a healthy, natural tint.
- Buff the edges until they are whisper-smooth.
- Massage cuticle oil into the base for a hydrated, professional finish.
Budget Range
- Glass File: $12.00 – $18.00
- Sheer Nude Polish: $9.00 – $14.00
Forever Yours: Flawless Bridal Nails [ID:3]
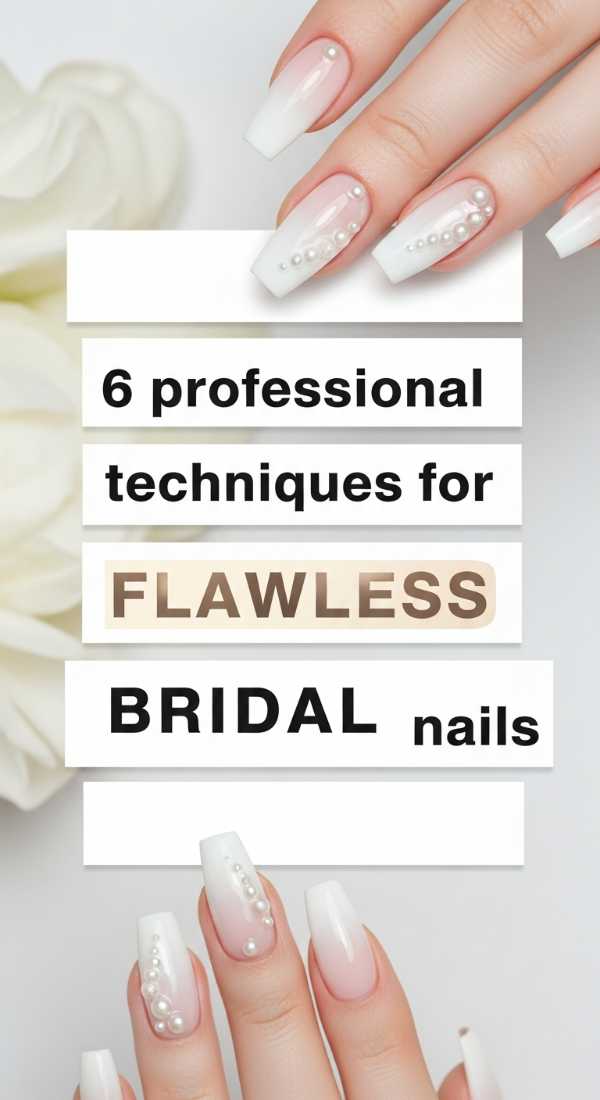
Why to love these Nails:
Bridal nails need to be timeless. This look is about creating a flawless, pearl-like finish that looks stunning in photos and even more beautiful when you’re holding your bouquet.
Essential Items:
- Builder gel for strength
- Opaque milky white gel
- Micro-shimmer top coat
- Tiny pearl accents
How to Prepare:
- Apply builder gel to create a smooth, even architecture and add strength.
- Layer two coats of milky white gel for a soft, clouded look.
- Apply a micro-shimmer coat to catch the light subtly.
- Place a single tiny pearl at the base of the ring finger for a sentimental touch.
- Seal everything with a high-shine tempered top coat.
- Cleanse with alcohol for a squeaky-clean reflection.
Budget Range
- Builder Gel Kit: $20.00 – $35.00
- Pearl Accents: $4.00 – $7.00
Sunkissed Sorbet: Pastel Summer Dreams [ID:4]
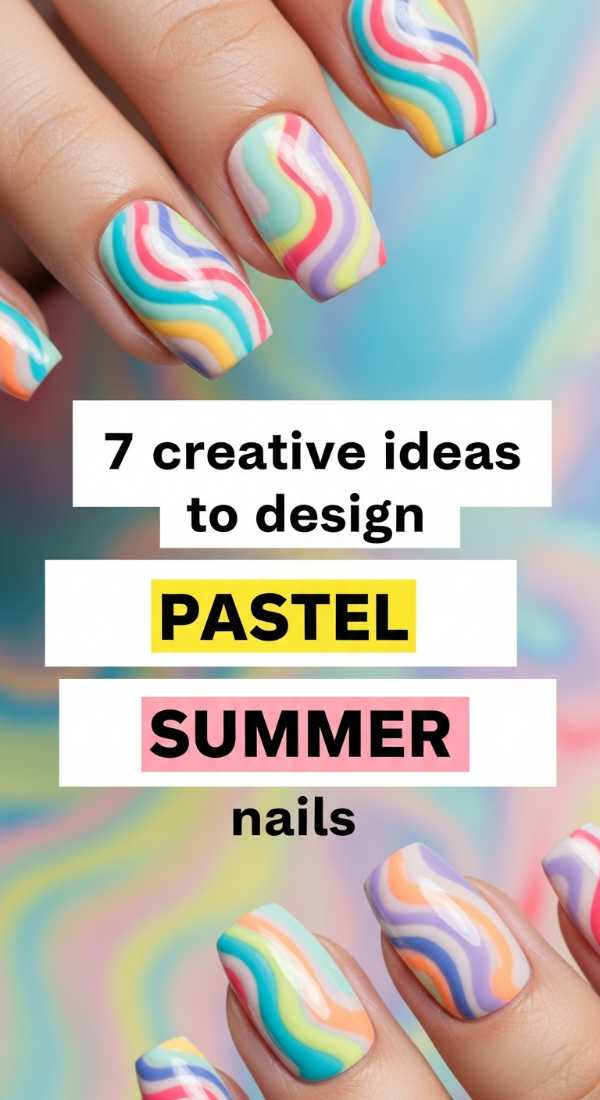
Why to love these Nails:
Summer is all about joy, and these pastel shades feel like a cold scoop of sorbet on a hot afternoon. They are bright enough to be fun but soft enough to wear with any outfit.
Essential Items:
- Pastel set (Mint, Lavender, Peach, Lemon)
- Matte top coat
- White base polish (to make colors pop)
How to Prepare:
- Start with a white base coat to ensure the pastels look vibrant and opaque.
- Alternate colors on each finger for a ‘Skittles’ manicure effect.
- Try a vertical ombre by blending two pastels in the center of the nail.
- Add tiny white daisies using a dotting tool for a garden vibe.
- Experiment with a matte finish for a ‘velvet’ pastel look.
- Use a thin brush to create wavy ‘swirl’ patterns over a clear base.
- Finish with a UV-protectant top coat to prevent fading in the sun.
Budget Range
- Pastel Polish Set: $15.00 – $25.00
- Matte Top Coat: $8.00 – $12.00
Starlight Sculpt: Glitter Coffin Magic [ID:5]
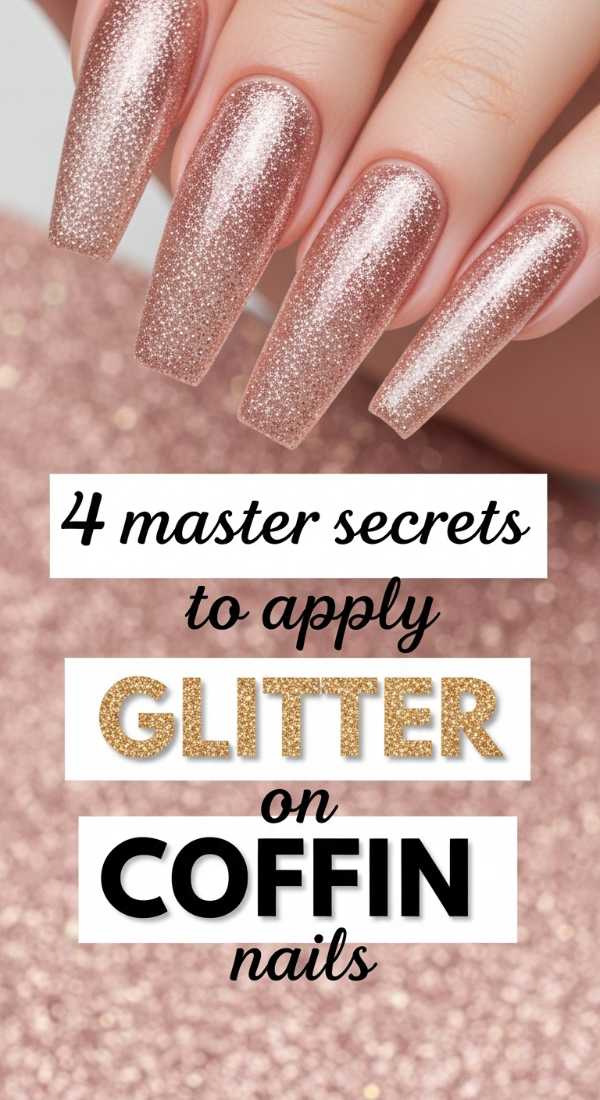
Why to love these Nails:
The coffin shape provides a bold canvas for some serious sparkle. This look is for the moments when you want to feel like you’re carrying a bit of the galaxy right on your fingertips.
Essential Items:
- Loose holographic glitter
- Clear structure gel
- Makeup sponge
- Buffer block
How to Prepare:
- Press loose glitter onto the tacky layer of a base gel using a sponge for maximum density.
- Concentrate the glitter at the tips and fade it toward the cuticle for a gradient effect.
- Apply a thick layer of structure gel over the glitter to ‘encapsulate’ it.
- Buffer the surface after curing to ensure the ‘coffin’ edges are sharp and the surface is flat.
Budget Range
- Loose Holographic Glitter: $5.00 – $10.00
- Structure Gel: $15.00 – $22.00
Modern Canvas: Aesthetic Gel Art [ID:6]
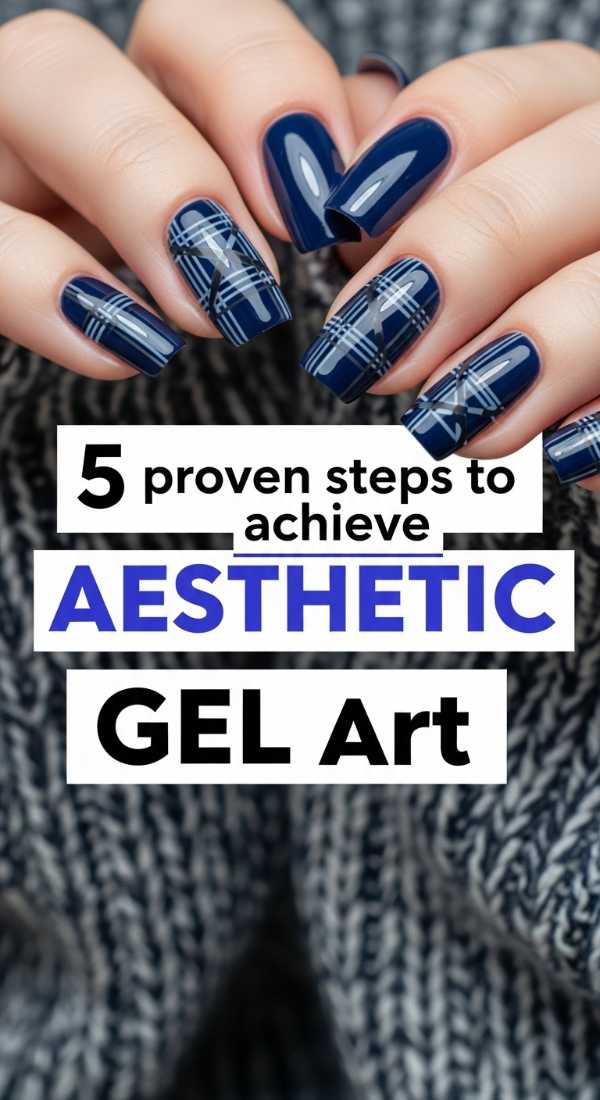
Why to love these Nails:
This is where your personality shines. Aesthetic gel art is all about organic shapes, thin lines, and negative space. It’s like wearing a piece of modern art that is unique to you.
Essential Items:
- Gel liner set (multiple colors)
- UV/LED Lamp
- Lint-free wipes
How to Prepare:
- Prep the nail with a dehydrator to ensure the gel art sticks perfectly.
- Lay down a neutral base color and cure completely.
- Paint organic, flowing ‘blobs’ or lines using a liner brush.
- Flash cure (5 seconds) between different colors to prevent bleeding.
- Apply a final high-gloss top coat to give the art depth.
Budget Range
- LED Nail Lamp: $25.00 – $45.00
- Gel Liner Set: $18.00 – $30.00
The Timeless Tip: French Manicure Hacks [ID:7]

Why to love these Nails:
The French tip is a classic for a reason—it is clean, professional, and sophisticated. These hacks make achieving that perfect ‘smile line’ easier than ever.
Essential Items:
- Silicone nail stamper
- French tip guide stickers
- Crisp white polish
How to Prepare:
- Apply white polish to the surface of a silicone stamper, then gently push your nail tip into it at an angle.
- Use guide stickers for a more structured, deep-V French look.
- Clean up the ‘smile line’ with a flat brush dipped in acetone for a razor-sharp edge.
Budget Range
- Silicone Stamper: $5.00 – $8.00
- Guide Stickers: $3.00 – $6.00
Structured Elegance: Classy Acrylic Designs [ID:8]
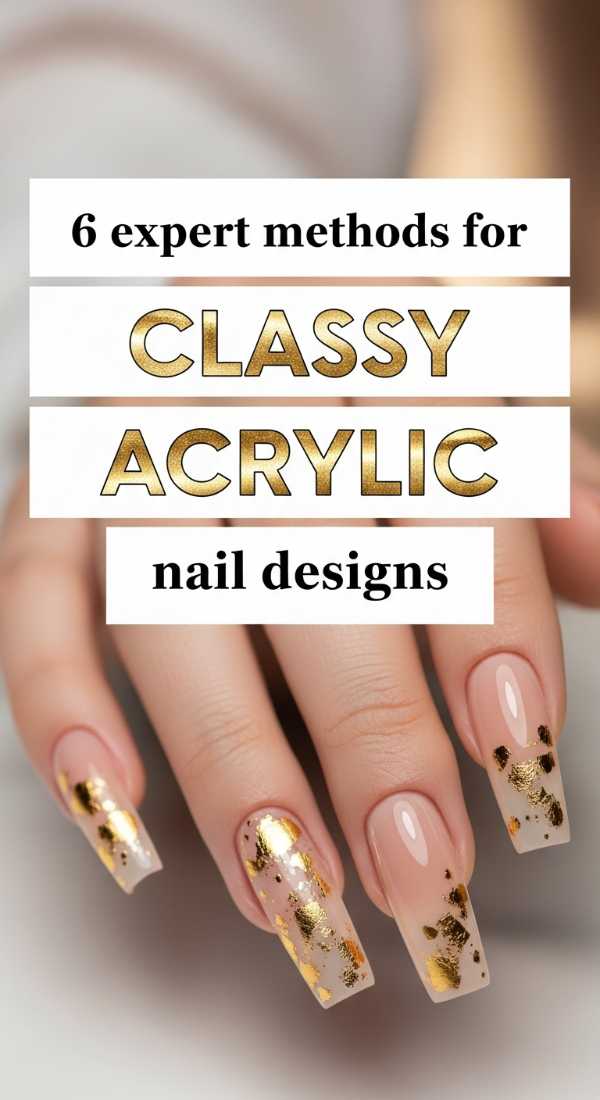
Why to love these Nails:
Acrylics offer a level of durability and length that is unmatched. When done with a ‘classy’ mindset, they look incredibly expensive and polished.
Essential Items:
- Professional acrylic monomer
- Fine polymer powder (Cover Pink)
- Kolinsky acrylic brush #8
How to Prepare:
- Apply the acrylic in a ‘single bead’ method to minimize filing time.
- Pinch the sidewalls while the product is curing to create a slim, elegant profile.
- Build a proper ‘apex’ (the highest point of the nail) for structural integrity.
- File the free edge into a perfect square or oval.
- Buff to a high shine before applying any color.
- Finish with a cuticle oil soak to restore moisture to the surrounding skin.
Budget Range
- Acrylic Starter Kit: $40.00 – $65.00
- Kolinsky Brush: $20.00 – $40.00
Fresh Perspectives: Refreshing Your Nail Inspo [ID:9]
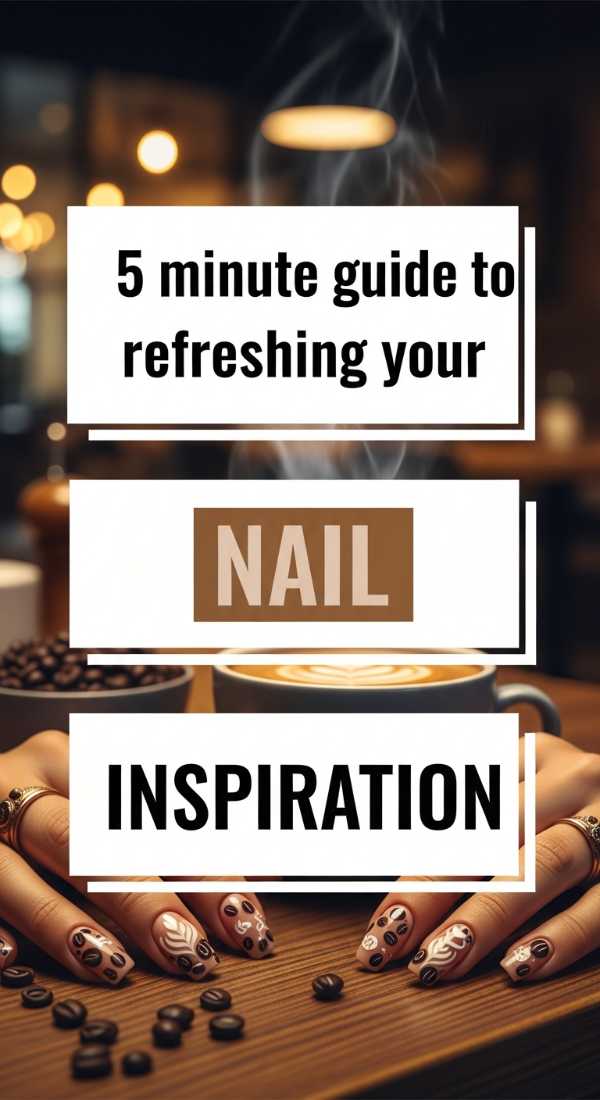
Why to love these Nails:
Sometimes the best manicure is the one that breaks your usual routine. This is about finding new inspiration and refreshing your personal style.
Essential Items:
- Pinterest or Instagram access
- A notebook for sketching
- Color wheel
How to Prepare:
- Browse ‘Interior Design’ or ‘Nature’ tags rather than just nail tags to find unique color palettes.
- Identify one texture you haven’t tried (matte, velvet, chrome).
- Select a nail shape that is the opposite of your current one.
- Sketch a rough idea of a 5-nail ‘story’ where each nail is slightly different but cohesive.
- Look at your jewelry and choose a color that complements your most-worn pieces.
Budget Range
- Inspiration Apps: Free
- Sketchbook: $5.00 – $10.00
Embrace Your Inner Artist
My loves, I hope these tutorials inspire you to take a moment for yourself this week. Whether you’re painting a tiny black bow or sculpting a perfect almond shape, remember that this is your time to create. Your hands do so much for you—they work, they hold, they comfort. Treating them to a beautiful manicure is just one small way to say thank you to yourself. Stay soft, stay creative, and I can’t wait to see the beautiful architecture you build on your own sculpted edges. Until next time!