
The Only Summer Food Checklist You’ll Ever Need for Your Next Party
Hello, my loves! There is something truly magical about the way the golden hour light dances across a table full of food during the height of summer. It is that time of year when the days stretch out like a long, warm embrace, and every meal feels like a celebration of the sun. I’ve spent so many afternoons curated the perfect menu that feels both effortless and intentional, and today, I am so beyond thrilled to share my ultimate summer checklist with you.
Gathering your favorite people together under a canopy of string lights or a bright blue sky is my absolute love language. These recipes aren’t just about feeding people; they are about creating those soft, hazy memories that we cling to when the winter frost eventually arrives. From the crunch of a fresh salad to the nostalgic warmth of a grilled kabob, every bite is a love letter to the season. Let’s dive into these recipes and make your next gathering something truly extraordinary.
The Secret To Making The Ultimate Creamy Summer Pasta Salad

Why we love this
This pasta salad is like a soft cloud of comfort on a warm afternoon, blending a nostalgic creaminess with the bright, sharp notes of fresh garden vegetables. We love how the dressing clings perfectly to every single noodle, ensuring that no bite is ever dry or dull, making it a reliable staple for any outdoor gathering. It is the kind of dish that tastes even better as it sits, allowing the flavors to meld into a beautiful harmony of textures and tastes. It truly is the ultimate crowd-pleaser that disappears from the table within minutes of being served to your hungry guests.
Ingredients
- 1 lb Rotini or Bowtie pasta
- 1 cup high-quality mayonnaise
- 1/2 cup Greek yogurt for tang
- 2 tablespoons apple cider vinegar
- 1 tablespoon honey
- 1 cup cherry tomatoes, halved
- 1 cup English cucumber, diced
- 1/2 cup red onion, finely minced
- 1/4 cup fresh parsley and dill, chopped
- Salt and cracked black pepper to taste
How to make it
- Begin by boiling a large pot of salted water and cooking your pasta until it is just past al dente, as slightly softer pasta absorbs the dressing much better.
- Drain the pasta and immediately rinse it under cold running water to stop the cooking process and remove excess starch, then set aside to drain thoroughly.
- In a small mixing bowl, whisk together the mayonnaise, Greek yogurt, vinegar, honey, salt, and pepper until the mixture is silky smooth and perfectly emulsified.
- In a large serving bowl, combine the cooled pasta with your tomatoes, cucumber, and red onion, tossing them gently to distribute the colors evenly throughout the dish.
- Pour the creamy dressing over the pasta mixture and fold it in with a spatula, ensuring every nook and cranny of the noodles is coated.
- Top with the fresh herbs and chill in the refrigerator for at least two hours before serving to let the flavors fully develop.
How To Make The Most Addictive Rotel Dip For Your Next Cookout

Why we love this
There is a certain undeniable magic in a bowl of warm, melty cheese that brings people together faster than anything else I know. This Rotel dip is my absolute secret weapon because it hits all the right notes: salty, spicy, creamy, and deeply satisfying with every single crunch of a tortilla chip. It feels like home and hospitality in a bowl, offering a comforting warmth that balances out the cool breezes of a summer evening. You will find that this is the dish everyone circles around, sharing stories and laughs while they dive in for just one more bite.
Ingredients
- 1 lb Velveeta or high-quality melting cheese, cubed
- 1 can (10 oz) Rotel Original diced tomatoes and green chilies
- 1/2 lb ground sausage or lean ground beef
- 1/2 cup sour cream
- 1 teaspoon taco seasoning
- Fresh cilantro for garnish
- Tortilla chips for serving
How to make it
- In a medium skillet over medium-high heat, brown your ground sausage or beef until it is fully cooked and slightly crispy, then drain the excess fat carefully.
- In a slow cooker or a heavy-bottomed saucepan, combine the cubed cheese and the entire can of Rotel, including the flavorful juices from the can.
- Add the cooked meat and the taco seasoning to the cheese mixture, stirring gently to incorporate the spices into the melting cheese base.
- Heat the mixture on low, stirring frequently to prevent scorching, until the cheese is completely melted and the dip is smooth and bubbling.
- Stir in the sour cream at the very end to give the dip an extra layer of velvety richness and a slight tang that cuts through the salt.
- Transfer to a serving bowl, garnish with fresh cilantro, and serve immediately with a big basket of salty, crunchy tortilla chips.
The Professional Secret To Perfect Juicy Kabobs On The Grill

Why we love this
Kabobs are the quintessential summer meal, bringing a beautiful rainbow of colors and charred flavors right to your plate with a stunning presentation. We love the professional secret of marinating the meat separately from the vegetables to ensure that every component is seasoned to its absolute maximum potential. There is something so satisfying about the sizzle of the grill and the way the smoke infuses the meat with a deep, rustic aroma that screams summer. These skewers are not only delicious but also incredibly fun to eat, making them a hit for both kids and adults alike.
Ingredients
- 2 lbs sirloin steak or chicken breast, cut into 1-inch cubes
- 1/2 cup olive oil
- 1/4 cup soy sauce
- 3 cloves garlic, minced
- 1 tablespoon Dijon mustard
- 2 bell peppers (any color), cut into chunks
- 1 red onion, cut into wedges
- 1 cup whole mushrooms
- Wooden or metal skewers
How to make it
- If using wooden skewers, soak them in water for at least 30 minutes to prevent them from burning on the hot grill grates.
- In a large bowl or zip-top bag, whisk together the olive oil, soy sauce, garlic, and Dijon mustard to create a savory, deep marinade.
- Add your cubed meat to the marinade and let it sit in the refrigerator for at least 4 hours, though overnight is always better for the most tender results.
- Thread the marinated meat and the fresh vegetables onto the skewers, alternating them to create a vibrant pattern and allowing a tiny bit of space between pieces for airflow.
- Preheat your grill to medium-high heat and lightly oil the grates to ensure the kabobs don’t stick when you try to turn them.
- Grill the skewers for about 8-12 minutes, turning them every few minutes, until the meat reaches your desired doneness and the veggies have beautiful charred edges.
Better Than The Bakery Easy Glazed Apple Fritter Bites

Why we love this
These apple fritter bites are like tiny, sweet clouds of joy that bring the cozy feeling of a crisp morning to a warm summer afternoon. We love how they offer that perfect contrast between a golden, slightly crunchy exterior and a soft, spiced center filled with tender bits of fresh fruit. They are much easier to make than a full-sized fritter, making them the perfect finger food for a party where guests want a sweet treat without the commitment. Every bite is glazed to perfection, creating a shimmering finish that looks just as beautiful as it tastes on your dessert table.
Ingredients
- 2 cups all-purpose flour
- 1/4 cup sugar
- 1 tablespoon baking powder
- 1 teaspoon ground cinnamon
- 2 large Granny Smith apples, peeled and finely diced
- 3/4 cup whole milk
- 2 large eggs
- Oil for frying
- For Glaze: 1 cup powdered sugar, 2 tbsp milk, 1/2 tsp vanilla
How to make it
- In a large mixing bowl, whisk together the flour, sugar, baking powder, and cinnamon until the dry ingredients are perfectly combined and lump-free.
- In a separate small bowl, beat the eggs and milk together before folding them into the dry ingredients to create a thick, sticky batter.
- Gently fold in the finely diced apples, ensuring they are evenly distributed so that every bite gets a piece of fruit.
- Heat about 2 inches of oil in a heavy pot to 350 degrees Fahrenheit, using a thermometer to keep the temperature consistent throughout the process.
- Drop small spoonfuls of batter into the hot oil, frying them for about 2 minutes per side until they are deep golden brown and puffed.
- Whisk your glaze ingredients together and dip the warm fritters into the glaze, letting the excess drip off on a wire rack before serving.
The Only Healthy Summer Salad Recipe You Will Ever Need

Why we love this
This salad is a vibrant celebration of everything that grows in the sun, offering a refreshing crunch that revitalizes your spirit on a humid day. We love that it avoids heavy grains or creams, focusing instead on nutrient-dense greens and the natural sweetness of summer berries and crisp nuts. It is the perfect balance of flavors—sweet, salty, tangy, and earthy—all tossed in a light dressing that enhances rather than hides the ingredients. It leaves you feeling light and energized, which is exactly how we want to feel when the summer days are long and full of activity.
Ingredients
- 5 cups baby spinach or arugula
- 1 cup fresh strawberries, sliced
- 1/2 cup blueberries
- 1/4 cup crumbled goat cheese or feta
- 1/4 cup toasted pecans or walnuts
- 1/2 small red onion, thinly sliced
- Dressing: 3 tbsp olive oil, 1 tbsp balsamic glaze, 1 tsp honey, pinch of salt
How to make it
- Start by washing your greens thoroughly and spinning them dry, as any excess water will prevent the light dressing from sticking to the leaves.
- In a large, shallow salad bowl, lay down the greens as a plush base, then scatter the sliced strawberries and blueberries over the top like jewels.
- Add the thinly sliced red onions and the crumbled cheese, ensuring the cheese is broken into small enough pieces to get a little bit in every forkful.
- In a small jar, combine the olive oil, balsamic glaze, honey, and salt, shaking vigorously until the mixture is thick and well-combined.
- Just before you are ready to serve, sprinkle the toasted nuts over the top to maintain their maximum crunch and prevent them from getting soft.
- Drizzle the dressing lightly over the salad and toss very gently with large spoons so you don’t bruise the delicate berries or the greens.
The Best Way To Pack Refreshing Beach Snacks For A Hot Day

Why we love this
Packing for the beach is an art form, and there is nothing worse than opening your cooler to find soggy sandwiches and lukewarm drinks. We love this method because it focuses on hydrating, cooling foods that stay fresh and crisp even under the blazing midday sun. It is all about the preparation and the clever use of containers to keep everything organized and sand-free, allowing you to relax and enjoy the waves. These snacks are designed to be eaten with your fingers, making them the ultimate low-maintenance fuel for a day spent lounging by the ocean.
Ingredients
- Frozen grapes and watermelon cubes
- Pre-cut cucumber and carrot sticks
- Individual hummus cups
- Chilled sparkling water or coconut water
- Cheese sticks and turkey roll-ups
- Reusable ice packs or frozen water bottles
How to make it
- The night before your trip, wash your grapes and cut your watermelon into cubes, then freeze them in a single layer to act as edible ice cubes.
- Prep your vegetables into long sticks and place them in airtight containers with a damp paper towel at the bottom to keep them from drying out.
- Assemble turkey roll-ups by spreading a little cream cheese on a slice of deli turkey and rolling it tightly; these stay firm and don’t get soggy like bread.
- Layer your cooler by placing the heavy, frozen items (like water bottles) at the very bottom to create a cold foundation for the rest of your food.
- Place the delicate items like the turkey roll-ups and cheese on top of the foundation, ensuring they are tightly sealed to prevent any cooler water from entering.
- Pack individual servings of hummus and dips so that everyone has their own, which prevents cross-contamination and makes it much easier to handle while sitting in the sand.
Stress Free Pre Made Camping Meals For Your Next Adventure

Why we love this
Camping should be about the crackle of the fire and the stars in the sky, not about spending hours prepping food on a shaky picnic table. We love these pre-made meals because they take the stress out of outdoor cooking, allowing you to simply heat and eat while you soak in the wilderness. By doing the heavy lifting at home in your own kitchen, you ensure that every meal is just as delicious as it would be at home, but with that added smoky flavor of the campfire. It turns a rugged trip into a gourmet experience that feels incredibly indulgent and soulful.
Ingredients
- Foil packets: Sliced smoked sausage, potatoes, and green beans
- Pre-mixed pancake batter in a squeeze bottle
- Pre-marinated chicken thighs in a leak-proof bag
- Hard-boiled eggs for easy breakfasts
- Pre-washed and cut fruit salad
- A small container of ‘campfire seasoning’ (salt, pepper, garlic powder, paprika)
How to make it
- At home, assemble your foil packets by placing sausage, sliced potatoes, and beans onto a large piece of heavy-duty foil, seasoning them well, and folding them into a tight seal.
- Prepare your pancake batter and pour it into a clean, recycled condiment squeeze bottle; this makes it so easy to pour perfect circles onto a griddle over the fire.
- Marinate your meat in the kitchen and freeze the entire bag; it will act as an ice pack in your cooler and be perfectly thawed and ready to grill by the second night.
- When you arrive at camp, simply place the foil packets directly onto the hot coals or a grill grate and cook for 20 minutes, turning once for even heating.
- Use the squeeze bottle batter to make quick breakfast pancakes over a portable stove or the fire’s edge, serving them with the pre-cut fruit.
- By organizing your meals by day in the cooler, you can easily grab what you need without letting all the cold air out of the chest.
Creative Lemonade Flavor Ideas To Keep You Cool All Summer

Why we love this
Lemonade is the ultimate symbol of summer, but adding a creative twist makes it feel like a fancy artisan drink from a high-end boutique. We love how simple infusions can transform a basic sweet-and-sour drink into a complex, refreshing beverage that delights every sense. It is a wonderful way to use up fresh herbs from your garden or that extra pint of berries that is perfectly ripe. Serving these vibrant, colorful pitchers to your guests is a beautiful way to show care and intention in your hosting, making everyone feel special and refreshed.
Ingredients
- Base: 1 cup fresh lemon juice, 1 cup sugar, 4 cups cold water
- Blueberry Basil: 1/2 cup muddled blueberries, 4 basil leaves
- Lavender Honey: 2 tbsp dried culinary lavender, 2 tbsp honey
- Strawberry Jalapeño: 1/2 cup sliced strawberries, 2 thin jalapeño slices
- Sparkling Mint: 2 cups sparkling water (subbed for flat), 1/4 cup fresh mint
How to make it
- First, create a simple syrup by heating the sugar and one cup of the water until the sugar is completely dissolved, then let it cool completely.
- For the Blueberry Basil version, muddle the fruit and herbs at the bottom of your pitcher before adding the lemon juice and syrup to release the aromatic oils.
- To make Lavender Honey lemonade, steep the lavender in the hot simple syrup for 10 minutes, then strain it out and stir in the honey while it is still warm.
- For a spicy kick, add the jalapeño slices to the pitcher and let them sit for at least 30 minutes; the longer they sit, the more the heat will infuse into the drink.
- Stir all your chosen ingredients together in a large glass pitcher with plenty of ice and extra lemon wheels for a beautiful, professional look.
- Always taste-test your creation before serving, adding a splash more water or a squeeze of lemon to balance the sweetness to your personal preference.
The Most Delicious Sourdough Discard Recipes For Easy Baking

Why we love this
If you are a sourdough lover, you know the guilt of throwing away discard, but these summer recipes turn that ‘waste’ into the star of the show. We love the unique, subtle tang that sourdough discard adds to baked goods, providing a depth of flavor that you just can’t get with standard flour alone. It creates a texture that is incredibly tender and moist, perfect for summer snacks that need to hold up in the heat. Plus, it feels so sustainable and earthy to use every bit of your starter, connecting your kitchen traditions with your summer celebrations.
Ingredients
- 1 cup sourdough discard (unfed)
- 1/2 cup melted butter or coconut oil
- 1 large egg
- 1 cup all-purpose flour
- 1/2 teaspoon baking soda
- 1/2 teaspoon sea salt
- Optional: 1/2 cup chocolate chips or dried cranberries
How to make it
- In a medium bowl, whisk together your sourdough discard, melted butter, and egg until the mixture is smooth and has a slight sheen to it.
- In another bowl, sift together the flour, baking soda, and salt to ensure there are no lumps and the leavening agent is evenly distributed.
- Gradually fold the dry ingredients into the wet discard mixture, being careful not to over-mix, which can make the finished product tough.
- Fold in your optional chocolate chips or fruit, then spread the batter into a greased baking dish or scoop it into muffin tins.
- Bake at 350 degrees Fahrenheit for 20-25 minutes, or until a toothpick inserted into the center comes out clean and the edges are golden.
- Let the bake cool completely before slicing, as the sourdough flavors continue to develop and settle as the temperature drops.
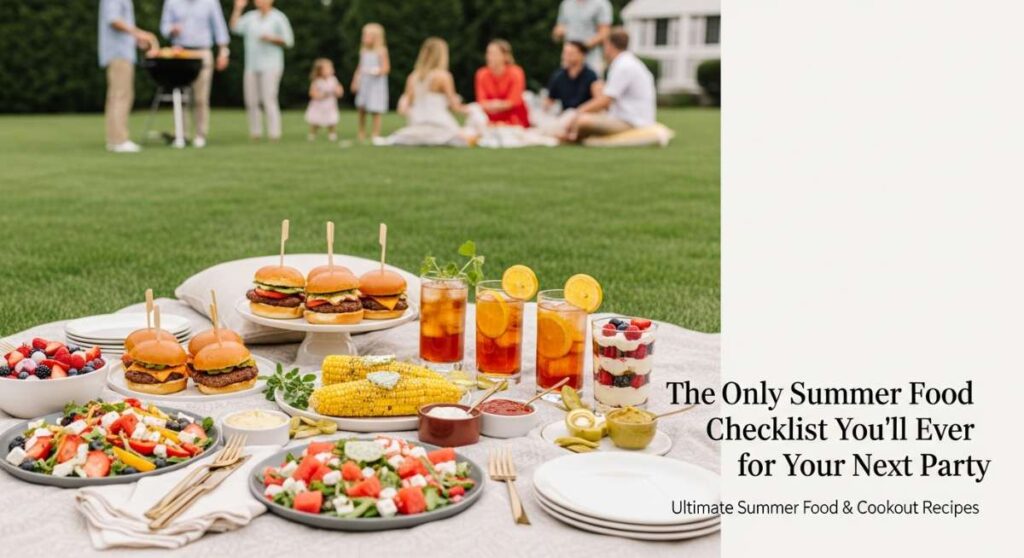
Elevate Your Next Outing With These Easy Picnic Food Ideas
[IMAGE_10]
Why we love this
Picnics are a soulful way to reconnect with nature, but the food needs to be portable and elegant without requiring a full set of silverware. We love these elevated ideas because they take the classic sandwich-and-chips combo and turn it into a sophisticated outdoor feast. Think individual charcuterie jars and crusty baguettes that feel like a scene from a European getaway right in your local park. It is about the joy of eating with your hands and sharing small plates while the grass tickles your toes and the breeze rustles the trees above you.
Ingredients
- Individual ‘Jarcuterie’: Small jars with cheese cubes, olives, and salami
- Caprese Skewers: Cherry tomatoes, bocconcini, and basil
- Pressed Sandwiches: Baguette with pesto, prosciutto, and arugula
- Handheld Fruit Galettes or hand pies
- Cold Pasta Salad in mason jars
- A beautiful linen cloth and woven basket
How to make it
- Assemble your ‘Jarcuterie’ by layering heavy items like olives at the bottom and poking cheese and meat skewers out of the top for a beautiful vertical display.
- Make pressed sandwiches by filling a baguette with your favorite gourmet ingredients, wrapping it tightly in parchment, and weighing it down in the fridge for 2 hours before slicing.
- Thread the Caprese skewers together and drizzle them with a tiny bit of balsamic reduction just before you leave so they stay fresh and vibrant.
- Layer your pasta salad at the bottom of wide-mouth mason jars, keeping the dressing at the very bottom and the greens or pasta on top to prevent sogginess.
- Pack everything into a sturdy woven basket, placing the heaviest jars at the bottom and the delicate fruit galettes on the very top to avoid crushing them.
- Don’t forget to pack a set of cloth napkins and a small cutting board; they add a touch of luxury and utility to your beautiful outdoor setup.
Conclusion: Embracing the Sun-Drenched Moments
My loves, I hope this checklist inspires you to throw open your doors and invite the world in this summer. There is so much beauty in the simple act of sharing a meal, and these recipes are designed to make those moments feel as light and airy as a summer breeze. Whether you are at the beach, in the woods, or simply in your own backyard, remember that the most important ingredient is always the love you pour into the gathering. Go forth, cook with heart, and soak up every golden second of this beautiful season!