
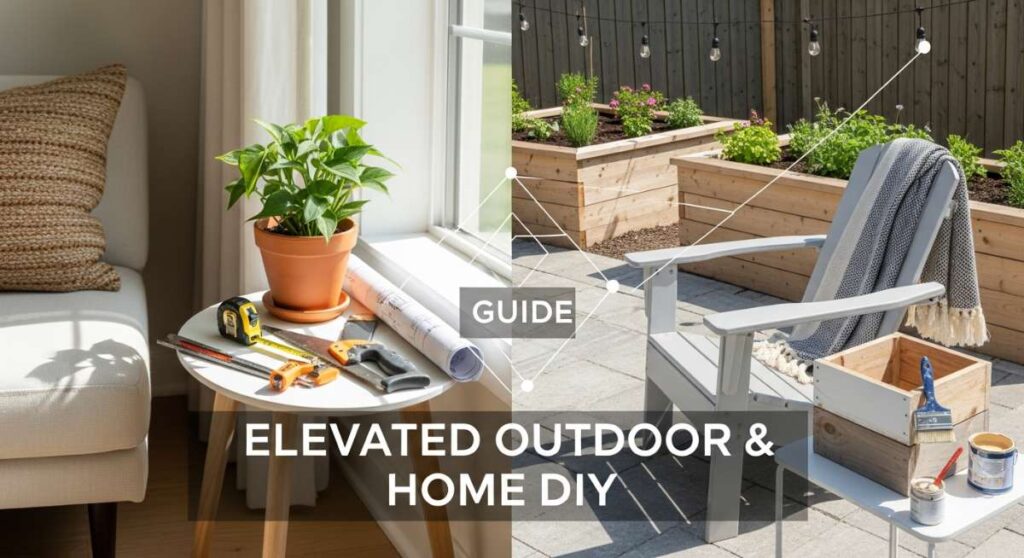
The Modern Maker’s Guide to Chic Home and Garden Upgrades
There is a profound, soul-deep satisfaction that comes from looking at a corner of your home and knowing your own two hands brought that beauty to life. It’s more than just ‘fixing up the place’; it’s about curate-ing a sanctuary that reflects the rhythms of your daily life. Whether it’s the way the golden hour light hits a freshly stenciled patio or the organized hum of a pantry that actually works for your family, these upgrades bridge the gap between a house that functions and a home that inspires.
In this guide, we are diving deep into the art of the ‘elevated DIY.’ We aren’t just looking for quick fixes; we’re looking for those projects that add texture, scent, and a sense of architectural intention to your space. From the tactile crunch of river rocks underfoot to the nostalgic glow of a retro-inspired teen retreat, let’s explore how to transform the everyday into something extraordinary.
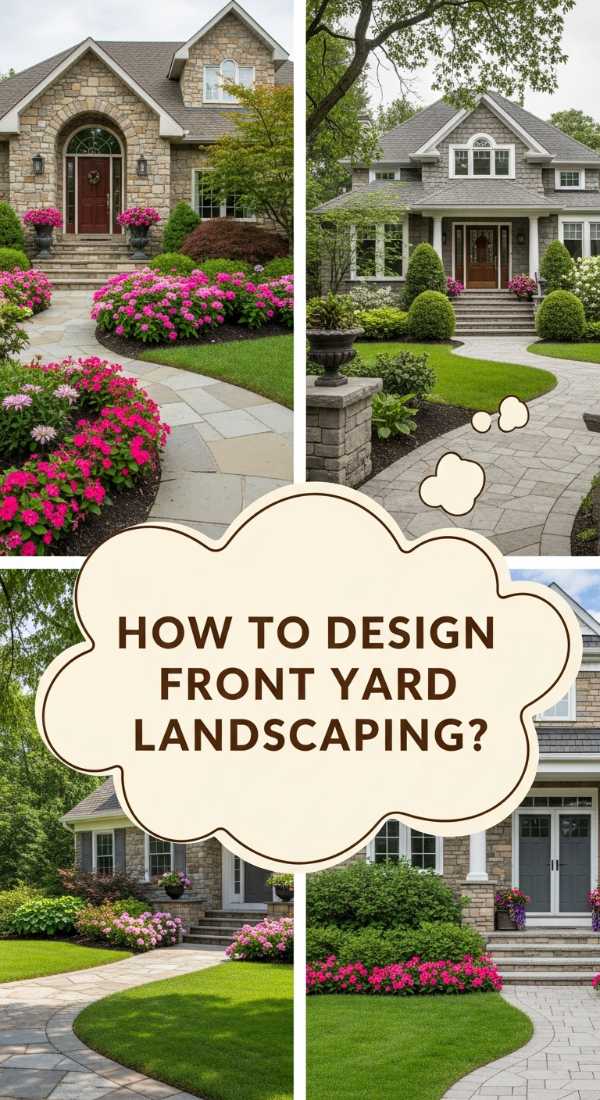
How to Design Front Yard Landscaping for Maximum Curb Appeal
Why we love this
There is nothing quite like pulling into your driveway and being greeted by a curated explosion of color and texture. We love this approach because it balances the structured elegance of boxwoods with the whimsical, airy movement of ornamental grasses and lavender. As the breeze catches the purple blooms, the scent of fresh earth and floral sweetness wafts toward your front door, creating an immediate sense of peace. The visual depth created by layering heights—tall perennials in the back and low-creeping groundcovers in the front—gives your home a high-end, professional feel that evolves beautifully with every season.
Essential Elements:
- A mix of evergreen shrubs for year-round structure
- Perennial flowers (Lavender, Coneflowers, or Salvia)
- Hardscaping accents like large boulders or solar-powered path lights
- Premium dark mulch or pea gravel
- Edging material (steel or stone) to define the beds
How to make it
- Begin by sketching a ‘zone map’ of your front yard, identifying sun exposure and drainage areas; this prevents planting shade-lovers in a scorching hot spot.
- Edge your beds using a sharp spade or a power edger, creating deep, clean lines that separate the lawn from the planting area for that crisp, professional look.
- Amend the soil with high-quality compost and organic matter, tilling it to a depth of 6-8 inches to ensure roots can breathe and expand easily.
- Arrange your plants while they are still in their nursery pots, stepping back to the sidewalk to check the visual balance and ensuring the ‘thriller, filler, and spiller’ hierarchy is maintained.
- Dig holes twice as wide as the root ball, backfill with a mix of native soil and starter fertilizer, and press firmly to remove air pockets.
- Apply a 3-inch layer of hardwood mulch, keeping it away from the base of stems to prevent rot, and soak each plant thoroughly until the water penetrates deep into the root zone.
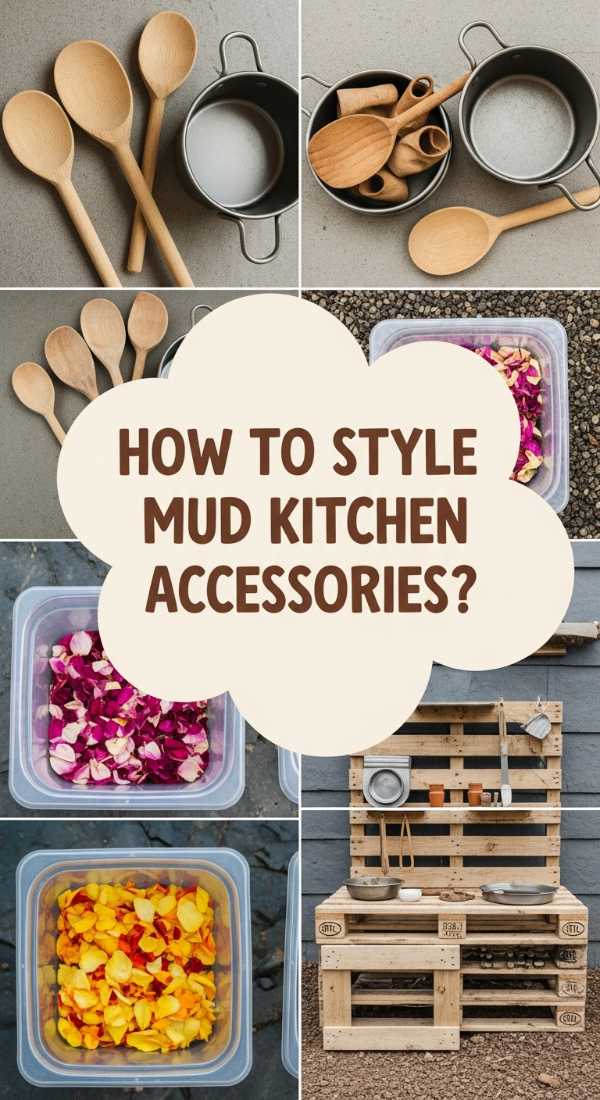
How to Style Mud Kitchen Accessories for Creative Outdoor Play
Why we love this
A mud kitchen is a magical portal to sensory-rich childhood play, where the boundaries between nature and imagination blur. We love the tactile experience of cool, squishy mud paired with the clink of stainless steel ladles and the earthy aroma of crushed mint and rosemary ‘soups.’ By styling these kitchens with aesthetic, functional accessories, you turn a messy corner of the garden into a beautiful woodland bistro. The sight of little hands meticulously ‘seasoning’ a mud pie with dried flower petals and smooth river stones is pure, nostalgic joy, grounding children in the textures of the natural world.
Essential Elements:
- Weather-resistant wooden mud kitchen station
- Stainless steel pots, pans, and mixing bowls
- Wooden spoons, whisks, and ladles
- Glass jars filled with ‘potions’ (dried lavender, marigold heads, pinecones)
- A functional water pump or a chalkboard menu sign
How to make it
- Select a level, shaded spot in the yard where ‘messy play’ is encouraged, preferably near a water source for easy refills.
- Treat the wooden kitchen frame with a clear, non-toxic outdoor sealant to protect it from moisture while maintaining the natural grain’s beauty.
- Install hooks and small shelves at child-height; use these to hang metal utensils that will develop a charming patina over time.
- Curate a ‘Sensory Bar’ by filling jars with natural elements of different textures—think rough bark, smooth stones, and brittle dried leaves.
- Introduce ‘active’ tools like a functional hand pump or a large beverage dispenser filled with water, teaching kids the mechanics of pouring and flow.
- Finalize the styling with a small chalkboard where ‘specials of the day’ can be written, encouraging literacy alongside tactile exploration.
How to Build a Private Hot Tub Area for Total Backyard Relaxation

Why we love this
Imagine stepping out into your backyard as the sun sets, the air cooling while steam rises in soft, ethereal swirls from a bubbling tub. We love this project because it creates a private sanctuary that feels miles away from the chaos of daily life. The scent of cedar fencing mixed with the clean, ozone aroma of swirling water creates an instant spa atmosphere. Enclosed by lush greenery or sleek slat screens, this area becomes a tactile haven—the warmth of the water against the skin, the soft glow of Edison bulbs overhead, and the absolute stillness of a hidden retreat.
Essential Elements:
- Level concrete pad or reinforced deck base
- Privacy screens (cedar slats or tall bamboo)
- Dimmable outdoor string lights or solar lanterns
- Weatherproof storage bench for towels and robes
- Potted palms or tall grasses for natural screening
How to make it
- Clear and level the site meticulously; a hot tub is incredibly heavy when filled, so a 4-inch reinforced concrete pad or a professionally braced deck is non-negotiable.
- Install vertical privacy screens around at least two sides of the tub, using 1×2 cedar slats with 1/2 inch gaps to allow airflow while blocking sightlines.
- Run an outdoor-rated electrical line (ensure a certified electrician handles the final hookup) to power the tub and any ambient lighting.
- Build or place a wide ‘landing step’ or a small deck platform around the base to make entering and exiting the tub feel seamless and safe.
- Layer in soft elements: hang heavy-duty hooks for plush robes and place a weatherproof rug at the entry to keep the tub water debris-free.
- Finish the perimeter with large planters filled with tall, wispy foliage like Miscanthus or Bamboo to create a living wall of green.
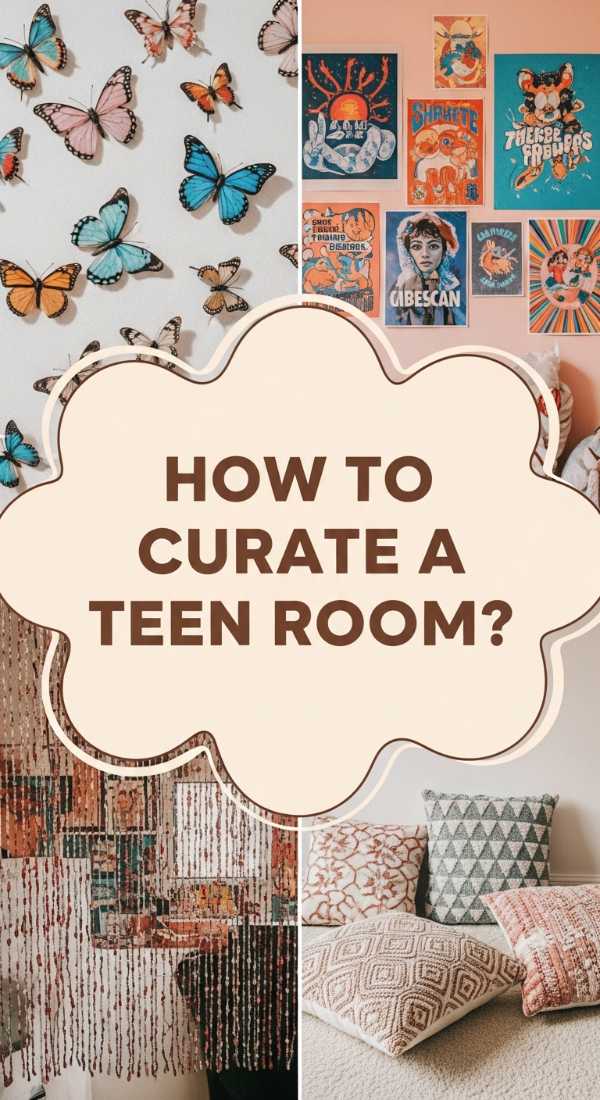
How to Curate a Teen Room for a Retro Aesthetic Vibe
Why we love this
There is something undeniably cool about the blend of 70s warmth and 90s grit that defines the modern retro aesthetic. We love how this style allows for total self-expression through a curated mix of textures—think the fuzzy pile of a checkerboard rug against the sleek, cool surface of a vinyl record player. The room becomes a multi-sensory experience with the warm, amber glow of a sunset lamp and the nostalgic crackle of an LP. It’s a space that feels lived-in, soulful, and deeply personal, providing a cozy cocoon for creativity and late-night venting sessions.
Essential Elements:
- Record player and a curated vinyl display
- Sunset lamp or neon signage
- Textured textiles (velvet floor pillows, crocheted throws)
- Retro-inspired artwork and vintage-style posters
- A mix of mid-century modern furniture and thrifted finds
How to make it
- Start with a neutral base on the walls—warm whites or soft ochre—to let the vibrant retro accessories take center stage without overwhelming the eye.
- Define the ‘Chill Zone’ by layering a high-pile shag or patterned rug over existing flooring, creating a soft landing spot for lounging.
- Install floating shelves or a dedicated crate system to display a vinyl collection, treating the album art as primary wall decor.
- Layer lighting by combining a primary ceiling fixture with a ‘sunset lamp’ directed at a corner and a neon sign for a moody, after-hours glow.
- Mix furniture eras; pair a modern desk with a thrifted velvet armchair or a chrome side table to achieve that ‘curated over time’ look.
- Add ‘living’ textures like a pothos plant in a macrame hanger or a lava lamp to introduce movement and an organic feel to the space.
How to Create Rock Flower Beds for a Low Maintenance Entryway
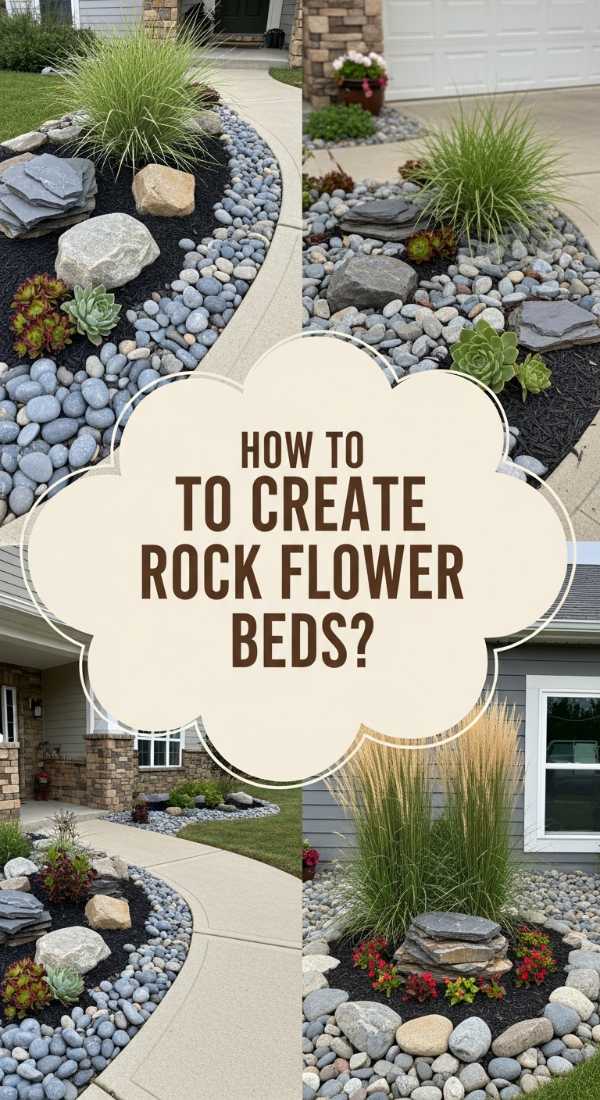
Why we love this
Rock flower beds are the ultimate marriage of rugged durability and modern sophistication. We love the crisp, clean contrast between the smooth, variegated grays of river stones and the vibrant, waxy green leaves of succulents or structural shrubs. There’s a satisfying ‘crunch’ to the walk-up and a visual neatness that traditional mulch just can’t match. In the heat of summer, the stones hold their color perfectly, and after a rain, they glisten with a refreshed, earthy intensity. It’s a sensory win that requires almost zero upkeep, leaving you more time to actually enjoy your entryway.
Essential Elements:
- River rocks, Mexican beach pebbles, or crushed slate
- Heavy-duty landscape fabric (pro-grade)
- Drought-tolerant plants (Agave, Lavender, or Boxwoods)
- Steel or heavy-duty plastic edging
- Landscape staples
How to make it
- Excavate the area to a depth of about 3-4 inches, removing all weeds and grass to ensure a perfectly flat and debris-free foundation.
- Install a high-quality, woven landscape fabric—not the cheap plastic kind—and secure it tightly with landscape staples every 12 inches to prevent any future weed growth.
- Cut ‘X’ shapes into the fabric only where you intend to plant, tucking the flaps under and digging your holes directly through the openings.
- Set your plants into the ground, ensuring the crown of the plant is slightly above the soil level to prevent moisture from pooling and causing rot.
- Pour your chosen rocks over the fabric, starting from the center and working outward, maintaining a consistent depth of 2-3 inches for total coverage.
- Hose down the rocks once the project is finished to wash away any dust and reveal the natural colors and textures of the stone.
How to Apply a Concrete Stencil for a Designer Patio Makeover
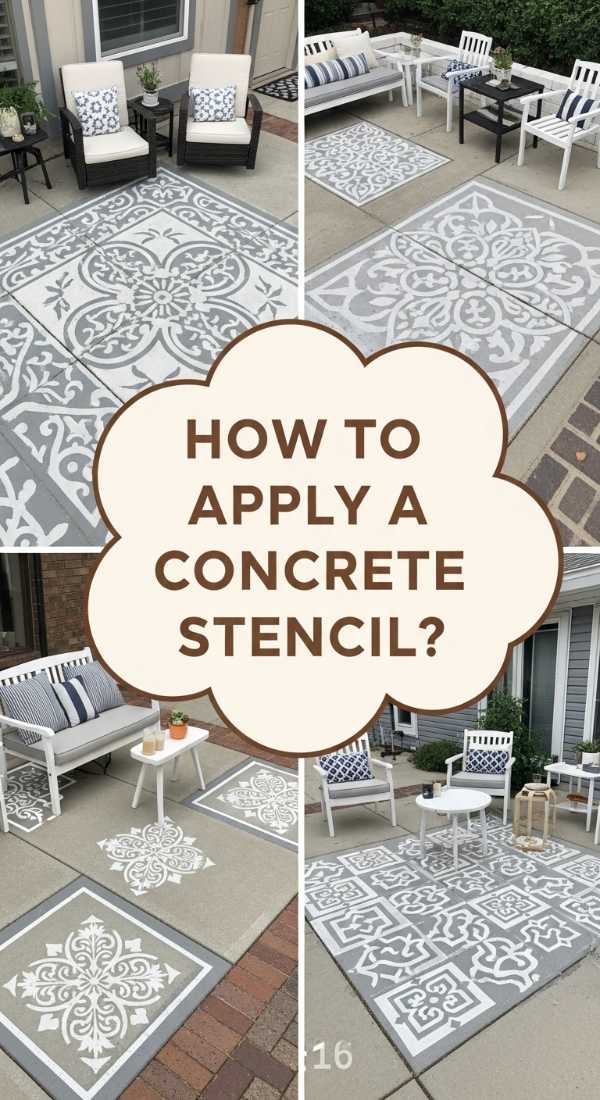
Why we love this
Transforming a tired, gray concrete slab into a Mediterranean-inspired masterpiece feels like absolute magic. We love concrete stenciling because it adds an architectural rhythm to your outdoor living space without the cost of real tile. The matte finish of the concrete stain feels cool and smooth under bare feet, and the intricate patterns provide a visual anchor for your patio furniture. There’s a wonderful tactile quality to the finished surface—a subtle grip that feels substantial and high-end. It turns a boring backyard floor into a conversation piece that smells of fresh air and summer nights.
Essential Elements:
- Large-scale floor stencil (Mandala or Moroccan patterns)
- Outdoor concrete paint or opaque stain
- High-density foam roller and stencil brushes
- Painter’s tape and a chalk line
- Clear concrete sealer (anti-slip additive recommended)
How to make it
- Power wash the concrete surface thoroughly to remove all dirt, oil, and old sealers; the surface must be ‘bone dry’ and slightly porous for the paint to bond.
- Find the exact center of your patio using a chalk line; starting your stencil from the center ensures the pattern remains symmetrical as it reaches the edges.
- Secure the stencil with painter’s tape and use a ‘dry’ roller technique—loading the roller with paint and then rolling most of it off onto a paper towel to prevent bleeding.
- Apply the paint in light, even layers, using a dabbing motion with a stencil brush in corners where the roller cannot reach.
- Carefully lift the stencil and realign it using the built-in registration marks, repeating the process until the entire surface is covered.
- Allow the paint to cure for 24-48 hours before applying two thin coats of a high-quality concrete sealer to protect the design from UV rays and foot traffic.
How to Master Sidewalk Chalk Designs for Artistic Neighborhood Fun
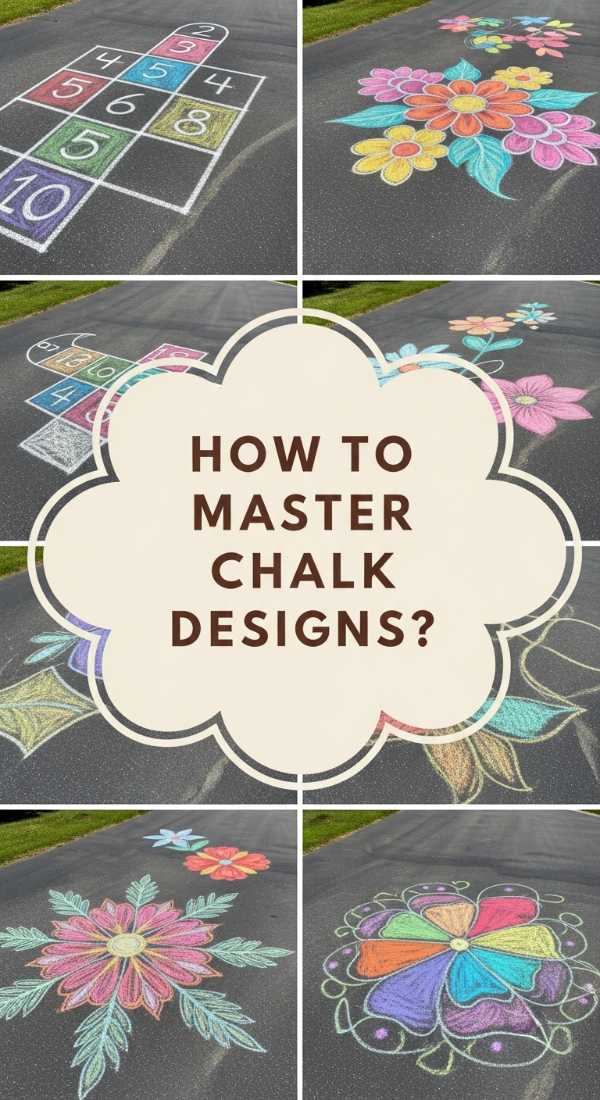
Why we love this
There is a fleeting, ephemeral beauty to sidewalk chalk art that captures the essence of childhood wonder. We love the way the dusty, vibrant pigments transform the rough, gray grit of the pavement into a vivid tapestry. The scent of rain-on-asphalt mixed with the chalky dust takes you right back to elementary school recesses. It’s a community-building activity that encourages neighbors to slow down, smile, and appreciate a splash of temporary brilliance. Seeing a 3D illusion or a bold floral mural emerge from the concrete is a sensory delight for both the artist and the passerby.
Essential Elements:
- High-pigment sidewalk chalk or chalk pastels
- A bucket of water and various paintbrushes
- Knee pads or a foam garden kneeler
- Blending tools (microfiber cloths or old sponges)
- Masking tape for sharp ‘stained glass’ edges
How to make it
- Sweep your ‘canvas’ clean of all pebbles and dust, then use masking tape to create a border or a geometric pattern for a crisp, clean finish.
- Sketch your main outlines lightly with a neutral-colored chalk, focusing on scale and perspective before committing to the bold colors.
- To achieve a ‘painted’ look, dip your chalk into water before drawing; this softens the binder and creates a creamy, saturated texture that hides the grain of the concrete.
- Use a damp sponge or a dry microfiber cloth to blend colors together, creating smooth gradients and shadows that add depth to your design.
- For fine details, use chalk pastels or small brushes dipped in ‘chalk slurry’ (crushed chalk mixed with a tiny bit of water).
- Peel back any masking tape at a 45-degree angle while the chalk is slightly damp to reveal sharp, professional-looking lines.
How to Organize a Realistic Pantry for a Busy Family Kitchen
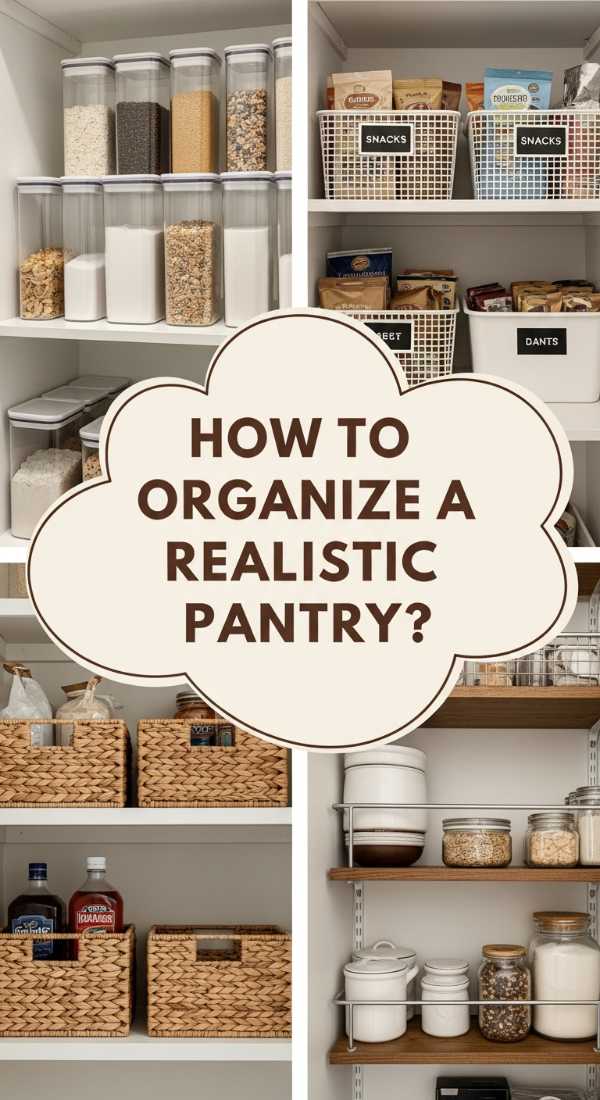
Why we love this
A well-organized pantry is the unsung hero of a peaceful home. We love the visual harmony of uniform glass jars and the rhythmic click of airtight lids that seal in the aroma of roasted coffee and warm cinnamon. This isn’t just about ‘aesthetic’—it’s about the tactile ease of reaching for exactly what you need without a frantic search. The sight of neatly labeled zones and clear bins allows you to see the textures of your grains and pastas, turning everyday chores into a moment of calm. It makes the kitchen feel like a high-end gourmet shop where everything is fresh, accessible, and intentionally placed.
Essential Elements:
- Clear, airtight containers (various sizes)
- Tiered shelving for canned goods
- Woven or wire baskets for ‘bulky’ items
- Uniform labels (minimalist or handwritten style)
- A turntable (Lazy Susan) for oils and vinegars
How to make it
- Empty the entire pantry and categorize every item (e.g., baking, snacks, dinner prep) to understand the volume of each category before buying containers.
- Decant ‘dry’ goods like flour, sugar, and pasta into clear containers; this keeps food fresher and allows you to see at a glance when you’re running low.
- Group ‘like with like’ in bins—put all the kids’ snacks in one low-reaching basket and all the baking supplies in a high-reaching one.
- Use a tiered ‘stadium’ shelf for canned goods so you can see the labels of the back row, preventing the dreaded ‘expired can at the back’ syndrome.
- Place oils, vinegars, and heavy jars on a Lazy Susan in the corner; this maximizes awkward corner space and makes everything accessible with a quick spin.
- Apply consistent, waterproof labels to every bin and jar, ensuring the text is legible and at eye-level for a cohesive and functional finish.
How to Construct a Shed Out of Pallets for Sustainable Storage

Why we love this
Building a pallet shed is the ultimate tribute to sustainable, resourceful DIY. We love the rustic, weathered texture of the reclaimed wood and the earthy, pine-scented atmosphere it creates inside. There’s a raw, architectural honesty in using ‘upcycled’ materials to create something sturdy and functional. The variegated colors of the wood—ranging from silver-gray to deep amber—give the shed a character that a store-bought plastic version could never replicate. It’s a project that feels grounded, purposeful, and perfectly integrated into a natural garden setting.
Essential Elements:
- 15-20 heat-treated (HT) wood pallets
- 4×4 pressure-treated posts for the corners
- Corrugated metal or asphalt shingles for the roof
- Heavy-duty wood screws and galvanized nails
- Reclaimed door and window (optional)
How to make it
- Source only ‘HT’ (Heat Treated) pallets to avoid chemicals; inspect them for structural integrity and remove any protruding nails with a pry bar.
- Level the ground and set 4×4 pressure-treated posts in concrete at the corners to provide a stable, rot-resistant skeleton for the pallet walls.
- Secure the pallets to the corner posts using long wood screws, ‘sandwiching’ two pallets together for extra wall thickness and insulation if desired.
- Construct a simple shed roof frame using 2×4 rafters, ensuring a sufficient ‘pitch’ or slope so that rainwater and snow can slide off easily.
- Install corrugated metal roofing sheets over the rafters, overlapping them by at least two ridges to prevent leaks during heavy storms.
- Sand the exterior of the pallets to remove splinters and apply an oil-based wood stain or a clear UV-protector to enhance the natural grain and longevity.
How to Install a Floating Deck for an Instant Patio Upgrade
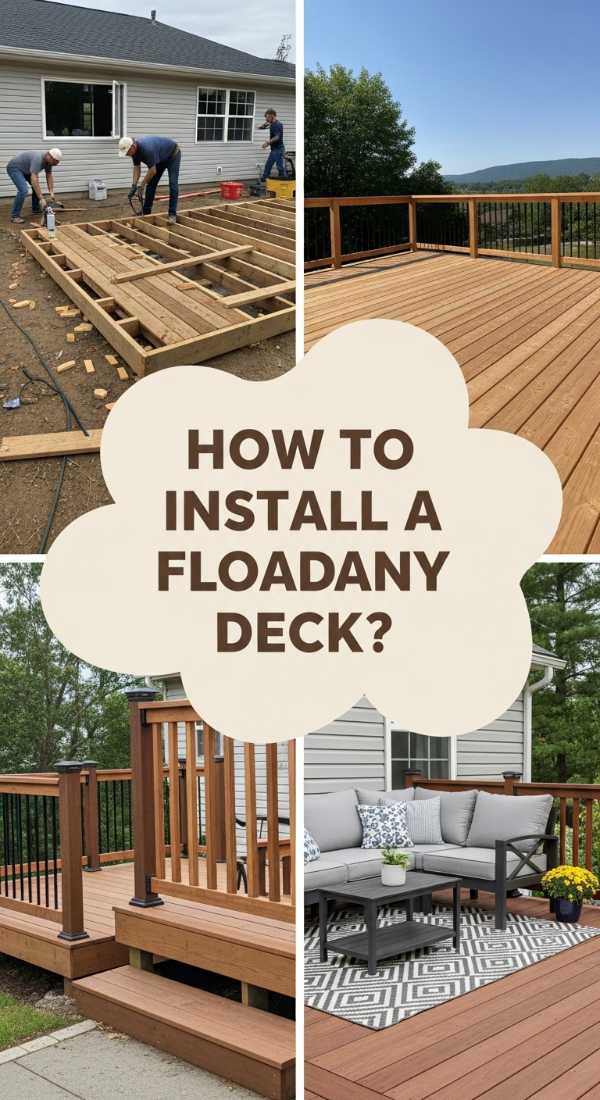
Why we love this
A floating deck is the crown jewel of an elevated backyard. We love the way it defines a space, lifting you just slightly off the ground to create a dedicated ‘island’ of relaxation. The warmth of the sun-baked wood underfoot and the clean, parallel lines of the boards offer a sense of modern architectural order. Whether you’re barefoot with a morning coffee or hosting a sunset dinner, the deck provides a level, stable surface that feels luxurious and intentional. It creates a ‘room without walls’ that smells of cedar and fresh-cut grass, inviting you to linger just a little bit longer outdoors.
Essential Elements:
- Pressure-treated 2×4 or 2×6 joists
- Decking boards (Cedar, Redwood, or Composite)
- Concrete deck blocks (no-dig foundation)
- Hidden deck fasteners or galvanized screws
- Landscape fabric and gravel for the base
How to make it
- Clear the area and lay down heavy-duty landscape fabric topped with a layer of gravel to prevent weed growth and ensure proper drainage under the deck.
- Position concrete deck blocks at the corners and every 3-4 feet in a grid pattern; use a long spirit level to ensure every block is perfectly even with its neighbor.
- Build the outer frame of the deck using pressure-treated joists, checking for squareness by measuring the diagonals (they should be identical).
- Install the internal joists every 16 inches on center, securing them with joist hangers for a rock-solid foundation that won’t bounce or sag.
- Lay your decking boards across the joists, using spacers to maintain a consistent 1/8 inch gap for wood expansion and water drainage.
- Secure the boards using hidden fasteners for a ‘hardware-free’ look, then trim the overhanging edges with a circular saw for a perfectly flush finish.
Creating Your Signature Space
The journey of a Modern Maker is never truly finished, and that’s the beauty of it. Each project you tackle—from the smallest pantry label to the grandest floating deck—adds a layer of your personality to your environment. These upgrades are about more than just resale value; they are about creating a life that feels as good as it looks. So, grab your tools, trust your intuition, and start building the chic, elevated home you’ve always dreamed of.
Frequently Asked Questions
Q: Do I need a permit for a pallet shed or a floating deck?
A: Generally, small floating decks (under a certain square footage and height) and small sheds do not require permits, but you should always check your local building codes as they vary significantly by municipality.
Q: What is the best wood for outdoor DIY projects?
A: Cedar and Redwood are naturally rot-resistant and beautiful, making them top choices. Pressure-treated pine is a more budget-friendly option that also stands up well to the elements if sealed properly.
Q: How do I keep my rock flower beds from getting messy?
A: The key is high-quality landscape fabric and a solid edging material. The edging keeps the rocks in and the grass out, while the fabric prevents weeds from pushing through the stones.