
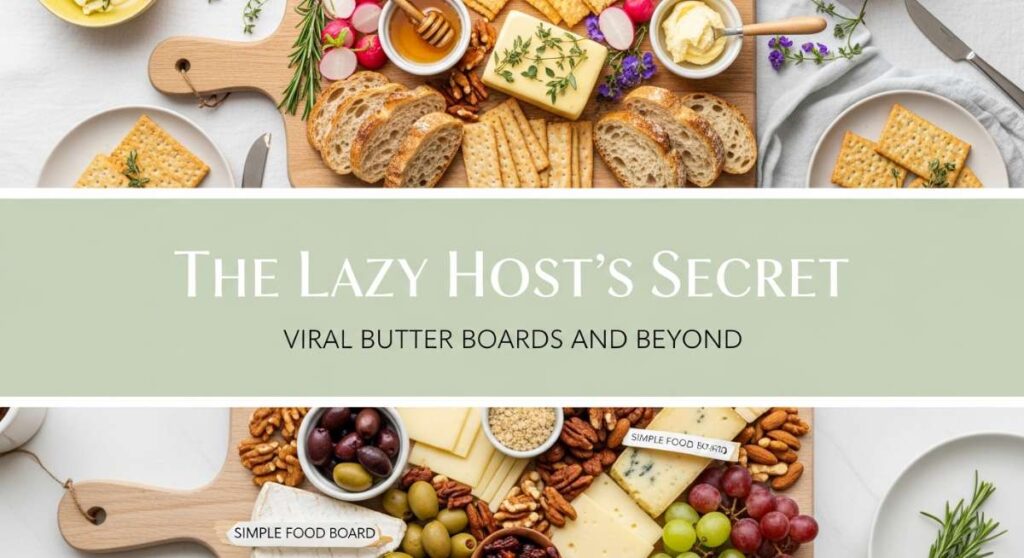
We’ve all been there—the guests are arriving in twenty minutes, the house smells like a frantic mix of scented candles and desperation, and your ‘elaborate appetizer’ plan just went up in smoke. It was during one of these hosting-induced meltdowns that I discovered the magic of the butter board. There is something profoundly communal and inherently relaxing about a beautifully spread board that invites everyone to dig in together, breaking bread quite literally.
Being a ‘lazy host’ isn’t about not caring; it’s about choosing where to spend your energy so you can actually enjoy the people you invited over. This post is a love letter to that philosophy. We are diving deep into the viral food board trend and expanding our horizons into the world of tarts, cakes, and even the business of baking, all while keeping that warm, effortless vibe that makes a house feel like a home.
How to bake fruit tarts?

Why we love this
There is nothing quite like the visual feast of a glazed fruit tart sitting on a sun-drenched patio table. We love this dish because it combines the buttery, shortbread-like snap of a Pâte Sablée with the silky, vanilla-flecked luxury of Crème Pâtissière. The aroma of toasted almond flour and fresh berries fills the kitchen, creating an atmosphere of sophisticated French elegance without requiring a culinary degree. Each bite is a symphony of textures: the crisp crust, the velvety custard, and the bright, acidic pop of fresh raspberries or kiwi.
Ingredients
- 1 1/4 cups All-purpose flour
- 1/2 cup Cold unsalted butter, cubed
- 1/4 cup Powdered sugar
- 1 Egg yolk
- 2 cups Whole milk
- 1/2 cup Granulated sugar
- 4 Egg yolks (for custard)
- 1/4 cup Cornstarch
- 1 tsp Vanilla bean paste
- Assorted fresh fruit (berries, kiwi, mango)
- Apricot preserves for glazing
How to make it
- **Prepare the Crust:** In a food processor, pulse flour and powdered sugar. Add cold butter and pulse until it looks like coarse crumbs. Add the egg yolk and pulse until the dough just starts to clump. Do not overwork it, or the crust will be tough.
- **Chill and Roll:** Press the dough into a disk, wrap in plastic, and chill for 1 hour. On a floured surface, roll it out to 1/8 inch thickness. Press it into a tart pan with a removable bottom, trimming the edges flush.
- **Blind Bake:** Preheat your oven to 375°F (190°C). Line the dough with parchment and pie weights. Bake for 15 minutes, remove weights, and bake for another 10 minutes until golden brown and dry to the touch. Let cool completely.
- **Make the Pastry Cream:** Whisk egg yolks, granulated sugar, and cornstarch in a bowl. In a saucepan, bring milk and vanilla to a simmer. Slowly whisk the hot milk into the egg mixture (tempering), then return everything to the pan. Whisk constantly over medium heat until it thickens into a pudding-like consistency.
- **Assemble:** Spread the cooled pastry cream into the tart shell. Arrange sliced fruit in concentric circles. Melt apricot preserves with a splash of water and brush over the fruit for a professional, high-gloss finish.
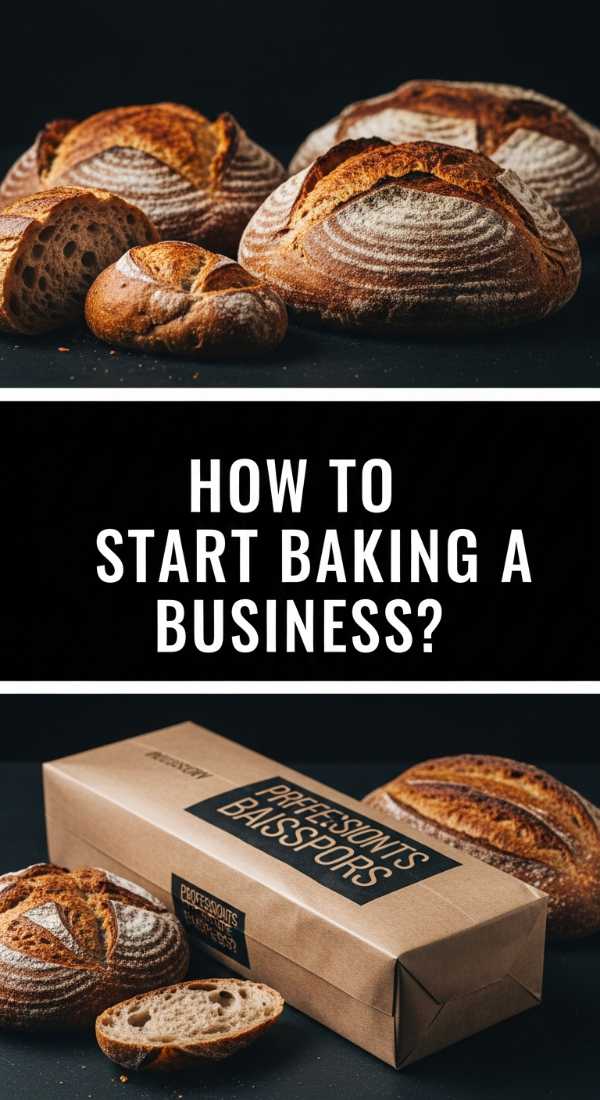
How to start baking business?
Why we love this
The dream of waking up to the smell of fresh sourdough and the hum of a commercial mixer is one many of us share. We love the idea of a baking business because it’s the ultimate way to share your heart with your community. There is a specific kind of magic in seeing a line of people out the door, all waiting for a taste of your signature cinnamon rolls. It’s about more than just flour and water; it’s about building a brand that stands for comfort, quality, and the simple joy of a treat well-made.
Ingredients
- A solid business plan
- Local health department permits
- Commercial-grade oven and mixers
- Brand identity (name, logo, colors)
- A curated menu of 5-10 ‘hero’ products
- Accounting software (like QuickBooks)
- Marketing strategy
How to make it
- **Research and Legalities:** Check your local ‘Cottage Food Laws’ to see if you can start in your home kitchen. If not, scout for a shared commercial kitchen space. Register your business name and obtain an EIN for tax purposes.
- **Perfect Your Menu:** Don’t try to bake everything. Choose 5 items you do better than anyone else. Standardize these recipes by weight (grams) to ensure consistency every single time someone buys from you.
- **Branding:** Create a visual identity that matches your vibe. Is it rustic and organic? Or sleek and modern? Use these colors and logos across your packaging and social media to create a recognizable ‘face’ for your business.
- **Financial Setup:** Set up a separate business bank account. Calculate your food cost per item meticulously—don’t forget to include the cost of packaging, electricity, and your own labor time.
- **Launch Strategy:** Start small at local farmers’ markets to test your products and get direct feedback. Use these interactions to build an email list and a social media following before committing to a physical storefront.
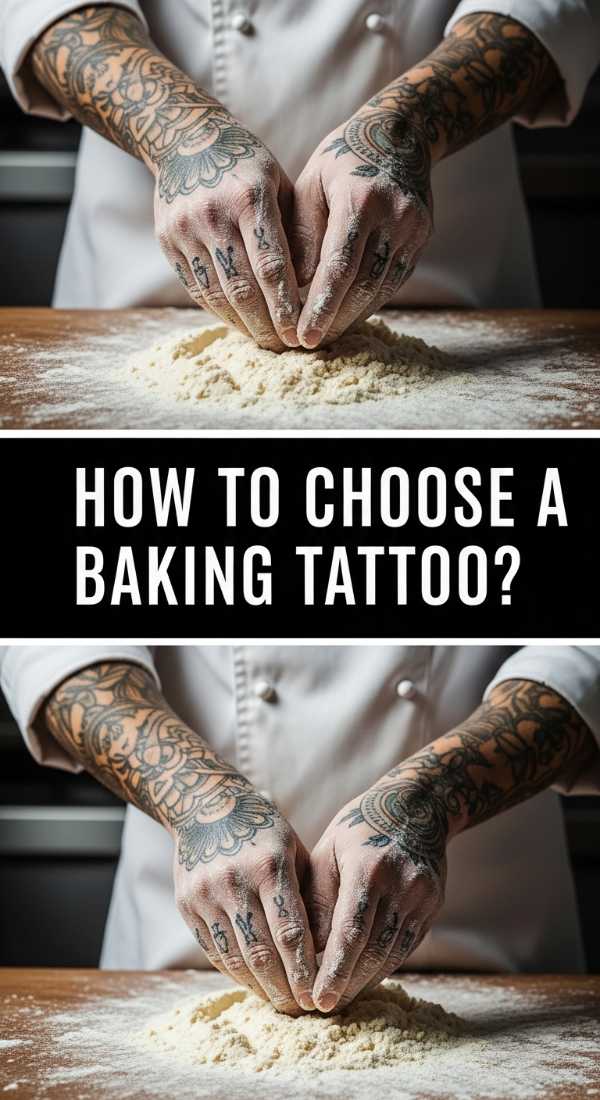
How to choose baking tattoo?
Why we love this
A baking tattoo is a permanent badge of honor, a way to wear your passion on your sleeve—quite literally. We love these designs because they bridge the gap between grit and sweetness. Whether it’s a delicate fine-line whisk or a bold, traditional-style stand mixer, these tattoos tell a story of early mornings, burnt fingertips, and the persistence required to master the art of pastry. It’s a visual reminder of the creative fire that keeps you in the kitchen even when the flour is everywhere.
Ingredients
- Portfolio of tattoo artists (Instagram is best)
- Reference photos of baking tools
- Meaningful botanical elements (wheat, vanilla orchids)
- A clear idea of placement (forearm, wrist, ankle)
- Aftercare supplies (fragrance-free lotion)
How to make it
- **Identify Your Style:** Decide if you want ‘American Traditional’ (bold lines, bright colors), ‘Fine Line’ (delicate and minimalist), or ‘Realism.’ Look for artists who specialize specifically in the style you crave.
- **Gather References:** Collect images of the specific tools that mean the most to you. Maybe it’s the specific vintage rolling pin your grandmother used, or a stalk of harvested wheat. High-quality photos help the artist tremendously.
- **Consider Placement:** Think about your daily life. If you are a professional baker, remember that tattoos on hands or fingers may fade faster due to frequent washing and flour abrasion. Forearms are a classic choice for visibility.
- **Consultation:** Book a meeting with your artist. Discuss size, detail level, and how the design will flow with the natural curves of your body. Listen to their advice on what will ‘age’ well over time.
- **The Session and Aftercare:** On the day, stay hydrated and eat a full meal. Once the tattoo is done, follow the artist’s aftercare instructions perfectly—usually involving gentle washing and keeping it moisturized—to ensure the ink stays vibrant.
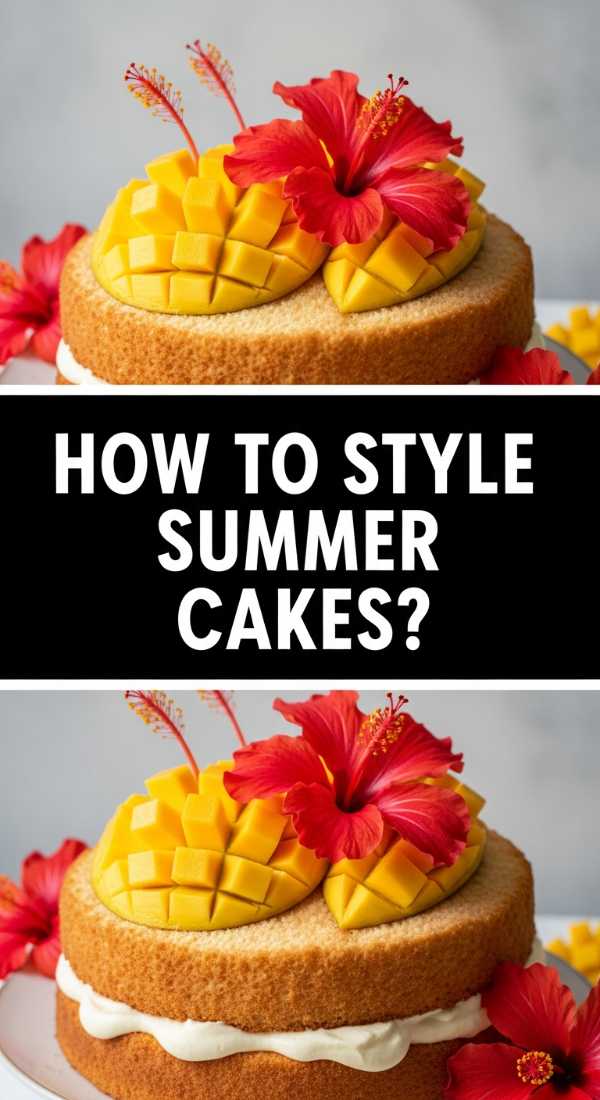
How to style summer cakes?
Why we love this
Summer cakes should look like they were decorated by a whimsical garden fairy who happened to have a palette knife. We love this styling approach because it embraces imperfection and the abundance of nature. Imagine a tall, lemon-infused sponge dripping with a light elderflower glaze, adorned with wild chamomile and sliced peaches. The aroma of fresh citrus and blooming florals makes the cake feel alive, turning a simple dessert into the centerpiece of a golden-hour garden party.
Ingredients
- Chilled, frosted layer cake
- Fresh, edible flowers (pansies, marigolds, lavender)
- Fresh seasonal fruit
- Offset spatula and palette knives
- Natural elements (honeycomb, herbs)
- Rotating cake stand
How to make it
- **The Foundation:** Start with a ‘Naked’ or ‘Semi-Naked’ frosting style. Use an offset spatula to apply a thin layer of buttercream, then scrape most of it off so the cake layers peek through. This creates an organic, rustic look.
- **Fruit Placement:** Don’t just place fruit on top. Slice strawberries or peaches thinly and press them into the sides of the frosting. Use different shapes—whole berries, halved cherries, and sliced citrus—to create visual interest and height.
- **Adding Florals:** Ensure your flowers are food-safe and pesticide-free. Cut the stems short and insert them into the cake in small clusters rather than scattering them evenly. Think about ‘movement’—place them so they seem to be cascading down one side.
- **Texture and Garnish:** Use a palette knife to create ‘swooshes’ in the frosting on top. Add a drizzle of honey or a sprinkle of flaky sea salt to catch the light and add a sophisticated flavor profile.
- **Lighting and Presentation:** Place the cake on a wooden or marble pedestal. Style it in natural, indirect sunlight to make the colors of the fruit and flowers pop without melting the frosting.
How to make peach cobbler?
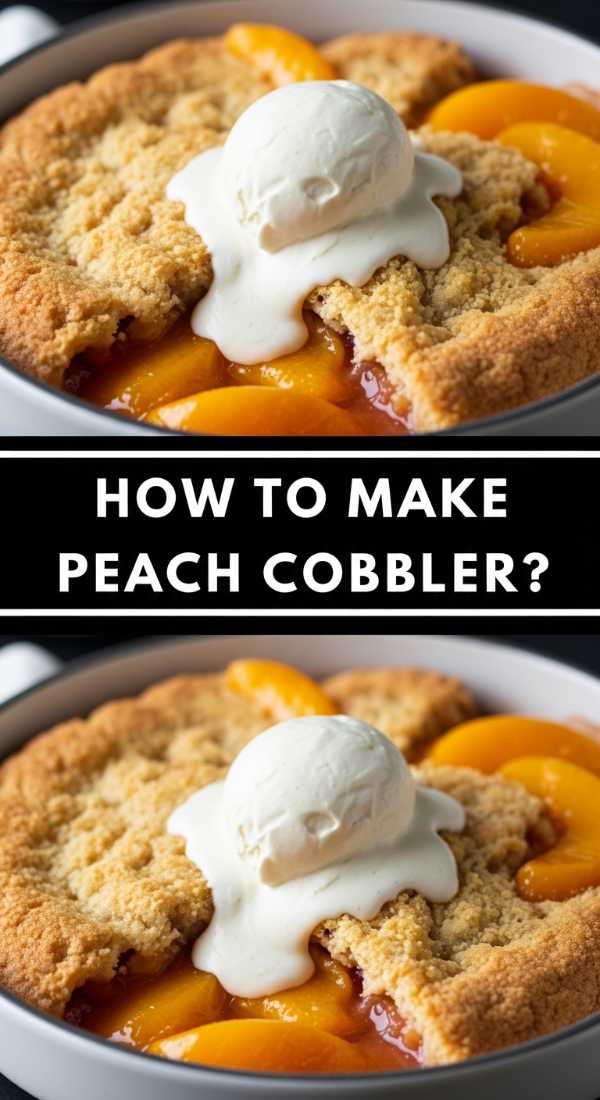
Why we love this
Peach cobbler is the culinary equivalent of a warm hug on a Sunday evening. We love it for the contrast between the bubbling, molten fruit filling and the sugar-crusted, biscuit-like topping that soaks up all those golden juices. As it bakes, the scent of cinnamon and caramelized peaches wafts through the house, acting like a magnet for everyone in the vicinity. It’s best served warm, with a scoop of vanilla bean ice cream slowly melting into the nooks and crannies of the cobbler top.
Ingredients
- 6-8 Fresh peaches, sliced
- 1/2 cup Brown sugar
- 1 tsp Cinnamon
- 1 tbsp Lemon juice
- 2 cups All-purpose flour
- 1/2 cup Granulated sugar
- 1 tbsp Baking powder
- 1/2 cup Cold butter, grated
- 3/4 cup Buttermilk
- Turbinado sugar for topping
How to make it
- **Macerate the Peaches:** Toss the sliced peaches with brown sugar, cinnamon, and lemon juice in a large baking dish. Let them sit for 20 minutes while you prep the topping; this allows the natural juices to create a thick, syrupy base.
- **Mix the Dough:** In a large bowl, whisk flour, granulated sugar, and baking powder. Using a pastry cutter or your fingers, work the cold, grated butter into the flour until it resembles pea-sized crumbles.
- **Add Liquid:** Gently fold in the buttermilk until a shaggy dough forms. Do not overmix! The lumps are what make the biscuit topping light and fluffy.
- **Dollop and Bake:** Spoon large mounds of the dough over the peach mixture, leaving some gaps for the steam and bubbles to escape. Sprinkle the tops of the dough generously with Turbinado sugar for a crunch.
- **The Visual Cue:** Bake at 375°F (190°C) for 40-45 minutes. You are looking for the fruit juices to be bubbling aggressively in the center and the biscuit tops to be a deep, golden brown. Let rest for 15 minutes before serving to let the sauce thicken.
How to market baking business?
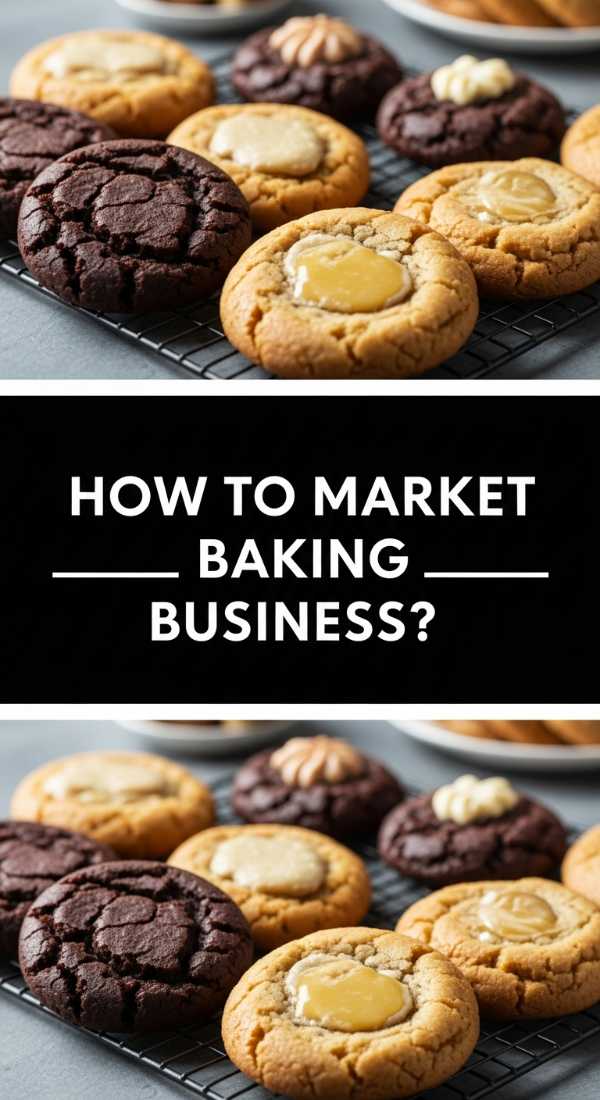
Why we love this
Marketing your baking business is the bridge that connects your oven to your customer’s table. We love this phase because it allows you to showcase the personality behind the pastry. It’s about more than just selling a cookie; it’s about selling the story of why you bake. When you master marketing, you create a community of ‘super-fans’ who don’t just buy your bread—they celebrate your successes and wait eagerly for your next seasonal drop. It turns a job into a movement.
Ingredients
- High-quality smartphone camera
- Consistent brand voice
- Social media accounts (Instagram, TikTok)
- Email marketing platform (Mailchimp/Flodesk)
- Partnership mindset
- Local SEO keywords
How to make it
- **Visual Storytelling:** People eat with their eyes first. Invest time in learning basic food photography. Use natural light and capture ‘the drip,’ ‘the crumb,’ and ‘the steam.’ Post behind-the-scenes videos of you kneading dough or frosting a cake to build trust.
- **Leverage Local SEO:** Claim your ‘Google My Business’ profile. Use local hashtags (e.g., #AustinBakery) and ensure your location and hours are incredibly easy to find on every platform.
- **Collaborate:** Partner with a local coffee shop that doesn’t have a kitchen. Offer a ‘Pop-Up’ Saturday. This introduces your brand to their established customer base and creates a ‘limited edition’ feel.
- **Build an Email List:** Social media algorithms change, but an inbox is direct access. Offer a small discount or a ‘secret recipe’ in exchange for an email signup. Send weekly updates on what’s coming out of the oven.
- **Engagement over Broadcast:** Don’t just post and ghost. Reply to every comment, share customer photos of your treats, and ask your followers for their input on new flavors. This builds a loyal community that feels invested in your brand.
How to bake strawberry pie?
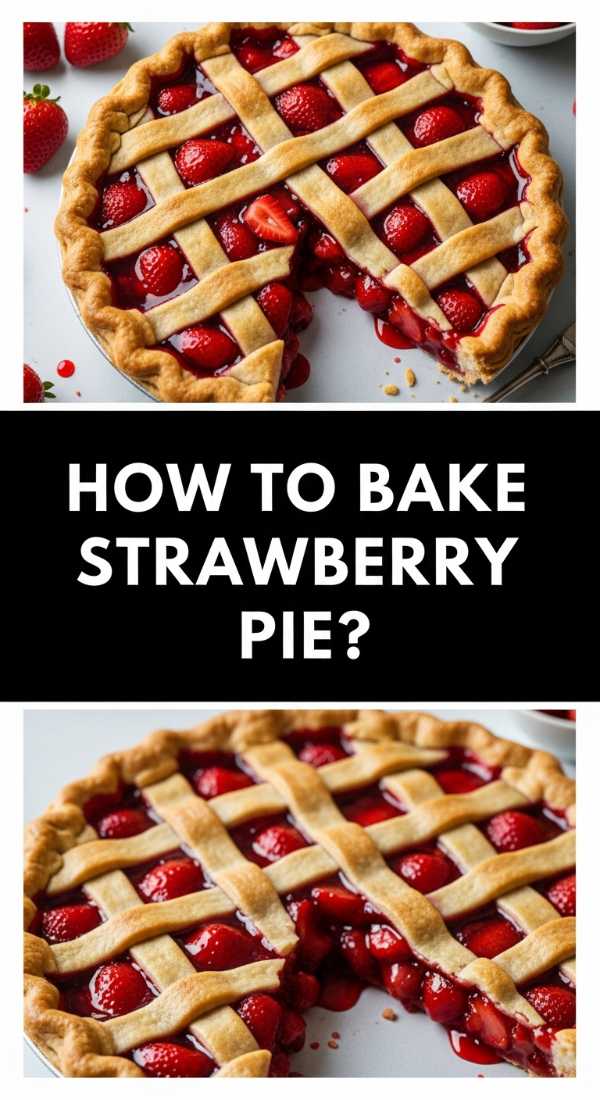
Why we love this
The strawberry pie is the undisputed queen of the summer picnic. We love it because it represents the peak of the season—bright, red, and unapologetically sweet. A perfect strawberry pie features a flaky, lard or butter-based crust that shatters upon impact, revealing a vibrant filling that isn’t too runny or too starchy. The aroma of roasted strawberries is deep and jammy, providing a nostalgic trip back to childhood summers spent picking berries in the sun.
Ingredients
- 2 1/2 cups All-purpose flour
- 1 cup Cold unsalted butter, cubed
- 1 tsp Salt
- 6-8 tbsp Ice water
- 6 cups Fresh strawberries, halved
- 3/4 cup Granulated sugar
- 1/4 cup Cornstarch
- 1 tbsp Lemon zest
- 1 Egg (for wash)
How to make it
- **Master the Crust:** Mix flour and salt. Cut in butter until chunks are the size of peas. Add ice water one tablespoon at a time until the dough just holds together. Divide into two disks, wrap, and chill for at least 2 hours.
- **Prep the Filling:** In a large bowl, toss strawberries with sugar, cornstarch, and lemon zest. Let them macerate for 15 minutes. The cornstarch is vital—it will bind with the berry juices to create a sliceable filling.
- **Roll and Fill:** Roll out the bottom crust and fit it into a pie plate. Pour in the strawberry mixture. Roll out the second disk and cut into strips for a lattice top, or place it whole and cut large steam vents.
- **The Egg Wash:** Whisk an egg with a splash of water and brush it over the entire top crust. Sprinkle with a little extra sugar. This is the secret to that glossy, deep-mahogany color.
- **Bake with Patience:** Bake at 400°F (200°C) for 20 minutes, then reduce to 375°F (190°C) and bake for another 40 minutes. The filling MUST be bubbling through the vents to ensure the cornstarch has activated. Cool completely (4-6 hours) before slicing.
How to master macaron shells?
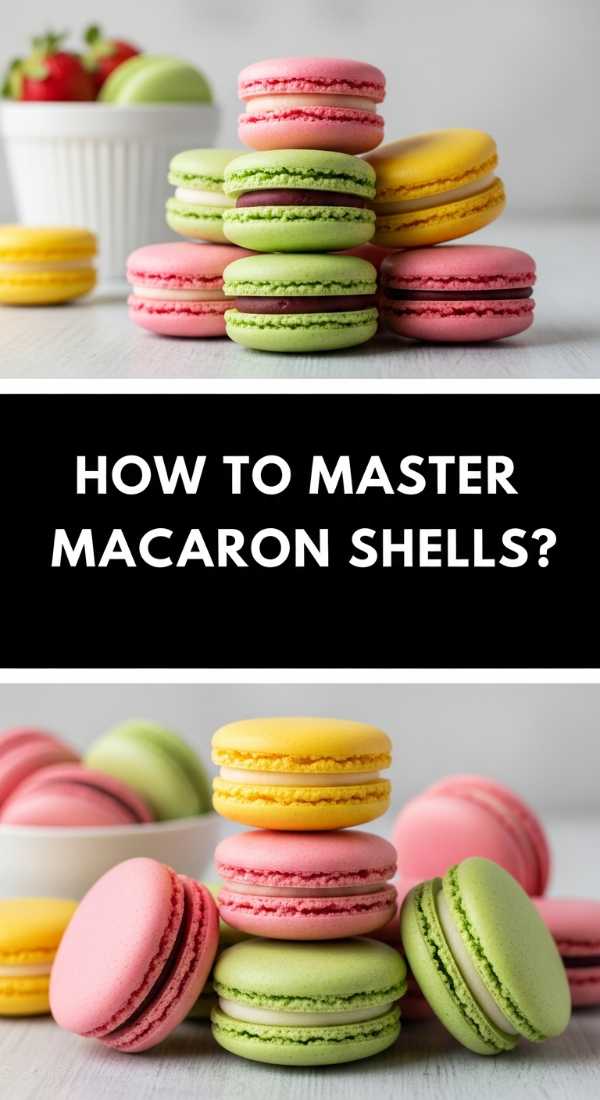
Why we love this
Mastering the macaron shell is the ultimate ‘level up’ for any home baker. We love the challenge because it requires absolute presence and precision. When you finally pull a tray out of the oven and see those perfect, ruffled ‘feet’ and smooth, eggshell-thin tops, the feeling of accomplishment is unparalleled. They are delicate, almond-scented canvases that can be filled with anything from salty caramel to tangy passionfruit curd, making them the crown jewel of any dessert board.
Ingredients
- 100g Aged egg whites (room temp)
- 90g Granulated sugar
- 130g Super-fine almond flour
- 130g Powdered sugar
- Pinch of cream of tartar
- Gel food coloring (optional)
How to make it
- **The Sifting:** Pulse almond flour and powdered sugar in a food processor, then sift through a fine-mesh strainer. Discard any large almond chunks. This ensures your shells are perfectly smooth.
- **The Meringue:** Whisk egg whites and cream of tartar to soft peaks. Gradually add granulated sugar and whisk until you reach stiff, glossy peaks. You should be able to hold the bowl upside down without anything moving.
- **The Macaronage:** Fold the dry ingredients into the meringue. This is the ‘make or break’ step. Fold gently until the batter flows like ‘slow lava’ or ‘ribbons.’ When you lift the spatula, you should be able to draw a figure-eight without the batter breaking.
- **Piping and Resting:** Pipe 1.5-inch circles onto a silicone mat. Tap the tray firmly on the counter 5 times to pop air bubbles. Let the shells sit at room temperature for 30-60 minutes until a ‘skin’ forms and they are no longer tacky to the touch.
- **The Bake:** Bake at 300°F (150°C) for 14-16 minutes. Do not open the door! Test for doneness by gently touching a shell; if it doesn’t wobble on its feet, it’s done. Let cool completely before peeling off the mat.
How to create baking tattoo?
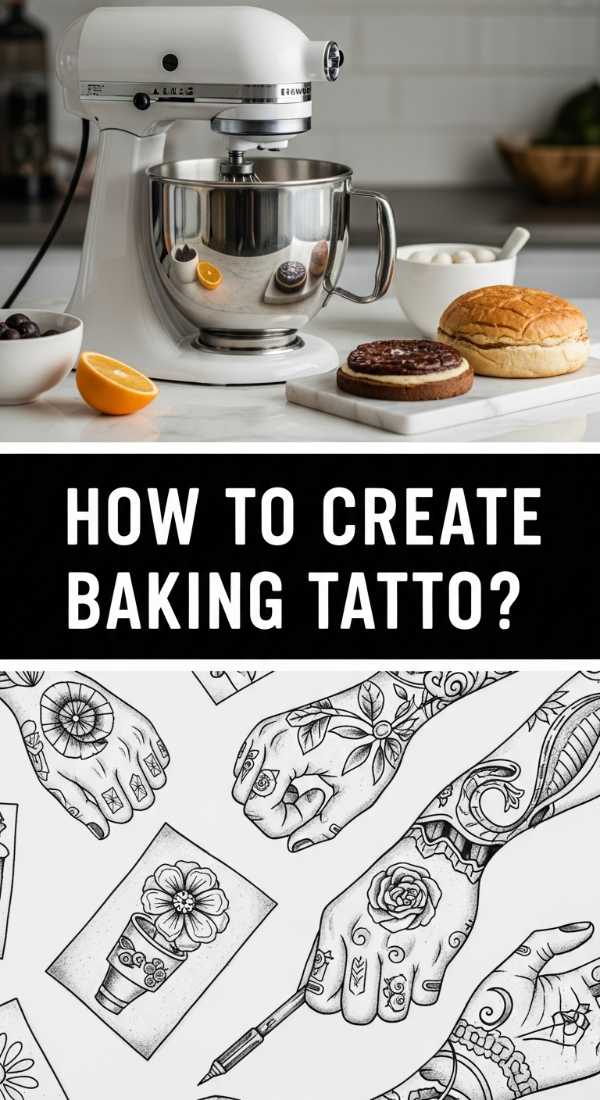
Why we love this
Creating a baking tattoo design is a deeply personal creative process. We love this because it allows you to combine your culinary identity with visual art. It’s not just about a generic whisk; it’s about the specific way a sprig of rosemary curls or how the word ‘Knead’ looks in your favorite font. Designing your own ink ensures that your body art is a one-of-a-kind reflection of your journey as a maker, serving as a permanent source of inspiration every time you look down at your hands.
Ingredients
- Sketchbook or digital drawing tablet (Procreate)
- Reference mood board (Pinterest)
- Symbolism dictionary (to find hidden meanings)
- A collaborative tattoo artist
- Tracing paper
How to make it
- **Concept Development:** Start by listing the three things that define your baking style. Is it heritage grains? Delicate pastry? Sourdough? Use these as your core visual elements.
- **Composition:** Experiment with how the items overlap. A rolling pin looks great as a horizontal base, while a flowering vanilla bean can wrap around it to add softness and organic lines.
- **Symbolism:** Look for deeper meanings. For example, a bee represents community and hard work, while a sprig of sage represents wisdom. Incorporating these adds layers of story to your design.
- **Drafting:** Draw multiple versions. Focus on ‘line weight’—do you want the design to be bold and chunky or thin and ethereal? If you aren’t an artist, create a collage of different elements to show your tattooist.
- **Artist Collaboration:** Take your drafts to your chosen artist. They will help you ‘simplify’ the design so it ages well. Too much detail in a small space can blur over time, so trust their professional eye for longevity.
How to bake lemon bars?
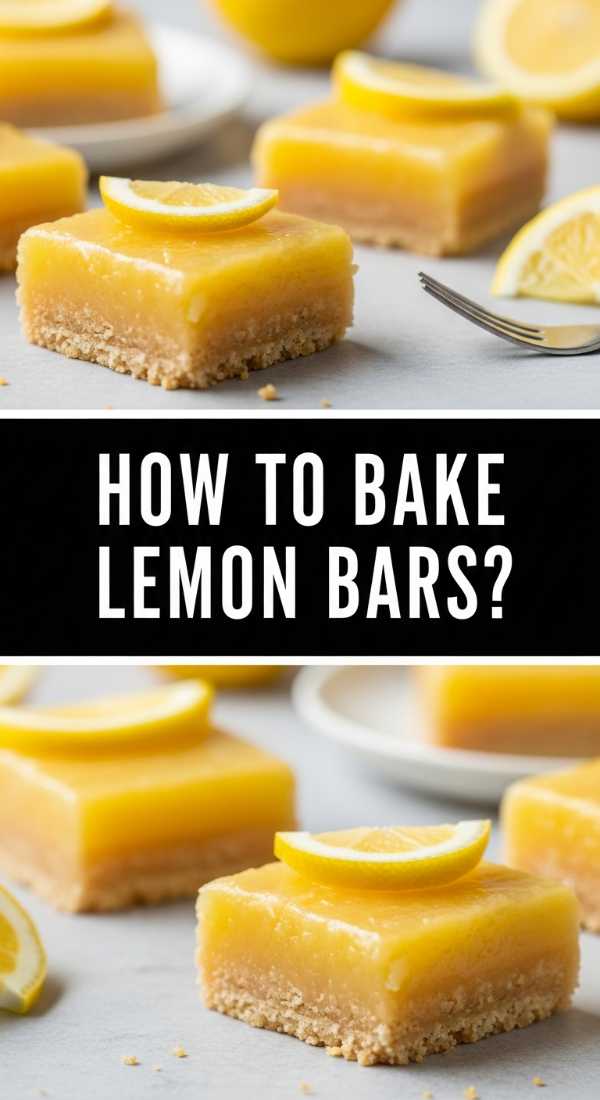
Why we love this
Lemon bars are the bright, zesty antidote to heavy chocolate desserts. We love them because they strike a perfect balance between the buttery, crumbly shortbread base and the intense, pucker-inducing lemon curd top. When you bite into one, the immediate hit of citrus aroma clears the palate and leaves you feeling refreshed. They are incredibly easy to share, looking beautiful when cut into sharp squares and dusted with a snowy layer of powdered sugar that looks like a spring frost.
Ingredients
- 1 cup Butter, softened
- 1/2 cup Granulated sugar (for crust)
- 2 cups All-purpose flour (divided)
- 1/4 tsp Salt
- 4 Large eggs
- 1 1/2 cups Granulated sugar (for filling)
- 2/3 cup Fresh lemon juice
- 1 tbsp Lemon zest
- Powdered sugar for dusting
How to make it
- **The Shortbread Base:** Cream together softened butter and 1/2 cup sugar. Stir in 1 1/2 cups of flour and salt. Press this dough firmly into the bottom of a greased 9×13 inch baking pan.
- **The Pre-Bake:** Bake the crust at 350°F (175°C) for 15-20 minutes until it is lightly golden. This ‘sets’ the base so it doesn’t get soggy when you add the liquid filling.
- **The Lemon Custard:** While the crust is hot, whisk together eggs, 1 1/2 cups sugar, lemon juice, lemon zest, and the remaining 1/2 cup of flour. Whisk until very smooth with no flour lumps.
- **The Final Bake:** Pour the lemon mixture over the hot crust. Return to the oven for 20-25 minutes. The center should be set and no longer jiggly, but not browned.
- **Cooling and Finishing:** This is the hard part—let them cool completely on the counter, then refrigerate for at least 2 hours. This ensures clean cuts. Sift a generous layer of powdered sugar over the top just before serving.
The Art of the Effortless Host
Whether you are spreading softened butter over a wooden board and topping it with flaky salt and honey, or meticulously sifting almond flour for a batch of macarons, the goal is always the same: connection. Hosting doesn’t have to be a performance; it’s an invitation into your world. By mastering a few of these ‘hero’ dishes and embracing the ‘lazy host’ secrets, you can spend less time stressed in the kitchen and more time making memories with the people you love. Now, go grab a board and some butter, and let the magic happen.
Frequently Asked Questions
- Can I make a butter board ahead of time? It’s best to assemble it about 30 minutes before guests arrive. If you make it too early, the butter can lose its soft texture or the toppings can make it oily.
- What can I use instead of butter for a board? Goat cheese, cream cheese, hummus, or even a thick Greek yogurt make excellent viral board bases!
- Why do my lemon bars always turn out runny? Usually, this is because they weren’t baked quite long enough or weren’t allowed to fully chill in the fridge. The chilling time is essential for the curd to set.
- How long do macaron shells last? You can store unfilled shells in an airtight container at room temperature for 2 days, or freeze them for up to 3 months!