

We’ve all been there—scrolling through Pinterest for hours, feeling that weird mix of inspiration and utter exhaustion at the thought of actually cooking something that looks that good. You want the aesthetic, the ‘viral’ board vibes, but your energy level is currently at ‘ordered takeout twice this week.’ Trust me, I get it. My kitchen has seen more cereal bowls than gourmet platters lately, but I’ve discovered a secret: creating a show-stopping food board doesn’t require a culinary degree; it just requires a few reliable, high-impact recipes that look and taste like you spent all day in the kitchen.
This is my Lazy Girl’s Guide to conquering the kitchen without losing your mind. We are talking about dishes that have that ‘wow’ factor—the kind of stuff that makes people stop scrolling and ask for the recipe immediately. Whether you’re hosting a last-minute brunch or just want to treat yourself to a beautiful weeknight spread, these recipes are the building blocks of a viral food board. Let’s dive into the cozy, the crispy, and the sweet secrets that will make you the star of the feed.
How to bake soft cookies?

Why we love this
There is nothing quite like the aroma of brown butter and vanilla wafting through the house to make it feel like a sanctuary. These cookies are the ultimate comfort food, featuring a delicate balance between a slightly crisp, golden edge and a center that is so soft it practically melts on your tongue. The texture is chewy and dense, studded with pools of molten dark chocolate that create a beautiful, messy contrast against the pale dough. It’s the kind of treat that demands a cold glass of milk and a cozy blanket, providing a sensory experience that is both nostalgic and deeply indulgent.
Ingredients
- 2 1/4 cups all-purpose flour
- 1 tsp baking soda
- 1/2 tsp sea salt
- 1 cup unsalted butter, softened
- 3/4 cup granulated sugar
- 3/4 cup packed brown sugar
- 1 tsp vanilla extract
- 2 large eggs
- 2 cups semi-sweet chocolate chips
How to make it
- Begin by whisking your dry ingredients (flour, baking soda, and salt) in a medium bowl until perfectly combined to ensure even rising.
- In a large stand mixer, cream together the softened butter and both sugars on medium-high speed for at least 3-5 minutes. Look for the mixture to turn a pale, fluffy ivory color; this aeration is key to a soft texture.
- Add the eggs one at a time, beating well after each addition, followed by the vanilla extract. Scrape down the sides of the bowl to ensure no streaks of butter remain.
- Turn the mixer to the lowest setting and gradually add the dry ingredients. Mix only until the white streaks of flour disappear—overmixing at this stage will develop gluten and make the cookies tough.
- Fold in the chocolate chips by hand using a spatula. Chill the dough in the refrigerator for at least 30 minutes; this prevents the cookies from spreading too thin in the oven.
- Preheat your oven to 350°F (175°C). Scoop rounded tablespoons onto a parchment-lined baking sheet, spacing them 2 inches apart.
- Bake for 9-11 minutes. The visual cue for doneness is when the edges are just barely golden, but the centers still look slightly soft and underbaked. They will firm up on the hot pan outside the oven.
How to make lemon tarts?

Why we love this
A lemon tart is like a slice of pure sunshine on a plate, offering a vibrant pop of color that instantly elevates any food board. The crust is buttery and short, snapping with a satisfying crunch that gives way to a silky, luscious lemon curd filling. The aroma is bright and citrusy, awakening the senses and providing a refreshing palate cleanser after a heavy meal. It’s the perfect balance of tart and sweet, with a velvety mouthfeel that feels incredibly sophisticated despite the simplicity of its components.
Ingredients
- 1 1/2 cups all-purpose flour
- 1/2 cup powdered sugar
- 3/4 cup cold unsalted butter, cubed
- 4 large eggs
- 1 1/2 cups granulated sugar
- 2 tbsp lemon zest
- 3/4 cup fresh lemon juice
- 1/2 cup all-purpose flour (for filling)
How to make it
- To create the shortbread crust, pulse 1.5 cups flour and powdered sugar in a food processor. Add the cold, cubed butter and pulse until the mixture resembles coarse crumbs.
- Press the mixture firmly into the bottom and sides of a 9-inch tart pan with a removable bottom. Use the flat bottom of a measuring cup to ensure the base is even and compact.
- Bake the crust at 350°F (175°C) for 15-20 minutes or until it is lightly browned. Let it cool slightly while you prepare the filling.
- In a large bowl, whisk together the eggs, granulated sugar, lemon zest, and lemon juice until the sugar is dissolved and the mixture is frothy.
- Sift the remaining 1/2 cup of flour over the liquid mixture and whisk gently until no lumps remain. This flour helps stabilize the curd so it sets perfectly.
- Pour the lemon mixture over the warm crust and return to the oven for 20-25 minutes.
- The tart is done when the edges are set and the center only has a slight, gelatinous jiggle when the pan is nudged. Allow to cool completely at room temperature, then refrigerate for at least 2 hours before slicing.
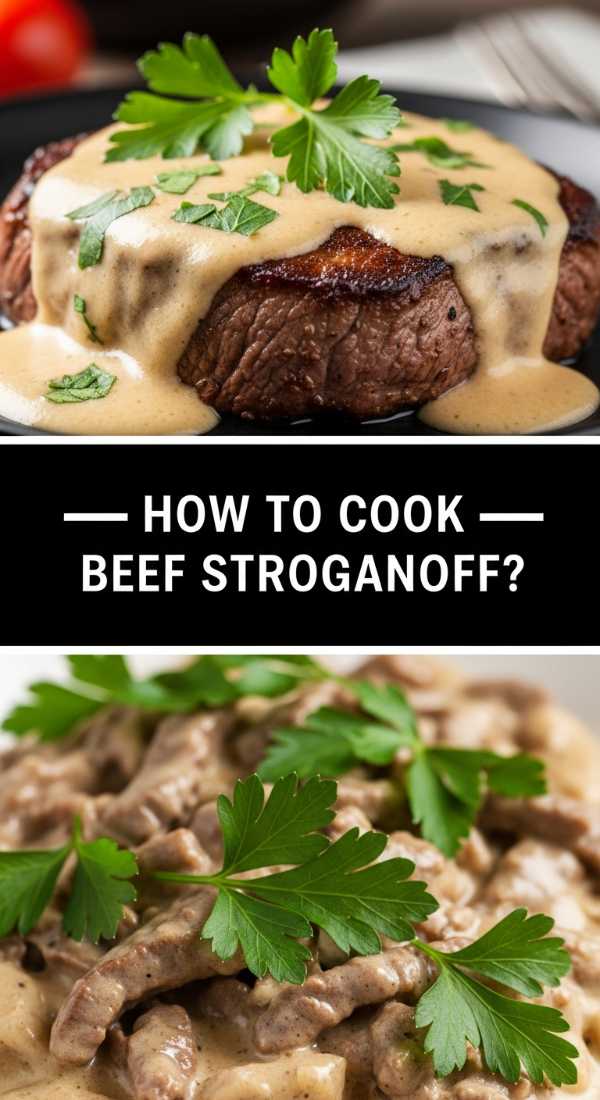
How to cook beef stroganoff?
Why we love this
Beef stroganoff is the epitome of rustic elegance, bringing a deep, umami-rich flavor profile to your table. The tender strips of beef are seared to perfection, creating a savory crust that locks in the juices, while the mushrooms add an earthy, meaty texture. The sauce is the real star here—creamy, tangy, and laced with the sharpness of Dijon mustard and the richness of sour cream. It’s a warm, enveloping dish that feels like a big hug, especially when served over a bed of buttery egg noodles that soak up every last drop of the decadent gravy.
Ingredients
- 1.5 lbs sirloin steak, sliced into thin strips
- 1 lb cremini mushrooms, sliced
- 1 large onion, diced
- 2 cloves garlic, minced
- 2 cups beef broth
- 1 tbsp Dijon mustard
- 1 cup sour cream
- 3 tbsp all-purpose flour
- 2 tbsp butter
- Fresh parsley for garnish
How to make it
- Season the beef strips generously with salt and pepper. In a large skillet over high heat, melt 1 tablespoon of butter. Sear the beef in batches to avoid crowding the pan; you want a deep brown crust, which should take about 2 minutes per side. Remove the beef and set aside.
- In the same pan, add the remaining butter and sauté the mushrooms until they release their moisture and turn golden brown. Add the onions and cook until translucent.
- Stir in the minced garlic and cook for 30 seconds until fragrant. Sprinkle the flour over the vegetables and stir constantly for 1 minute to cook out the raw flour taste.
- Slowly pour in the beef broth while whisking to prevent lumps. Bring the mixture to a simmer over medium heat and let it thicken for about 5 minutes.
- Stir in the Dijon mustard and return the beef (and any juices) to the pan.
- Reduce the heat to low. This is critical: do not boil the sauce once the sour cream is added or it will curdle. Stir in the sour cream until the sauce is smooth and velvety.
- Taste for seasoning and serve immediately over egg noodles, garnished with a generous sprinkle of fresh parsley.
How to make fluffy pancakes?

Why we love this
There is a specific kind of magic in a stack of pancakes that are so light and airy they feel like edible clouds. These aren’t your typical flat flapjacks; they are tall, thick, and possess a gentle sweetness that pairs perfectly with the saltiness of melted butter. The exterior has a micro-thin, golden-brown crust that yields to a steaming, porous interior designed to trap pools of maple syrup. The aroma of sizzling batter on a griddle is the universal signal for a slow, beautiful morning, making this the ultimate centerpiece for a breakfast food board.
Ingredients
- 1 1/2 cups all-purpose flour
- 3 1/2 tsp baking powder
- 1 tsp salt
- 1 tbsp white sugar
- 1 1/4 cups milk
- 1 egg
- 3 tbsp butter, melted
- 1 tsp vanilla extract
How to make it
- In a large bowl, sift together the flour, baking powder, salt, and sugar. Sifting is essential for achieving that viral, lump-free fluffiness.
- In a separate jug, whisk the milk, egg, melted butter, and vanilla. Make sure your milk isn’t ice-cold, or it will resolidify the melted butter into small chunks.
- Make a well in the center of the dry ingredients and pour in the wet mixture. Use a wire whisk to combine them. Important: Stop as soon as the flour is incorporated. A few small lumps are perfectly fine; overmixing will result in rubbery pancakes.
- Let the batter rest for 5-10 minutes. This allows the baking powder to activate and the gluten to relax, which ensures a higher rise.
- Heat a non-stick griddle or frying pan over medium heat. Lightly grease with a tiny bit of butter or oil.
- Pour about 1/4 cup of batter for each pancake. Watch for the “bubble cue”: when bubbles form on the surface and the edges look matte and set, it’s time to flip.
- Flip carefully and cook for another 1-2 minutes until the other side is golden brown. Serve stacked high with a pat of butter on top.
How to bake fudgy brownies?

Why we love this
The perfect fudgy brownie is a masterclass in chocolate intensity, offering a dense, moist interior that is almost truffle-like in consistency. Unlike cakey brownies, these are heavy on the cocoa and butter, creating a rich mouthfeel that lingers. The top should have that iconic, paper-thin crackle crust that shatters when you bite into it, providing a delicate textural contrast to the gooey center. Every bite is a deep dive into dark chocolate heaven, making these an irresistible addition to any dessert board that needs a touch of decadence.
Ingredients
- 1 cup unsalted butter, melted
- 2 cups granulated sugar
- 4 large eggs
- 1 tbsp vanilla extract
- 3/4 cup cocoa powder (Dutch-processed for richness)
- 1 cup all-purpose flour
- 1/2 tsp salt
- 1 cup dark chocolate chunks
How to make it
- Preheat your oven to 325°F (165°C). Line an 8×8 inch baking pan with parchment paper, leaving an overhang on the sides for easy removal.
- In a large bowl, combine the melted butter and sugar. Whisk vigorously by hand for about 2 minutes; this helps create that coveted shiny, crackly top.
- Add the eggs one at a time, whisking well after each addition until the batter looks glossy. Stir in the vanilla extract.
- Sift the cocoa powder, flour, and salt into the wet ingredients. Using a rubber spatula, fold the dry ingredients in gently. Do not overmix; stop when no dry streaks remain.
- Gently fold in the chocolate chunks. The chunks provide pockets of melted chocolate that enhance the fudgy texture.
- Pour the batter into the prepared pan and smooth the top with your spatula.
- Bake for 35-40 minutes. To check for doneness, insert a toothpick; it should come out with a few moist crumbs attached. If it comes out clean, they are overbaked; if it’s liquid, they need more time. Let them cool completely in the pan to allow the structure to set before slicing.
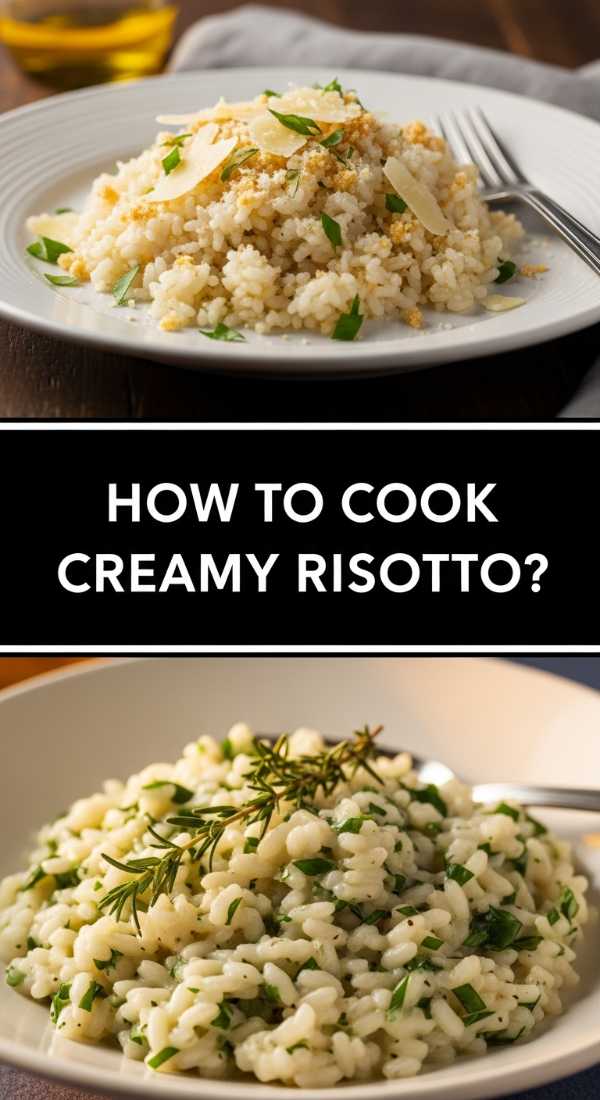
How to cook creamy risotto?
Why we love this
Risotto is the ultimate slow-food luxury, a dish that feels like a labor of love because of the patient stirring it requires. The result is a bowl of Arborio rice that has released its starches to create a naturally creamy, velvety sauce without needing any actual cream. Each grain of rice remains distinct but is suspended in a rich, savory liquid infused with white wine, parmesan, and aromatics. It’s warm, sophisticated, and has a gentle, flowy consistency—often described by chefs as “all’onda” (like a wave)—that looks stunning when plated on a board.
Ingredients
- 1.5 cups Arborio rice
- 5 cups chicken or vegetable broth, kept warm
- 1/2 cup dry white wine (like Pinot Grigio)
- 2 tbsp butter
- 1 tbsp olive oil
- 1 small onion, finely minced
- 1/2 cup freshly grated Parmesan cheese
- Fresh thyme or parsley
How to make it
- Keep your broth in a small saucepan over low heat. It must be warm when added to the rice to maintain a consistent cooking temperature.
- In a wide, heavy-bottomed skillet, heat the olive oil and 1 tablespoon of butter over medium heat. Sauté the minced onion until soft and translucent, about 5 minutes.
- Add the Arborio rice to the skillet. Stir constantly for 2-3 minutes to “toast” the rice. The edges should look translucent while the center remains white. This step is vital for a nutty flavor.
- Pour in the white wine and stir until it has been completely absorbed by the rice.
- Add one ladle of warm broth to the rice. Stir frequently. Wait until the liquid is almost entirely absorbed before adding the next ladle. This constant movement rubs the rice grains together, releasing the starch that creates the creaminess.
- Continue this process for about 18-22 minutes. Taste the rice regularly; it should be “al dente”—tender but with a slight firm bite in the center.
- Once the rice is cooked, remove from heat. Stir in the remaining tablespoon of butter and the Parmesan cheese. Cover for 2 minutes to let it rest. If it’s too thick, add a tiny splash of broth before serving to achieve that perfect wavy texture.
How to roast crispy chicken?

Why we love this
There is something fundamentally satisfying about a perfectly roasted chicken with skin so crispy it crackles when touched. The contrast between the salty, herb-rubbed exterior and the incredibly juicy, tender meat inside is what culinary dreams are made of. As it roasts, the fat renders out, basting the meat and creating a savory aroma that fills the entire home with warmth. It’s a versatile centerpiece that brings a sense of abundance and wholesomeness to a food board, especially when surrounded by roasted root vegetables that have carmelized in the chicken drippings.
Ingredients
- 1 whole chicken (approx. 4 lbs)
- 2 tbsp olive oil
- 2 tbsp softened butter
- 1 tbsp kosher salt
- 1 tsp cracked black pepper
- 4 cloves garlic, smashed
- 1 lemon, halved
- Fresh herbs (rosemary, thyme, sage)
How to make it
- Remove the chicken from the fridge 30 minutes before cooking. Use paper towels to pat the skin completely dry. Moisture is the enemy of crispiness; the drier the skin, the better the result.
- Preheat your oven to 425°F (220°C). High heat is necessary to render the fat quickly and crisp the skin.
- Stuff the cavity of the chicken with the lemon halves, smashed garlic, and a bundle of fresh herbs. This infuses the meat with flavor from the inside out.
- Rub the softened butter under the skin of the breasts, then coat the entire outside of the chicken with olive oil. Season aggressively with salt and pepper.
- Place the chicken breast-side up in a roasting pan or a heavy cast-iron skillet. Tuck the wing tips under the body to prevent burning.
- Roast for 60-75 minutes. The visual cue is a deep golden-brown skin. Use a meat thermometer to check the thickest part of the thigh; it should read 165°F (74°C).
- Crucial step: Let the chicken rest for at least 15 minutes before carving. This allows the juices to redistribute, ensuring the meat stays moist when sliced.
How to bake foccacia bread?

Why we love this
Focaccia is perhaps the most photogenic bread in existence, with its deep dimples and golden, oil-slicked crust. The texture is a delightful mix of a fried, crispy bottom and a soft, pillowy, honeycomb-like interior. The scent of rosemary and sea salt baking into the dough is intoxicating, evoking images of a rustic Italian bakery. It’s incredibly rewarding to make because it’s forgiving and allows for so much creativity—you can decorate the top with herbs and veggies like a canvas, making it a viral sensation for any aesthetic food board.
Ingredients
- 4 cups all-purpose flour
- 2 tsp sea salt
- 2 1/4 tsp instant yeast
- 2 cups warm water
- 1/2 cup extra virgin olive oil, divided
- Fresh rosemary sprigs
- Flaky sea salt (Maldon)
How to make it
- In a large bowl, whisk together the flour, salt, and instant yeast. Pour in the warm water and stir with a wooden spoon until a sticky dough ball forms. No kneading is required!
- Pour 2 tablespoons of olive oil into a clean bowl, place the dough inside, and turn to coat. Cover with plastic wrap and let it rise in a warm spot for 1.5 to 2 hours, or until doubled in size.
- Generously grease a 9×13 inch baking pan with olive oil. Transfer the dough to the pan. Do not force it to the corners yet; let it rest for 20 minutes to relax the gluten.
- Gently stretch the dough to the edges of the pan. Cover again and let rise for another 45 minutes until it looks bubbly and puffed.
- Preheat your oven to 425°F (220°C). Now for the fun part: oil your fingers and press them straight down into the dough to create deep dimples all over the surface.
- Drizzle the remaining olive oil over the top, letting it pool in the dimples. Sprinkle with fresh rosemary and flaky sea salt.
- Bake for 20-25 minutes until the top is a deep golden brown. Immediately transfer to a wire rack so the bottom stays crispy.
How to make steamed dumplings?

Why we love this
Steamed dumplings are like little parcels of joy, offering a delicate, translucent wrapper that hides a savory, punchy filling. The texture is unique—soft and slightly chewy on the outside, with a burst of juicy, seasoned meat or vegetables on the inside. When you lift the lid of a bamboo steamer, the cloud of ginger and scallion-scented steam is purely therapeutic. They are perfect for sharing, encouraging a communal eating experience that is both fun and deeply satisfying, especially when paired with a glossy, spicy dipping sauce.
Ingredients
- 1 pack round gyoza or dumpling wrappers
- 1 lb ground pork or finely chopped mushrooms
- 2 cups shredded cabbage
- 2 green onions, minced
- 1 tbsp grated ginger
- 1 tbsp soy sauce
- 1 tsp sesame oil
- 1/2 tsp white pepper
How to make it
- In a large bowl, mix your protein (pork or mushrooms) with the shredded cabbage, green onions, ginger, soy sauce, sesame oil, and white pepper. Mix vigorously in one direction until the filling becomes slightly tacky/pasty.
- Prepare a small bowl of water. Place a wrapper in your palm and put 1 teaspoon of filling in the center. Don’t overfill, or they will burst during steaming.
- Wet the edge of the wrapper with your finger. Fold the wrapper in half and pleat the edges to seal. Ensure there are no air bubbles trapped inside.
- Line a steamer basket (bamboo or metal) with parchment paper or large cabbage leaves to prevent the dumplings from sticking to the bottom.
- Arrange the dumplings in the steamer, ensuring they don’t touch each other.
- Bring an inch of water to a boil in a wok or large pan. Place the steamer basket over the boiling water.
- Cover and steam on medium-high heat for 8-10 minutes. The wrappers should look translucent and feel firm to the touch when done. Serve immediately with a side of chili oil and black vinegar.
How to cook vegetable curry?

Why we love this
A vibrant vegetable curry is a feast for both the eyes and the soul, boasting a kaleidoscope of colors from turmeric, emerald spinach, and bright red peppers. The sauce is a complex masterpiece—creamy coconut milk infused with toasted spices like cumin, coriander, and garam masala that provide a slow-building, comforting heat. The vegetables are cooked just until tender, retaining their individual textures while being bathed in a rich, aromatic gravy. It’s a healthy, hearty dish that brings a sense of global flair and incredible fragrance to your viral food board.
Ingredients
- 2 tbsp coconut oil
- 1 large onion, diced
- 2 tbsp curry powder or red curry paste
- 1 can (14 oz) full-fat coconut milk
- 1 cup vegetable broth
- 3 cups mixed vegetables (cauliflower, bell peppers, sweet potatoes)
- 1 cup canned chickpeas, drained
- 2 cups fresh spinach
- Fresh cilantro and lime wedges for garnish
How to make it
- Heat the coconut oil in a large pot over medium heat. Add the onion and sauté for 5 minutes until soft and golden.
- Add the curry powder or paste. Stir constantly for 1-2 minutes. This “blooming” process is essential as the heat releases the essential oils in the spices, drastically deepening the flavor.
- Pour in the coconut milk and vegetable broth, whisking to combine the spices into the liquid.
- Add the hard vegetables first (like sweet potatoes and cauliflower). Bring to a gentle simmer. Do not let it boil vigorously, as coconut milk can sometimes separate at high temperatures.
- Cover and simmer for 15-20 minutes until the hard vegetables are fork-tender.
- Stir in the softer vegetables (bell peppers and chickpeas) and cook for another 5 minutes.
- At the very last minute, stir in the fresh spinach; it will wilt in the residual heat in about 30 seconds. Finish with a squeeze of fresh lime juice to brighten all the heavy flavors and garnish with plenty of cilantro.
The Finishing Touch for Your Board
Creating a viral food board isn’t about being a perfect chef; it’s about the joy of textures, colors, and the stories we tell through food. These recipes are designed to be your go-to toolkit for those moments when you want to impress with minimal stress. Remember to play with heights, add some fresh herb garnishes, and always serve while the steam is still rising. Happy hosting!