

The Grad Party Blueprint: Decor, Drinks, and Unforgettable Memories
Oh, my loves, can you feel that sweetness in the air? It’s the season of new beginnings, of caps tossed high into the blue sky, and those bittersweet tears that come when we realize our favorites are all grown up. My heart is just overflowing thinking about all the milestones you’re celebrating this year. Graduation isn’t just a ceremony; it’s a bridge to a beautiful new chapter, and you deserve a celebration that feels like a warm, cloud-soft embrace for all your hard work.
I’ve spent the last few weeks dreaming up the ultimate graduation party guide just for you, filled with the kind of magic that turns a simple backyard gathering into a memory that lingers in the soul forever. Whether you’re toasted under the sun or dancing under the stars, I want every detail to reflect the light and joy you bring into the world. Let’s dive into these little moments of party-planning bliss together, shall we?
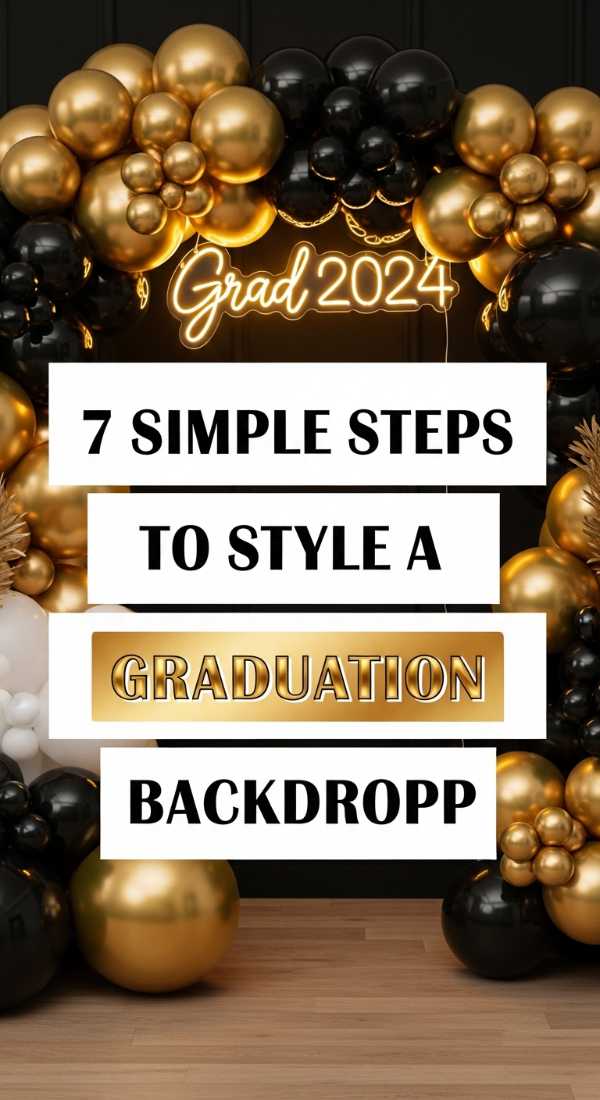
7 simple steps to style a graduation backdrop
Why to love this recipe:
This isn’t just a photo op; it’s the frame for your most precious memories. I love this because it creates a focal point that instantly elevates the mood and gives everyone a beautiful space to capture their ‘we made it’ smiles.
Essential Ingredients:
- A portable backdrop stand or a clean wall
- Tinsel fringe or sheer fabric drapes
- Assorted balloons in school colors
- A ‘Class of 2024’ neon sign or banner
- Fishing line and command hooks
- Fairy lights
- A few stems of fresh eucalyptus
How to Prepare:
- Find your light—choose a spot with soft, natural lighting.
- Set up your stand or secure your base fabric/tinsel to the wall using command hooks.
- Layer your textures; I love mixing a shimmering fringe with a soft chiffon.
- Create a mini balloon garland using fishing line and attach it to the top corner.
- Weave in your fairy lights for that magical evening glow.
- Center your ‘Class of’ sign right at eye level.
- Tuck in bits of greenery for a fresh, organic touch.
Budget Range
- Backdrop Stand: $35.00
- Tinsel Curtains: $12.00
- Neon Sign: $45.00
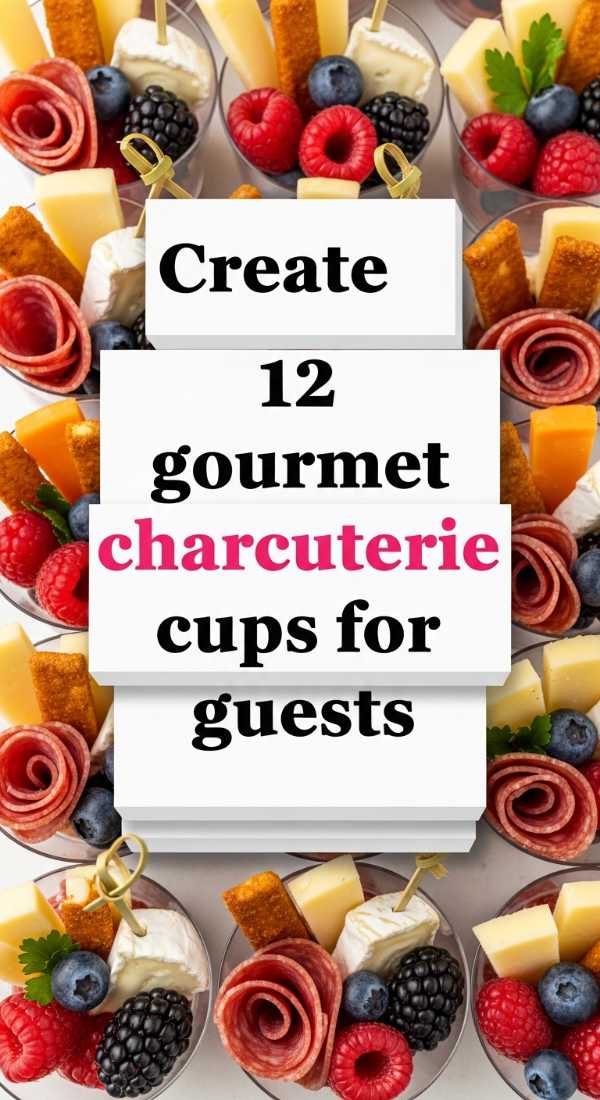
Create 12 gourmet charcuterie cups for guests
Why to love this recipe:
There is something so intimate and thoughtful about individual servings. These cups are my favorite way to keep things sanitary and stylish, allowing your loves to graze while they mingle without the fuss of a heavy plate.
Essential Ingredients:
- 12 Kraft paper cups
- Salami or Prosciutto rosettes
- Cheddar and Brie cubes
- Fresh blackberries and green grapes
- Artisan crackers and breadsticks
- Fresh rosemary sprigs
- Small jars of honey with dippers
How to Prepare:
- Place a few nuts or dried fruits at the bottom of each cup to act as a base.
- Add your taller elements like breadsticks and crackers toward the back.
- Thread meat and cheese onto small bamboo skewers for height.
- Tuck in your fresh fruit clusters.
- Drizzle a tiny bit of honey or place a mini honey dipper inside.
- Garnish with a sprig of rosemary for that heavenly scent.
- Arrange them on a tiered wooden stand for a beautiful display.
Budget Range
- Kraft Cups (50ct): $15.00
- Artisan Cheese Sampler: $25.00
- Bamboo Skewers: $5.00
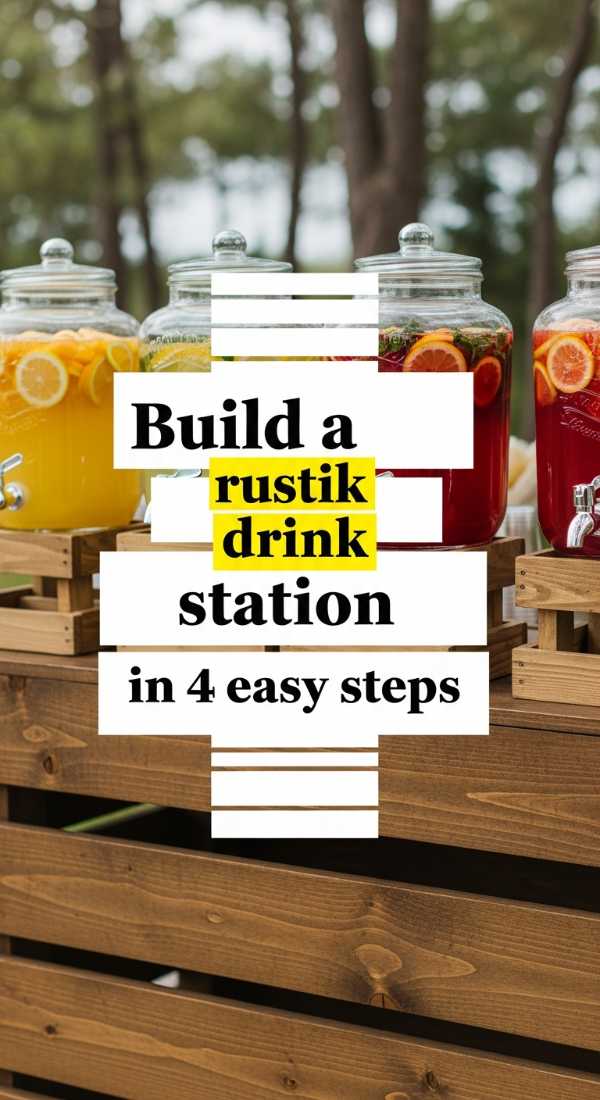
Build a rustic drink station in 4 easy steps
Why to love this recipe:
I adore the grounded, earthy feel of a rustic bar. It invites guests to slow down and help themselves to something refreshing, creating a relaxed ‘stay a while’ atmosphere that I just cherish.
Essential Ingredients:
- Two vintage wooden crates
- A large wooden plank or tabletop
- Galvanized metal buckets
- Chalkboard labels and markers
- Glass dispensers for infused water or lemonade
How to Prepare:
- Stack your wooden crates to create two pillars.
- Place your wooden plank across the top to create a sturdy counter.
- Fill galvanized buckets with ice and nestle in your bottled drinks.
- Set out your glass dispensers and label them with sweet, handwritten chalkboard signs.
Budget Range
- Wooden Crates: $20.00 each
- Galvanized Buckets: $18.00
- Glass Beverage Dispenser: $22.00
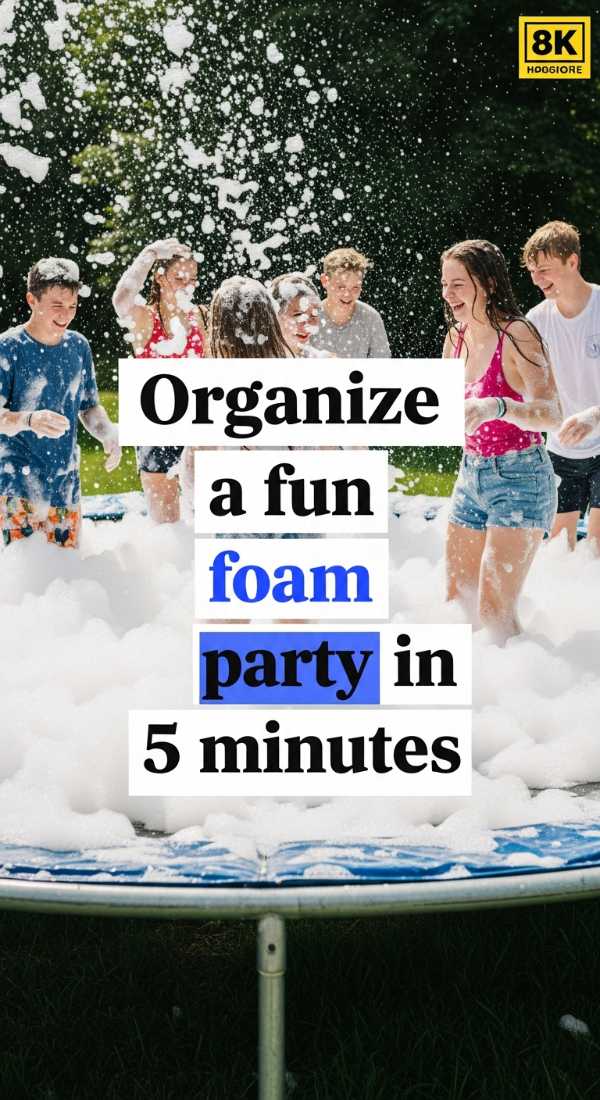
Organize a fun foam party in 5 minutes
Why to love this recipe:
Sometimes we just need to let go and be kids again! This is pure, unadulterated joy. It’s messy, it’s bubbly, and it creates the kind of laughter that you’ll hear in your dreams for weeks.
Essential Ingredients:
- Portable foam machine
- Organic, hypoallergenic foam solution
- A clear outdoor space (grass is best!)
- A high-energy playlist
- Towels for the ‘dry-off’ station
How to Prepare:
- Clear a 20×20 area of any furniture or tripping hazards.
- Connect your foam machine to a water source and power outlet.
- Add the foam concentrate as per the machine’s instructions.
- Point the nozzle toward the center of the yard and turn it on!
- Pump up the music and let the bubbles fly.
Budget Range
- Foam Machine Rental: $150.00
- Foam Solution: $40.00
- Party Towels: $30.00
Setup a pool bubble course in 3 stages
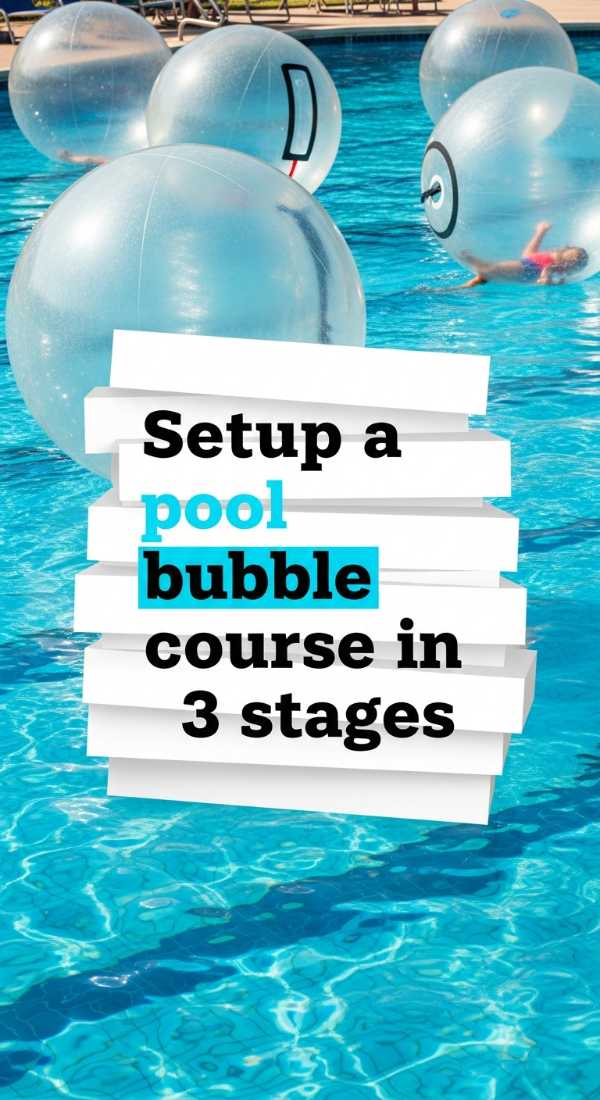
Why to love this recipe:
If you have a pool, this is a dreamy way to add movement and whimsy. It turns the water into a floating playground that looks just as beautiful as it is fun to navigate.
Essential Ingredients:
- Inflatable clear ‘zorbing’ bubbles or large transparent rings
- Floating pool lanterns
- Nylon rope (to guide the course)
How to Prepare:
- Stage 1: Inflate your bubbles and float them at one end of the pool.
- Stage 2: Use nylon rope to create a ‘lane’ or path through the water.
- Stage 3: Scatter floating lanterns around the edges to define the course for evening play.
Budget Range
- Inflatable Bubbles: $80.00
- Floating Lanterns: $25.00
- Nylon Rope: $10.00
Decorate 10 custom party sunglasses with gems
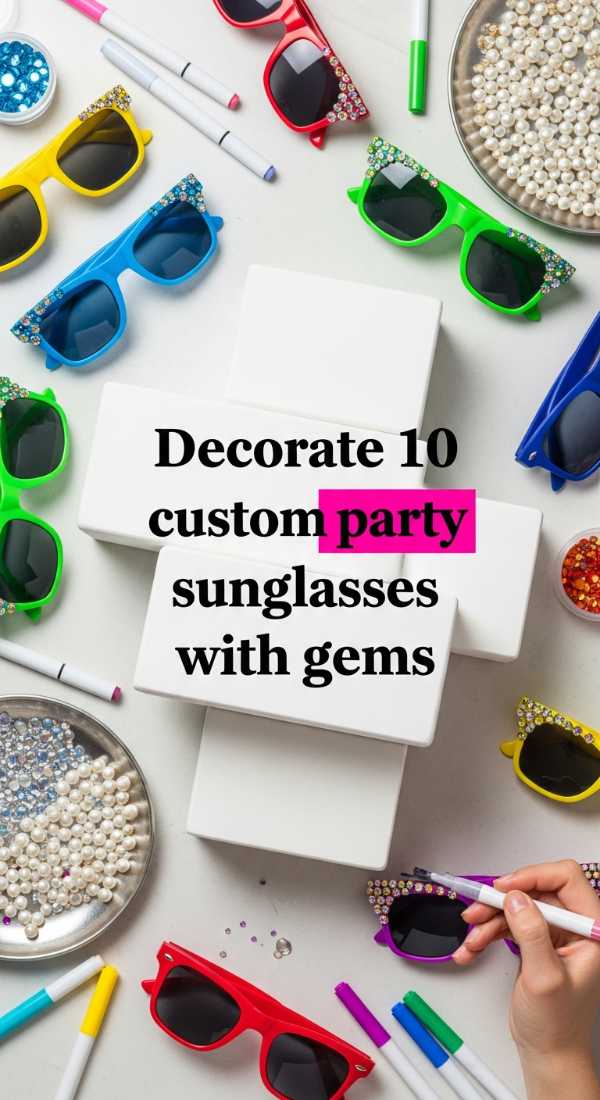
Why to love this recipe:
This is my favorite ‘crafty’ touch! These sunglasses become instant keepsakes. Every time your friends put them on, they’ll remember the sunshine and the sparkles of your special day.
Essential Ingredients:
- 10 pairs of retro white or pink sunglasses
- Flatback resin rhinestones or pearls
- E6000 glue or a precision craft glue
- Wax pencil (for picking up gems)
- Small charms (letters or hearts)
How to Prepare:
- Clean the frames of the sunglasses with a little rubbing alcohol.
- Map out your design—I love doing ‘GRAD’ in letters on the top corner.
- Apply small dots of glue to the frame.
- Use the wax pencil to gently press gems into the glue.
- Add clusters of pearls for a vintage, soft look.
- Let them dry for at least 4 hours before the party.
Budget Range
- Bulk Sunglasses: $15.00
- Rhinestone Kit: $12.00
- Precision Glue: $7.00
Assemble 5 stunning graduation party centerpieces
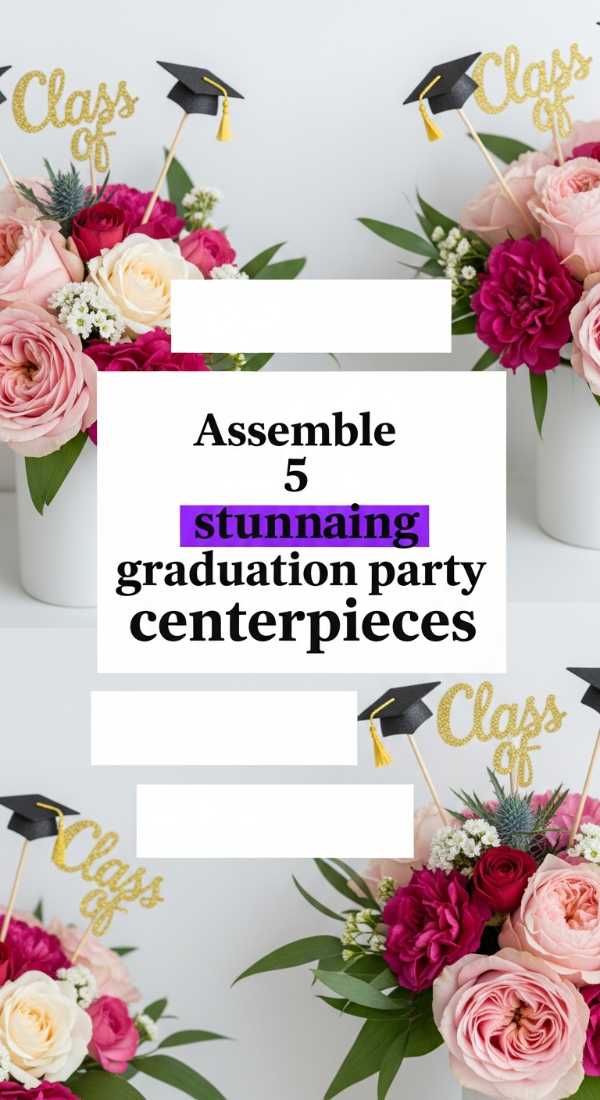
Why to love this recipe:
Table scapes are where the heart of the conversation happens. These centerpieces bridge the gap between ‘celebration’ and ‘home,’ adding a touch of sophisticated warmth to every seat.
Essential Ingredients:
- 5 glass hurricane vases
- Polaroid photos of the graduate
- Mini mortarboard (grad cap) cutouts
- Dried pampas grass or fresh peonies
- Gold-toned table numbers
How to Prepare:
- Fill the base of the vase with sand or decorative stones.
- Nestle a small photo of a favorite memory inside the glass against the side.
- Add your florals—pampas grass adds a lovely, soft height.
- Clip a mini grad cap to the rim of the vase.
- Place the gold table number next to the vase for a finished look.
Budget Range
- Hurricane Vases: $25.00
- Dried Pampas Grass: $20.00
- Gold Table Numbers: $15.00
Style a tropical graduation theme in 6 steps
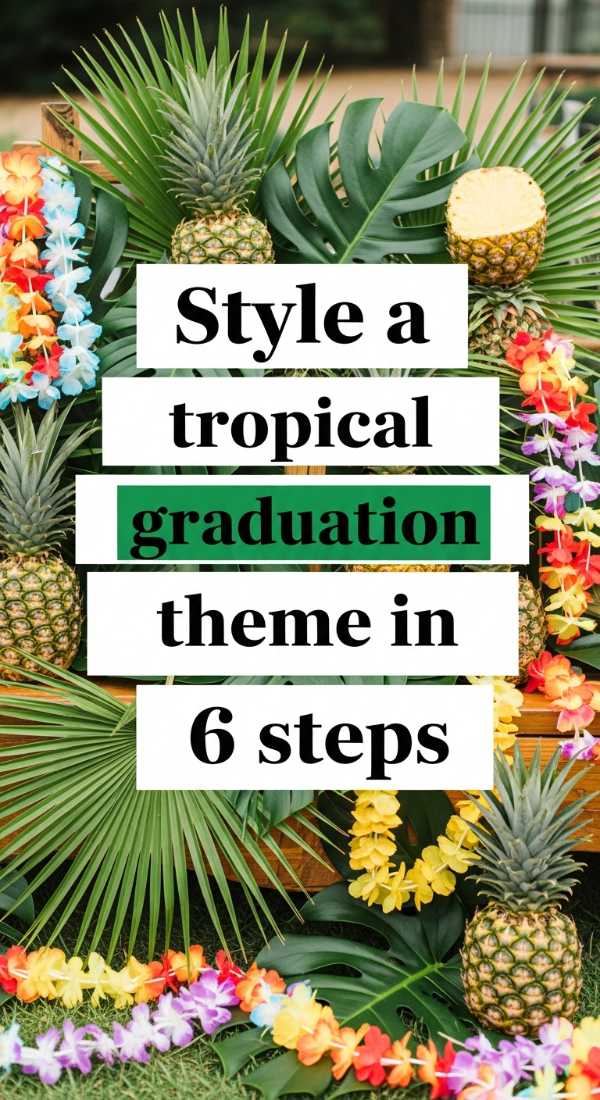
Why to love this recipe:
A tropical theme feels like an instant vacation. It’s vibrant, lush, and full of life—exactly how we want our graduates to feel as they head off on their next big adventure!
Essential Ingredients:
- Faux monstera leaves
- Real pineapples (painted gold for extra flair!)
- Hibiscus flower garlands
- Bamboo table runners
- Flamingo straws
- Fairy lights in warm tones
How to Prepare:
- Lay the bamboo runner across your main food table.
- Scatter monstera leaves down the center like a natural runner.
- Place your gold-painted pineapples at varying heights.
- Drape hibiscus garlands along the edges of chairs or tables.
- Pop those fun flamingo straws into every drink.
- String fairy lights through the greenery to mimic a sunset glow.
Budget Range
- Faux Leaves: $14.00
- Hibiscus Garlands: $18.00
- Bamboo Runner: $12.00
Make 15 budget graduation decorations today
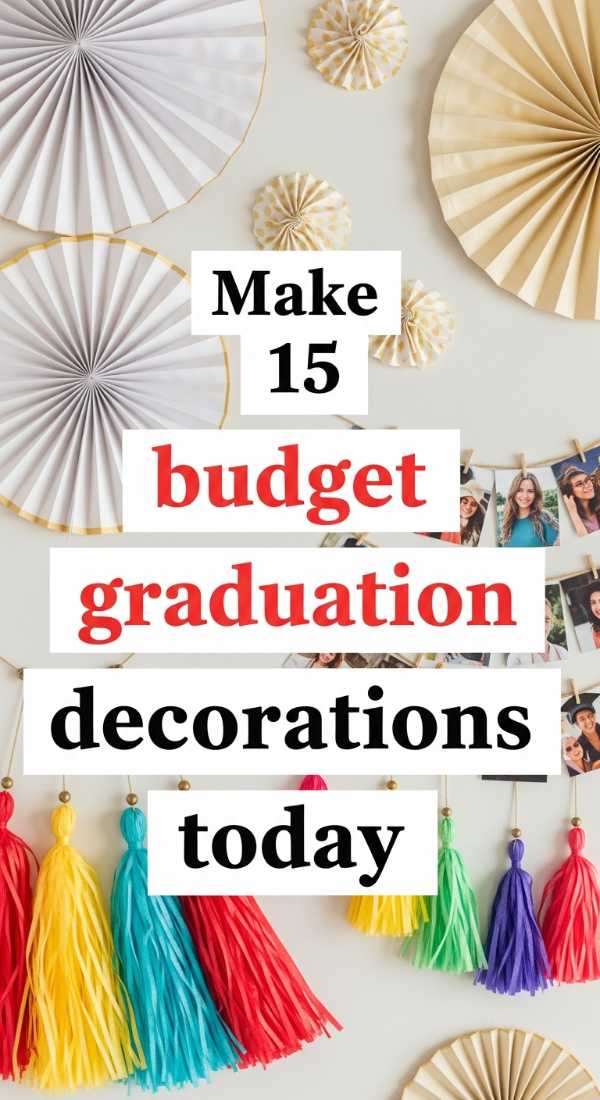
Why to love this recipe:
You don’t need to spend a fortune to create a million-dollar atmosphere. These DIY touches are filled with love and show your graduate that the best things in life are the ones we put our heart into.
Essential Ingredients:
- Twine and mini clothespins
- Cardstock in school colors
- Mason jars
- Glitter spray paint
- Tissue paper
How to Prepare:
- Spray paint mason jars with glitter and use them as cutlery holders.
- Create a ‘memory line’ by clipping photos to twine with clothespins.
- Make tissue paper pom-poms to hang from trees or ceilings.
Budget Range
- Mason Jars (Case): $12.00
- Glitter Spray: $8.00
- Tissue Paper/Twine: $10.00
Plan your perfect grad party in 8 weeks

Why to love this recipe:
Planning can be stressful, but when we break it down, it becomes a journey of joy. This timeline is your deep breath, your roadmap to a stress-free day where you can actually enjoy the magic too.
Essential Ingredients:
- A beautiful planner or notebook
- A clear guest list
- A set budget
- A ‘joy’ mindset
How to Prepare:
- Week 8: Pick a date and book your venue or prep your backyard.
- Week 7: Set your budget and draft the guest list.
- Week 6: Send out those darling invitations.
- Week 5: Plan your menu (charcuterie cups, anyone?).
- Week 4: Order your decor and DIY supplies.
- Week 3: Finalize RSVPs and start your DIY projects.
- Week 2: Shop for non-perishable food and drinks.
- Week 1: Final prep, decorate, and take a moment to breathe.
Budget Range
- Planner: $15.00
- Digital Invites: $0.00 – $20.00
- DIY Supplies: $50.00
Cheers to New Beginnings
As the sun sets on your beautiful celebration, I hope you take a moment to look around at the faces of the people who love you. That, my dear ones, is the true decor. The laughter, the hugs, and the shared excitement for the future are what stay with us long after the balloons have deflated. You’ve worked so hard, and seeing you shine is the greatest gift of all. Go forth with courage, keep that beautiful heart open, and never stop celebrating the little things. I’m so proud of you!