
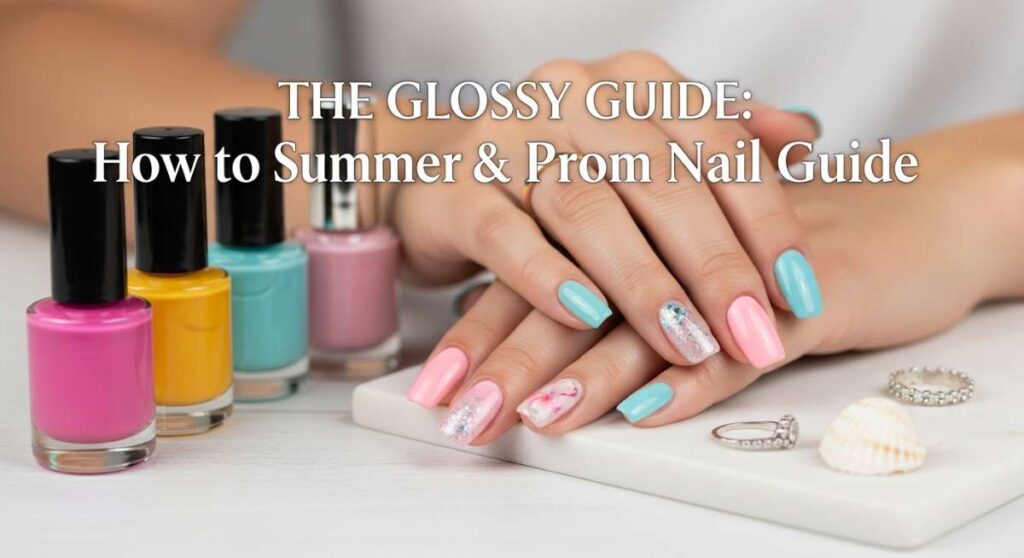
The Glossy Guide: How to Slay Your Summer and Prom Nail Game
Hello, my beautiful loves! Can you feel it? That sweet, golden warmth in the air and the humming excitement of long, sun-drenched days ahead. Summer is finally knocking at our doors, and with it comes the season of magic—from those unforgettable prom nights under shimmering lights to sun-soaked afternoons with a cold drink in hand. I’ve always felt that our nails are like little canvases for our souls, a tiny way to carry our joy wherever we go.
I remember my own prom night, feeling that flutter of nerves and excitement, and how much a simple, perfect manicure made me feel like the most confident version of myself. This season, I want that same feeling for all of you. Whether you’re dancing the night away or lounging by the pool, your hands deserve to look as radiant as your spirit feels. So, grab a matcha, settle into your favorite cozy chair, and let’s dive into our ultimate guide for the trendiest, most heart-warming nail looks of the year.
Squeeze the Day: 5 Easy Steps for Zesty Fruit Nails
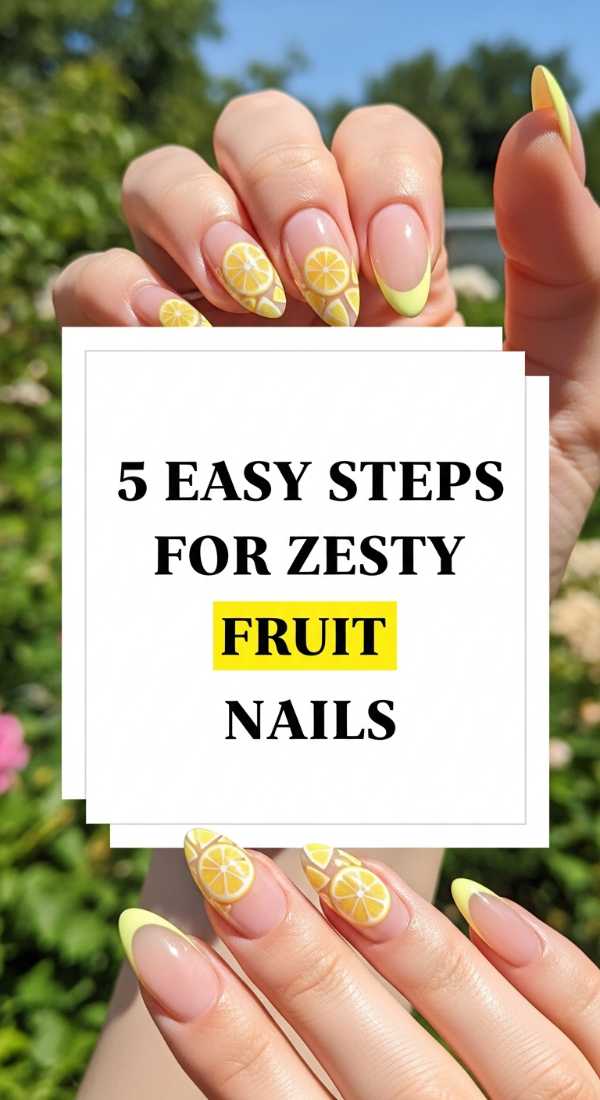
Why to love these Nails:
There is something so incredibly refreshing about a citrus-inspired manicure, my loves. It’s like carrying a little burst of sunshine right at your fingertips! These zesty lemon and lime designs are perfect for those casual beach days or backyard picnics where you just want to radiate pure, unadulterated joy.
Essential Items:
- Bright yellow and lime green polish
- A fine detailing brush or toothpick
- White polish for the pith details
- Clear glossy top coat
How to Prepare:
- Apply a clear base coat to protect your natural nails.
- Paint two thin layers of your base citrus color (yellow or lime).
- Using your detail brush, draw a small white semi-circle near the cuticle for the fruit center.
- Add tiny white lines radiating outward to create the fruit segments.
- Seal the look with a high-shine top coat for that juicy finish.
Budget Range
- Essie ‘Check Your Baggage’ Yellow: $10.00
- OPI ‘The Grass is Always Greener’: $11.50
- Detailing Brush Set: $6.00
Midnight Magic: Create Elegant Red Prom Nails in 4 Minutes
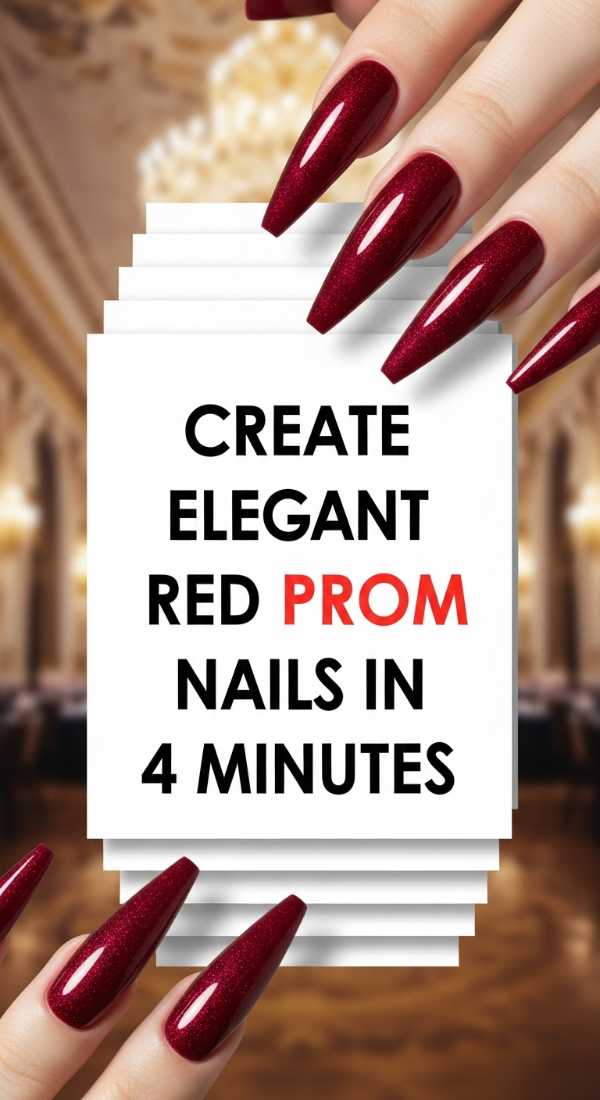
Why to love these Nails:
Red is the ultimate power move for prom night. It’s classic, bold, and exudes a confidence that says you’re ready to own the dance floor. This deep, elegant shade never goes out of style and pairs beautifully with almost any dress color, making you feel like a Hollywood starlet.
Essential Items:
- Quick-dry deep crimson polish
- Gold foil flakes or gold glitter
- Fast-acting top coat
How to Prepare:
- Swipe on one thick coat of high-pigment red polish (2 minutes).
- While slightly tacky, gently press a few gold foil flakes onto the ring finger (30 seconds).
- Apply a quick-dry top coat to smooth everything out (1 minute).
- Let it set while you grab your clutch and head out the door (30 seconds).
Budget Range
- Sally Hansen Insta-Dri ‘Red-y in a Flash’: $7.00
- Nail Art Gold Foil Flakes: $5.00
Ocean Breeze: 3 Simple Steps for Vibrant Turquoise Nails
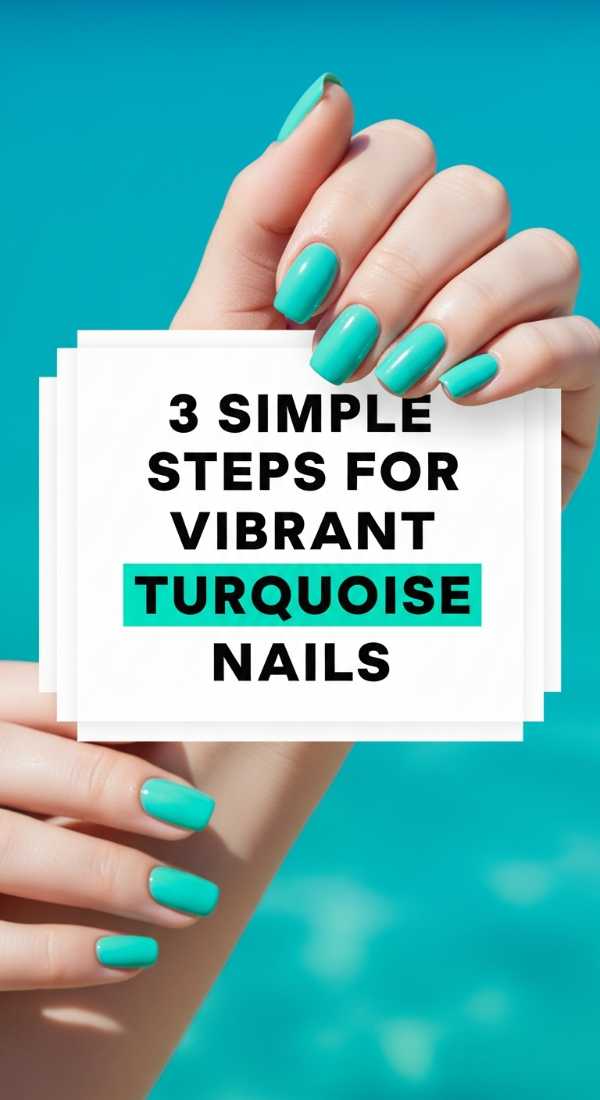
Why to love these Nails:
Turquoise is the color of the Mediterranean sea and endless summer skies. It’s a shade that instantly makes your tan pop and brings a sense of calm and serenity to your look. It’s simple, striking, and absolutely breathtaking against the sand.
Essential Items:
- Vibrant turquoise cream polish
- Buffing block
- Nail oil
How to Prepare:
- Buff your nails to a smooth surface to ensure the bright color doesn’t streak.
- Apply two even coats of turquoise, allowing 2 minutes of drying time between them.
- Finish with a drop of nail oil on each cuticle for that healthy, hydrated glow.
Budget Range
- Zoya ‘Robyn’ Turquoise: $12.00
- Cuccio Revitalize Cuticle Oil: $8.00
Nature’s Whisper: Master 3D Boho Flower Nails in 6 Steps
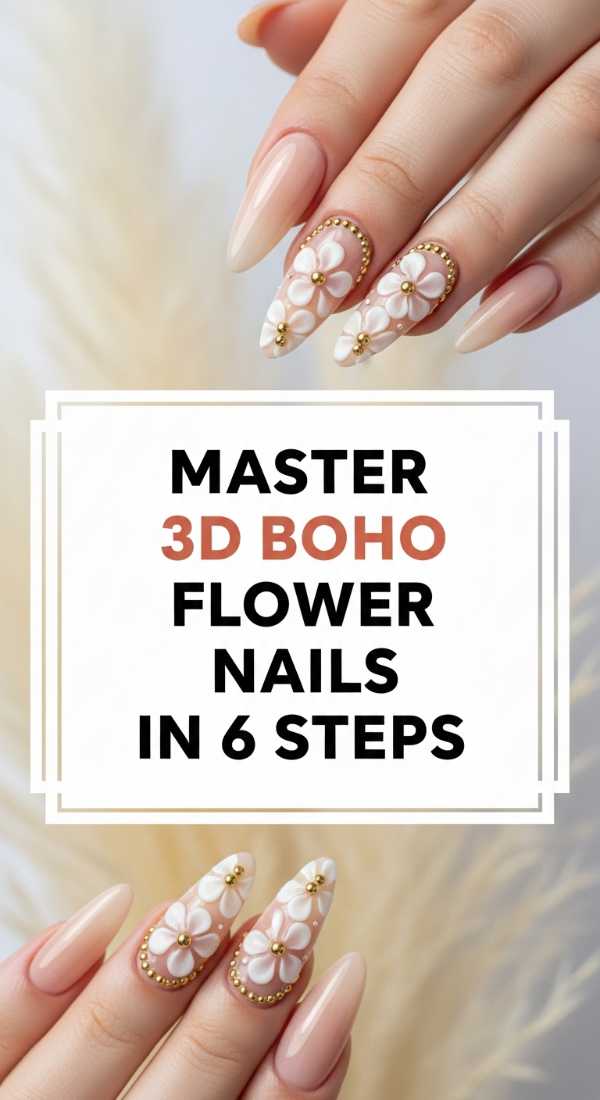
Why to love these Nails:
For my free-spirited souls, these 3D boho flowers are a dream come true. They add texture and a whimsical, artisan touch to your hands. It feels like wearing a tiny, delicate garden that matches your favorite flowing maxi dress.
Essential Items:
- 3D nail charm flowers or thick builder gel
- Nude base polish
- Tweezers
- Strong nail glue
How to Prepare:
- Apply a soft nude base coat and let it dry completely.
- Decide on your flower placement (usually the ring or middle finger).
- Apply a tiny dot of nail glue to the center of your nail.
- Use tweezers to carefully place the 3D flower charm onto the glue.
- Hold in place for 10 seconds to secure the bond.
- Apply top coat only around the base of the flower to keep the 3D texture matte.
Budget Range
- Butter London ‘mink’ Nude: $18.00
- Mixed Flower Nail Charms: $9.00
- Modelones Nail Glue: $7.00
Golden Hour: 4 Secrets to Perfect Gold Bridesmaid Nails
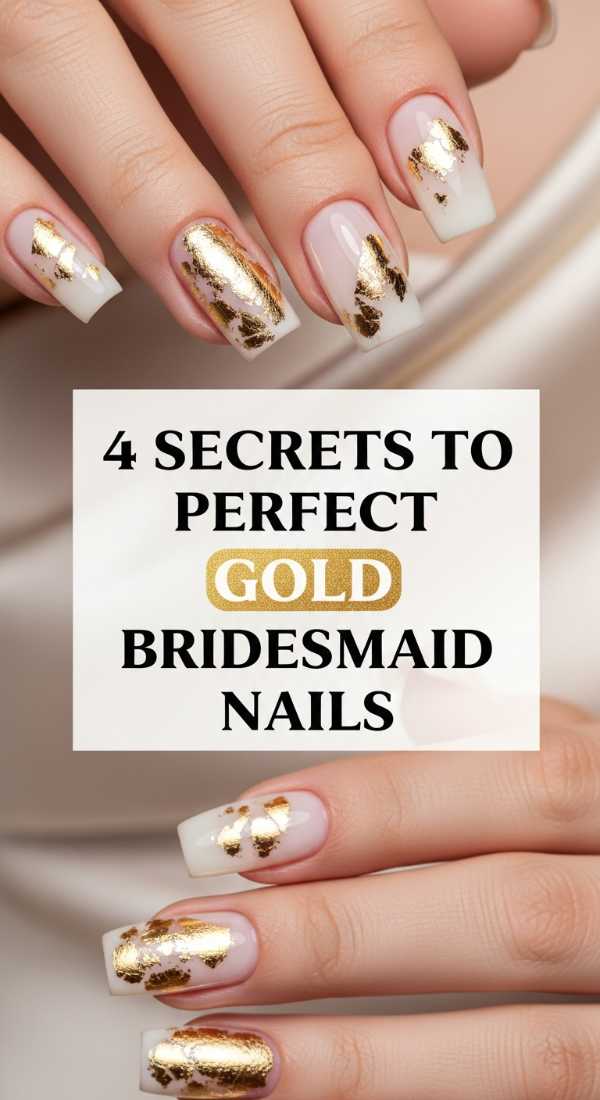
Why to love these Nails:
If you’re part of a bridal party this summer, gold is your best friend. It’s sophisticated, warm, and looks incredible in photos. These secrets will give you that expensive, high-end look without the salon price tag.
Essential Items:
- Metallic gold polish
- Sponge wedge
- Clean-up brush
- Acetone
How to Prepare:
- Secret 1: Use a sponge to dab the gold polish onto the tips for a seamless metallic gradient.
- Secret 2: Apply a second layer only to the very edge for extra depth.
- Secret 3: Use a brush dipped in acetone to clean the edges for a crisp, professional line.
- Secret 4: Use a gel-effect top coat to give the gold a mirror-like shine.
Budget Range
- ILNP ‘Empire’ Gold: $12.50
- Cosmetic Sponges (Bulk): $4.00
Sweet Berries: 5 Steps to Hand-Paint Strawberry Nails
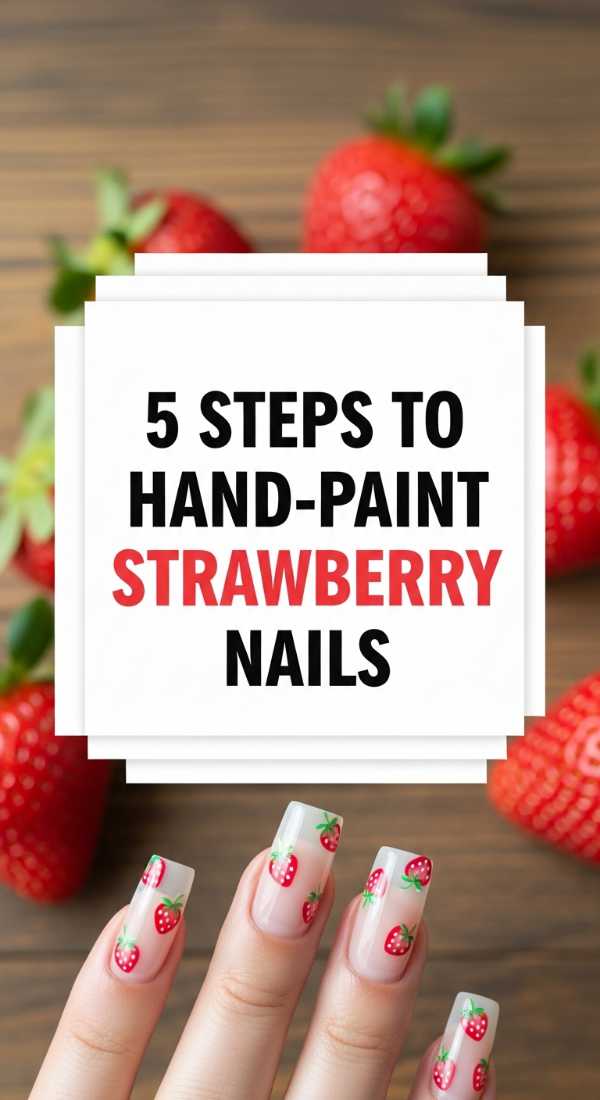
Why to love these Nails:
Strawberry nails are the epitome of cottagecore sweetness! They are darling, playful, and perfect for a summer date at the farmer’s market. Every time you look down, you’ll be reminded of sweet treats and sunshine.
Essential Items:
- Red, green, and yellow (or white) polishes
- Small dotting tool
- Fine liner brush
How to Prepare:
- Paint your nails with a vibrant red base.
- Using the green polish and a fine brush, paint 3-4 small leaves at the cuticle.
- Take your dotting tool and add tiny yellow seeds across the red area.
- Add a tiny white ‘highlight’ dot next to some seeds for a 3D effect.
- Finish with a plump, glossy top coat to make them look like real berries.
Budget Range
- China Glaze ‘Rose Among Thorns’: $9.00
- Nail Dotting Tool Set: $5.00
Electric Night: 3 Tips for Glowing Neon Festival Nails
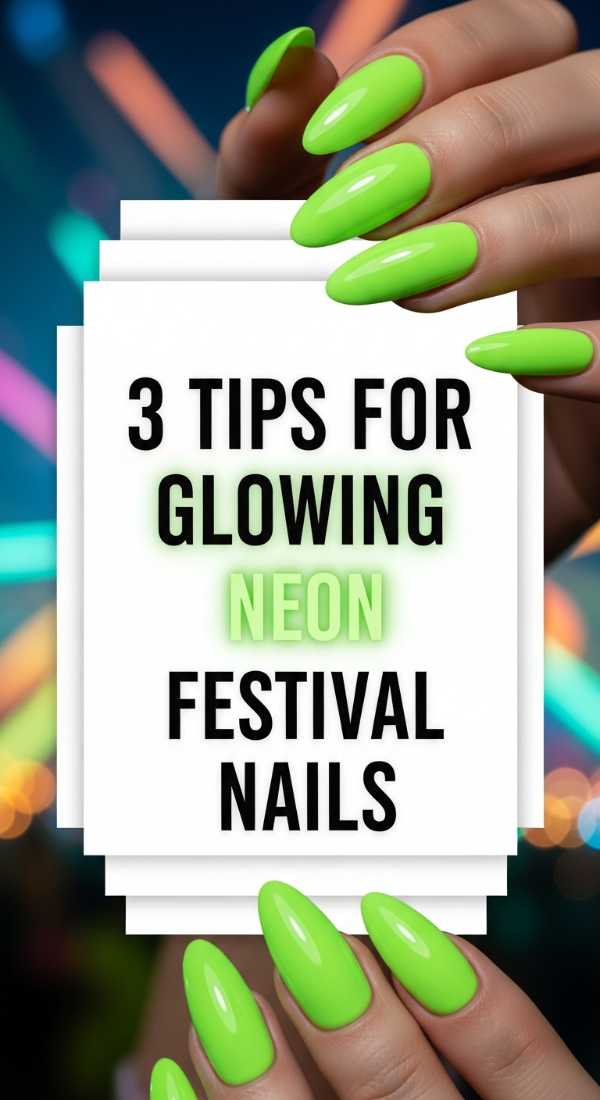
Why to love these Nails:
Festivals are all about self-expression and energy! Neon nails are high-impact and look amazing under blacklights or glowing in the dusk of a summer concert. They are bold, brave, and totally you.
Essential Items:
- Neon pink or orange polish
- White base color
- Matte top coat (optional for a modern look)
How to Prepare:
- Tip 1: Always apply a coat of white polish first—this makes the neon color truly ‘glow.’
- Tip 2: Apply the neon in thin layers to avoid bubbling under the heat.
- Tip 3: Seal with a UV-resistant top coat to prevent the sun from fading your bright color.
Budget Range
- Orly ‘Neon Heat’: $15.00
- Gelous White Base: $7.00
The Jetsetter: Get the Europe Summer Look in 5 Steps

Why to love these Nails:
Think Amalfi Coast vibes! The ‘Europe Summer’ look is all about effortless chic—minimalist designs with a touch of Mediterranean blue. It’s sophisticated enough for a fancy dinner but relaxed enough for a boat ride.
Essential Items:
- Sheer milky white polish
- Cobalt blue polish
- Striping tape
How to Prepare:
- Apply two coats of sheer milky white for a clean, ‘clean girl’ aesthetic base.
- Place a piece of striping tape horizontally across the top third of the nail.
- Paint the tip with cobalt blue to create a modern French tip.
- Remove the tape while the blue is still wet for a sharp line.
- Top with a glass-finish top coat.
Budget Range
- Cirque Colors ‘Marsala Jelly’: $14.00
- Holler and Glow Blue Polish: $6.00
Soft Romance: Craft Lavender Bachelorette Nails in 4 Steps
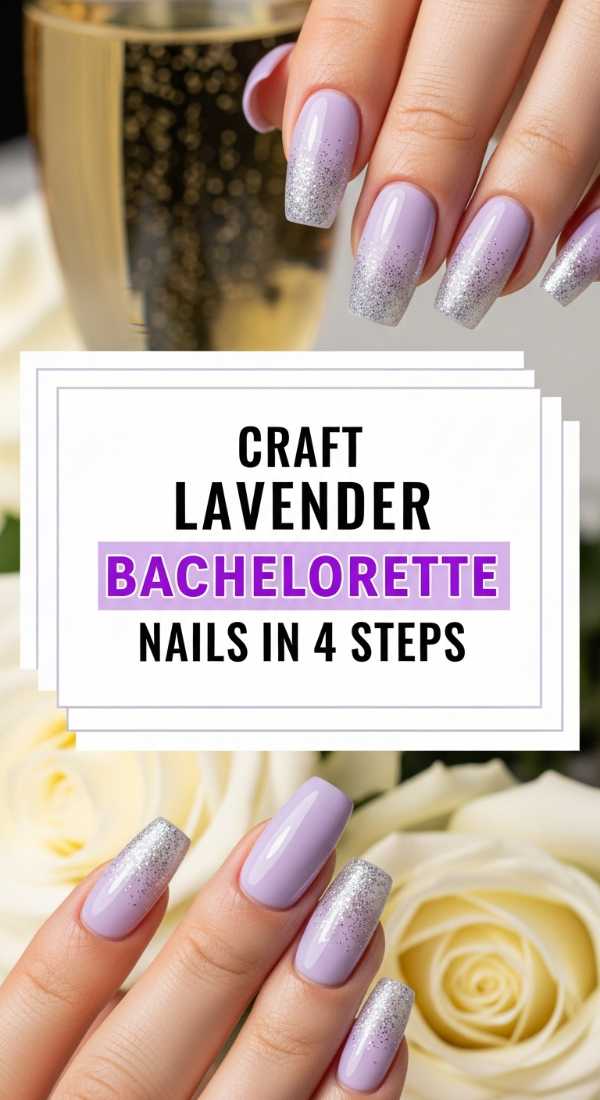
Why to love these Nails:
Lavender is the color of grace and relaxation. For a bachelorette weekend, it’s the perfect middle ground between bridal white and party colors. It’s a soft, cloud-like embrace for your hands that feels so feminine and sweet.
Essential Items:
- Pastel lavender polish
- Iridescent shimmer topper
- Nail file
How to Prepare:
- Shape your nails into a soft almond or oval to enhance the delicate color.
- Apply two coats of creamy lavender polish.
- Layer one thin coat of iridescent shimmer over the top for a ‘glazed’ effect.
- Finish with a moisturizing top coat.
Budget Range
- Olive & June ‘Wisteria’: $9.00
- Pearlova Shimmer Topper: $12.00
Wild Spirit: 6 Steps to Rustic Peach Cowgirl Nails
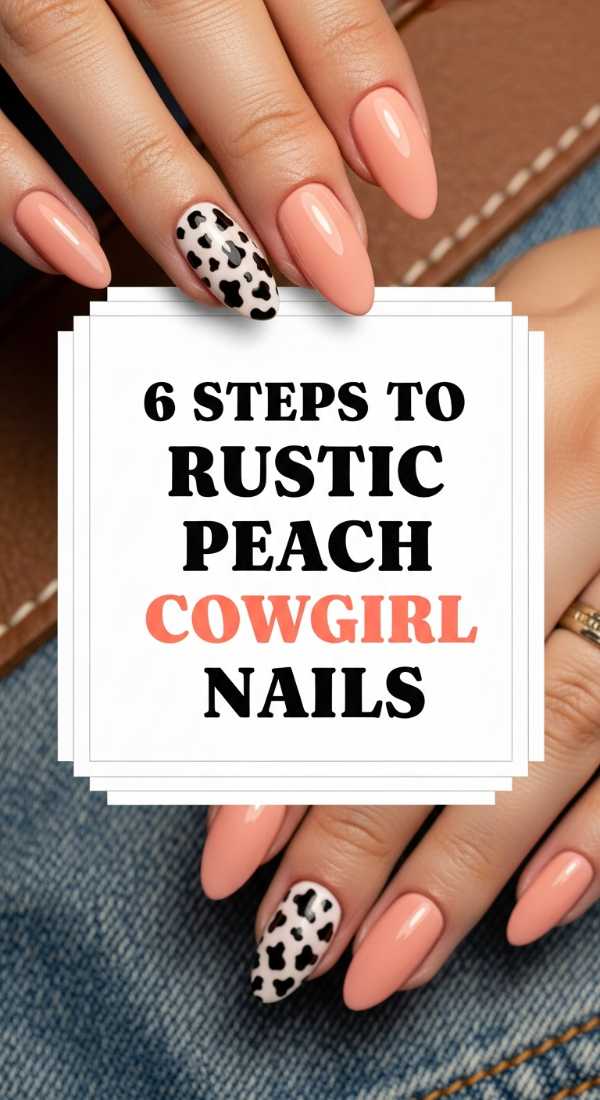
Why to love these Nails:
The ‘Coastal Cowgirl’ trend is everywhere, and these peach rustic nails fit the vibe perfectly. It combines the warmth of a summer sunset with a bit of western grit. It’s earthy, trendy, and incredibly flattering on all skin tones.
Essential Items:
- Muted peach or terracotta polish
- Brown stamping polish or detail brush
- Matte top coat
How to Prepare:
- Apply two coats of your peach base color.
- Using a sponge, lightly dab a tiny bit of white in the center for a ‘stone’ effect.
- Take your brown polish and draw very thin, wavy lines to mimic turquoise or marble veins.
- Add a tiny cow-print spot on one accent nail for that western flair.
- Seal with a matte top coat for a rustic, non-shiny finish.
- Apply a bit of hand cream to keep the look soft and lived-in.
Budget Range
- Lights Lacquer ‘Paper Snow’: $13.00
- Essie ‘Rocky Rose’: $10.00
Embrace Your Inner Glow
As we wrap up this guide, I want you to remember that the most beautiful thing you can wear is your own confidence. Whether you choose a bold neon or a soft lavender, let your nails be a reminder to take a deep breath, enjoy the sunshine, and celebrate every moment of this beautiful season. You are radiant, you are capable, and you deserve to feel absolutely stunning from head to toe. Go out there and slay your summer, my loves!
Frequently Asked Questions
- How can I make my summer manicure last longer at the beach? Saltwater and sand can be abrasive. Always apply a fresh layer of top coat every two days to seal the edges and protect the color from fading in the sun.
- What is the best nail shape for prom? Almond and Coffin shapes are currently very trendy for prom as they elongate the fingers and look incredibly elegant with evening gowns.
- Are 3D nail charms hard to remove? Not at all! Just soak a cotton ball in pure acetone, place it over the nail, wrap it in foil for 10 minutes, and the charm should slide off gently without damaging your nail.
- How do I prevent my white or light-colored polish from turning yellow? Use a UV-protective top coat. This prevents the sun’s rays from reacting with the pigment in your polish, keeping your ‘Europe Summer’ look crisp and clean!